10 – FOCUS STACKING
Focus Stacking is a technique used for sharp focus front to back in a scene.
In this section we will explore focus stacking using Auto Blend, manual focus stacking with masks and how successful Auto Align can be.
Auto Blend in Photoshop.
Manually blend with masks.
Focus stacking is another skill that will be invaluable to learn. There are times when the only way to get an image in focus front to back is to focus bracket, or take a number of shots with the focus point moved from the front to the back of the scene. In Macro photography it is essential and your camera probably has a Focus Bracketing function to capture the shots. In landscape photography we normally only need two or three shots, front middle and back, or just two, and it is often easier to move the focus point manually.
LR does not have a way to stack these images once they are captured but PS does. The good thing is we have already looked at all the skills we need to merge these shots using Auto Blend, and manually with layers and masks. Which you use depends on the image. Auto Blending may be easier depending on how many shots there are such as a Macro which may have many frames, or just a quick manual blend for a simple image.
PS AUTO-BLEND FOCUS STACKING
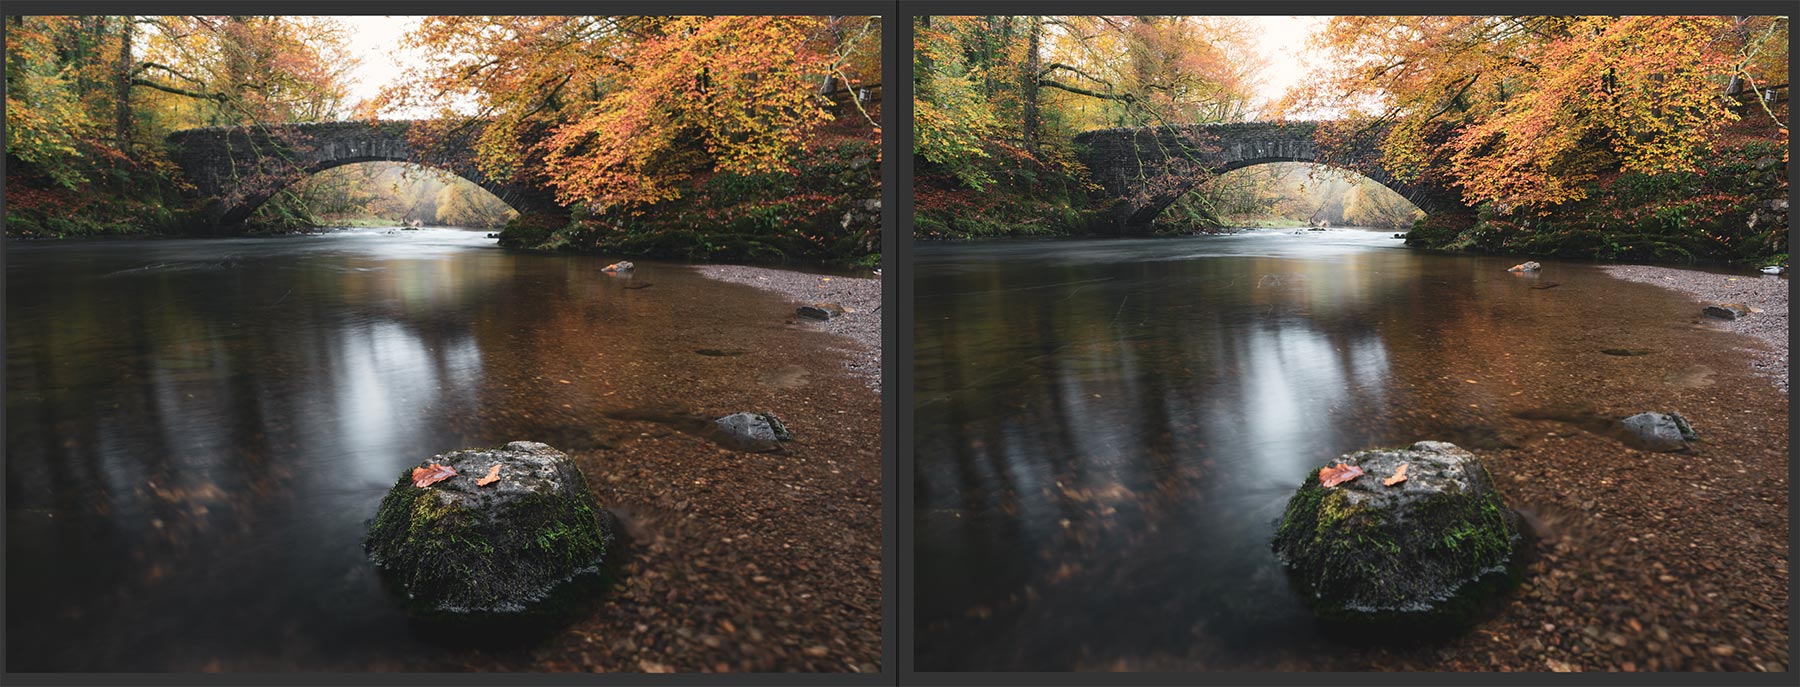
Focus Bracketed Frames-13mm 8 Sec @f6.3 ISO 200
The Raw files for both images above, one with focus on the bridge and the other on the rock. Rather than messing about with in camera features I just shift the focus manually, it is far easier. At 13mm with my Olympus lens and being so close to the rock I will not get all in focus in one shot. I don’t like the dry land at the side, or the duck, but I can fix these after they are merged. Both were taken on a tripod because they were long exposures and because I was focus bracketing.
First, I prepared each image in LR. A little alteration to exposure, black and white point, shadows and highlights, white balance, colour hue etc. I can process one, then copy and paste settings to the other. I ran noise reduction on each and then sent them to Photoshop at Layers.
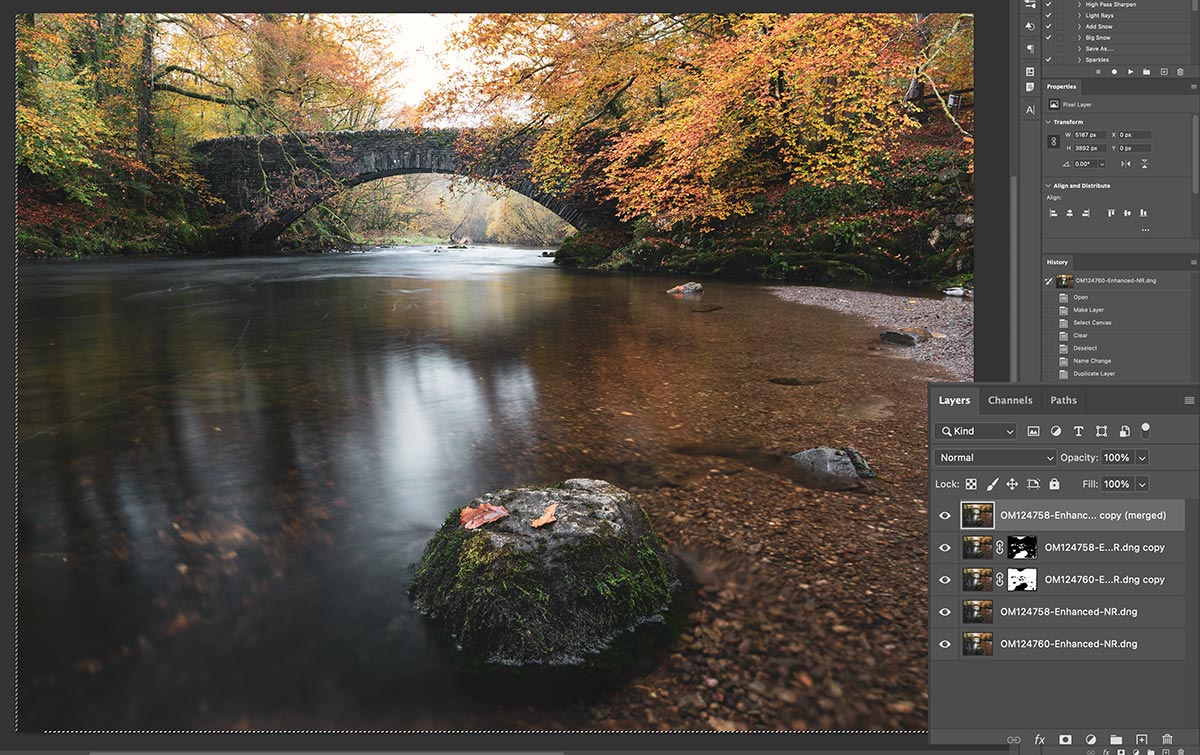
Auto Aligned and Auto Blended. Note the two duplicated layers and the active selection on the edges.
AUTO ALIGN
In PS the first task is to select both thumbnails and Auto Align them in Edit>Auto Align. Remember to do this, because even though a tripod is used and they will be aligned, when moving the focus point there may be some ‘focus breathing’. Before aligning them switch one layer off and notice there is a slight shift. Magnification and field of view change slightly because the focus point has moved which PS tries to eliminate when aligning the images, usually very successfully. Leave Vignette Removal and Geometric Distortion off, it has already been corrected in your Raw in LR.
AUTO BLEND
Make a duplicate of both layers by dragging to the + icon. This is useful to protect the original layers in case you need them again. Select ‘Stack Images’ and enable ‘Seamless Tones and Colours’ and ‘Content Aware Fill Transparent Areas’. We want the tones and colours merged to be seamless, or well blended obviously. When the images are Auto Aligned there can be a slight mismatch on the edges; PS will recognise this and fill them with Content Aware using adjacent pixels.
It will leave the fills selected as shown in the screenshot with Marching Ants. Because they are selected anything you do now will impact just that area, it is an active selection. Dismiss them with Cmd+D.
You now have a new layer which is a merged version of the two images underneath. Notice the masks PS has applied to the images when it analysed them to find the sharpest parts of both images and produce the final image.
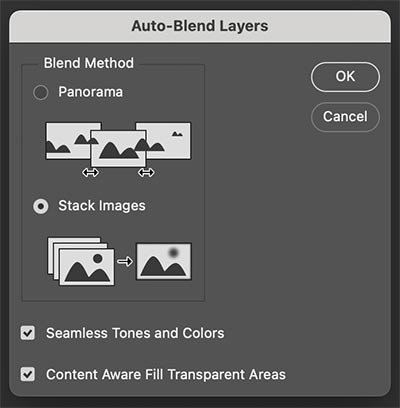
Auto Blend Dialogue
WHY DUPLICATE LAYERS?
PS does an amazing job finding all the parts to merge into one image and it will usually also eliminate movement. But it is not always perfect.
In the blended image I can see the background trees are not merged very well, some parts are sharp and others are not despite the background layer being fine. Switch off the top layer and disable the masks on the layers below and inspect each. You’ll see parts of the images that have been blended together in each layer; the trees are a mess in this layer, and notice the water has patches blended in. Despite ‘Seamless Tones’ being enabled it is the final image that is seamless. It looks like a torn image stuck back together.
This can present a problem; I can very easily fix the trees just by adding a mask and blending back in the ‘good’ trees, but not on the masked layer PS produced. I just disable the layers I don’t want, enable the original sharp background layer and blend them back. It takes no time and I have this ability because I copied the layers first.
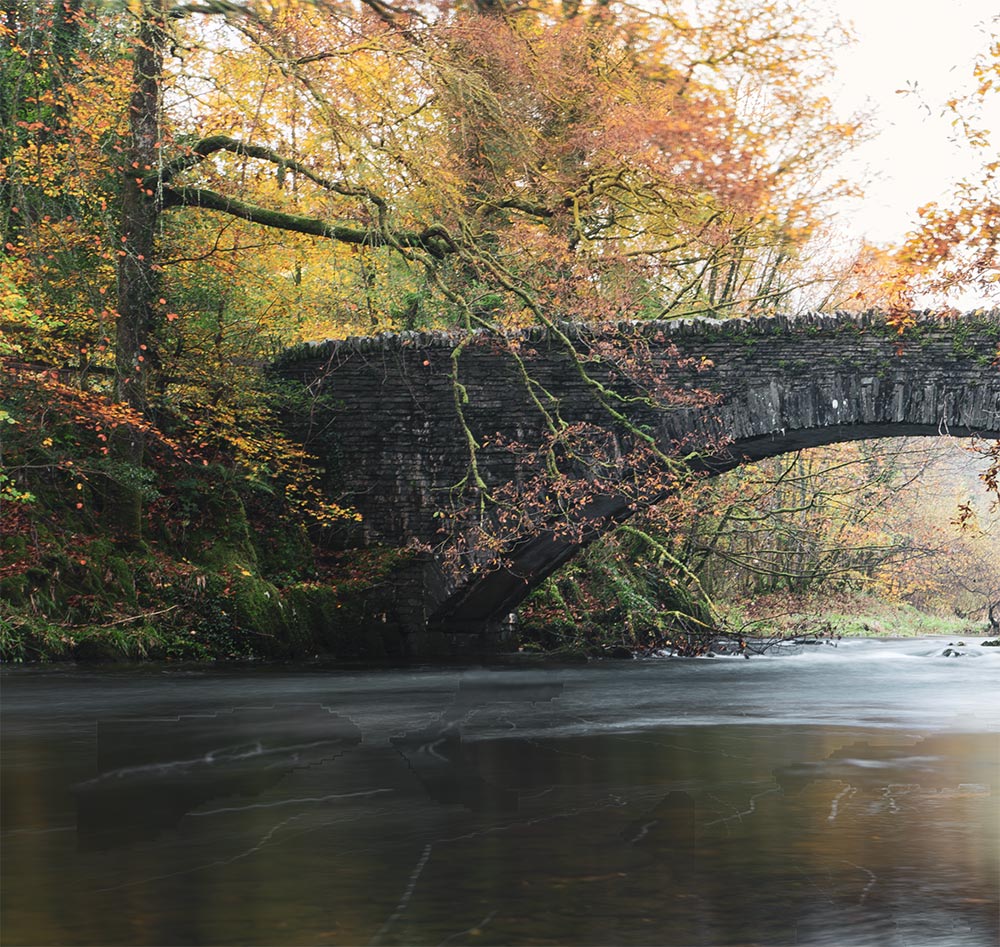
Mismatched areas after Auto Blending
FINAL STEPS
I flattened the image and carried on. You may want to keep layers, so just stamp them whenever needed. Rename layers too as a reminder.
First I fix the ground on the right just by using the Lasso Tool and using Generative Fill to fill the area. Generative Fill uses lower quality pixels so be aware, check and then when you click the variation you want to use click the Detail icon to improve it. I removed the sign in the background just with the Remove tool.
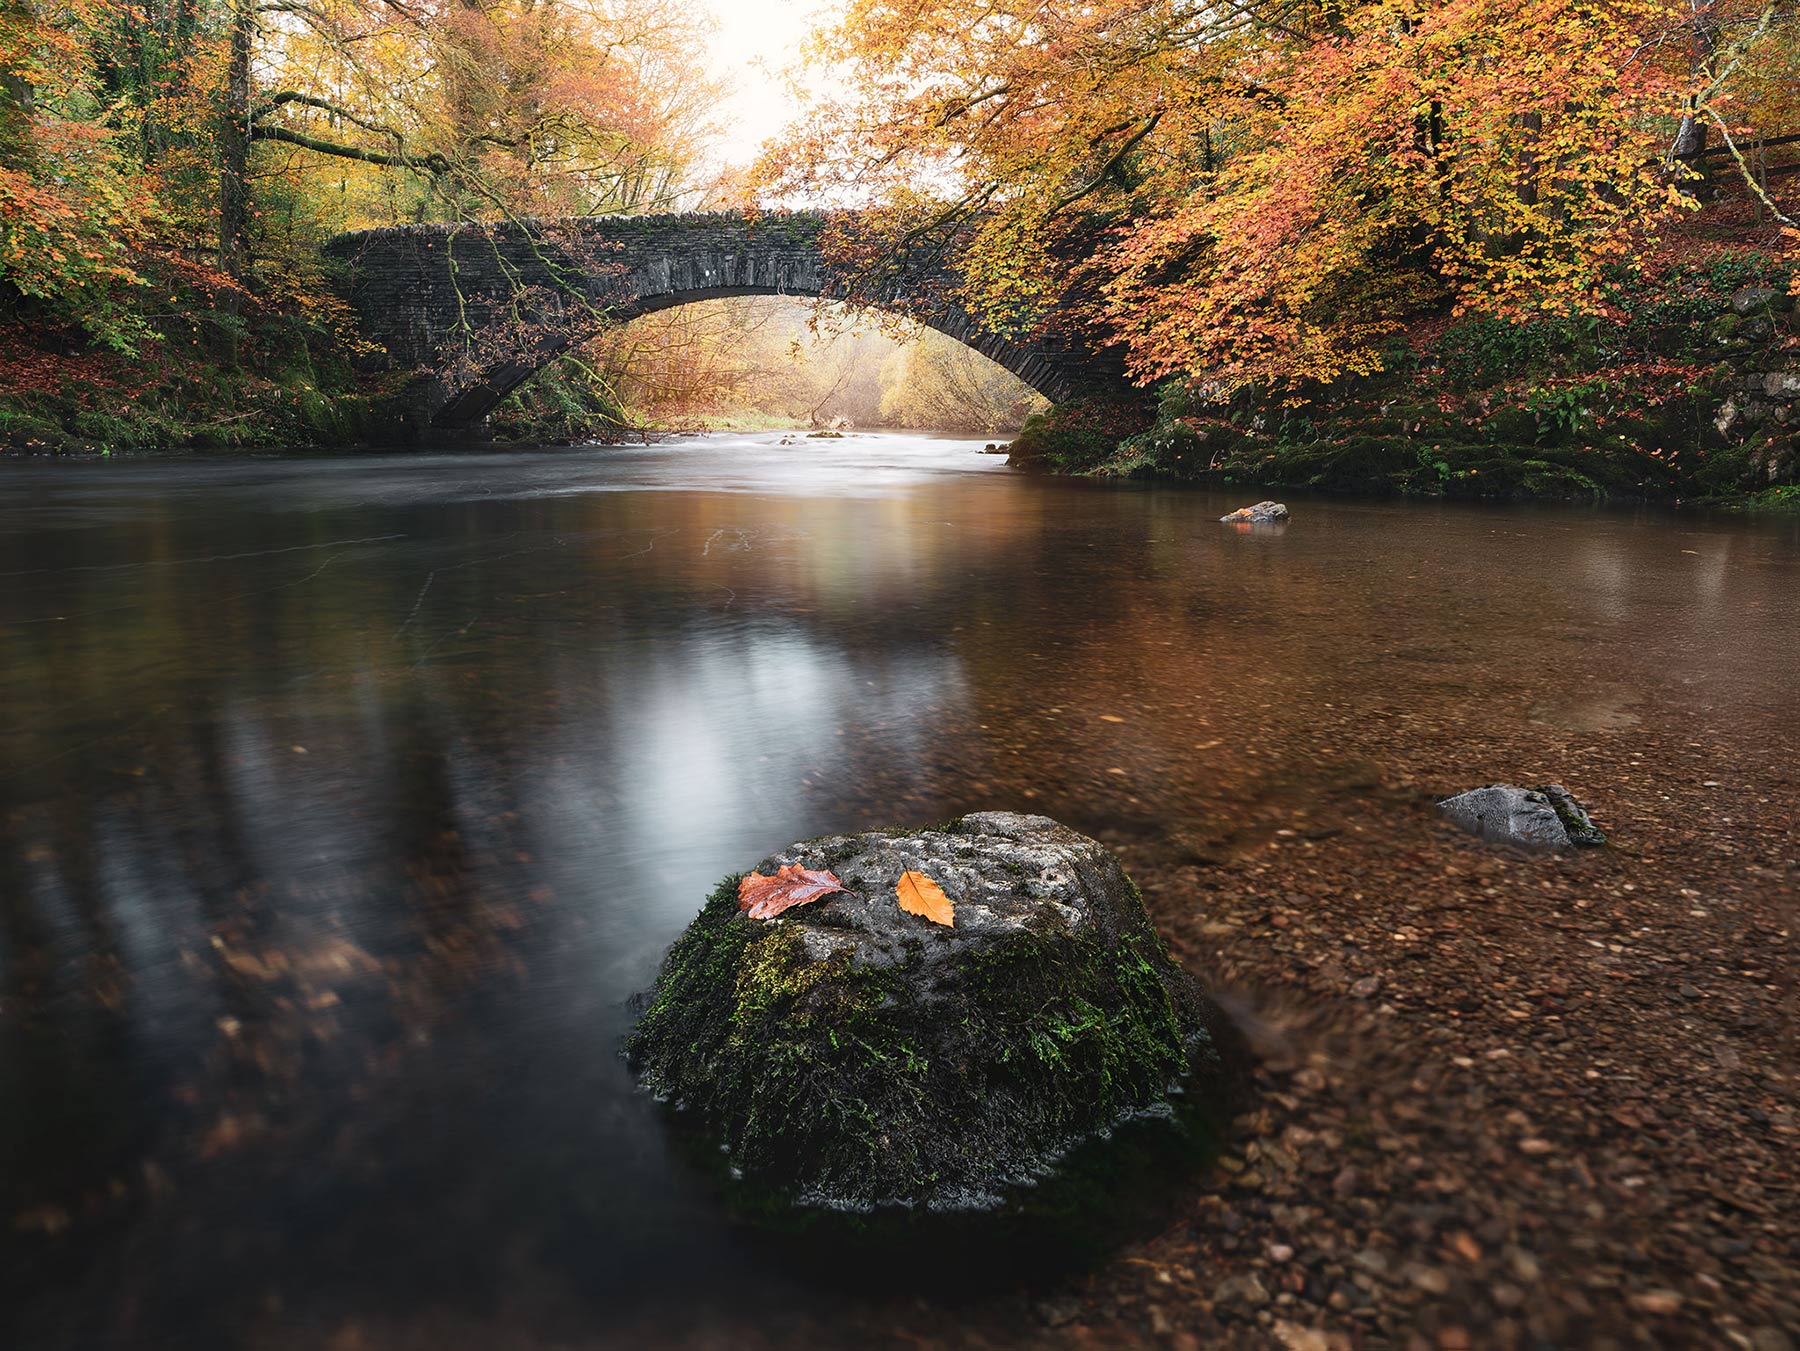
Notice the foreground is larger in the final image than the original raws? I wanted the rock over to the left a little but was constrained by the deep water over my wellies. As in the example of Blea Tarn previously, I made a selection of the foreground with the Marquee Rectangle tool and copied it. I enlarged it slightly being very aware of the water reflections and blended it with a mask along the top. I was blending free-hand, then when it came to the edge of the rock I made a selection of it for more precision to constrain where I masked.
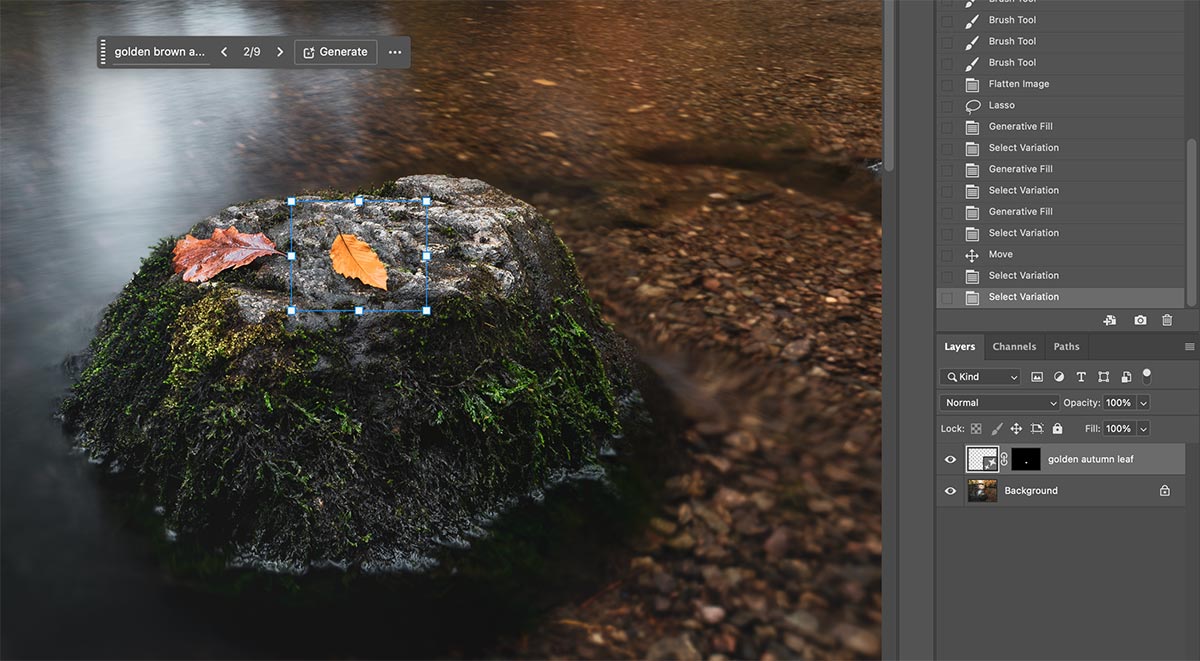
Leaf replaced with AI
Did you notice the leaf has changed? This is not something I normally do but I was intrigued. The original leaf was a little scruffy so I made a selection around it with the Lasso, not an accurate one, just roughly to include some of the background rock. In the Generative Fill box I typed ‘Golden Brown Autumn Leaf’. Clicking Generate some of the results were hilarious. After 9 variations and refining one it actually looked ok.
Finally I adjusted tones and colours, and again increased depth. I used Curves to alter tones a little, Hue/Saturation to shift yellow more towards a warmer tone, and gave the background light in the sky and under the bridge more warmth. It is always best to go with what is there and enhance it. In Camera Raw I use negative Dehaze and reduced texture in the background under the bridge. Each step I just used History Brush for speed and to keep the process fluid.
MANUAL FOCUS STACKING
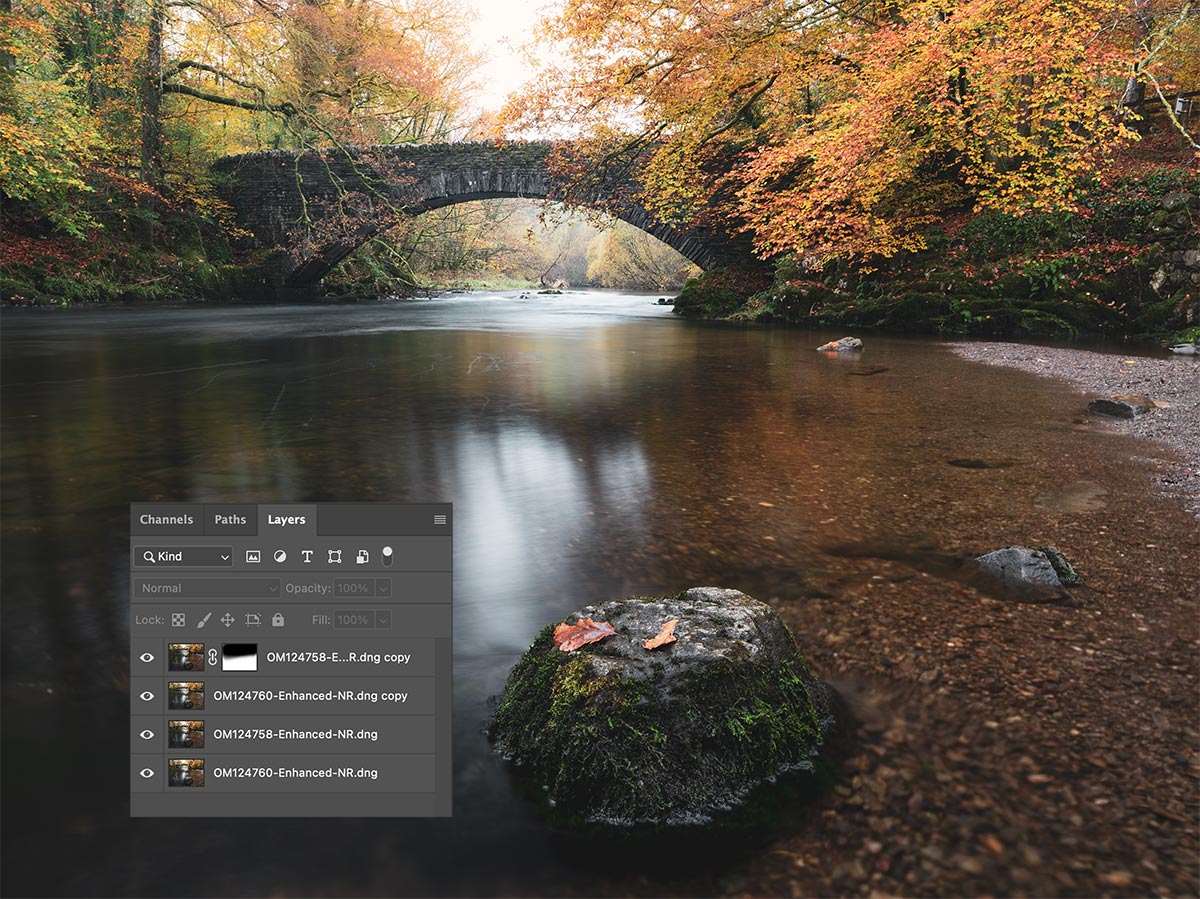
Focus Bracketed Frames-13mm 8 Sec @f6.3 ISO 200
It isn’t always necessary to use Auto-Blend for focus stacking, it depends on the complexity of the image. In the screenshot above I auto aligned the layers after duplicating them, added a mask to the top and simply brushed on it to reveal the image underneath. Because the mid-ground has such little detail I need not worry about differences with focus drifting or detail not matching. You simply choose the method that suits the image and your workflow.
This image below taken at 30mm (Olympus, so 60mm full frame equivalent) was a little soft in the background with one shot, so I manually focus bracketed with another shot for the background.
There was a little movement with the very light spring breeze which Auto Blend may have struggled with, maybe not. I didn’t even bother; stacking both images as layers I simply added a mask and painted to reveal the sharper image underneath, avoiding any issue with movement of branches.
The difference in the depth of field was not great so I was able to use the path as a natural break to gently feather in. Notice the far background; as the light is strongest I wanted to increase the sense of depth and draw the eye into the scene by making the detail a little softer. I can do this simply by painting back in some of the softer layer, reducing the opacity of the brush.
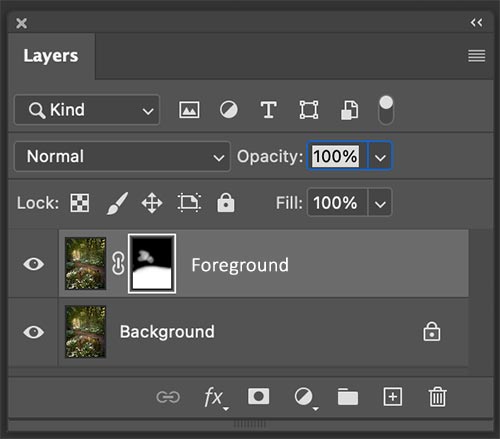

30mm (60mm FF Equiv) @ f6.3
Another simple scene below with images focus bracketed for the front and the back. The shutter speed was 2s for both to ensure blending would work well. Although the water was fine, the texture in the sky was different for each. Instead of Auto Blending I manually blended the top and the Bottom of each frame and thus avoided any issues with the sky.
I wanted a straight blend so this time instead of painting I used a Gradient. Select the Gradient tool, click Linear (there are other options too such as Radial, worth exploring for knowledge), make sure black is the foreground colour in the foreground/background toolbox, and simply drag a gradient down on the mask. Because black is set the top is hidden and the bottom is preserved. The Grad will have ‘handles’ allowing the position and depth of the graduated area to be manipulated to suit your needs.
If white was set the top would be preserved and the bottom hidden. Or if I wanted I could drag the Grad up instead. It is simply just a case of layer order and which will be hidden or revealed. You have the options to do it any way you want.
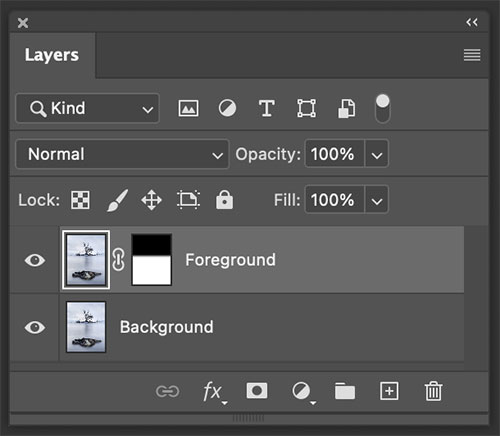
Layers and mask added with Gradient Mask
Context Menu changes to show Gradient Tool Options
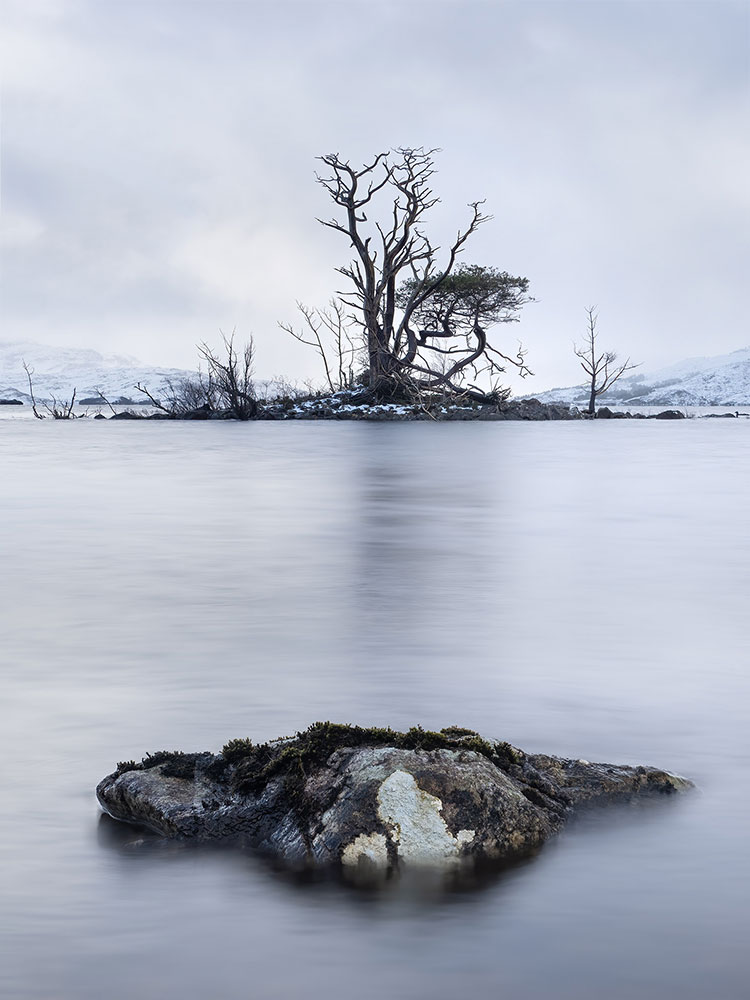
35mm (70mm FF Equiv) @ f5.6 2s
HAND HELD FOCUS BRACKETING
Focus Bracketing shots is better on a tripod obviously, however LR and PS are so good these day with aligning images it is entirely possible to shoot hand-held. It may be awkward moving your focus point or manually focusing without moving the frame but it can be done with a little care.
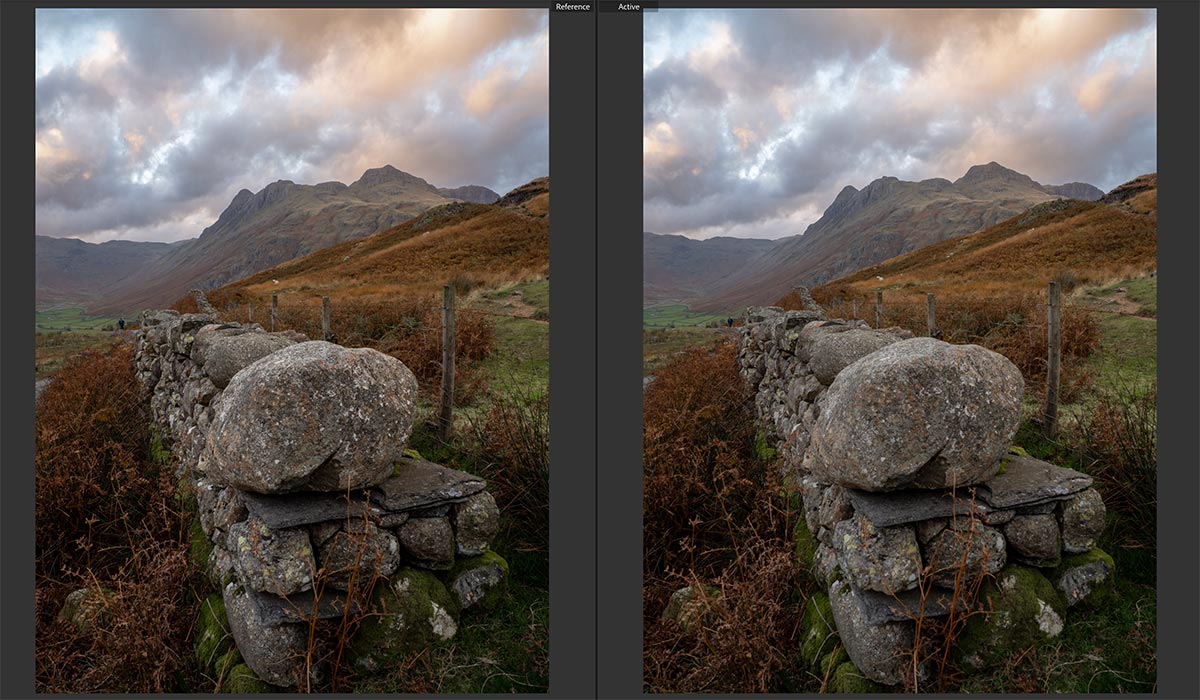
Two images hand held focus bracketed, one on the front wall and one towards the back of the wall.
This image won’t win any prizes, it wasn’t the point though. Taken to demonstrate focus stacking from two hand held images, notice in the background a figure walking down the path. I compare them with LR Library Reference View, adding the images I want. There is also movement with the sheep and in the clouds. They are simple fixes, I am more interested with how PS will align them considering there will be focus breathing after moving the focus point, and my own movement.
This is when Auto Align is really important. Select the image thumbnail and use Edit>Auto Align Layers. Keep Auto selected, PS is smart and will figure it out.
Leave Lens Corrections off, they have already been applied in LR Raw images. For fun try it and see how it tries to remove distortion that is not there.
When the layers are not auto-aligned the auto blend may still work in some areas but my own camera movement was not corrected, as shown in the screenshot. This shows how much I actually moved, and how much auto-align can actually correct!
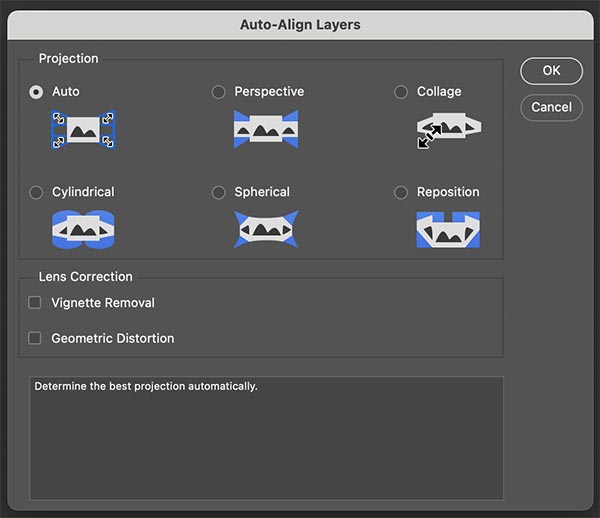
Auto-Align Dialogue
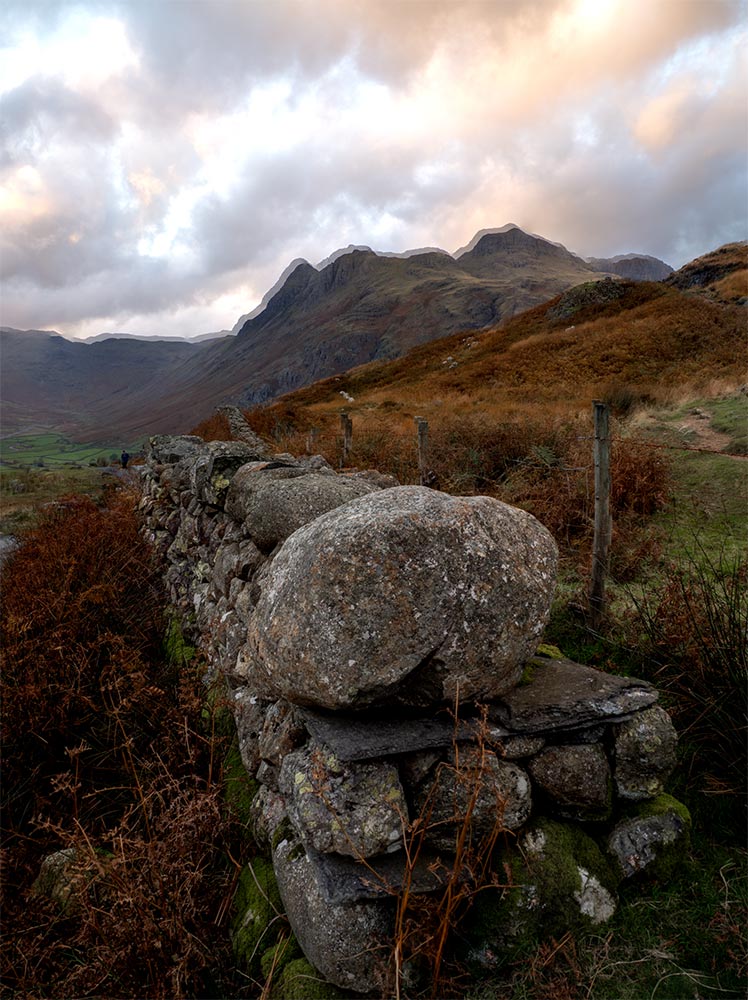
Non Aligned. Please do not adjust your glasses.
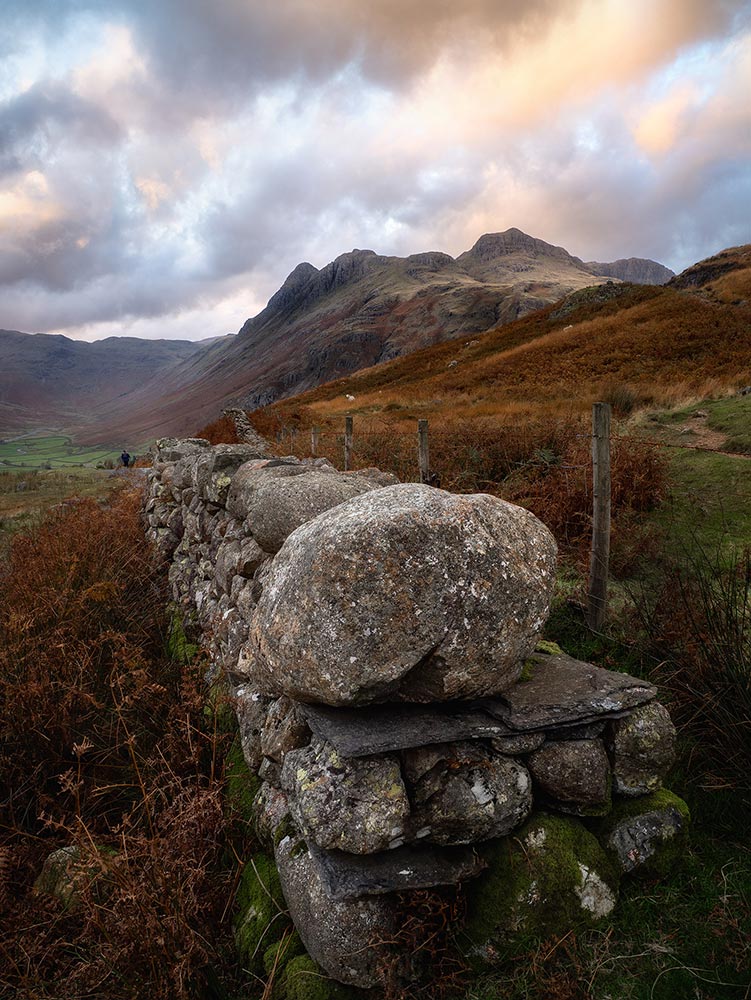
The final image after Auto-Aligning the layers and Auto-Blending.
I cleaned up the front of the wall with the Remove tool, and added a few adjustments to the brightness in some parts with simple selections and Curves.
More importantly look how well the layers have been aligned and blended; the mountains are now correct, the fence and the wires and all of the wall is now perfectly aligned. Not only has PS blended the sharpest parts together, and corrected focus breathing, it has also aligned the movement caused by hand holding.
And it has detected the movement with the sheep in the distance and the moving figure, then used the sharpest most defined parts to include in the the layer. Clever.
MACRO FOCUS STACKING
The process for focus stacking Macro images is exactly the same. Process one image and sync the settings to the rest, then send them to PS as a layered document. Duplicate the images as a precaution, Auto-Align and then Auto-Blend.
→ TIP Be selective with the images you use. One issue your final image can end up with is an out of focus halo around the edge, usually because you included an image in the stack that was out of focus. Eliminate any images you don’t actually need before you send them to PS, or check each layer in the stack and remove it.
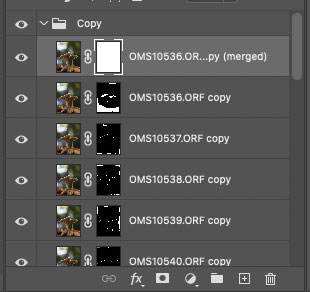
The layers from this Glowing Shroom image. There were 30 images, and they were duplicated. Further layers were added with more editing so the number of layers can quickly get confusing. A solution is to group the layers.
Select the layers, in the Layers panel menu shortcut (3 lines), click New Group From Layers. In the dialogue that pops up give it a name and your layers will then appear in that group, kind of like a new folder.
You can then hide the whole group, individual images, and rearrange the layer order if needed. If there is an issue with the final image you can switch off the masked layers, find the original layer and take steps to do repairs needed.
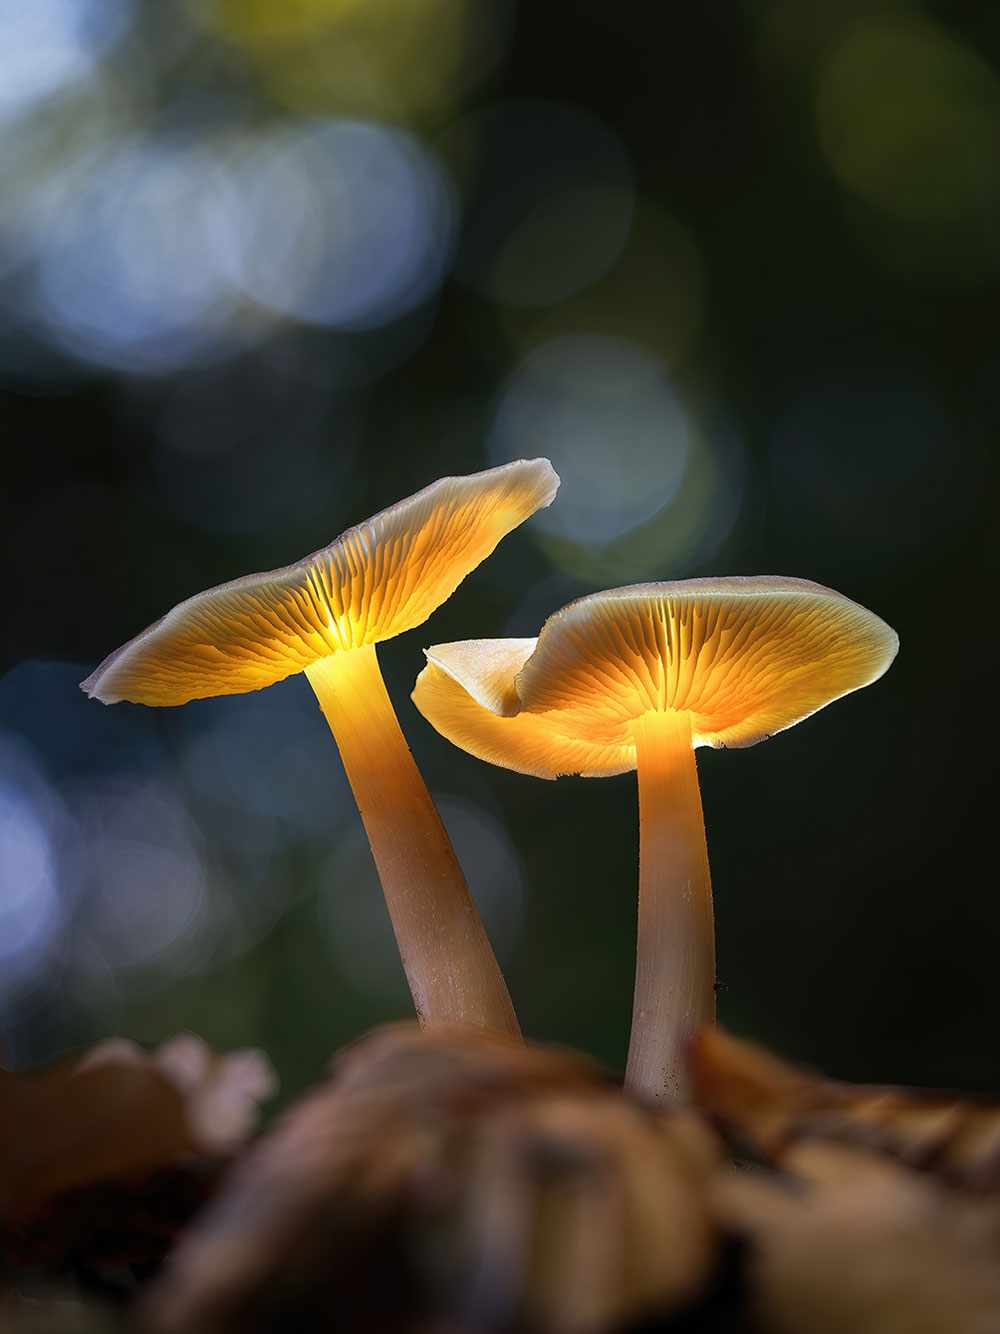
Stacked Macro image of Glowing Shrooms
→ TIP HELICON FOCUS is a stand alone app that many Macro photographers prefer because it can handle large files better. It is available for Windows and Mac and can handle images exported directly from Lightroom.
GLOWING SHROOMS
If you’re interested in the macro image above and how I made the shrooms glow you can find out more in my Glowing Shrooms Guide. It covers not only the processing of the focus stacked images, but also illumination and shooting techniques.

Raw images from the captured sequence one stop apart.
COMPLETE
This section is complete and you should have an understanding of using of using PS to stack and merge focus bracketed images.
Next we will explore another important technique, stitching Panoramic images. It is quite straight forward and as usual there is more than one way.
NEXT – 11 PANORAMICS
