12 – BLACK AND WHITE
Converting images to black and white.
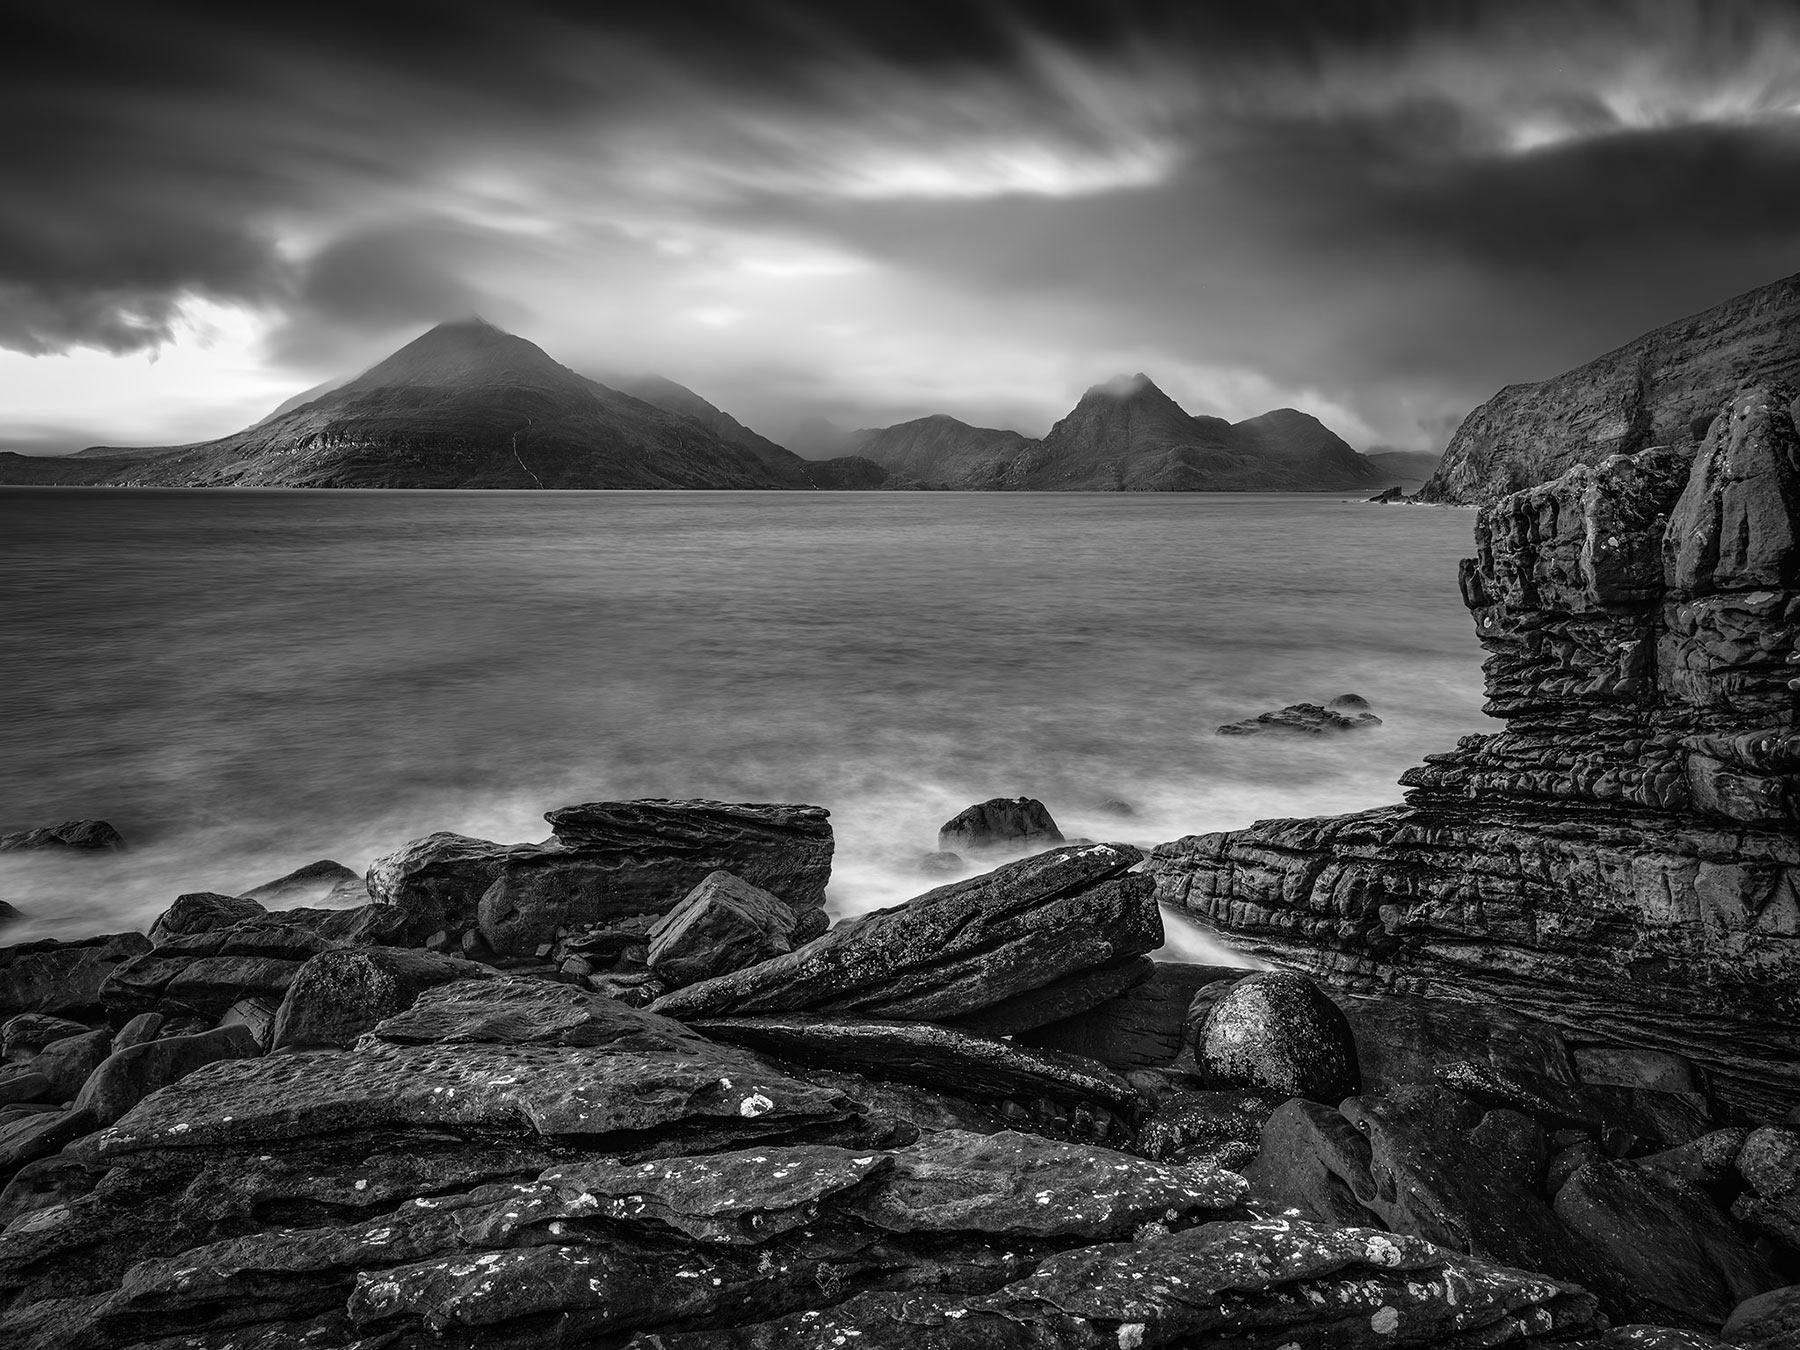
Elgol, Isle of Skye
Producing black and white (BW) images in LR is pretty easy, so easy I was going to skip this but it would be remise of me not to mention it for those that have never used LR. And there are a few points to consider too.
A black and white image removes us from reality. We do not see the world in black and white (unless colour blind), and therefore the old adage applies ‘photography is the art of taking reality and twisting it’. Reality here was manipulated with a 25 second long exposure too, so it presents an image to the viewer of a place they may have never seen but also in a way they never will too. Removing the colour allows the tones and shapes to speak for themselves, the viewer notices the drama and streaks in the sky more and the curves of the foreground leading up and around to the Cuillin mountains without being distracted by colour.
The point is there has to be a reason, a conscious decision, for the BW image to exist, not just because the photographer couldn’t get decent colour image out of it so tried his luck with BW. I wanted BW so I actually shot it in BW too, changing the colour profile of my camera. The raw is still colour, but I could see it in BW as I shot it.
THE RAW
The raw image has all the information needed. I knew that sky would look incredible in BW.
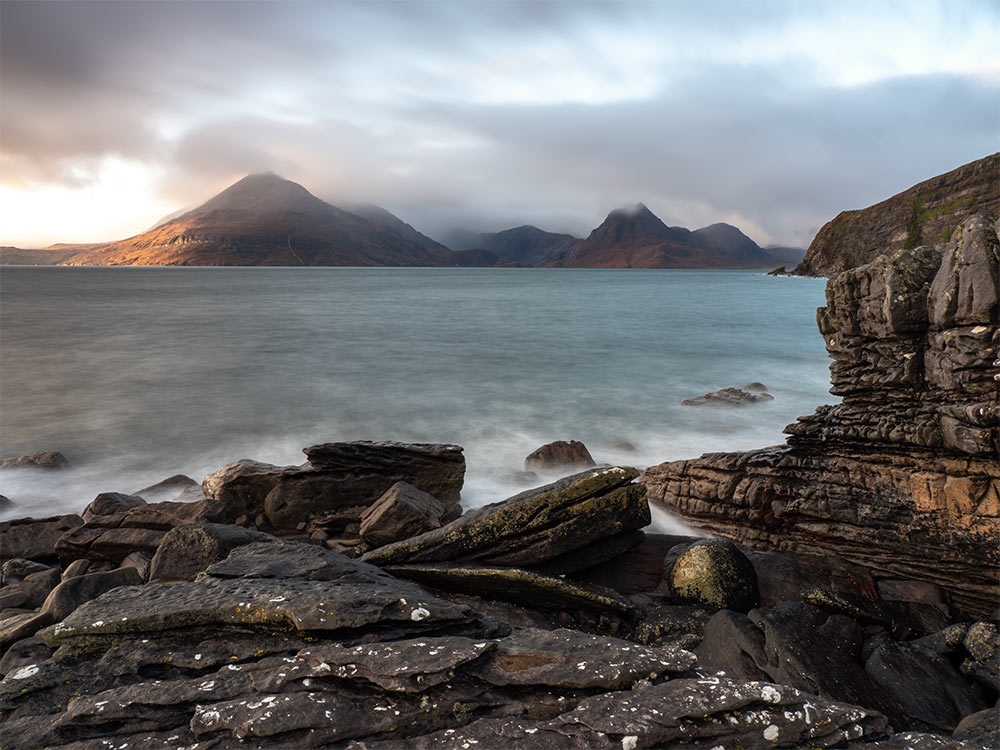
Raw image. 25 second exposure.
BW MIX
Click the BW Icon at the top of the Basic panel and work though the settings just as any image. I would pay particular attention to the Histogram, Contrast and the Black and White Points. I want the best contrast with dark and light tones without sacrificing mid tones.
Hue/Saturation updates to the Black and White Mix. Although sounding counter-intuitive we are now adjusting the luminance of each of the colours which affects the grey tones in the image. If you have a blue sky move the blue slider right and watch how the tone shifts darker and darker.
Leave Colour Grading, this adds a tint to your image, unless you really want a sepia tone image to show how old fashioned you are.
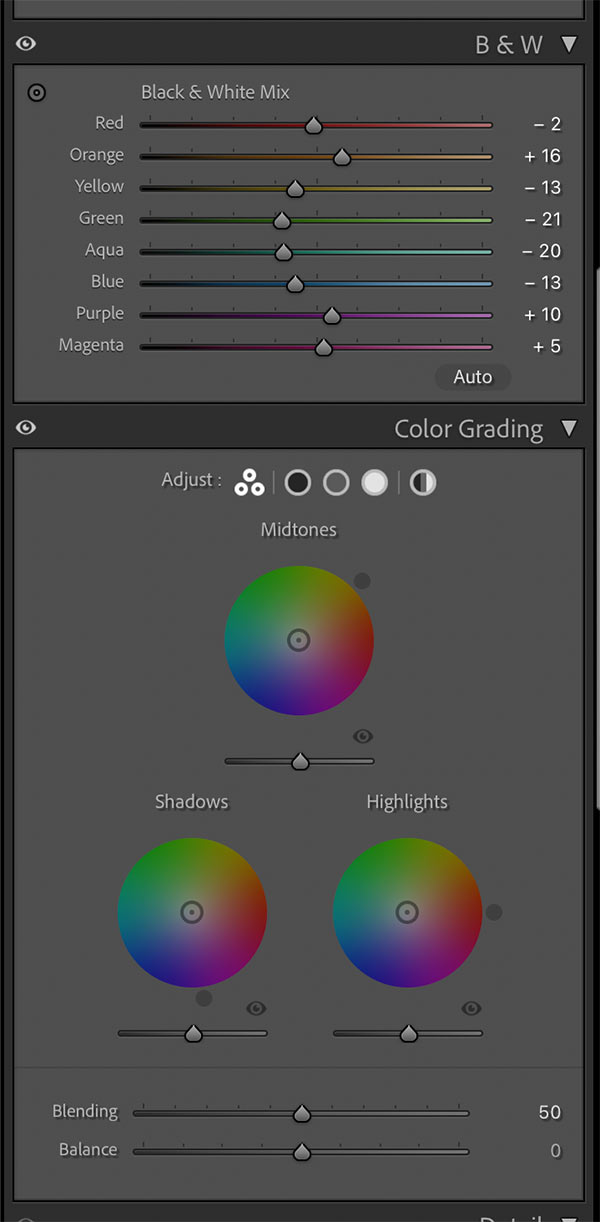
Black and White Mix
MASKS
Particularly useful are the Luminosity Range Masks. I produced one for brights so I could brighten them a little with white and retain detail by bringing Highlights down, and then one for darks so I could make sure shadows were not blocked in.
The bottom mask is a radial mask, inverted and then exposure reduced to add a vignette. I then subtracted it with a brush so I could remove it from areas I want to eliminate it or reduce it. Note on the sky I removed it from the white cloud streaks to emphasise them more.
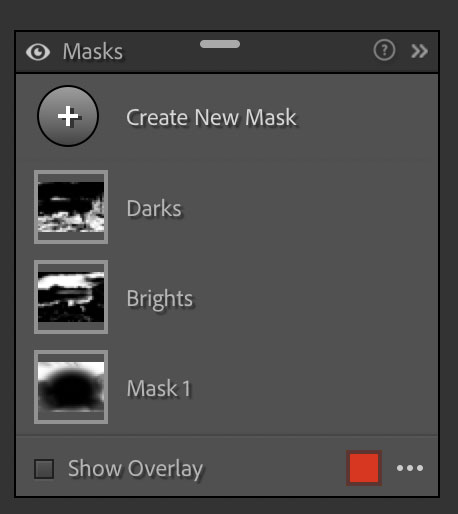
Masks
FINAL STEPS
Finally there was an edit I wanted to do in PS. On the right the rocks in the foreground were merging too much with the cliff in the background. I made a selection first around the cliff, brightened the whites a little and then with Levels moved the black slider over to reduce the black point, therefore reducing the blacks. On the main rocks I made another selection and increased the whites, undoing it and painting back with the History Brush. Now there’s some separation and better depth.
I wanted more detail in the background. Without sharpening because that has already been done in LR and will just create artefacts I will increase detail with a High Pass Filter. Copy the layer then convert it to High Pass in Filters>Other. Set the required detail and change the Layer Blend Mode to Soft Light. I only want it on the background so you’ve guessed how I did that? Add a black mask and just brush with white were I want it, avoiding the edges and the waterfall which are already sharp, I do not want to overdo it.
PHOTOSHOP BLACK AND WHITE
ADJUSTMENT LAYER
Photoshop has two ways to convert to BW, with an Adjustment Layer or with Camera Raw.
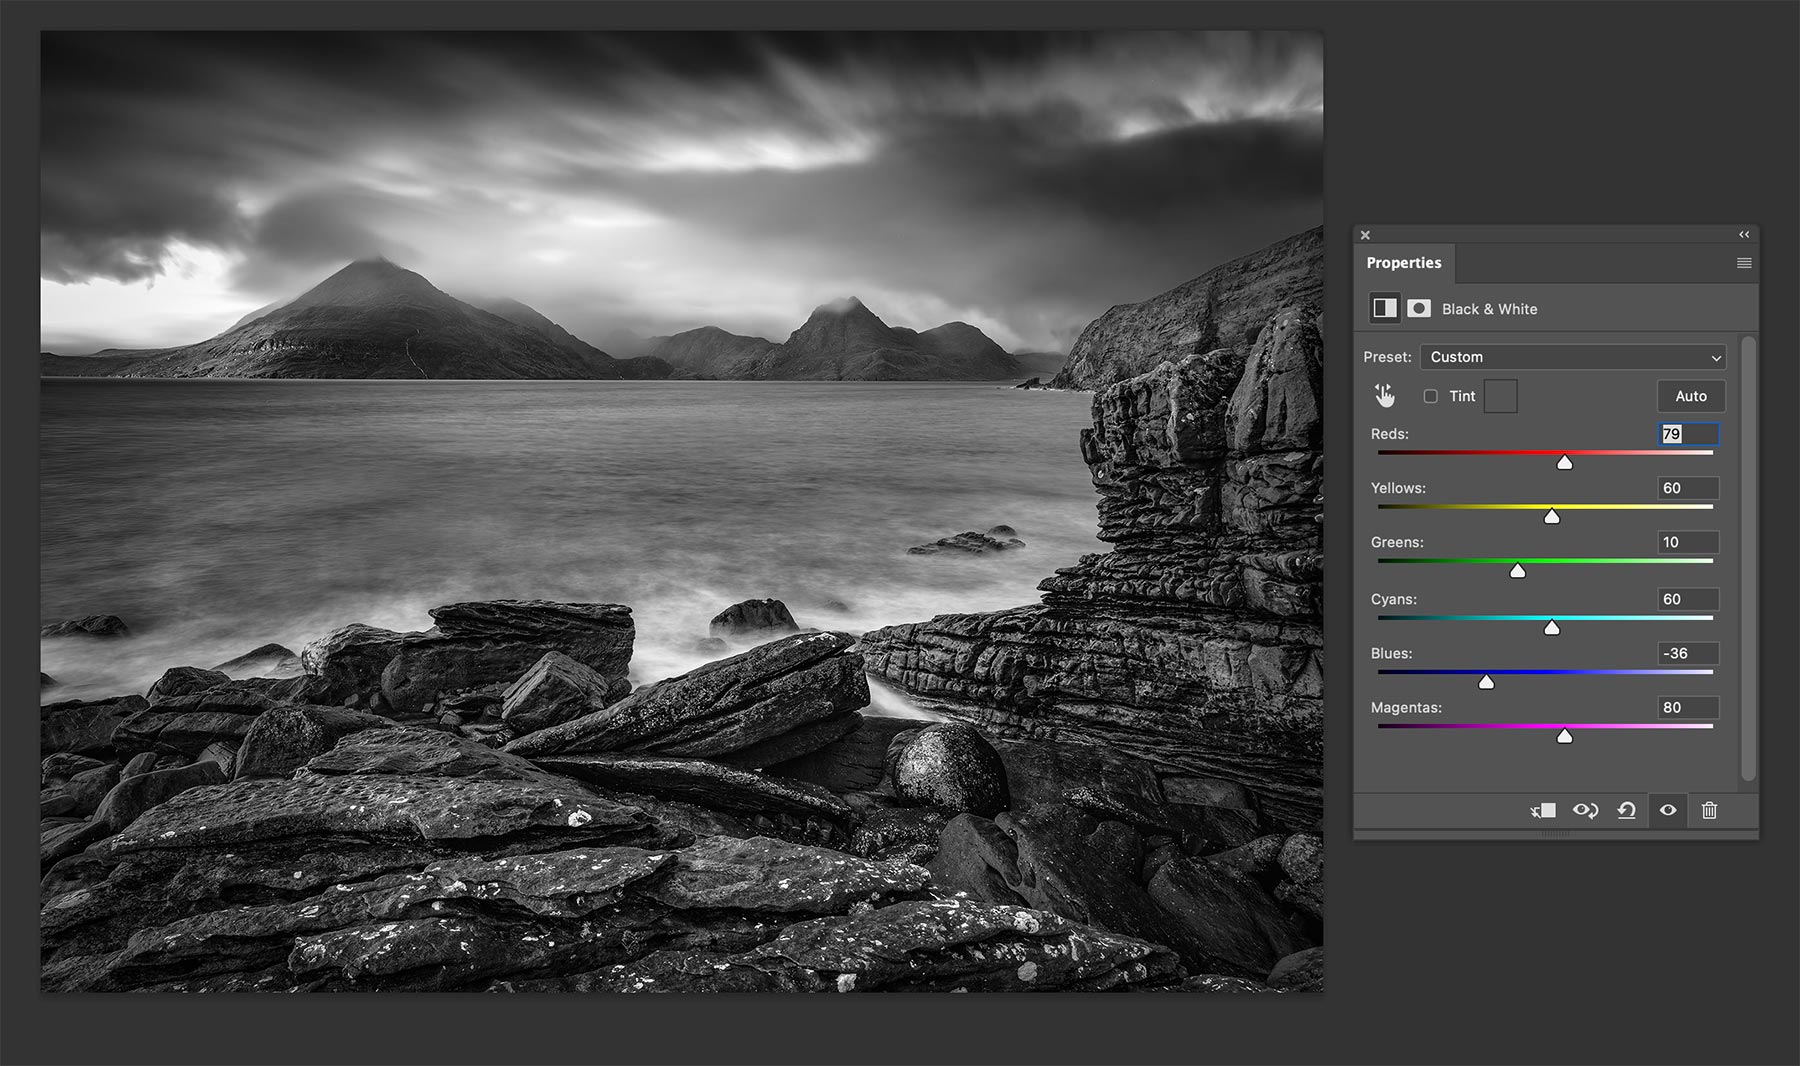
Photoshop BW Filter
Photoshop has a very similar method with a Black and White Adjustment Layer. In the Layers Pallet add the Black and White adjustment layer and adjust the colour sliders to suit. The colour sliders are different, why? In LR we are working with images, the colours are described as we would recognise them in a photograph. PS is not just for photographers so colour is described in the CYMK standard (cyan, yellow, magenta, black).
The disadvantage in PS is you do not have access to the LR Masks, or do you?
CAMERA RAW
With the image open in PS, launch Camera Raw from the Filters menu. Remember we will be working on a Tiff not a Raw.
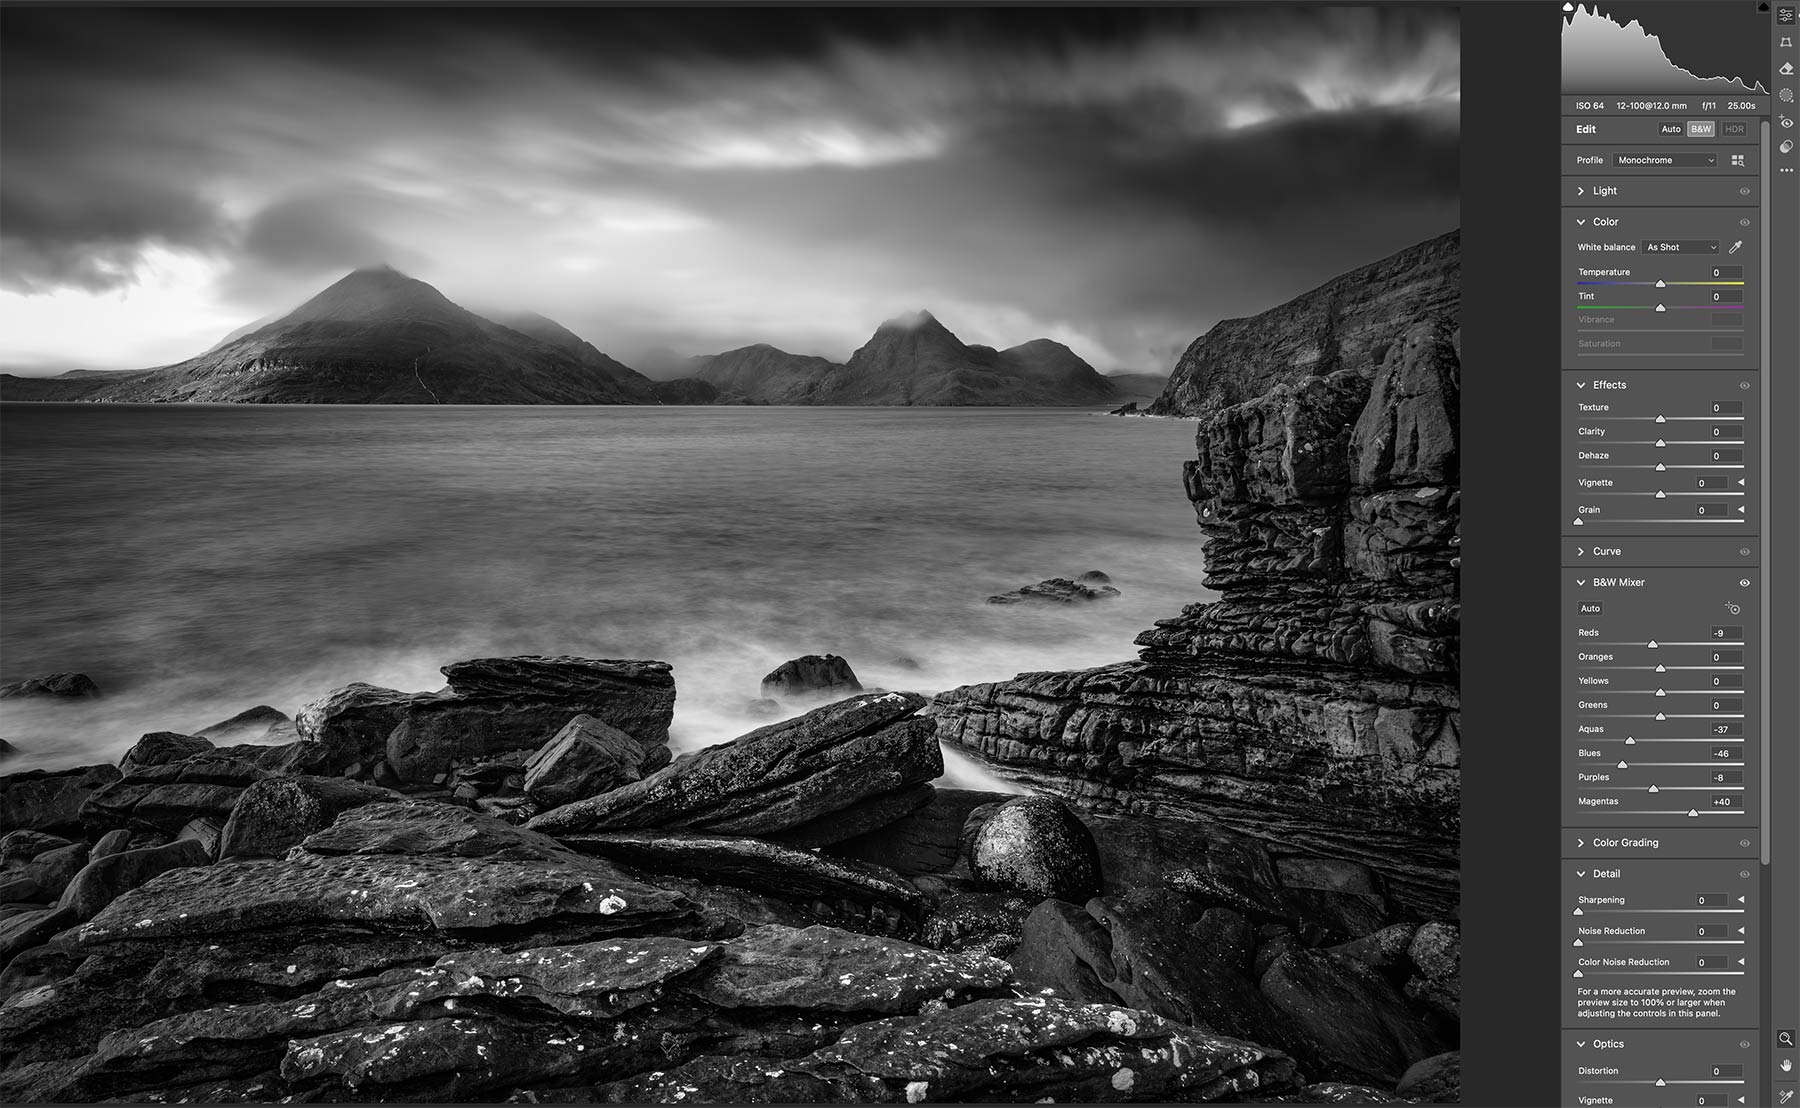
Camera Raw BW Conversion
Click the BW icon and we now have access to the same colour mixer and all the other features of LR including Masks and Luminosity Ranges. It is essentially LR.
OTHER WAYS
There are other ways too with a wide selection of plugins that can be used in LR and PS. One of the most popular was Silver FX, now part of DXO which used to be free with Nik Collection. It was very good, but being honest do you really need another plugin? LR and PS are both very capable as they are.
COMPLETE
