
WILDLIFE
An overview of using the EM1-MK3 for Wildlife
The EM1-MK3 is not as advanced as the EM-1x or the OM-1 which raised the bar with focus, tracking and subject detection modes, however wildlife photographers were managing back in the day with SLR cameras and no fancy features at all. The EM1-MK3 still has plenty of features that will assist, especially with focus target settings and continuous drive modes. There is also the unique Pro-Capture mode which attempts to remove hesitation allowing you to capture the shot just at the right moment.
CAF+M – CAF+M+TRACKING
Probably the first thing to consider is what focus mode should you use, standard AF, Continuous AF, or CAF plus Tracking. Continuous AF is the best to use for obvious reasons, it will constantly focus on the subject depending where you place the target point, and adjust as needed.
Tracking on the other hand although useful can be a little hit and miss depending how fast the subject is moving and how much clutter there is in your scene. It would be great if there were a way to quickly swap between the two, and luckily there is using the the rear lever. By programming the lever we can have two focus modes available just by flicking it from position 1 to 2.
Ensuring you have enabled AF+M (Gear) Custom Menu>A1>AF+MF) is handy because the lens focus ring can be used at the same time as Continuous AF for fine tuning. And do ensure Peaking was also enabled.
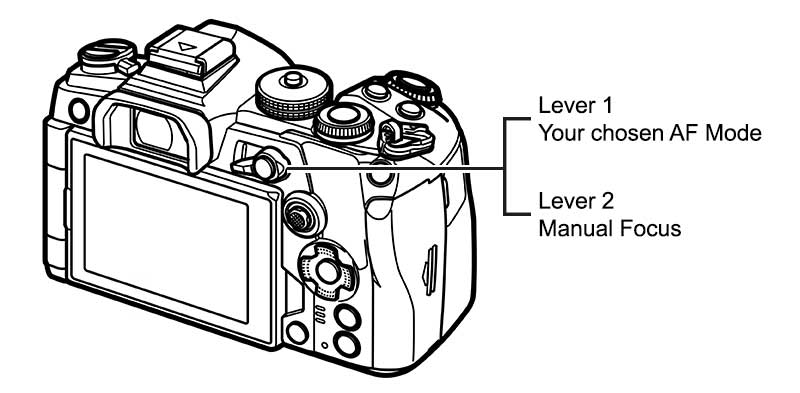
Remember in the Buttons Section we customised all the functions of the buttons and the lever to set up back Button Focus and in The Custom Modes Section we set up a CM for Wildlife. Hopefully you followed it and now is the chance to review it.
By setting the AF to C-AF on Lever1 and C-AF+Tracking on Lever2 we can swap easily. Applying them is very easy, with the lever in P1 use the Super Control Panel and set C-AF/M, then flip it to P2 and set C-AF/M+Tracking, and it’s done. As a note- you could also set up the AF Target to different sizes to suit your needs.
BACK BUTTON FOCUS
Using Back Button Focus for Wildlife is a function may Wildlife photographers rely on. We set up the camera to use Part Time BBF (See the Buttons Section) where the shutter button still uses AF for a single focus point and switching the lever to Lever2 employs BBF where the AEL button activates AF and the shutter is for shutter release only. It works great for most situations but if you want to employ Continuous focus modes and BBF we have to use Full Time BBF so the shutter button has AF removed.
One advantage is the rear lever no longer has to have M (full Manual Focus can be used with the lens clutch on Pro lenses) assigned to Lever2 so both positions are available for different options. S-AF can be assigned, C-AF, or C-AF+ Tracking. Remember each AF Mode also allows S-AF+M or C-AF+M when in Menu (Gear) Custom Menu>A1>AF+MF is enabled which is handy. When using C-AF+M focus can be fine tuned if required by using the lens focus ring (ensure Peaking is enabled) which also effectively locks the focus too.
To set up Full Time Back Button Focus first set Half Way AF to Inoperative to remove AF from the shutter button:
Menu (Gear) Custom Menu>A1>AEL/AFL>Half Way AF>Inoperative.
Set your chosen AF Modes to Mode 3 in the same menu, and then set each one to the Lever Positions just as we did before by putting the lever in each position and simply using the Super Control Panel to set the desired AF.
For Wildlife if you prefer this method I would set C-AF+M to Lever1 with a small target and C-AF+M+Tracking with a larger target grid.
This now enables Full Time Back Button Focus, which can be saved as pert of the Custom Mode to make it a dedicated Wildlife Mode.
Do remember that this required the AEL button to be set at the default AEL, so other suggestions for what to apply to it do not apply if you want full time BBF.
CUSTOM MODES
The Custom Mode we set up for Wildlife gave access to many functions for quick selection and flexibility, changing the AF mode as above, allowing quick access to the AF Target sizes, giving more access to the drive mode and setting up some of the Sequential settings, and with AF Limiter to a button. We also set the Monitor button for quick access to changing Stabilisation settings too, all of which are designed to make it as easy as possible to change on the fly.
Now we will have a closer look at the settings and how we can actually use them.
AF TARGET AREAS
AF Target Areas are crucial for achieving focus on you subject and there are many options to help assist, from a single small target for pinpointing a stationary subject, to larger grids
Custom Menu>A2>AF/MF
Some important settings to check and alter in the Custom Menu A2. Some of these we have already addressed in the Menu Walk Through section.
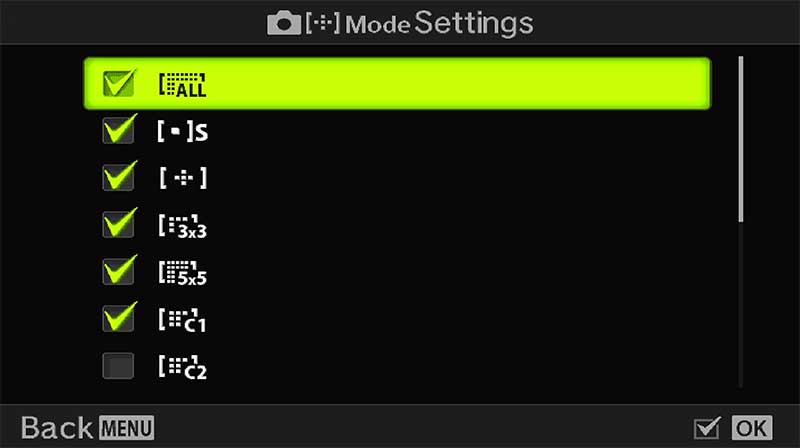
AF Target Mode Settings
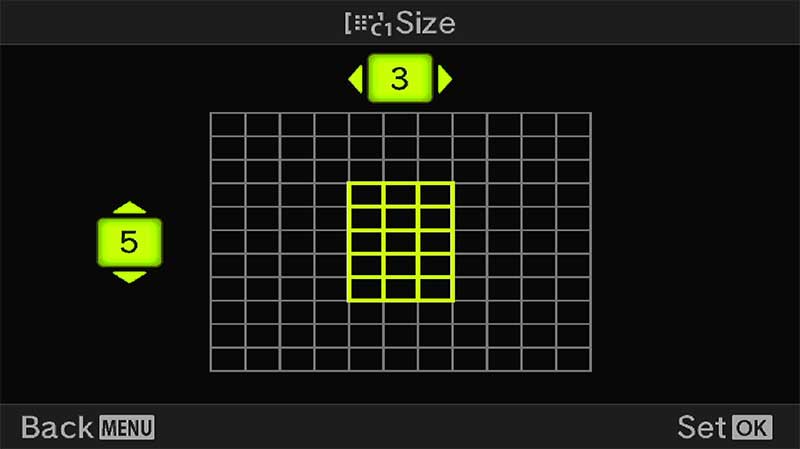
Custom Target Mode Settings
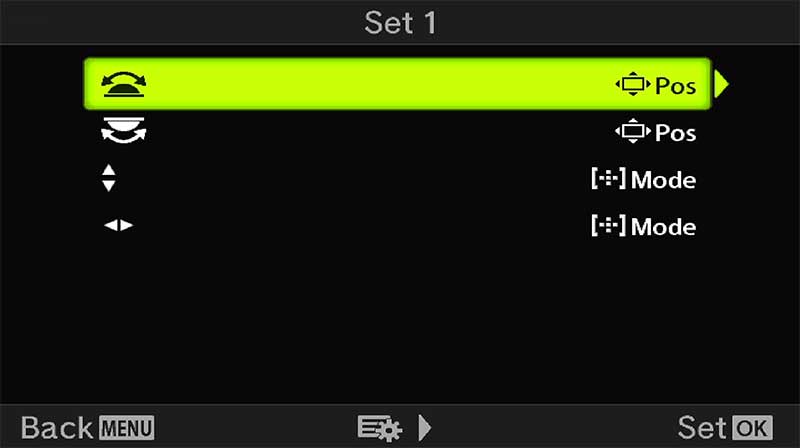
Select Screen Settings
Screen 1 shows the AF target Mode Settings. There are 5 ‘standard’ target modes and four modes that can be customised, C1 to C4. Activate them all by ticking them and customise the C1 etc as you see fit. C1 is shown here as an example, select the number of points wide and high to set your own target grids. You may not understand the need for them right now and you do not have to set any, the relevance of them is when you wish a target setting was slightly different.
Accessing them is easy, as long as the target focus point is active you can then set how you want to change the target size itself. In ‘Select Screen Settings’ the front and rear dials and the rear D-Pad can be set to either move the focus target, or change the size. Set the option that suits you. I have it set for the dials to move position and the D-Pad to change size. I press the left button to activate the focus target and then the controls will perform as shown.
You also have the Joystick which when nudged will activate the AF and can be used to move position. Also in the Buttons menu you can set the centre press to return the AF position to the centre Home position.
You could as an option set AF Area Select to the AEL Button which is easy to access with your thumb.
THE IMPORTANCE OF TARGET MODES
Target Modes are extremely useful but not fool proof and they can easily get it wrong.
AF Target Large
AF Target Medium
Setting a large target will usually pick up your subject such as in these examples. We do not know if the focus will be on the wing, the head or the tail, in which case more precise smaller targets would be needed, or leave it to chance. But for a quick reaction shot a large target can be very successful. The issue arises when another subject enters the target area and the focus point jumps to the other subject, it does not know what is priority. In a situation like this it is far better to use a smaller target. AF Sensitivity can also be adjusted so the target point is more ‘sticky’, see below.
RECOMMENDED TARGET MODES
Note that C-AF is best to use and tracking is best used with caution, experiment and find what suits you best. These suggested Target Modes can also be save as a preset to the Lever. i have experimented and at the moment have small set for P1, and a 3×3 Grid for CAF+Tracking.
LARGE OR ALL – When there is one subject such as a bird in flight. The Subject Detect will quickly detect and track the subject across the frame.
MEDIUM – When there is more than one subject and refining of the main subject is needed.
SMALL – When there is more than one subject or a busy background such as a bird on a perch or in trees, or stationary animals to get precise focus.
CROSS AND CUSTOM – These are useful to further refine the target area for you subject. For instance a rectangle grid can help when the AF focusses on a busy background or foreground.
EXAMPLES
A cute Puffin on the Farne Islands in Northumberland.
A small focus target with CAF will cope well enough with an image such as this, with little point in tracking. Reactions need to be quick because the head is moving constantly so setting the focus point in position and manually framing the shot is best. Using f6.3 gave enough sharpness and depth for the eyes of the eels and the eye of the Puffin.
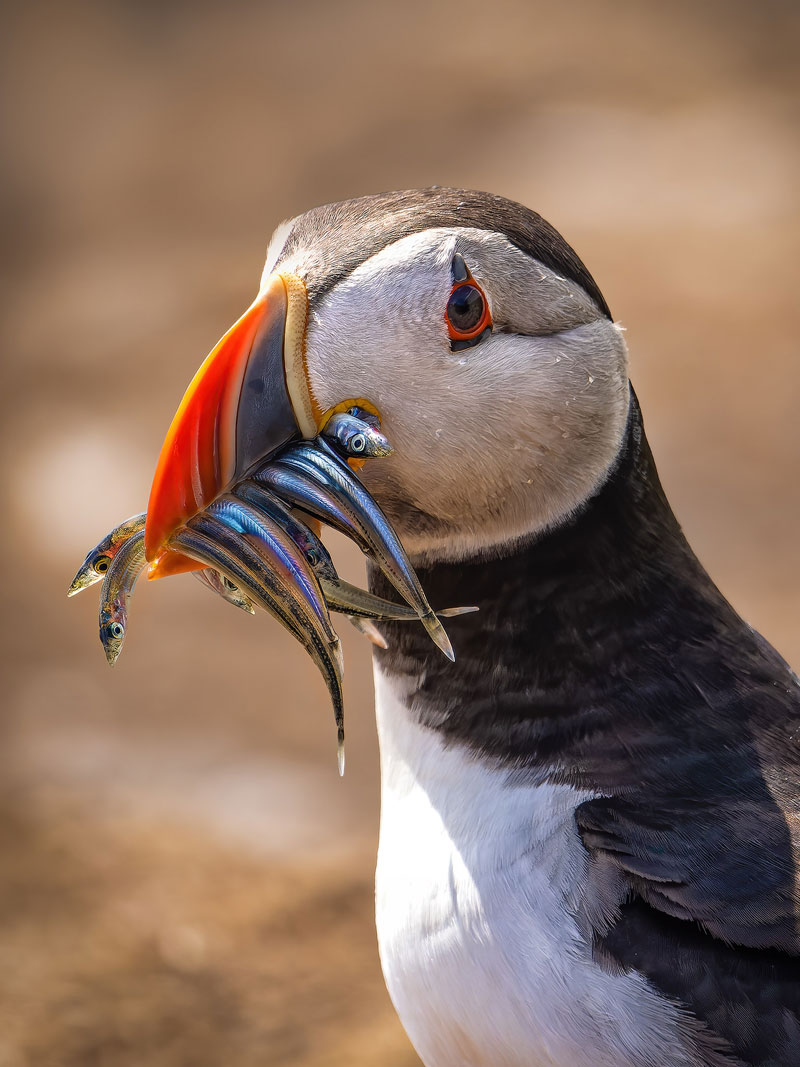
100-400 @ 400mm ISO 640 f6.3 1/3200s
This image however was different and shows what can happen if the focus target is too large, with the gull being out of focus and the focus point selecting the foreground.
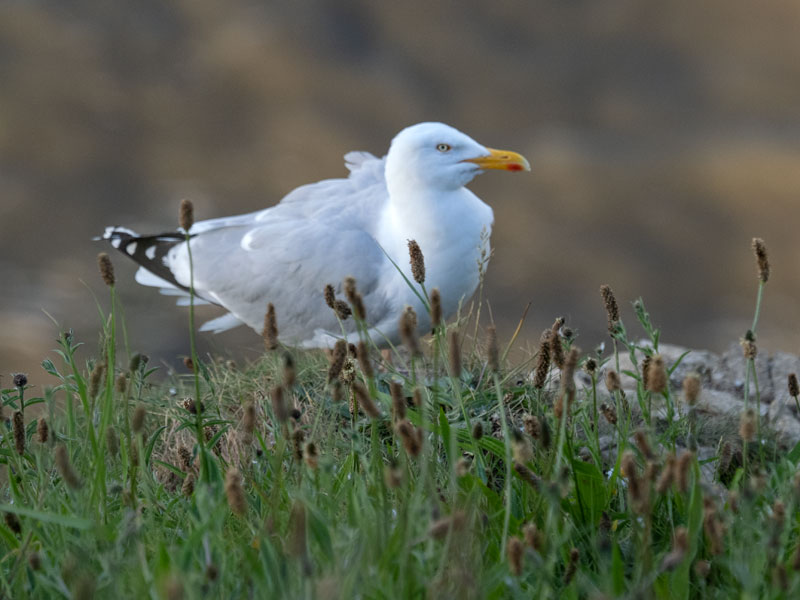
40-150 Pro 1000 f4.5 1/500s
LENS I.S. PRIORITY
Setting In Body IS or Lens IS Priority.
Custom Menu>C2
This is a setting which causes so much confusion, whether Lens IS Priority should be on or off, so it is worth trying to clarify more. The setting only has an impact on third party lenses or lenses with built in IS with no IS switch. From the Manual:
“If [On] is selected, priority is given to the lens function operation when using a lens with an image stabilisation function. This option has no effect on lenses that are equipped with an image stabilisation switch.”
Therefore the 12-100 Pro which has OIS (Optical Stabilisation) and an IS switch is not affected; stabilisation in both lens and body is synchronised and turned on or off completely by the switch. The Olympus 100-400 will use the body roll axis IS and the lens pitch and yaw axis together.
Third Party lenses with OIS but no switch will have priority given to the lens OIS. The Panasonic 100-400mm is a popular lens for wildlife so it is important to see how I.S. works.
| LENS IS PRIORITY | IBIS | LENS OIS SWITCH | ACTUAL STABILISATION |
|---|---|---|---|
| On | On | On | Optical Stabilisation |
| On | On | Off | In Body Stabilisation |
| Off | On | On | Optical Stabilisation |
| Off | On | Off | In Body Stabilisation |
| On | Off | On | Optical Stabilisation |
| On | Off | Off | NONE |
| Off | Off | On | Optical Stabilisation |
| Off | Off | Off | NONE |
Lens IS Priority On & Off / IBIS ON – Using the Lens OIS switch, on will engage Optical Stabilisation, off will engage In Body Stabilisation.
Lens IS Priority On / IBIS Off – Using the Lens IOS switch, on will engage Optical Stabilisation, off disengages all stabilisation.
Lens Priority Off / IBIS Off – Using the Lens IOS switch, on will engage Optical Stabilisation, off disengages all stabilisation.
We can see from this that Lens IS Priority has no effect at all. There are a few things to consider, the Panasonic 100-400 has a reputation for better stabilisation at the long end (200-400 approx) with Optical Stabilisation engaged. At the shorter end (100-200) In Body Stabilisation is more effective. These are easy to achieve, with lens Priority on or off and IBIS on use the lens switch on for Optical Stabilisation, and off for In Body Stabilisation. When using a tripod switch IBIS and the Lens switch off.
In The Menu Walkthrough I suggested setting Lens IS Priority On. It has no effect as shown above for the Panasonic 100-400, and no effect with Olympus lenses with a lens switch, when it will have an effect is with third party lenses with OIS that do not have a switch and do not use IBIS, so priority is best given to the lens.
OTHER SETTINGS
Other settings which are important and should be considered.
AF SENSITIVITY
AF Sensitivity can be altered plus or minus 1 or 2. When would you want or need to alter it?
Fast moving subjects can benefit from having sensitivity increased to allow the AF to react faster. This does mean if another subject enter the frame the AF can switch more easily so setting the AF less sensitive could help. Conversely setting it to a minus value helps to keep it more ‘sticky’.
It’s unfortunate this function cannot be mapped to a button so the best solution for quick access is to save it to you My Menu.
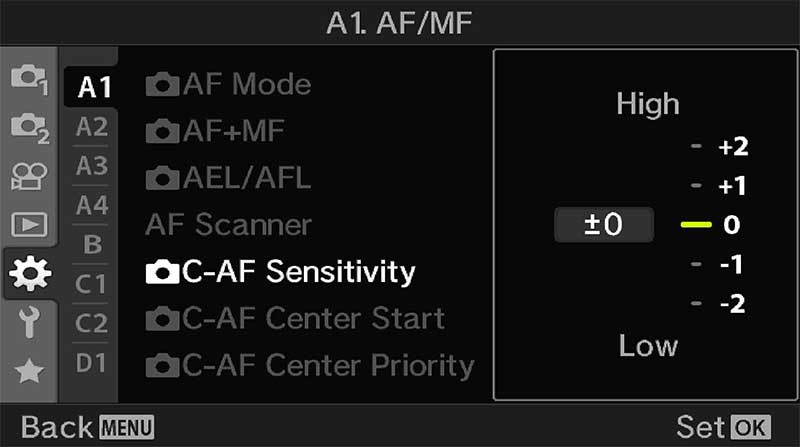
Custom Menu>A1
AF SCANNER
Longer lenses can sometimes struggle when contrast is low. AF Scanner will force the AF to try and rescan to acquire focus. It can lead to the lens ‘hunting’ where it scans from near to far focus, but disabling it can mean out of focus images. I tend to leave it on Mode 2 by default and revert to MF if there is an issue.
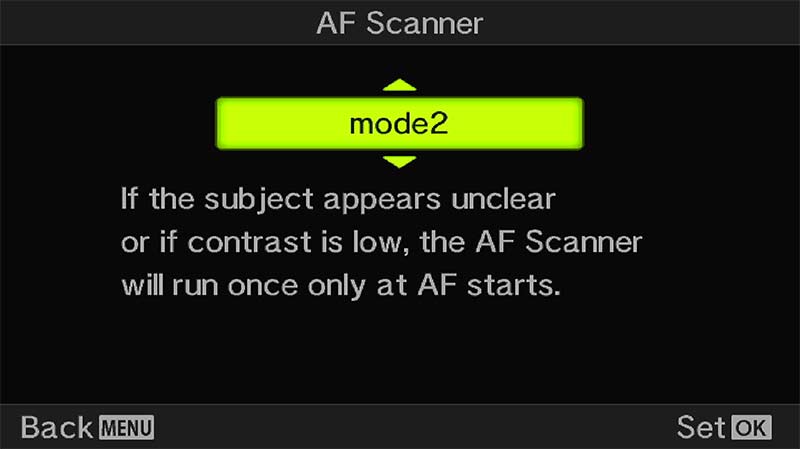
Custom Menu>A1
AREA POINTER
Note that AF sensitivity is not the same as Area Pointer which does seem to confuse some.
Area Pointer has two modes ON1 which show the green AF Point inside the Target Area when focus has been achieved, and ON2 will show multiple green AF Points when using C-AF or C-AF+Tracking.
I prefer to set it to On1 because I find it less distracting but it is worth experimenting with to suit your own preference.
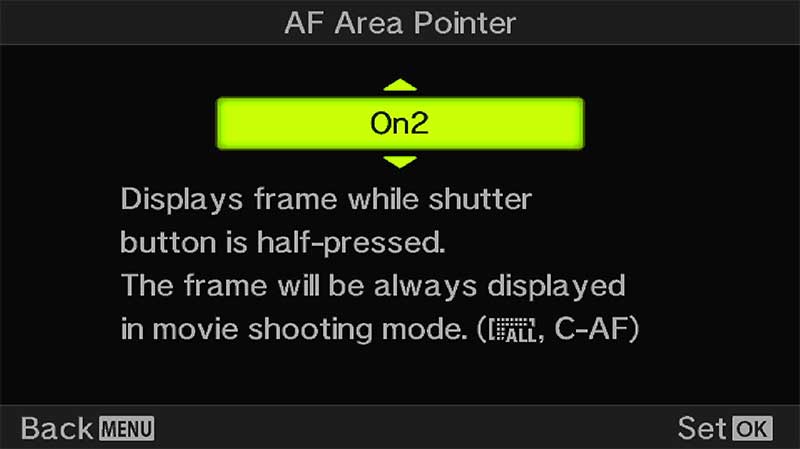
Custom Menu>A2
AF-LIMITER
There may be times when the lens struggles to gain focus or focusses on a background or foreground element instead of the subject.
AF Limiter allows you to save three presets with a minimum and maximum distance to control the range the AF will try to focus in. Make sure a wide enough range is set.
You have to guess the distance or use the PRE-MF ‘hack’.
Go to PRE-MF, press info and focus on the area you want to exclude such as the background. The screen will show the distance instead of guessing it. Do the same for the foreground if needed. Now in AF Limiter set a range between these distances.
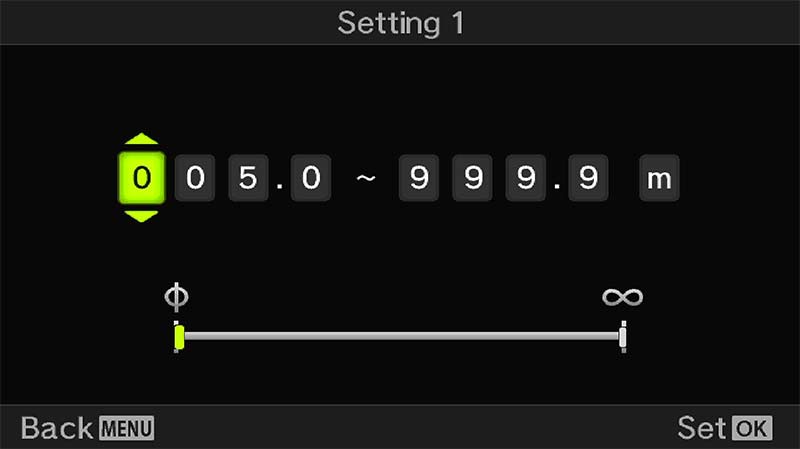
Custom Menu>A3
An advantage of having this saved to a button in a CM not just for quick access is it will not be active for your next session once the camera is turned off and on again, thus avoiding problems wondering why your AF is limited. Do remember if you set up ON1, ON2 and ON3 and want to save them as part of your CM you must resave the CM again. As with all CM’s any changes you want to make permanently must be resaved.
PRESET MF DISTANCE
Preset MF is exactly what it says and is used for setting a fixed distance for focus. If for example you’re taking images in a fixed spot it can be useful to program the focus to the exact distance and prevent the lens from hunting.
Remember this is for Manual Focus. There is no ability to add this to a button so for quick access the best way is to save it into My Menu.
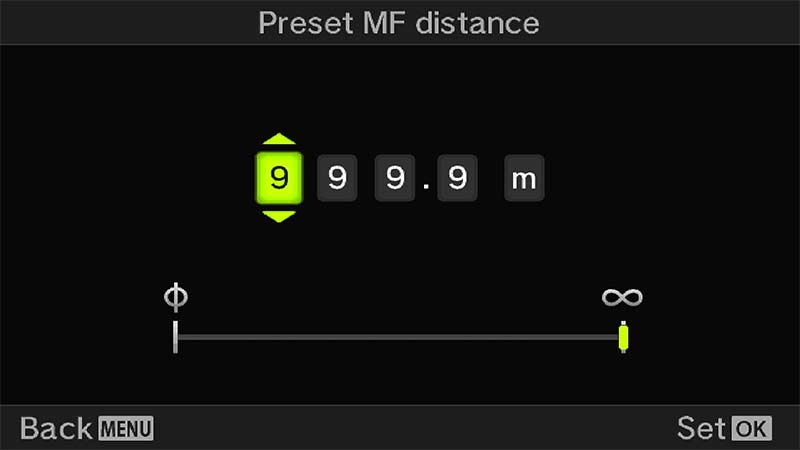
Custom Menu>A4
RELEASE PRIORITY
Release Priority determine whether the camera will take an image even if focus has not been confirmed. Set to off means it will be set to ‘Focus Priority’ which is much more sensible. The camera will not take an image if focus is not confirmed, but in continuous drive modes it is effective on the first frame only.
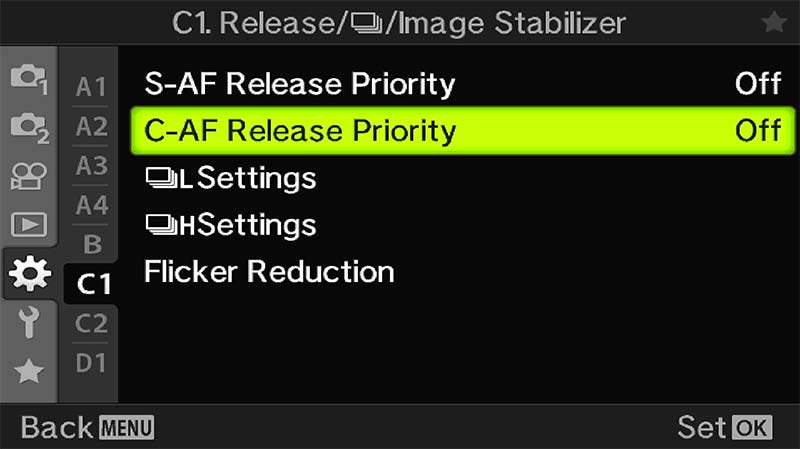
Custom Menu>C1
SEQUENTIAL SHOOTING
When considering AF Modes for wildlife it’s also important to consider which drive mode to use. Drive Modes are easy to access from the main settings on the top left, and saving one as a CM is useful. I tend to use Silent SH2 but it is important to understand each.
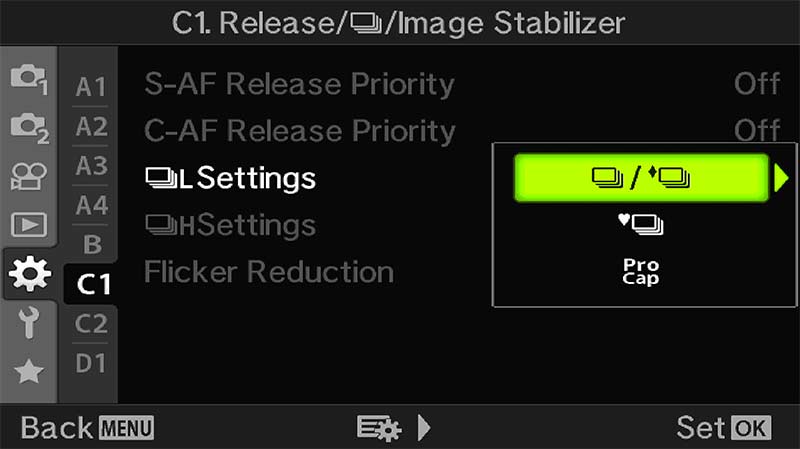
Custom Menu>C1
Sequential Shooting settings, or Drive Mode will affect you chances of getting the shot just at the right time obviously, but there is no point setting a drive mode that will capture too many images, your card will quickly fill and the scene may not warrant it. Equally a drive too slow means you miss the shot. Birds in flight for example, some dart all over whilst others are more sedate; a perched bird may be relatively still whilst a Kingfisher diving for food would need precise timing.
The same is true for other subjects, how you choose the drive mode can affect your keeper rate.
DRIVE MODE COMPARISON
| DRIVE MODE | ELECTRONIC (SILENT) SHUTTER | MECHANICAL SHUTTER |
|---|---|---|
| Low | 1-10, 15, 18 FPS | 1-10 FPS |
| Pro Capture Low | 1-10, 15, 18 FPS (f8 Min) | N/A |
| Pre-Shutter Frames 0-35 | N/A | |
| High | 15, 20, 30, 60 FPS | 10-15 FPS |
| Pro Capture High | 15, 20, 30, 60 FPS | N/A |
| Pre-Shutter Frames 0-35 | N/A | |
| Frame Count Limit | 99 Max | 99 Max |
Listing out the different drive modes in a table and we can clearly see the pros and cons of each. Mechanical shutter has the slowest FPS obviously because it is a physical shutter which has to open and close. There is a significant difference also between Low Sequential and High as expected, so for wildlife not only is Silent the better for frames per second, it is also quiet so it will not disturb your subject if you are close.
To avoid taking too many images the Frame Count Limit can be set from 2-99. This is a great option when speed is of the essence but you want to avoid filling your memory card. Once the limit is reached shooting will end.
PRO CAPTURE
Pro-Capture is designed to reduce the delay between half pressing the shutter to achieve focus and a full press to take the shot. Using the Kingfisher diving into water as an example, how well could you anticipate and press the shutter at the exact moment its beak is mm’s away from the water? Not easily. Pro-Capture aims to assist by capturing a set number of frames the moment the shutter is half pressed and thus reduce the delayed reaction between a half press and full press. Images are stored in the camera buffer and then written to the card.
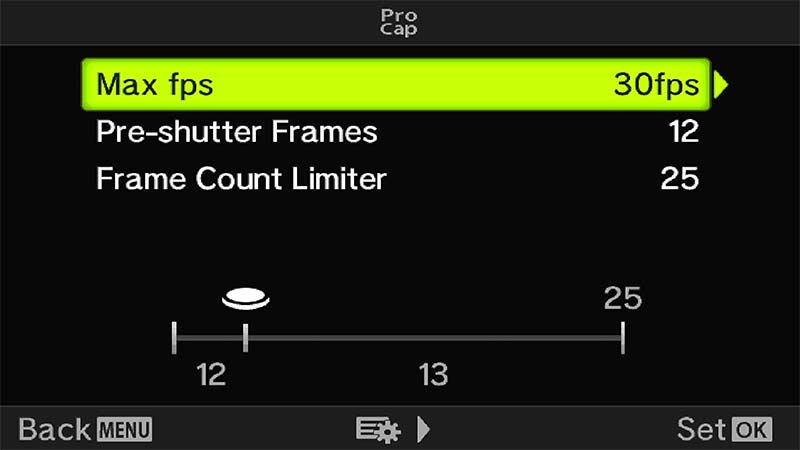
Custom Menu>C1
PRE-SHUTTER FRAMES
An important distinction from frames per second, the drive speed, is the number of Pre-Shutter Frames. This can be set up to a maximum of 35 and is the number of frames the camera will record before you press the shutter. Set it to whatever you feel suits the situation but remember you need fast cards.
OTHER CUSTOM MODES
In the Custom Modes Section we reviewed how to set up CM’s with suggestions for each of the four available. Only one was dedicated to Wildlife or any action. For me personally it is enough, with buttons set for access to the many options and with quick access to drive modes I don’t feel I need more, but I am a Landscape photographer; what if you want more?
GENERAL (M)
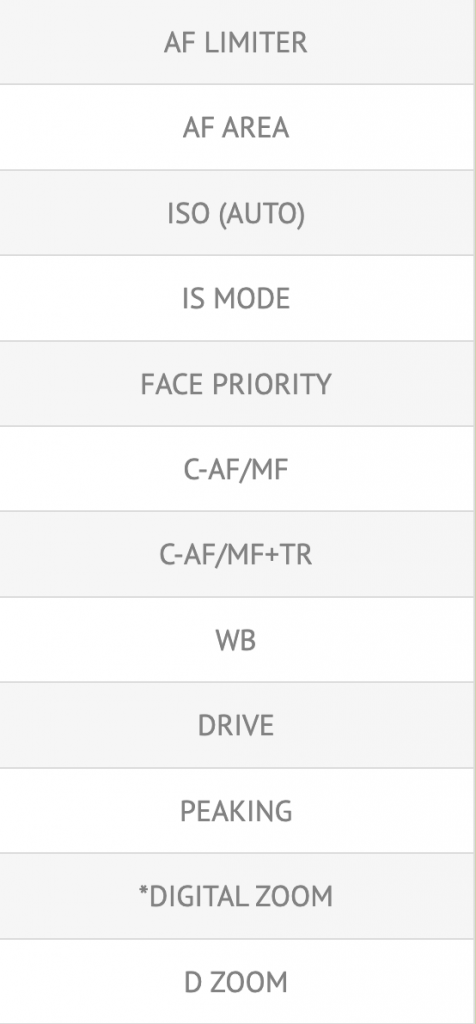
(Wildlife CM from ‘Custom Modes’ Section)
OTHER MODES
You could set up additional Custom Modes which differ from the main General one shown on the left. Options to consider are only limited by what you can think of, and usually come from experience. Personally I would keep buttons as close to your main set as possible and just change what suits the additional CM, otherwise it will get very confusing. A few items to consider setting for a new mode could be:
Pro-Capture High 14 Pre-Frames for fast moving subjects
Shutter Priority with a high shutter speed saved and high ISO (Not Auto) for higher control
Stabilisation set to IS2 for Vertical Stabilisation, not horizontal, for panning
Further options for the Lever with different settings, different target sizes or Back Button Focus
NOTE FOR BUTTONS
If your main genre is wildlife another approach is using buttons to recall Custom Modes. Obviously the more buttons used for recalling CM’s the less you have to map to other functions, but perhaps this will suit you more. This is the approach used by many wildlife photographers. the best advise is to write out a plan, a bubble diagram works well; think about the Custom Modes you want, which buttons you would need and which buttons you have left for other options.
FACE DETECT
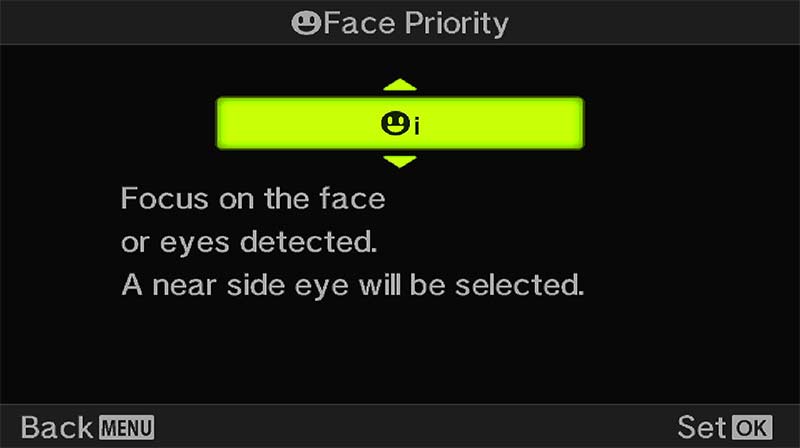
Another useful feature is Face Detect which will as the name suggests detect a face, detect eyes or even detect the left or right eye.
Face Detect can be useful especially when you want to shoot a spontaneous portrait, and having it mapped to a button for quick access makes it more convenient. You could also save it into My Menu. I tend to have it disabled for landscapes because it can often find what it thinks is a face in ground or rock patterns. For wildlife it has limited use, it will not detect a bird’s head but it can sometimes detect an animal’s face if distinct enough so it is worth having quick access to it.
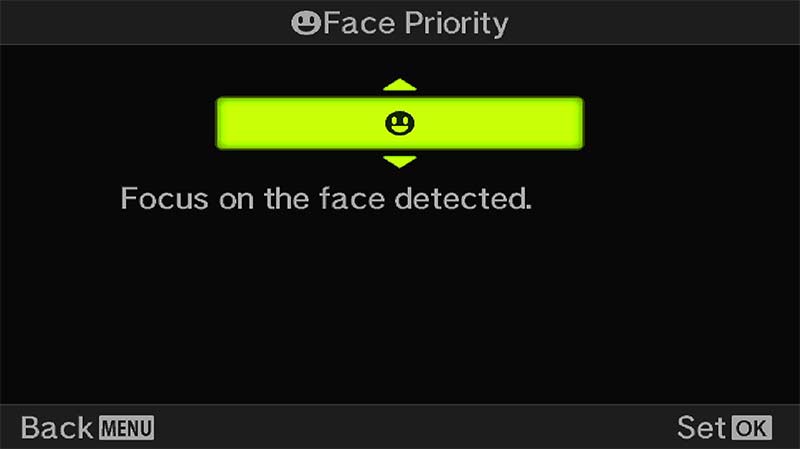
Face Detection-Face Priority
Face Detection-Eye Detection
OPTIONS
Mapping to a button means face Detection can be switched on and off at will and further options can be selected by a Press/Hold and turning the front dial. Other options include:
Face i (Eye) – Focus on face or detected eyes, nearside eye is selected.
Face iR – Focus on face or detected eyes, right eye is selected.
Face iL – Focus on face or detected eyes, left eye is selected.
→ TIP FACE SELECTION Face Selection allows the target to be shifted from one detected face to another if there are multiple faces in the frame and the wrong one is selected, however it is only available from a custom button, not a menu option, which is unfortunate. It’s easy to test without annoying your family, search on your PC ‘Faces’, select ‘images’ and give it a try. You will need Face Selection mapped to a button and Face Detect turned on. If you have a CM set up just assign any button, when you turn off the camera it will be reset back to your default button.
Face Detection is really designed for spontaneous portraits, not studio or posed portraits where you have more time to consider the focus point, so for this reason I have Face Detect mapped to a button as a useful ‘just in case’. If you do find yourself using Face Detect often when there are groups of people you would need Face Selection mapping to a button too. This uses two buttons, so consider a dedicated CM for it. Alternatively you could save Face Detect to My Menu and then just map Face Selection to a button. This as a work-around gives quick access to Face Detection and Face Selection, and uses just one button.
EXAMPLES
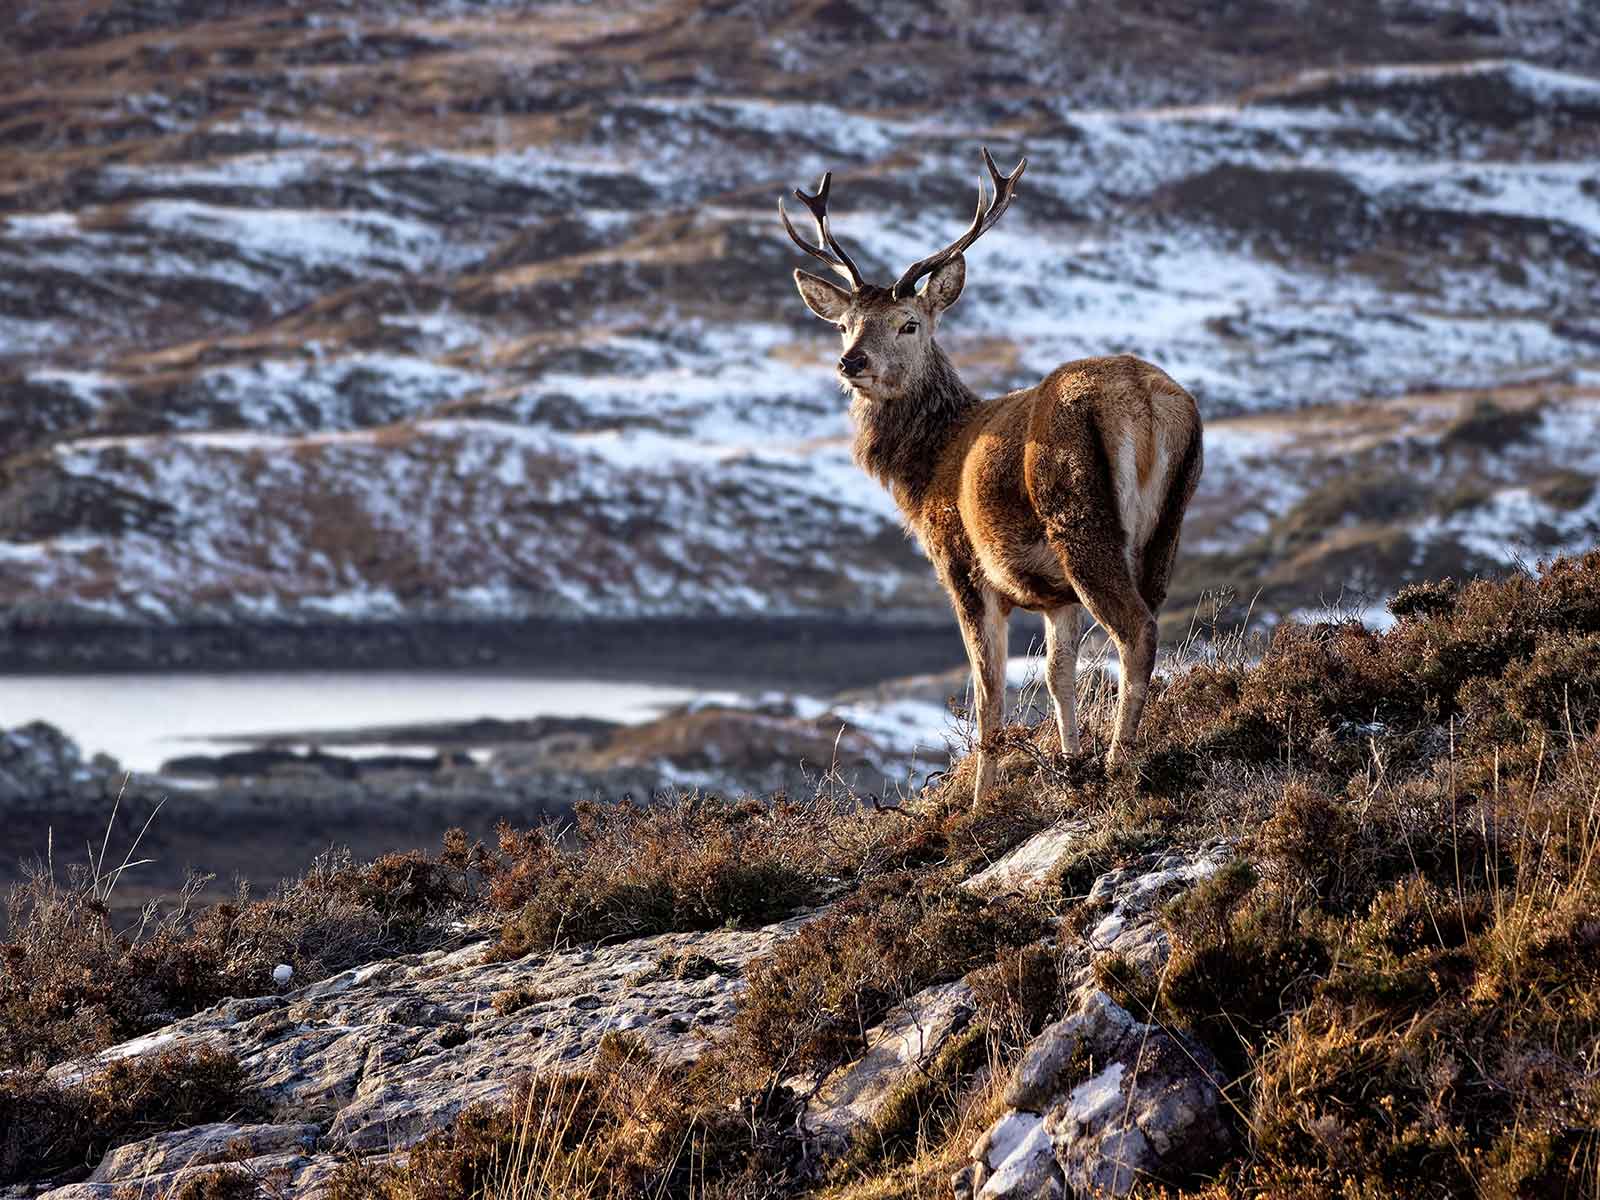
40-150 Pro @ 150mm ISO 640 f4 1/250s
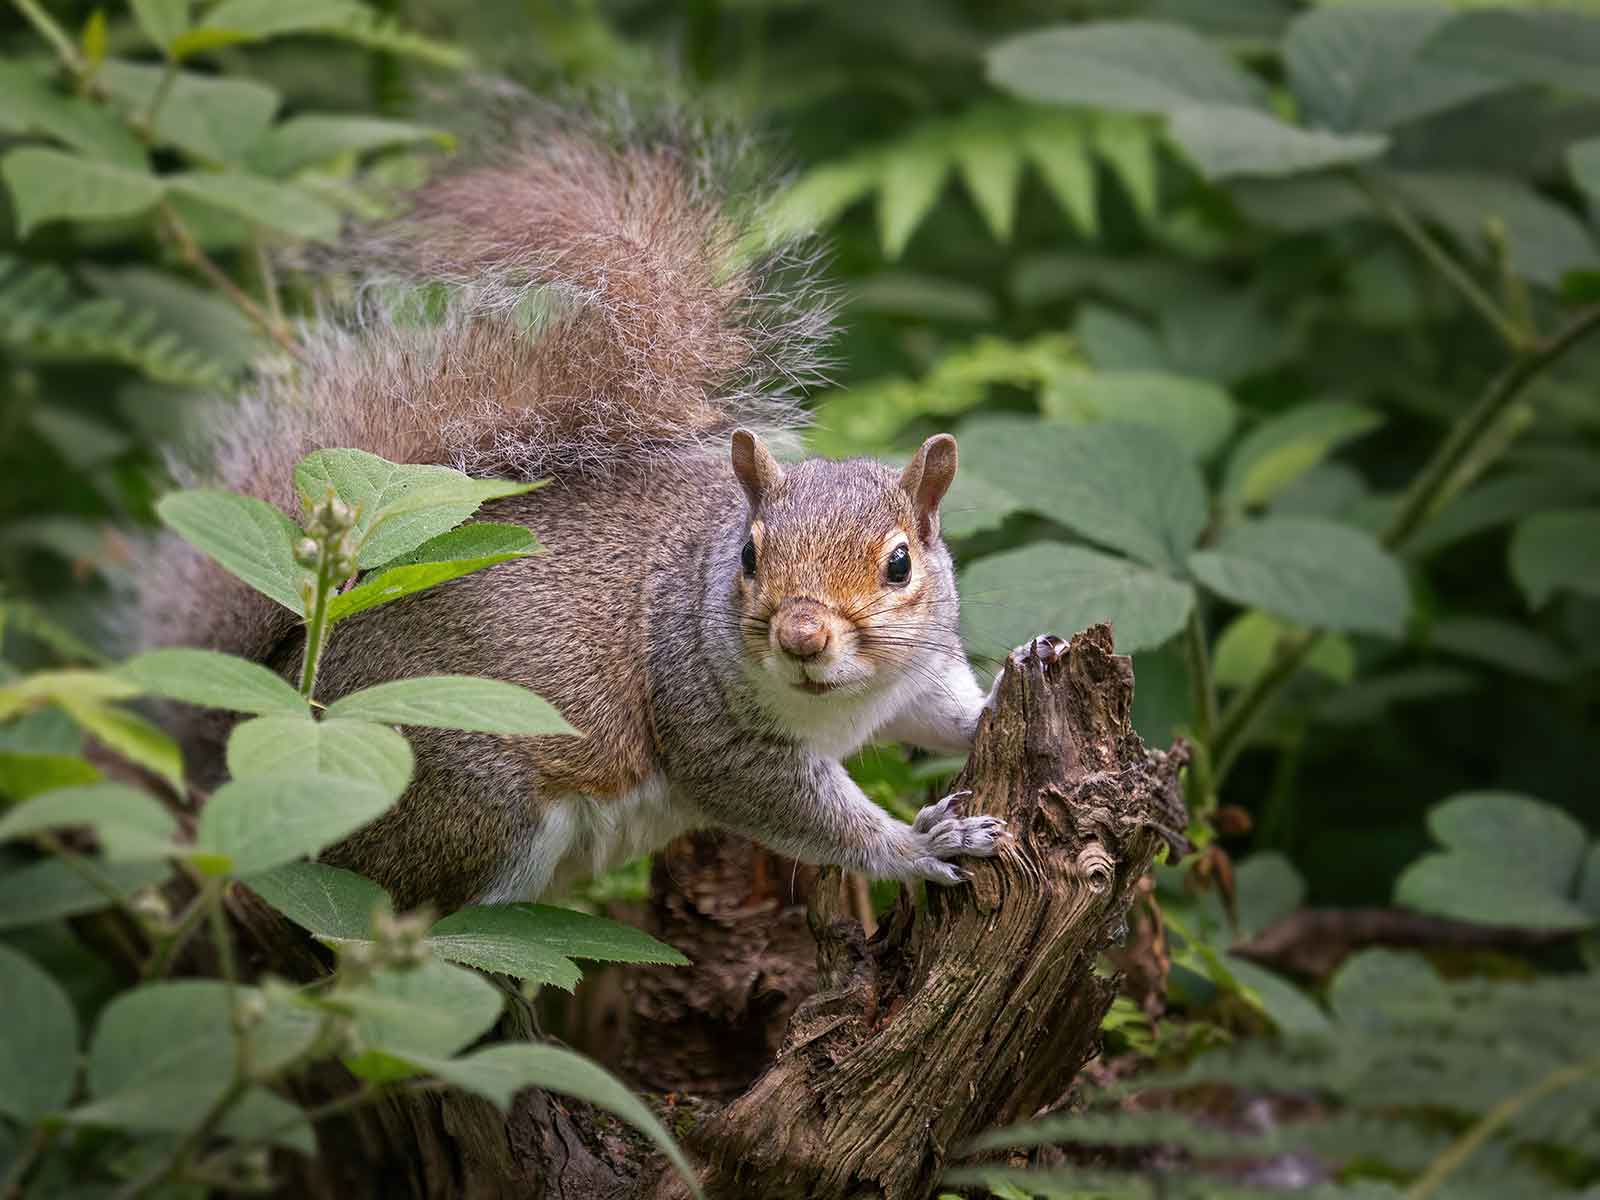
100-400 @ 210mm ISO 800 f4.5 1/160s
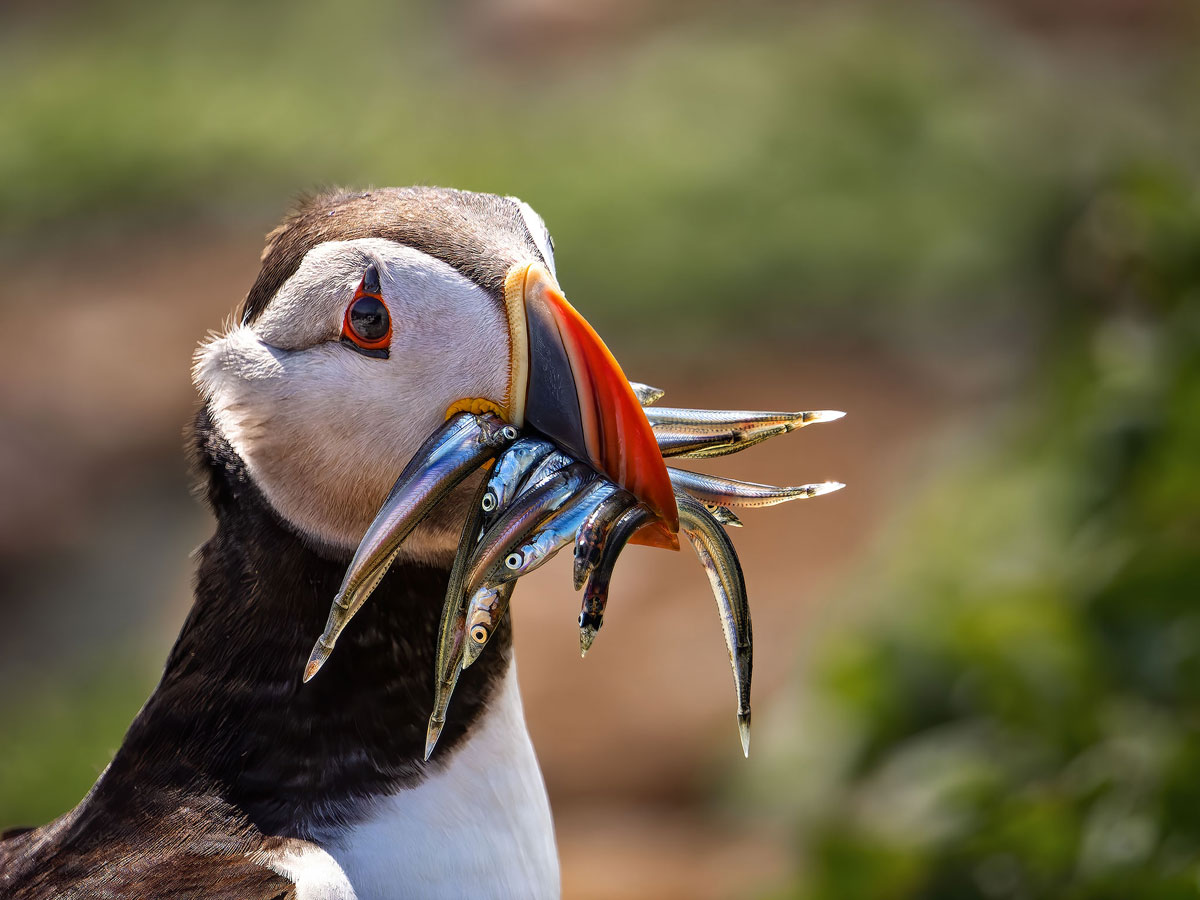
100-400 @ 400mm A.I Bird Detect ISO 640 f6.3 1/3200s
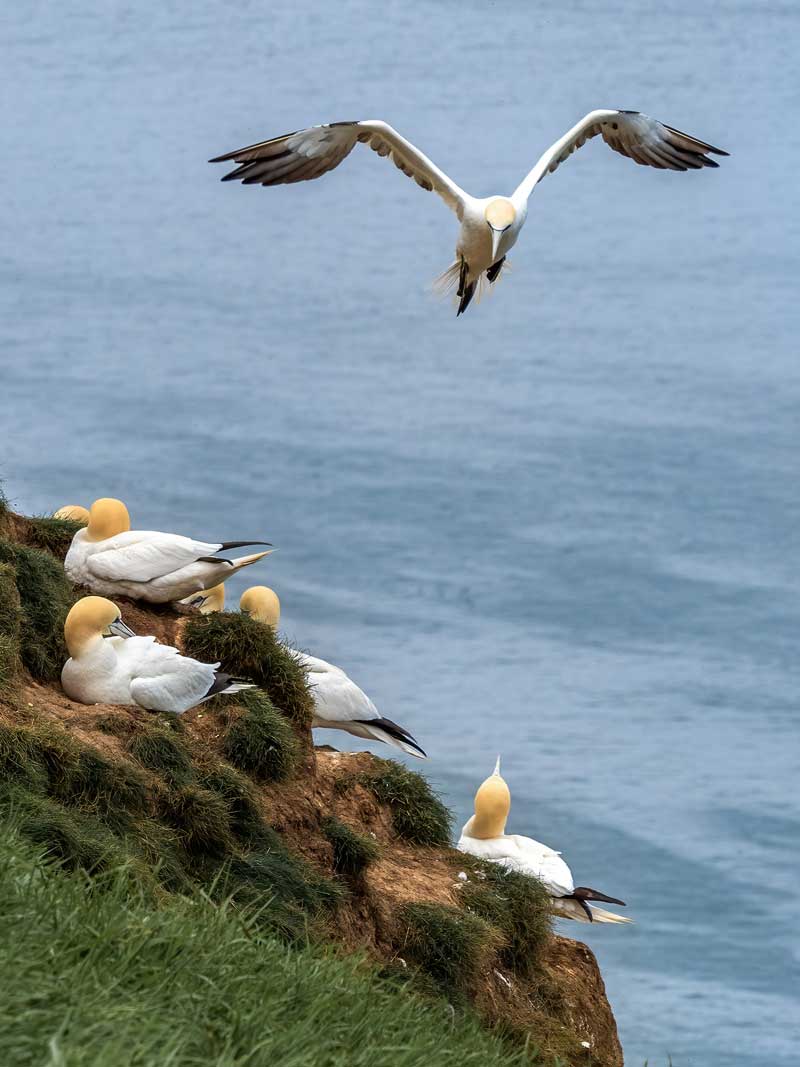
40-150mm Pro @ 110mm f5 1/1600s ISO200
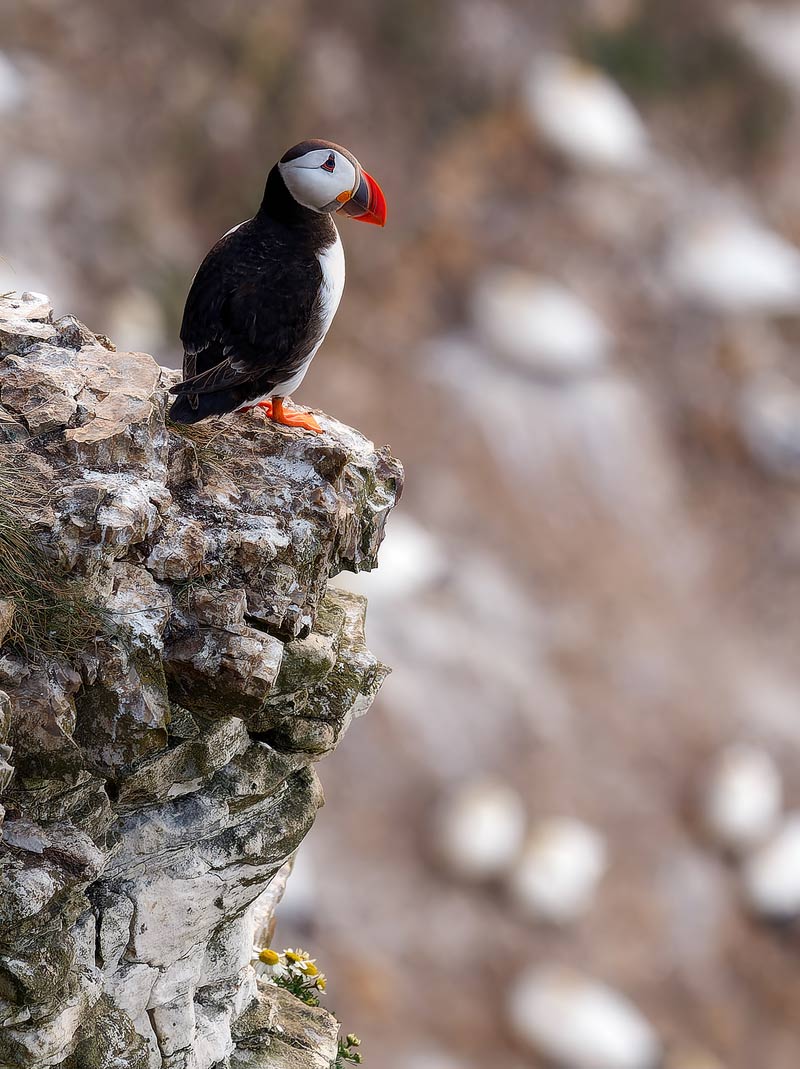
40-150mm Pro @ 150mm f4 1/640s ISO1000
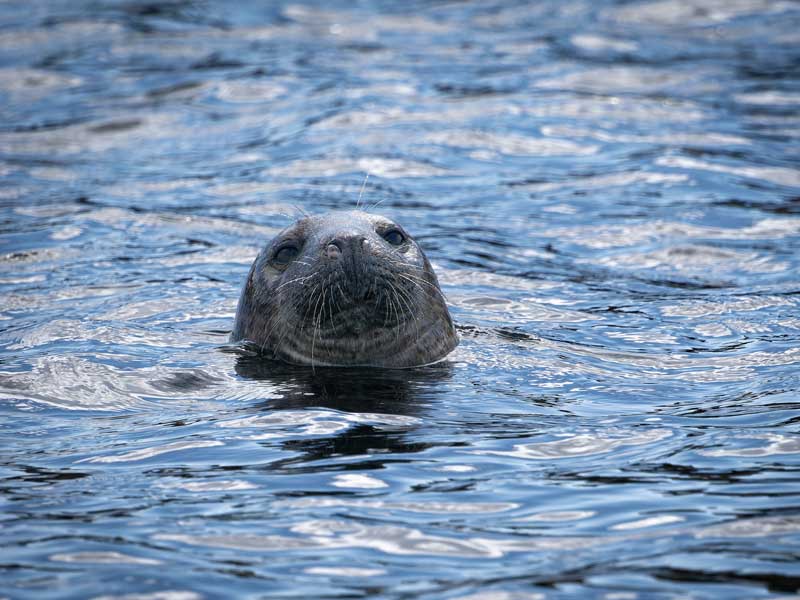
100-400mm @ 400mm f6.3 1/500s ISO640
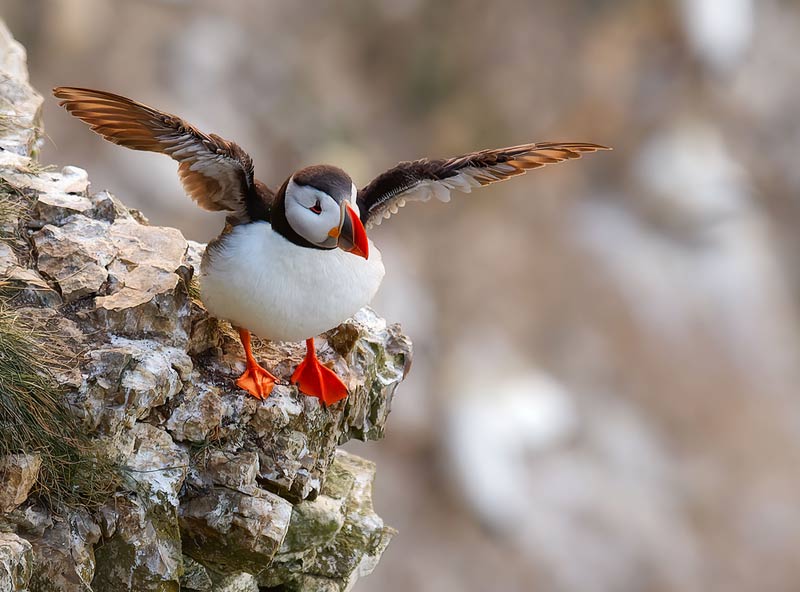
40-150mm Pro @ 150mm f4 1/1640s ISO1000
