
LONG EXPOSURE PHOTOGRAPHY
Creating Long Exposure images for drama and effect
How to create Long Exposures the traditional way and using in-camera Live-Time or Live-ND
Long Exposure Photography is the art of taking reality and twisting it. A definition I once saw and it is very much true. We use long exposures to flatten water creating tranquility, or emphasise rushing clouds creating movement and drama. It presents scenes in a way we just cannot see and therefore does twist reality.
This section explores how long exposures are created, first using the traditional method, then using Live Time and also using the in-camera Live ND.
TRADITIONAL TECHNIQUE
Shooting Long Exposures is surprising easy once you know the technique, with some simple gear and a few filters. Judging the effect is somewhat harder and comes from experience. Using ND filters which reduce the amount of light entering the camera, we expose for longer, thus creating the effect of blurred motion. Long Exposures are different from slow shutter exposures although there is no specific definition. To me using anything under 5 seconds or so is a slow shutter, more and it starts to enter the realms of ‘long-exposures’
Avoid clouds moving horizontally across the frame and look for clouds moving diagonally or straight towards you to create lead-ins. Sometimes clouds appear to have little movement, fix your eye on a part of the sky and count to judge how many seconds it will take to get any movement. The image below had a motionless sky but a very long exposure did produce some great movement.
Water depends on the conditions at the time, a very rough sea will be harder to flatten than a calm sea obviously. For a top down view like this from a cliff look for streaks in the water, or a bottom up image standing on a beach look for rocks with waves coming around them, a long exposure will make the rocks look like they are standing in mist.

8-25mm Pro @ 8mm f7.1 ISO200 Exp 4m30s 10 Stop ND
The traditional technique is surprising easy, but Live Time gives us the ability to see the image ‘develop’ live and make judgement. The technique is simply using an ND filter, working out the exposure with a chart or an app, putting the camera in Bulb Mode and then exposing the image for the time calculated.
GEAR (see ‘GEAR’ Section)
First you need a good steady tripod and a shutter release cable or a wireless one. I prefer wired because I am not reliant on batteries.
You’ll need ND filters to create the long exposure, I use NiSi and the most popular are ND8, ND64 and ND1000. ND’s reduce the amount of light entering the lens and thus create a longer exposure. Different densities give options for different scenes and light. I would always say start with a 10 Stop. A 6 stop is still useful because it can be combined with the in camera Live ND. I usually use a graduated filter for the sky too because that is the first to over-expose.
Conventions used can be confusing. The ND factor refers to how much light is reduced to calculate the exposure:
ND8 3 Stop (equiv to closing aperture 3 stops) 8x less light than without.
ND64 6 Stop (equiv. to closing aperture 6 stops) 64x less light than without.
ND1000 10 Stop (equip. to closing aperture 10 stops) 1000x less light!
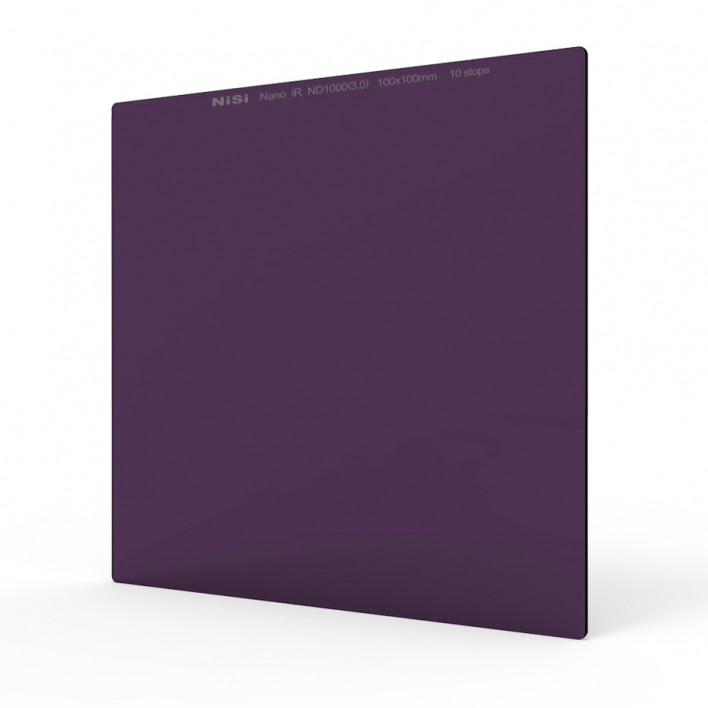
Filters are available as circular screw in or as square slot in systems. Personally I prefer the 100mm slot in system, it allows the flexibility to add graduated filters too and a polariser and they are easier to remove if I need to adjust focus. There is more information about the Nisi System on my website here: Nisi 100mm System.
THERE’S AN APP FOR THAT
Thankfully the days of having to work out exposure manually or with a chart are long gone, there are apps to do it for you. Photopills has a long exposure calculator and there are plenty of others too. Lee produce one limited to 3, 6 or 10 stops. I prefer the NiSi app because it’s so simple.
Notice there are no settings for aperture or ISO, they are irrelevant, all we need is the shutter speed. Take a note of your shutter speed WITHOUT the ND. If you have a polariser fitted take the reading with it on.
Now change the mode to BULB. Before you fit the ND set your focus either in Manual Focus or in Autofocus and then lock the focus (if you followed the setting up guide you mapped MF to a button). Not disabling AF means it will try to focus again when you fit the filter and it will hunt for focus.
Enter the shutter speed you noted, select the ND Factor and that’s it.
Here with a shutter speed of 1/20th with a 10 stop ND we get an exposure of 51 seconds.
Using your cable release press the shutter button and lock it, tap GO on the App and stop it when the time reaches 0. See how easy it is?

→ TIP Light can easily change over a long exposure so don’t be too surprised if the image looks a little under or over exposed. Remember to check the Histogram when you preview the image and take another shot adjusting to suit. And remember to try and get the exposure over to the right a little without blowing the highlights. The more light you can give the exposure the better the end result will be.
LIVE TIME
Luckily for us we have an even easier way to shoot Long Exposure images using Live Time which produces a ‘preview’ of the image during the exposure on the screen or EVF, allowing you to see exactly how it is progressing. The huge advantage of this is obviously you have the ability to stop the exposure when you feel it is right, you are not waiting until the end as in the traditional method. You also have a Histogram to use as a guide, and all that is needed is setting a few parameters.
EXAMPLE 1

8-25mm @8mm f6.3 ISO200 Exp 170s 10 Stop ND

Playing with composition waiting for the light to soften.
Blackchurch Rock in North Devon on a bright sunny day. Getting there early is always a good idea to explore the location and investigate compositions. After checking the sunset position I already knew the rock would be in shadow at sunset as it sets behind the cliff, so I gathered a few images whilst light illuminated it which worked out great (see them on my Facebook page or Instagram). A long exposure on the water was my goal with a composition further back to accent the lead-in lines. The tide was incoming so I had to choose my position and work quickly.
The final image was taken with the 8-25mm with an aperture of f6.3. The Hyperfocal given for this is 0.68m using Photopills, and because it is 8mm I already know setting focus close is fine, it has such wide DoF. I switched to Live Time with Noise off just in case I had chance for another shot (Top Mode Dial>Bulb> Rotate Front Dial to Live Time), set the composition and set focus making sure it is then locked to MF. With the tripod locked firmly and the cable release fitted all I have to do now is set Live Time parameters.
EXAMPLE 2

8-25mm @10mm f7.1 ISO200 Exp 49s 10 Stop ND

Waiting for the sunlight at Spurn Point
Spurn Point on the East Coast of Yorkshire, a wonderfully quiet location. It’s a very good place for shooting long exposure minimal images using the wooden groynes. Empty skies are not usually what we desire but when the tones are right they can work very well. Focus was on the rear of the left rock giving me plenty of Depth of Field. The only foreground I needed to considers was the rocks themselves. A 10 stop ND was used to lengthen the shutter and a 3 stop Medium Graduated ND to hold back the sky. Despite being only 49 seconds I used Live Time set on 4 seconds to make sure I have enough ‘headroom’.
USING LIVE TIME
Using Live Time makes Long Exposure images even easier. The advantage is you are not set to a fixed exposure length and you can stop it when you feel it is correct. With the traditional method if it isn’t correct adjustments are needed and the image retaken. Set the top Mode Dial to Bulb (B) and turn the front dial to Live Time. There are two other settings, Live Composite which is entirely different and allows images to be taken which add new light such as for car trails or star trails, and Live Bulb. Live Bulb is the same as Live Time but requires the shutter to be pressed (via a cable obviously) and held for the duration of the shot, where in Live Time the shutter is pressed to start and pressed to stop.
A couple of things to check first in Menu Camera 2>2.Other Shooting Functions>Bulb/Time/Comp Settings (in Live Time get to this quickly by pressing Menu twice). Bulb/Time Monitor is set to -7 brightness by default to save battery consumption but it is too dark, change it to 0. Also set time to the max 30mins.
Back in Live Time frame your composition, set and lock focus and set aperture, in fact everything as you would normally. Then press Menu to access the main Live Time Screen. This is where we set the time that will help the length of the exposure and it is simple to understand.
Some simple multiplication is needed, and the camera shows a chart as a guide:
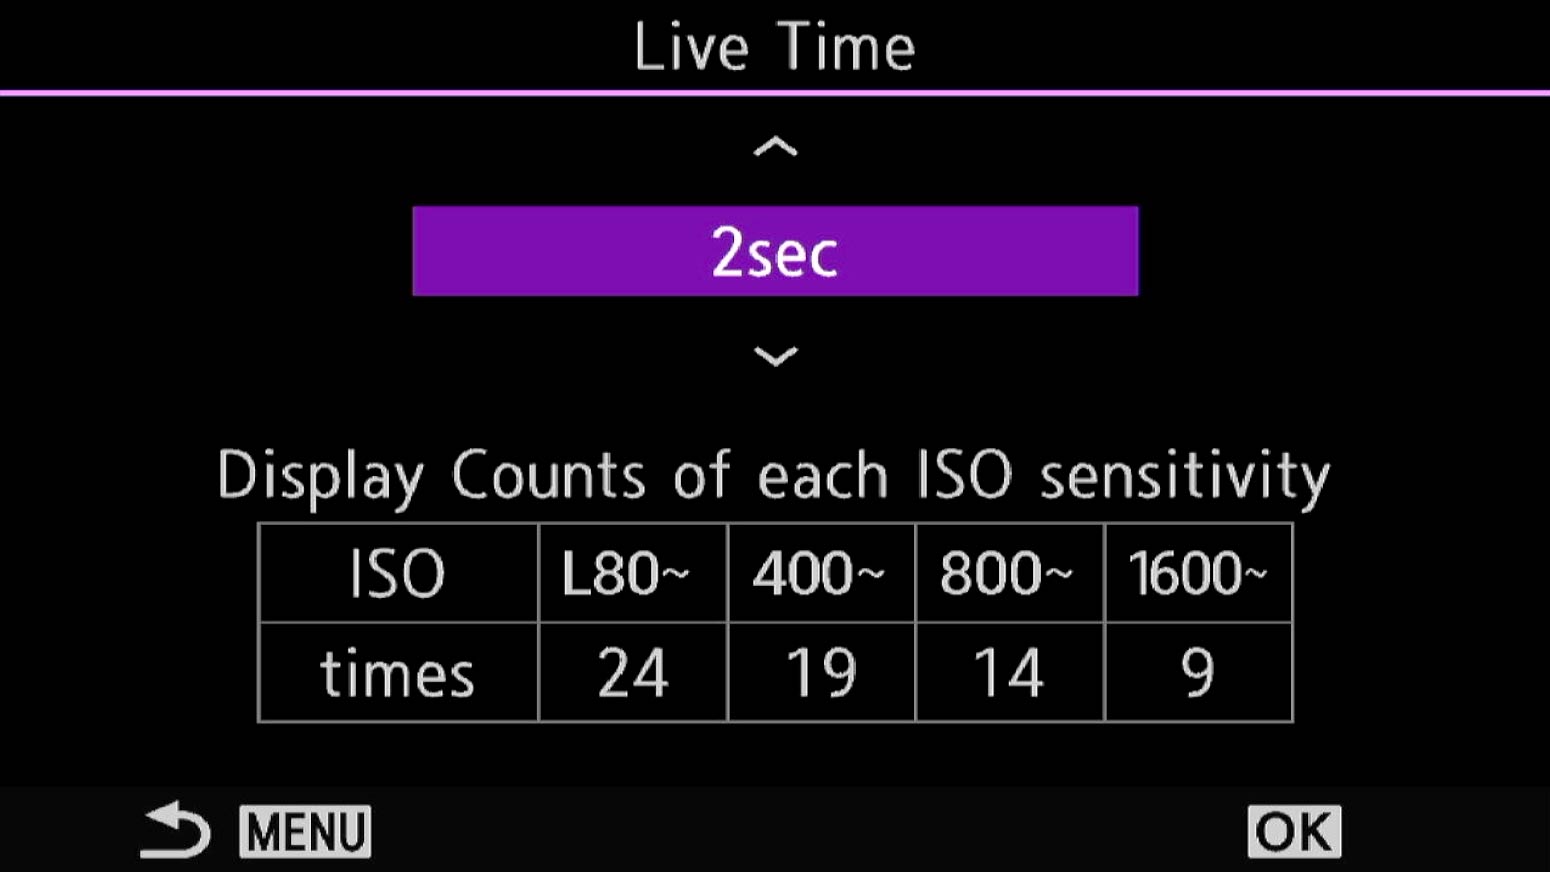
ISO L80 up to 400 24 Times. This means the camera will show up to 24 previews of the exposure at the interval we set, show in purple. Therefore 2×24=48. Set it to 4 seconds and 4×24=96 and so on. It can be set from 0.5s up to 60s.
The number of previews depends on the ISO. As ISO increases the sensor is working harder and producing previews is additional processing causing heat. Heat produces noise so the preview availability is reduced. The number of previews are sensibly reduced to help mitigate heat generated and therefore noise. And why would you want to shoot a long exposure at ISO1600 anyway?
WE NEED A CEILING
The calculation you make is NOT the exposure, it is simply the number of previews you can see over the duration of time given by the calculation. If it was set at 4 seconds at ISO 200 we have x24 previews that will be presented over 96 seconds every 4 seconds (4×24=96). After 96 seconds the camera is still exposing and will continue until you stop it, but you no longer see previews; you have no idea how the image will look. Therefore this is the ‘ceiling’ as I refer to it. All we have to do is make sure we set a ‘ceiling’ over the length of the exposure we need to give us some ‘headroom’ so we can still see previews.
How do you find the ceiling? You can use the Exposure Calculator App. In Aperture Priority with no ND fitted note the meter reading and work it out. Then set Live Time so that it is above, not below the exposure time. We want to see the exposure previews so we can decide when it is right and stop the exposure. Running out of previews means we don’t know. When using an App, take an exposure reading with the ISO and aperture you intend to use set, and make sure when you switch to Live Time they are the same. If not, the exposure will obviously be different.
You could guess it. It isn’t as hard as it sounds. In Aperture Priority take a reading with the filter fitted. If the shutter flashes ’60’ as a warning it is out of the exposure range (max shutter is 60s) and you therefore know it is over 60s. If you get a reading of say 40 seconds and your’e using ISO 200 you will have 24 previews available. 2×24=48s is a little close to 40, so set 4 (x24=96s). This gives plenty of head-room, or a high enough ceiling not to run out of previews.
If the meter reading was over 60s, how much more will it be? Guess or use the App. Setting 8×24=192 which may or may not be enough. Running Live Time for around half the exposure will soon tell you if it seems about right, although working it out with the App will obviously be more accurate. It sounds complicated but you will soon be able to make educated guesses.
There is also a Histogram to show the exposure of the image, a timer, and a frame counter, 1 of 24, 2 of 24 etc. At 24/24 previews stop and the exposure continues unless you stop it. The aim is to set the number of seconds between previews to give a longer time than what you anticipate the exposure to be.
→ TIP If you have guessed the settings and know it will be quite a long exposure, maybe a few minutes, you do not have to wait for all 24 previews. Watch the histogram, as the image builds on screen at 50% does it still look like you seriously underestimated it? Quit it and adjust settings. Similarly you’ve ran an exposure for a period of time, have only a few previews left and think it could have needed just a little more, 10, 20 seconds more, let it run and then stop it. Make a judgement call and let it run over a little more. Experience will help after a few attempts.
The point of Live Time is being able to see the exposure and stop it when it suits you, making it more accurate than the traditional way, and certainly more convenient. Imagine doing a 5 minute long exposure the traditional way only to find at the end you calculated it wrongly and have to start again. However if an exposure is only a few seconds there is little point using Live Time. If the camera can meter through the filter your’e using and exposure is way under 60s you probably don’t need to use Live Time. And do not set the time between previews too high. If your exposure is around 60s and you set preview to 30s your’e hardly making the most of being able to see the exposure ‘develop’ and make judgements.
LIVE TIME IN ACTION
Once your image is set up and Live Time settings are set, press the shutter remote button. In Live Time you do not need to lock it, press to start and press to end the exposure. In Live Bulb you would need to lock the shutter release button. The rear screen or the EVF depending what you use (you cannot swap between them during the exposure) will show the image gradually building up, along with an elapsed timer and the number of previews elapsed. All you have to do it end the exposure when it is properly exposed. A Histogram will also help to make a judgement.
LIVE ND
Exactly as the name suggests the OM1-MKII has Live ND’s built in which is a fantastic feature, now expanded to ND128 or 7 stops. These are one of the Computational Modes and the camera produces a number of images based on the ND factor chosen, blending them together to produce a final RAW and/or Jpeg depending on your settings. Live ND is only available in Shutter Priority or Manual Modes and cannot be used in conjunction with other computational modes such as Live Time or High Res.
If you followed the Set Up Sections you may have mapped Live ND to a button and even saved a Custom Mode for it. Alternatively save it in My Menu. Mapping to a button makes it much more accessible which is why I have a Custom Mode set for M with Live ND mapped to AEL. In Manual we do not need AEL at all. Press the button and turn the front dial to change the ND factor, or access it from the menu. In the menu make sure LV Simulation is On to see the effect of the ND.
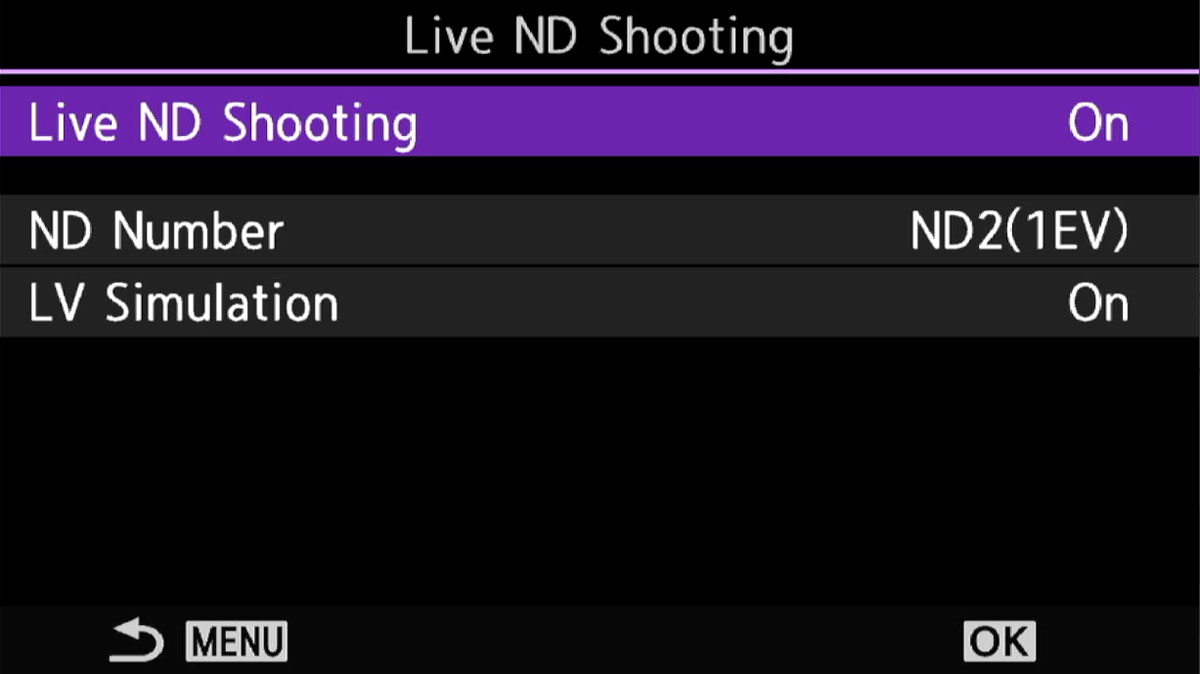
Menu Camera2>Live ND Shooting> Set LV Simulation On
When mapping to a button, press/hold and turn the front dial to select the desired ND. The equivalent number of ‘stops’ difference is show in brackets.
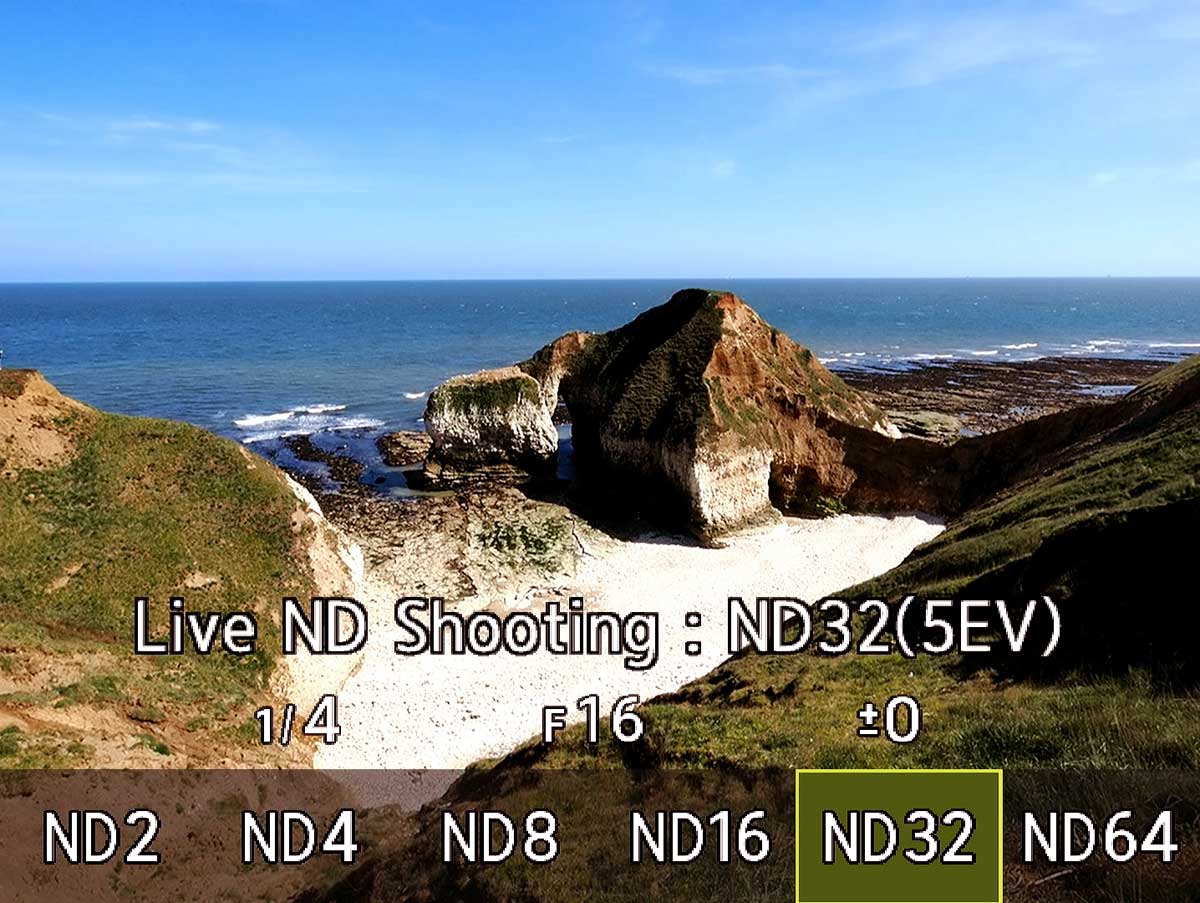
When LV Simulation is active it turns the live view into almost slow motion to emulate the final image which is very useful. The downside is if you want to change composition because the screen lags so much. With Live ND applied to a button just switch it off, recompose and switch it on again.
Live ND does work very well, it has an advantage of not needing external ND filters, however you can also use an external ND to extend the available range of the in-camera ND, but there are a few constraints to note:
SHUTTER SPEEDS
Live-ND works by combining a number of images depending on the ND factor selected and the number corresponds to that factor; ND2 2 images, ND4 for images right up to ND128 128 images. Therefore if you had a base exposure of 1 second, ND2 would give two seconds, ND4 4 seconds and so on. Problems arise when we reach 60 seconds, so with the example above ND64 would be 64 seconds and ND128 128 seconds. We cannot go over 60 seconds. Any exposure has to be under 60 seconds which is an unfortunate limitation, see in the Note below.
The Official Manual states that the ‘slowest shutter speeds available varies with the ND filter‘, ND2 1/60s, ND4 1/30s, ND8 1/15s, up to ND128 1s. This in true ‘official’ manual fashion is very misleading indeed, and should say the fastest speed that can be achieved. With ND4 you cannot shoot faster than 1/60s, ND128 the fastest is 1 second. Why would you want to shoot faster?
NOTE
Live ND is limited to Manual or Shutter Priority and it is limited to a longest shutter of 60 seconds and high ISO of 800, although you probably wouldn’t want to use a high ISO anyway. You can add additional external filters but bear in mind the longest shutter speed of 60s limit. It is useful to be able to use a physical ND Filter and extend it with the in-camera ND. Use a physical 6 stop ND and find it is only giving 20s? Enable in-camera ND2 (1 stop) and double the exposure to 40s. Of course what is the point of external filters if we have in-camera ND’s? Many of us have a 10 stop ND, which in bright light is nowhere near enough. Use it with in camera 1 or 2 stops and you have much more flexibility. I find Live ND very useful for waterfalls when I only want to use 1 or two stops.
Understanding is key to learning, why is it limited to 60s? All cameras have a longest shutter they can meter and calculate exposure for, most are traditionally 30s (though some are now exceeding this up to 15 or 30 minutes), the OM1-MKII is 60s. When the camera can calculate exposure up to 60s it can then make computations to decide how long the exposure should be based on the ND factors, it’s simple maths. If the camera cannot know what the exposure is over 60s because it cannot take meter readings it cannot work out what an in-camera ND exposure would be. This is why sometimes you may see the shutter flashing ’60’. It’s saying sorry no chance.
The reason Bulb mode exists on cameras is to make exposures over the maximum amount it can meter and work out itself. The OM1-MKII does have a Bulb Mode, you may just see Live-Time, Live Comp and Live-Bulb. In Live-Bulb change the seconds between previews to 0 and it will default back to traditional Bulb.
None of the computational modes can be combined, Live-Time, Live-ND, GND or High Res unfortunately. Maybe one day, but right now it’s like trying to mash a potato and chip it for fries at the same time.
ISO LOW (80 and 100) is best avoided as dynamic range is reduced. LOW settings are computational and whilst sometimes useful to slow shutter speeds you may notice highlight blow out easier than in a native ISO such as 200. A waterfall for example at the bottom where the water enters the river can quickly over-expose. Be aware of this and be prepared to take another frame under-exposing a little to blend in if necessary.
An advantage of Live-ND is it can increase dynamic range a little, and certainly produces less noise. As images are sampled and combined noise is also reduced and tones are enhanced.
NEW ND128
Live-ND has now been expanded from ND64 (6 Stops) to ND128 (7 Stops) which is very very welcome. It means the exposure can now be doubled from that previously.
Do remember though that we are limited to 60 seconds maximum so there is little benefit in very low light. There is a benefit when there is enough ambient light and using ND64 will only achieve a maximum of 30 seconds. If you used ND64 and it gives 60 seconds you would not be able to use ND128, it would be massively under-exposed.
This image was taken at twilight and using ND128 I was right on the limit, 60 seconds was the longest I could achieve and it could have been longer because it was a little under-exposed. Processing it in Lightroom and increasing exposure a little, opening the shadows and using noise reduction the image turned out fine.
Under-exposing is not the best practice; not only does it mean more noise but also means colours do not get the best saturation.
I am very happy to have an additional stop ND. Next I really really want the 60 second limit to be increased.
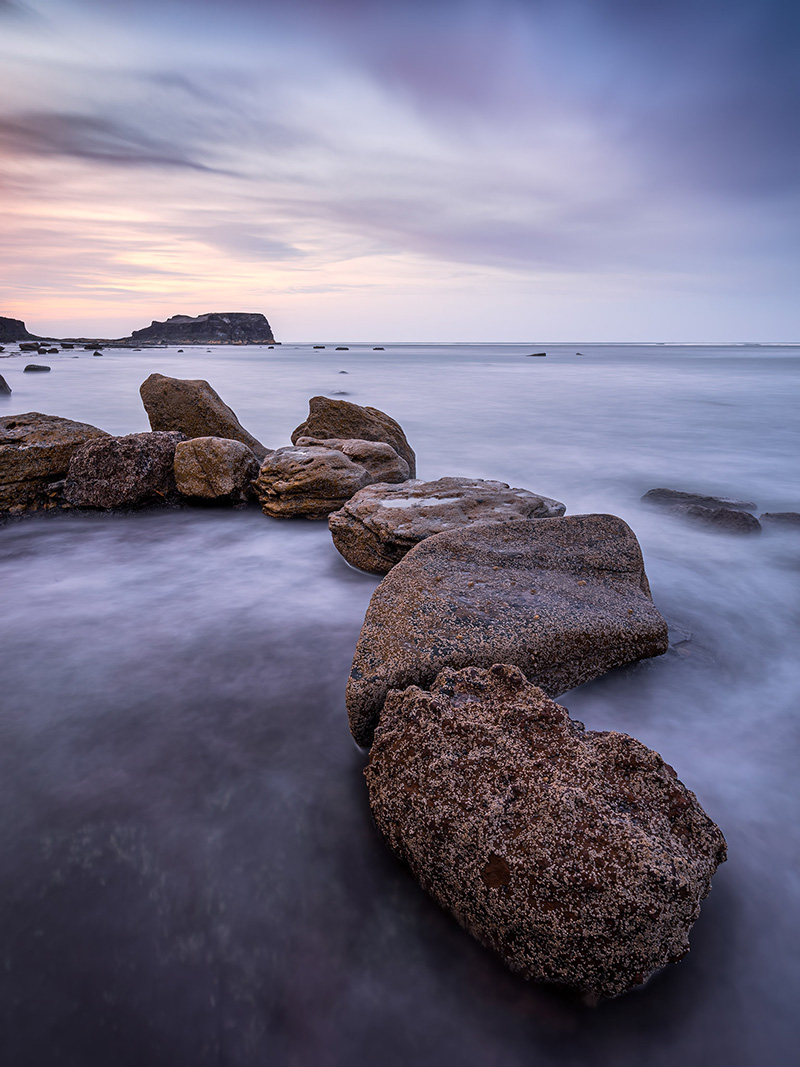
8-25mm @ 8mm f6.3 60s ISO200- Live-ND128
LV SIMULATION
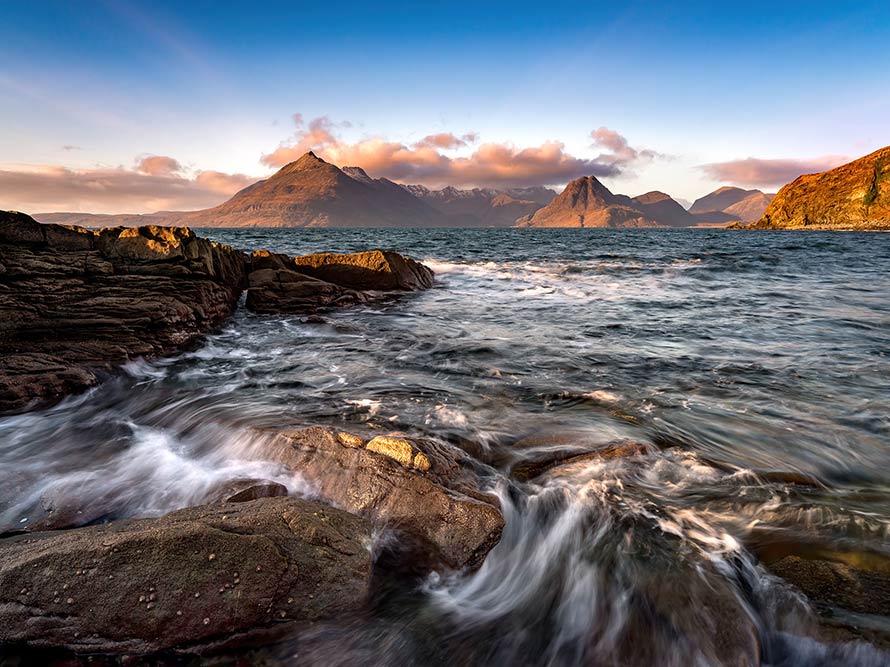
Live ND2 (1 Stop) + Polariser 1/2s Exp
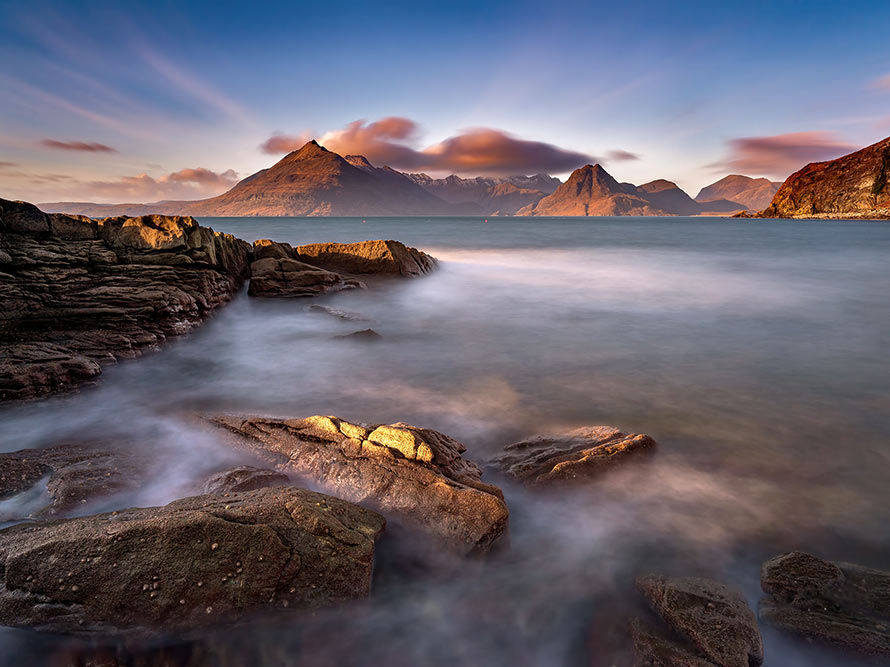
Live ND64 (6 Stops) + Polariser 30s Exp
Make sure you have LV Simulation set to ON. In the two images above I was able to experiment with the ND factor to obtain the results I wanted and actually see it live. With LV Simulation off you will not see the effect until the shot it taken. A polariser also reduces light by around a stop so the actual light reduction would have been 2 stops and 7 stops respectively. You do not need to factor a polariser in, the camera works out the exposure for you, it is useful to understand that a polariser will also reduce light.
Being such a bright day I also set the ISO to 100 to get a slower shutter speed. This is an extension, a computational ISO and not a native ISO. The difference is an ISO that is not real, or a computer generated calculation, will have a little less dynamic range and is best avoided. But when needs must try it out, you may get lucky. Both of these images look fine after a little highlights adjustment.

8-25mm Pro @8mm f7.1 ISO200 Exp 40s Live ND64 (6 Stops)
Top: Using Live ND to slow the sea movement down at Flamborough Head, East Yorkshire.
Next Image: Surf at Spurn Point. Don’t be afraid to try Live ND hand held, with class leading Stabilisation it can be rewarding and liberating.

12-100mm Pro @12mm f6.3 ISO200 Exp 2s Live ND8 (3 Stops)

12-100 Pro @38mm f7.1 ISO200 Exp 40s Live ND16 (4 Stops)
POLARISERS
A Polariser is probably one of the most essential filters any landscape photographer really should have. By removing polarised light reflections are reduced and the natural saturation of colour is revealed. They also reduce light entering the lens by a factor of around 1.5 stops which allows shutters to be slowed for creative uses.
Some scenes will require nothing more than a polariser to slow the shutter speed down. When using Live Time with an external ND you do NOT have to remove a polariser if you need to use an app to calculate exposure because the reading you took has already accounted for the reduction in light. Take a reading without the ND but leave a polariser on. If you take a reading without a polariser and fit it along with an external ND your calculation will be incorrect unless you factor in the polariser too. You can determine a polariser’s ND factor (usually 1-1.5 stops) by taking meter readings with and without, however most long exposure calculators do not include 1/2 stops for example, meaning you’d have to compensate yourself. It’s far easier just to take the reading with the polariser on.
When using Live ND again there is no need to worry about the effect of a polariser because the camera calculates the exposure based on the light entering the lens, with the polariser and the ND factor you select. It does mean the ND factor is not quite true; take an image with ND4 with a polariser and one without and the exposure will change, such as the example below:
- ND4 (2 Stops) without a polariser, exposure 1 second- Actual ND factor ND4 (2 Stops)
- ND4 (2 Stops) with a polariser, exposure 2 seconds – Actual ND factor ND8 (3 Stops)
The exposure doubles because the ND factor changes, and each full stop doubles or halves (1 doubled is 2, 2 halved is 1). In truth polarisers are not quite 1 stop, or 1.5. It is a useful guide and useful to understand what is happening just in case you come across this situation and end up scratching your head in puzzlement.

8-25 Pro @10mm f8 ISO200 Exp 1.3s Circular Polariser
BUACHAILLE ETIVE MOR
The classic waterfall in front of the ‘Buckle’. Light was getting low as sunset approached and shutter speed is easily affected. My preference for waterfalls is around 1/3rd second, never more than 1 second. There are situations when all you will need is a polariser and nothing more.
I like to soften the water flow but not turn it completely soft, although this can work well in some situations. See the black and white image below of the ‘Wailing Widow’ waterfall. Black and white and very soft water suited the mood I wanted to convey.
COMBINING SKILLS
Understanding each technique and in-camera feature is key to shooting great images. Understanding how to combine techniques for challenging situations is also key. You will not always use just one feature, you may want to do a long exposure and focus bracket, or exposure bracket.
This image below of Loch Assynt with Jupiter and Venus in the sky at twilight was quite a challenging image. I had seen Jupiter and Venus rising so rushed to a spot to capture them. I chose my location and whilst setting my composition I was already thinking about the technique. I knew there would be challenges but experience has taught me how to deal with them.
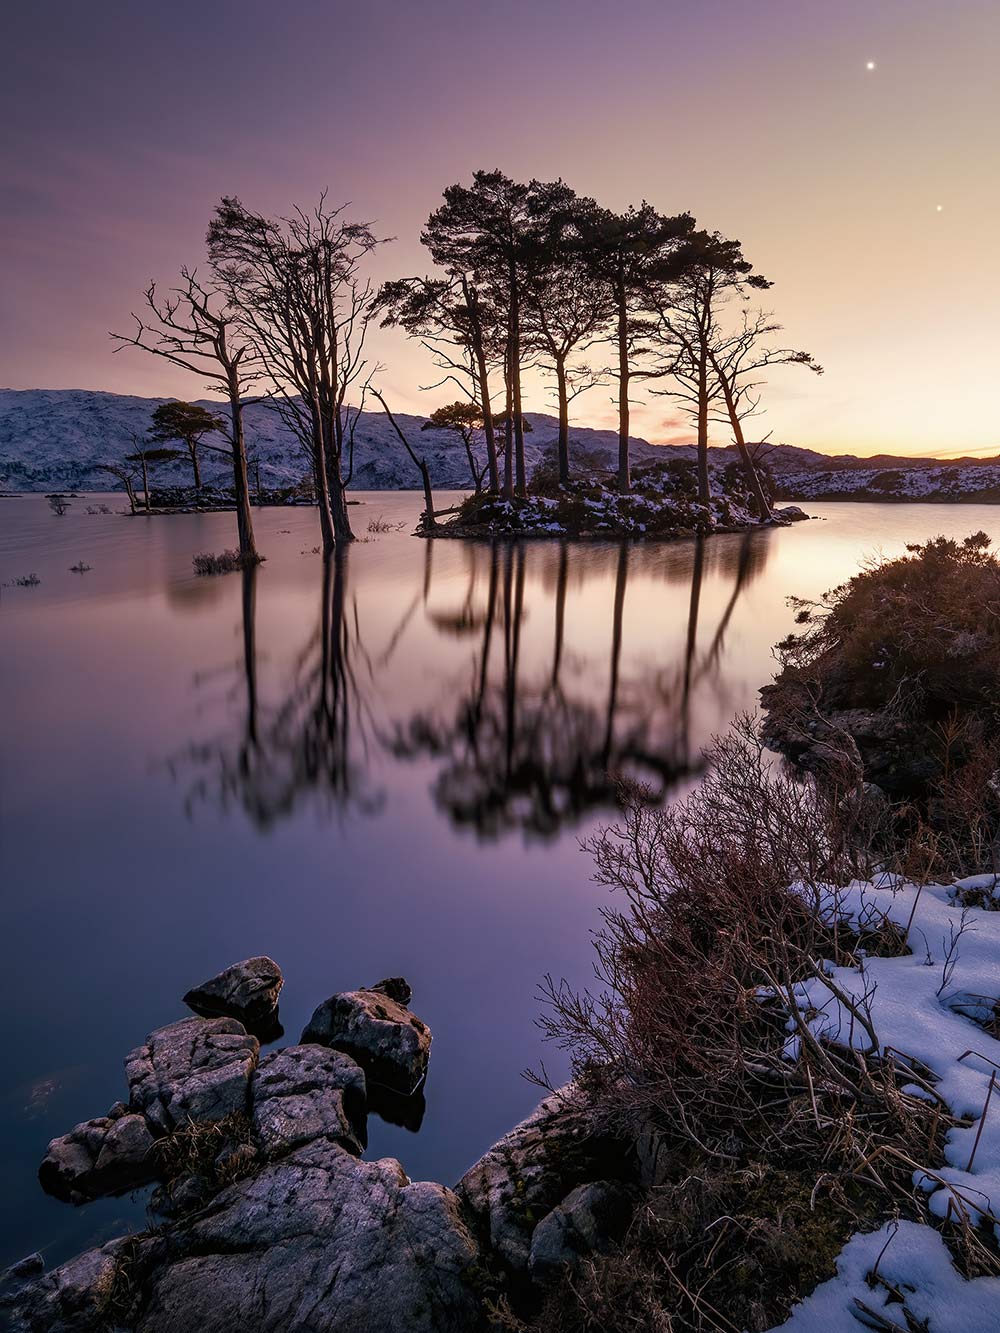
12-100 Pro @12mm f6.3 ISO200 Exp 30s Live Time
JUPITER AND LOCH ASSYNT
A quick check after setting my composition and exposure was going to be 30 seconds. As I want Venus and Jupiter in the frame I know I have to act fast, and I already know from experience that 30 seconds is too long, they will move and blur, but it is perfect to flatten the water like glass. At 12mm the maximum I can expose without blur is 20s using the 500 Rule (See Live-Composite). The foreground is fine because there was no wind, but what do I do about the planets? And at f6.3 will I have enough Depth of Field considering I am focussing so close. I can check with a test shot, or I can use PhotoPills to check, but I will lose time and lose the beautiful light of the sun below the horizon.
I switched to Live-Time with 2 second intervals so I can make better judgements on the exposure, giving it a little more or less if needed.
Focus was a challenge because it was actually quite dark on the foreground so I manually focussed with Peaking. I took the shot at 30s and it was perfect for the water but Venus and Jupiter are indeed blurred. All I had to do is open the aperture to f4, which will shorten the exposure. Changing the interval to 1s, I took another shot at 6 seconds, but at the same time I refocussed on the trees. I had two images I can blend together in Photoshop.
What I have effectively done in two images are long exposures, exposure bracketed, and focus bracketed. We cannot combine AE Bracketing or Focus Bracketing with Live-Time, but there’s nothing to stop us using the knowledge and doing it manually.
EXAMPLES
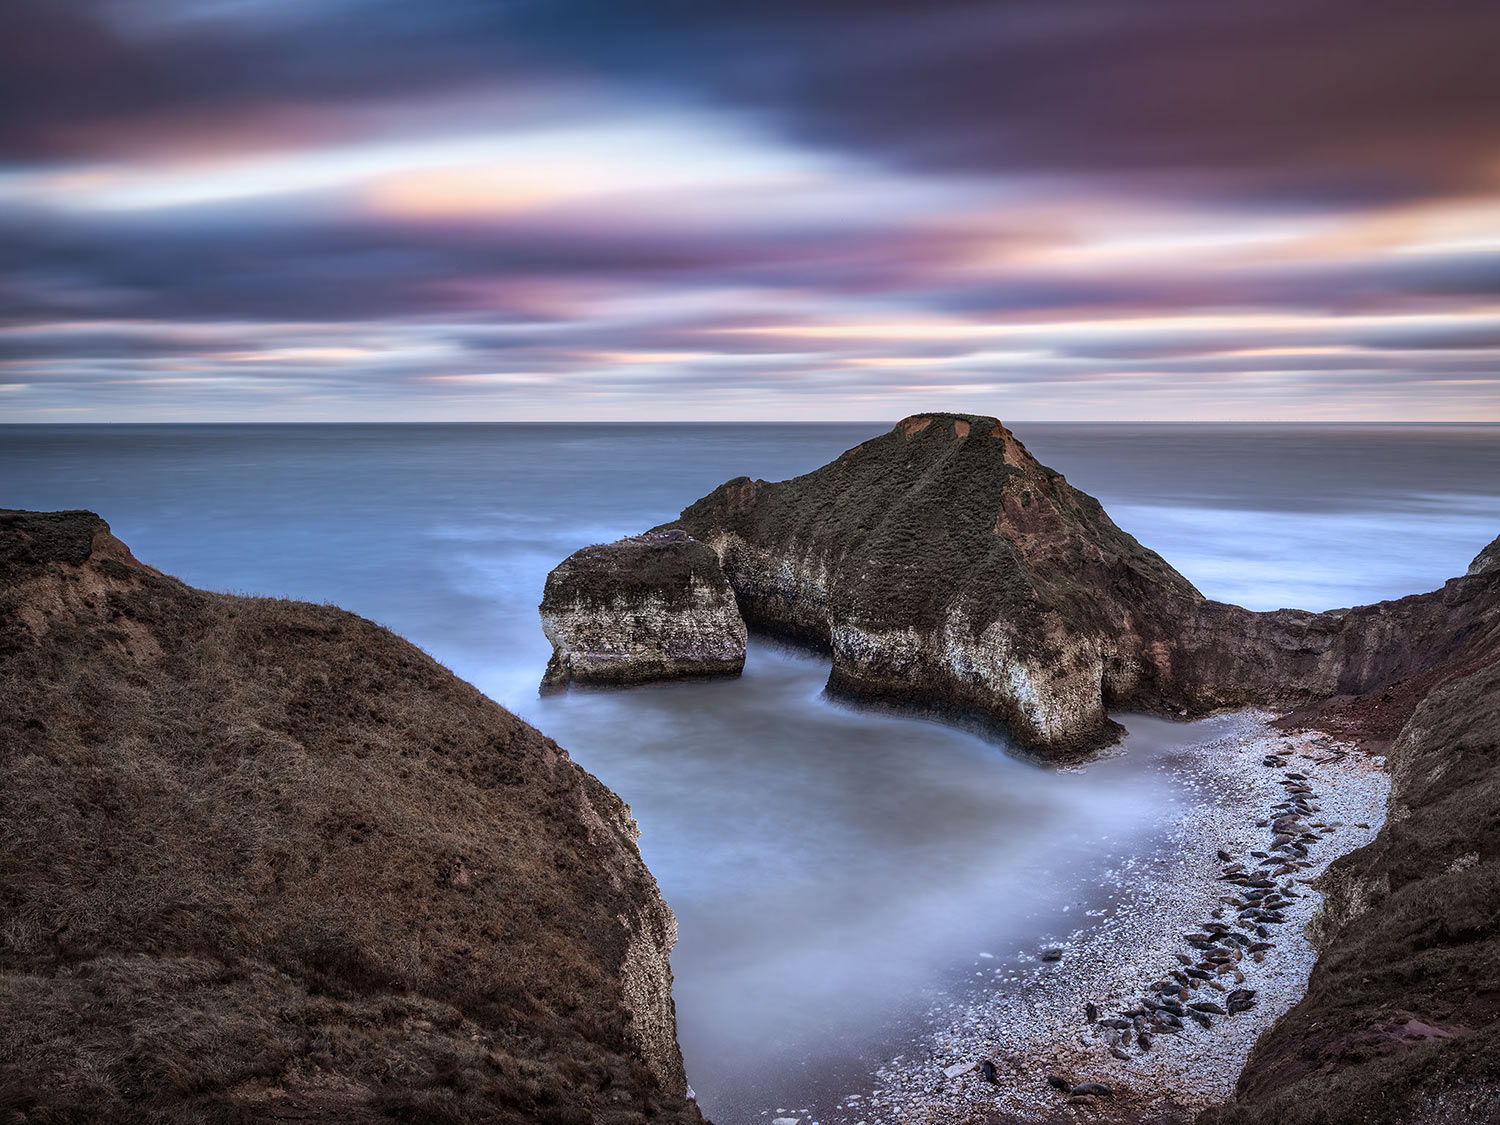
8-25 Pro @ 8mm ISO200 f7.1 102s Exp 10 Stop External ND Live Time
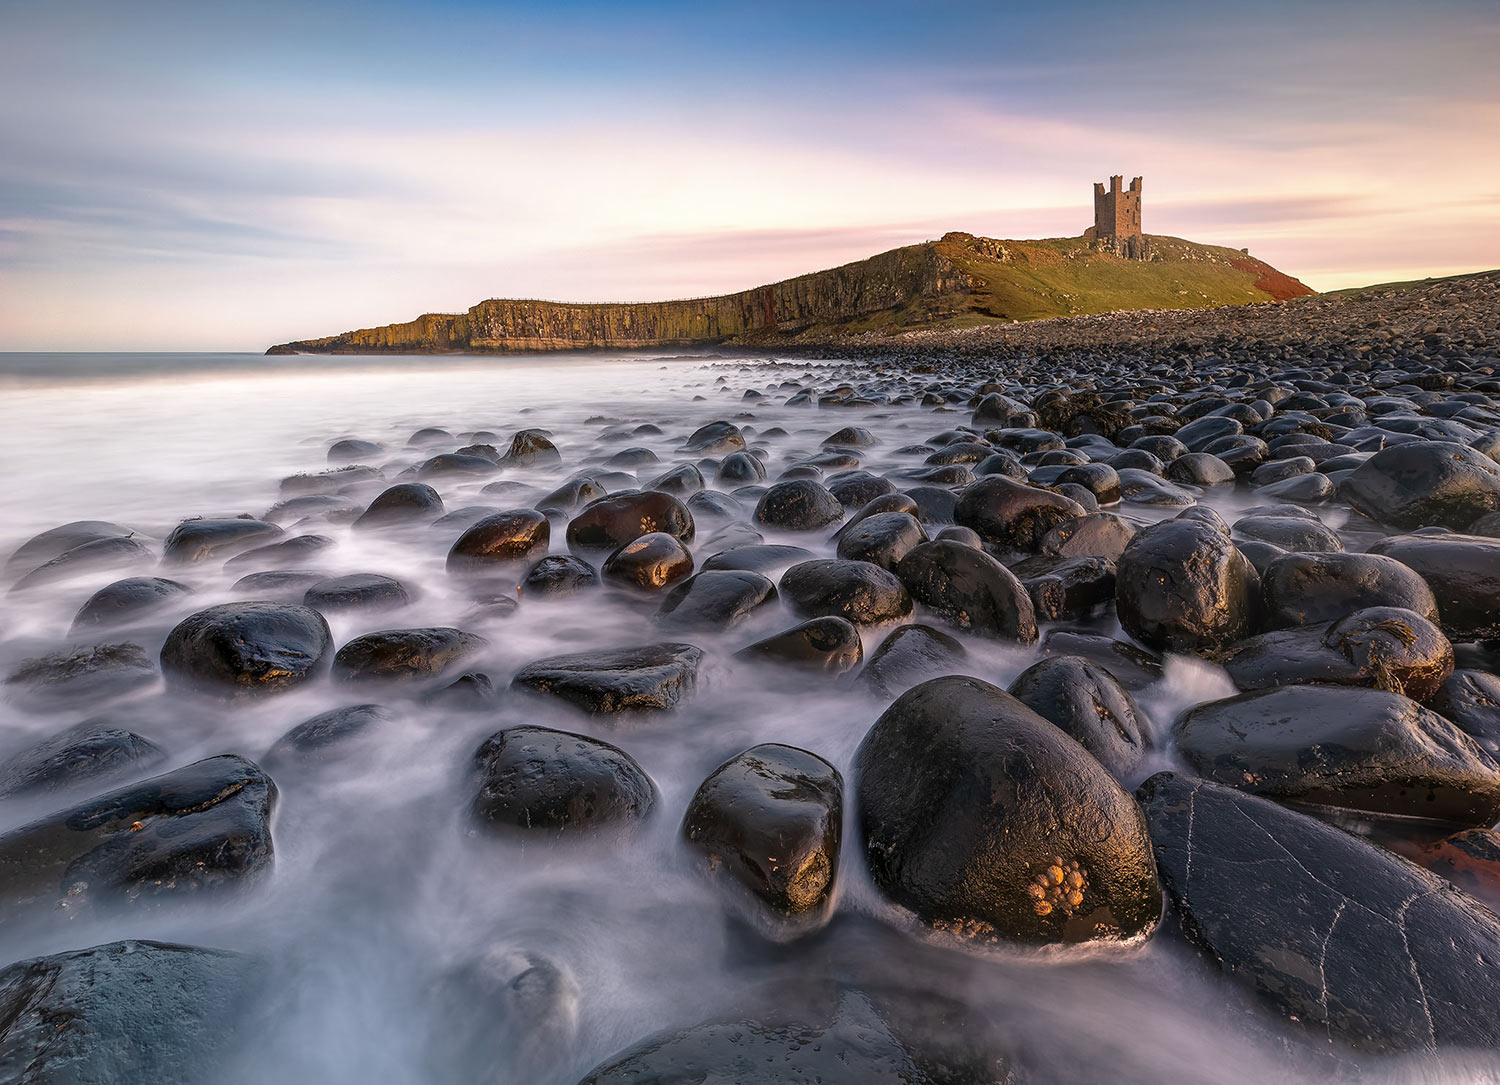
8-25 Pro @ 8mm ISO200 f7.1 25s Exp Live ND64 (6 Stops)
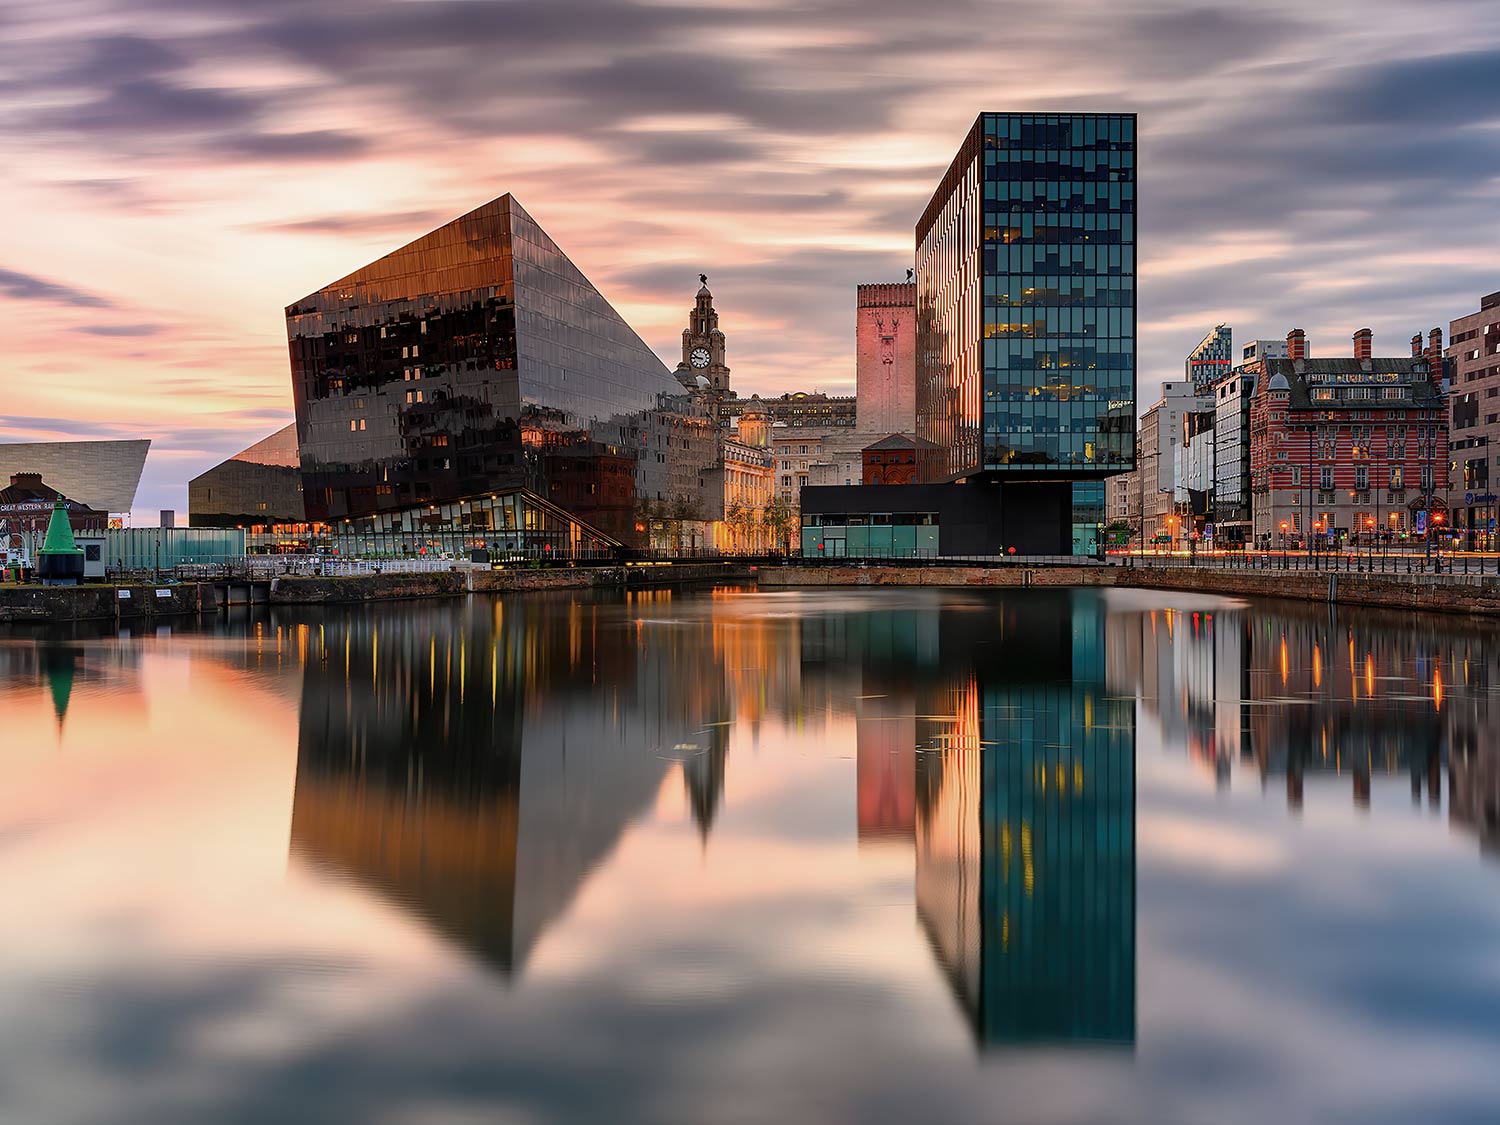
12-100 Pro @ 14mm ISO200 f5.6 50s Exp Live Time, external 10 stop ND
MINIMAL IMAGES
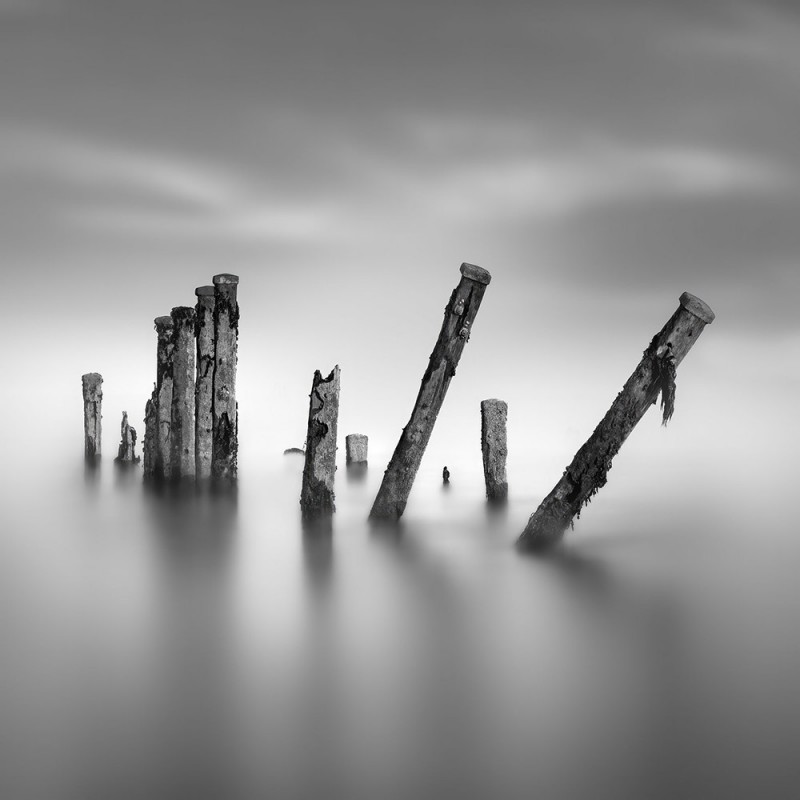
12-100 Pro @ 180s Exp 10 Stop External ND High Res Mode (8x22seconds)
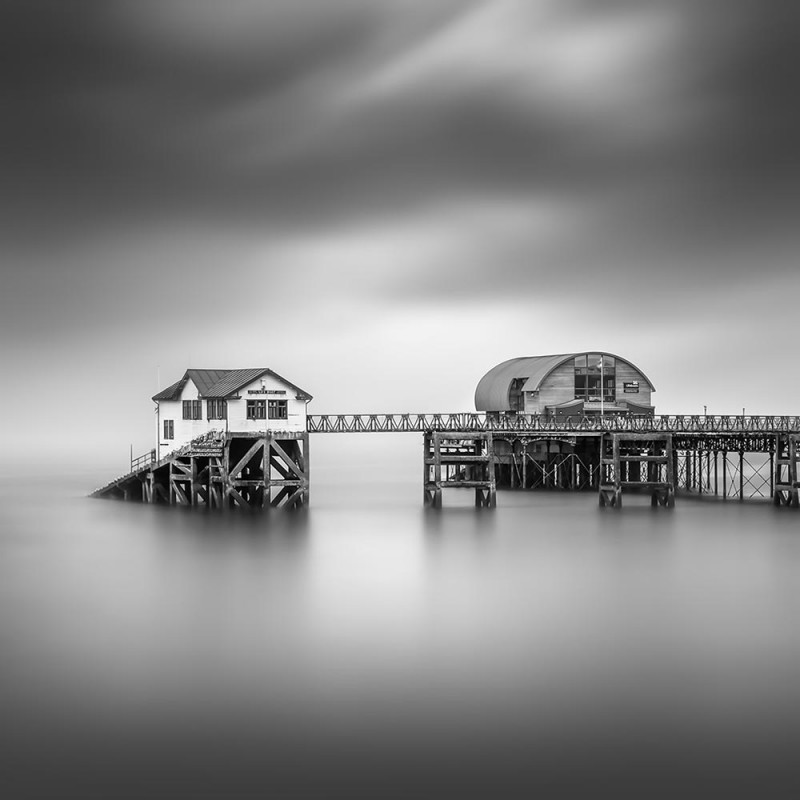
12-100 Pro 120s Exp 10 Stop External ND Live Time
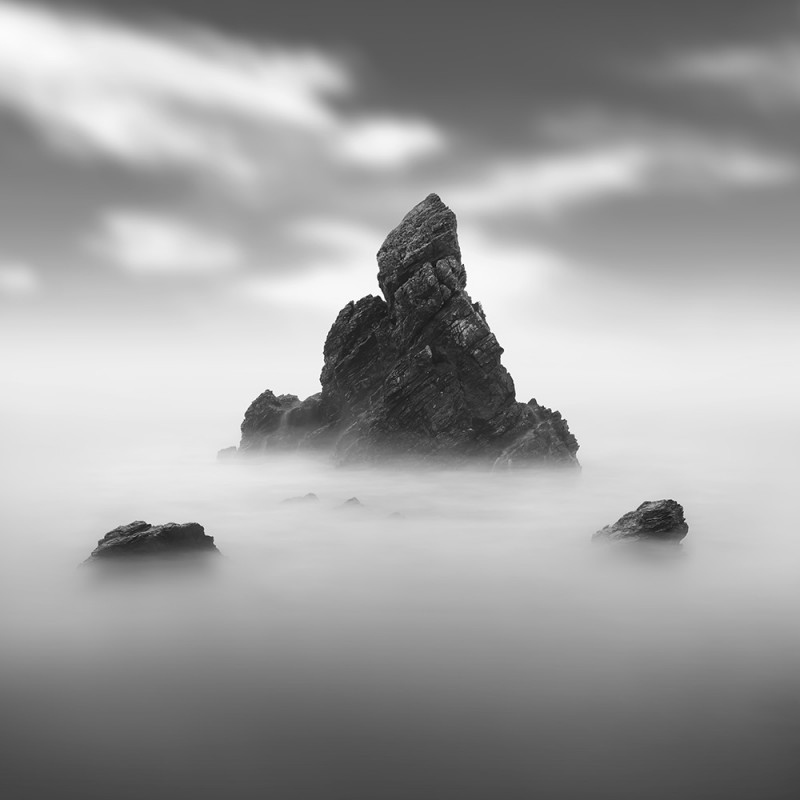
12-100 Pro 200s Exp 10 Stop External ND Live Time
CREATING MINIMALIST IMAGES
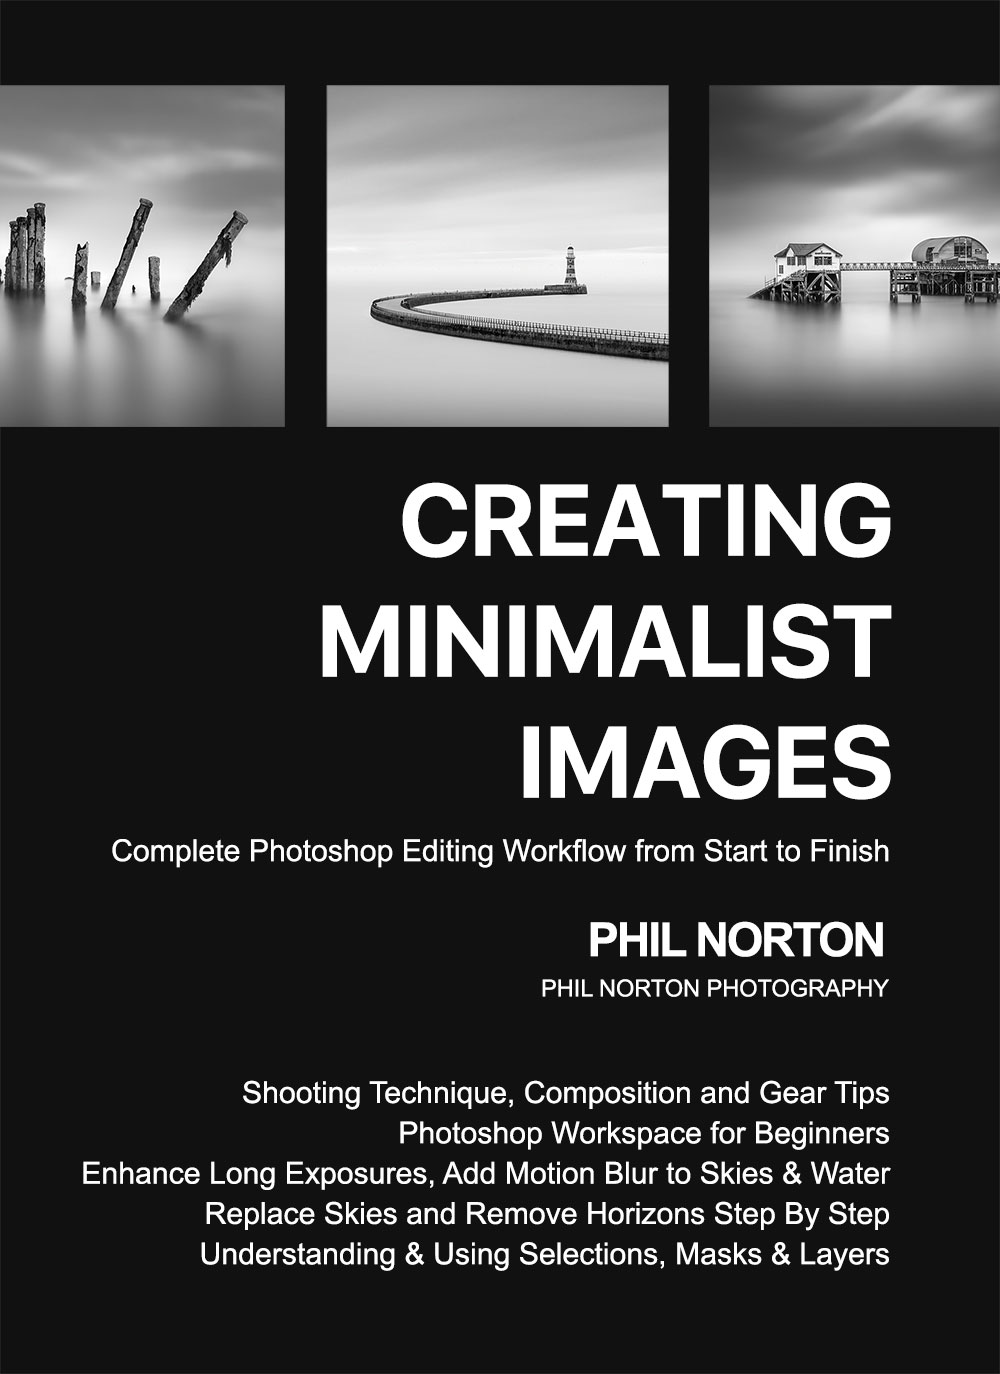
Each of these examples were created using either Live Time and an external ND, or High Res and an external ND. With Live-ND, Live-Time and High Res we have all the tools we need to get creative. See the High Res Section. I have published an additional Guide for how these images were created and edited in Photoshop step-by-step with techniques for editing water, skies and removing horizons.
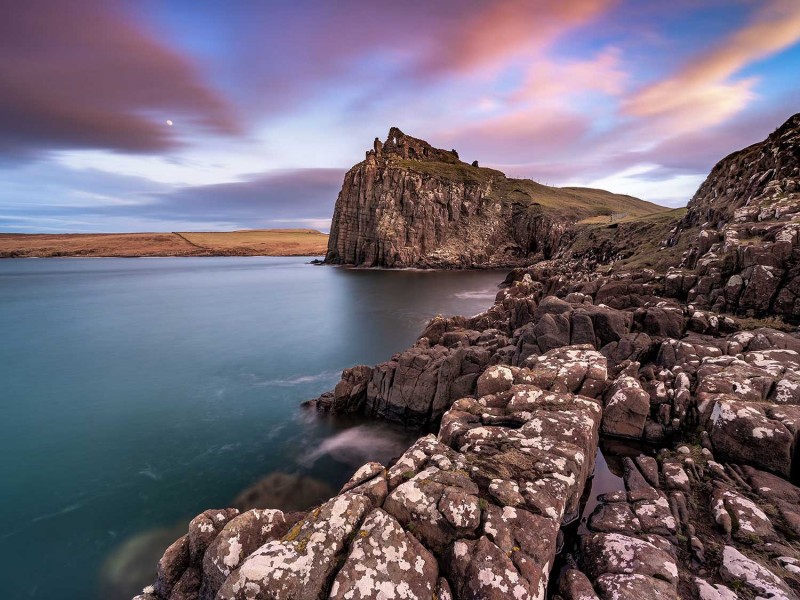
8-25 Pro @ 8mm ISO200 f7.1 110s Exp 10 Stop External ND Live Time
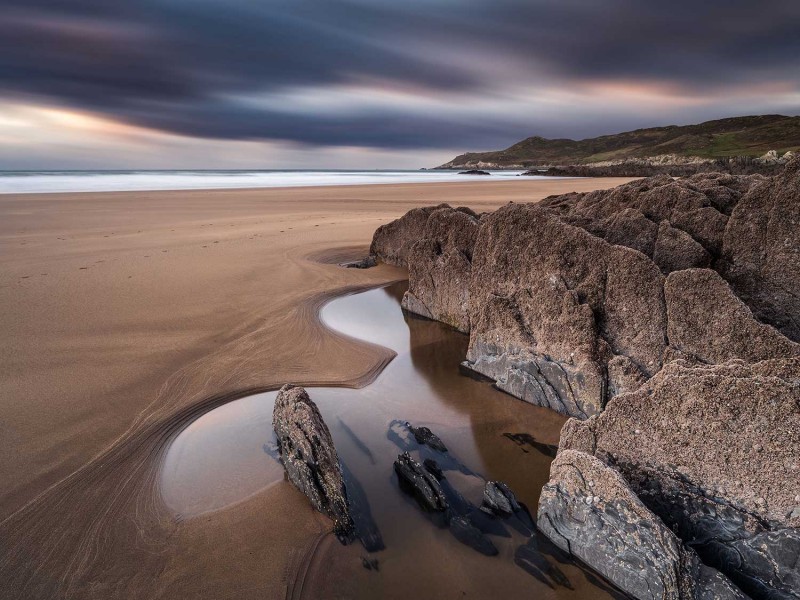
8-25 Pro @ 8mm ISO200 f7.1 120s Exp 10 Stop External ND Live Time

12-40 Pro @20mm f6.3 ISO200 60s Exp 6 Stop External ND Live-Time

8-25 Pro @10mm f6.3 ISO200 1/6s Exp Live ND4 (2 Stops)

12-100 Pro @17mm ISO200 f8 1.3s Exp Live ND8 (3 Stop)
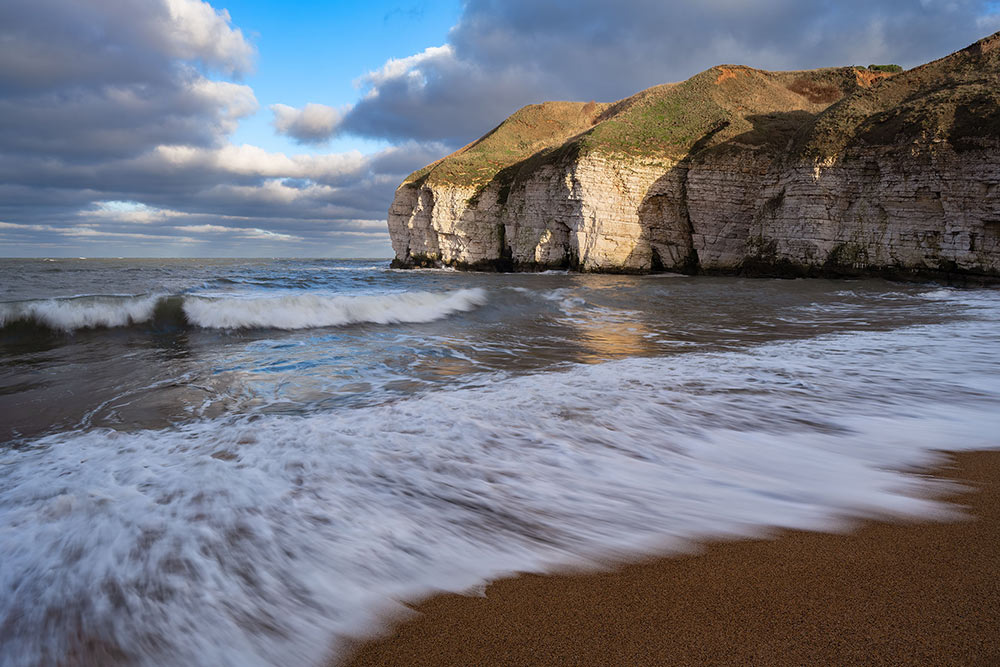
12-100 Pro @12mm f6.3 ISO200 1/6s Exp Live ND4 (2 Stops)
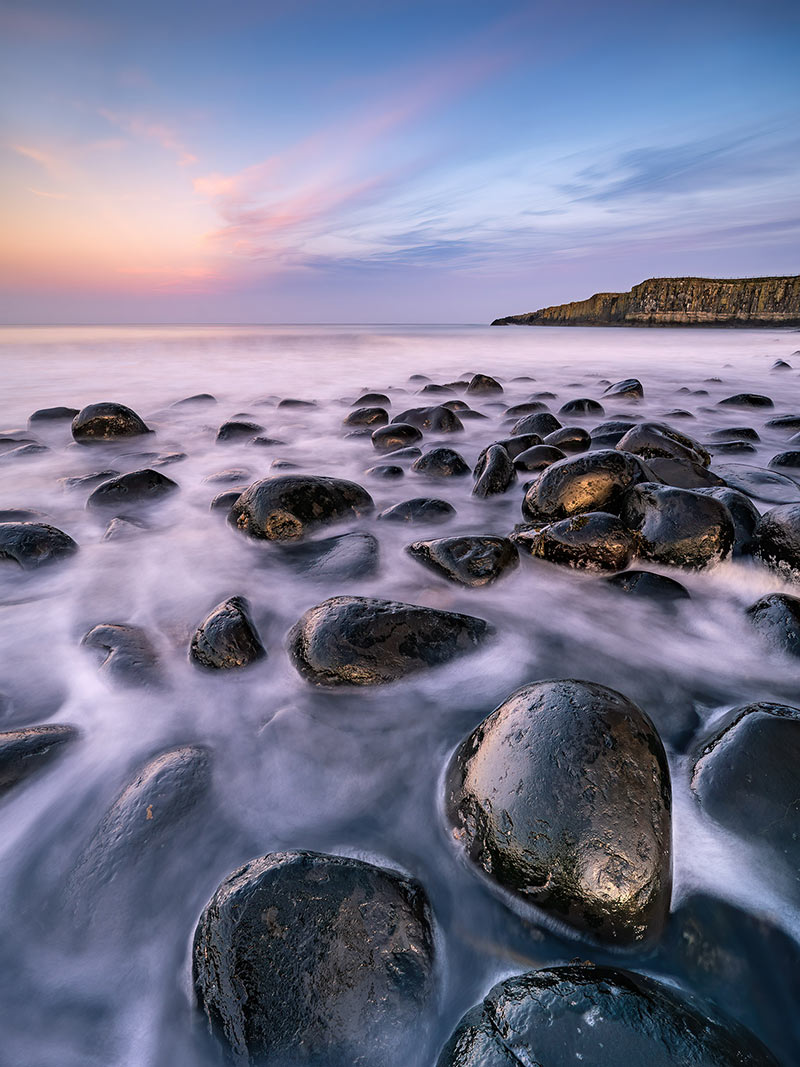
8-25 Pro @8mm f6.3 ISO200 20s Exp Live ND64 (6 Stops)
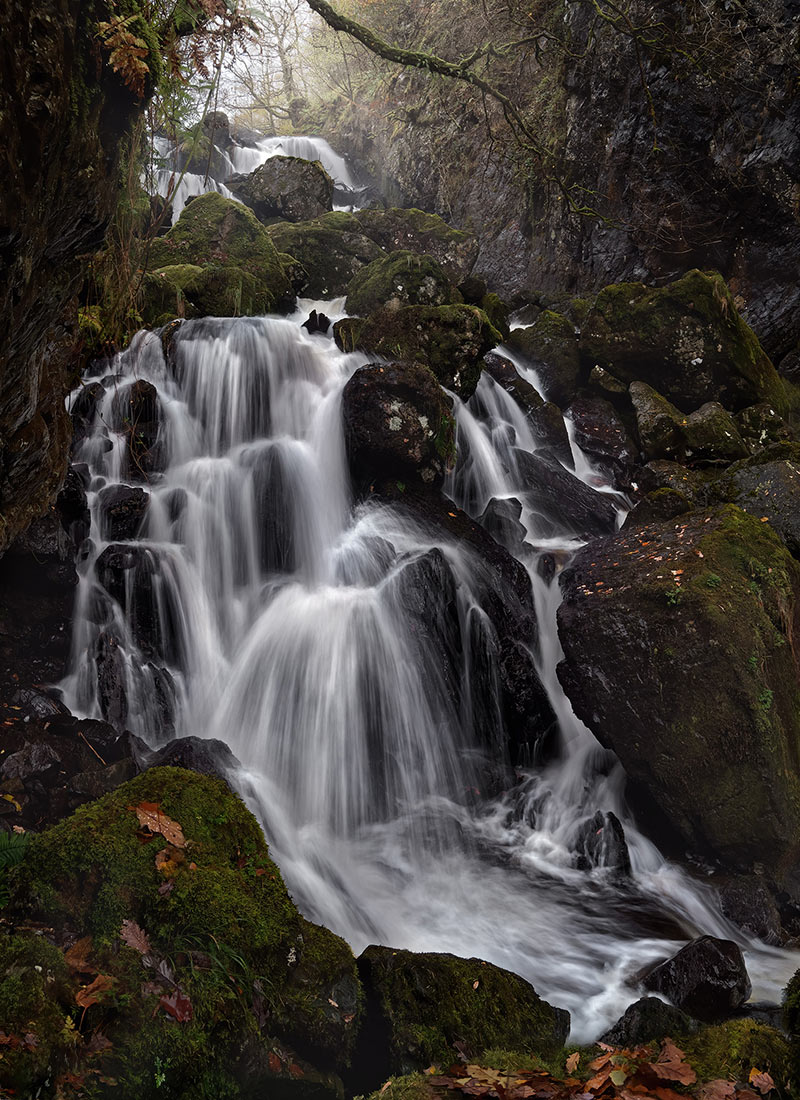
12-100 Pro @12mm f6.3 ISO200 1/2s Exp Live ND4 (2 Stop)
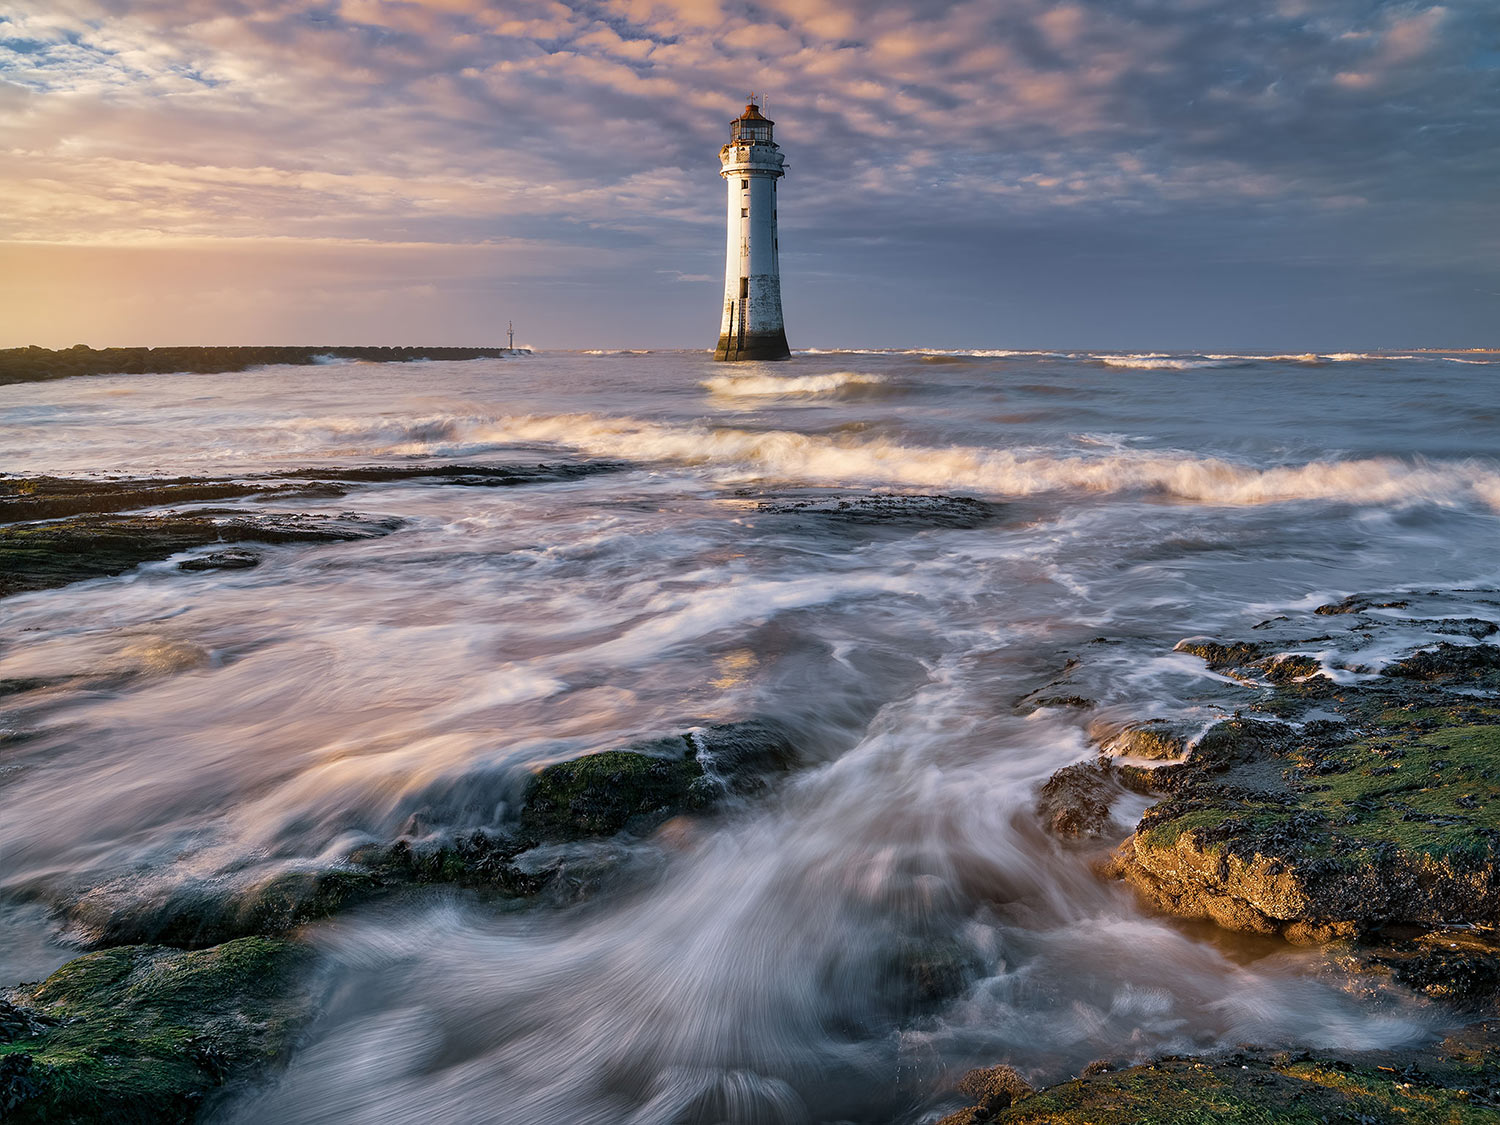
8-25 Pro @10mm f6.3 ISO200 1/4s Exp Live ND4 (2 Stop)
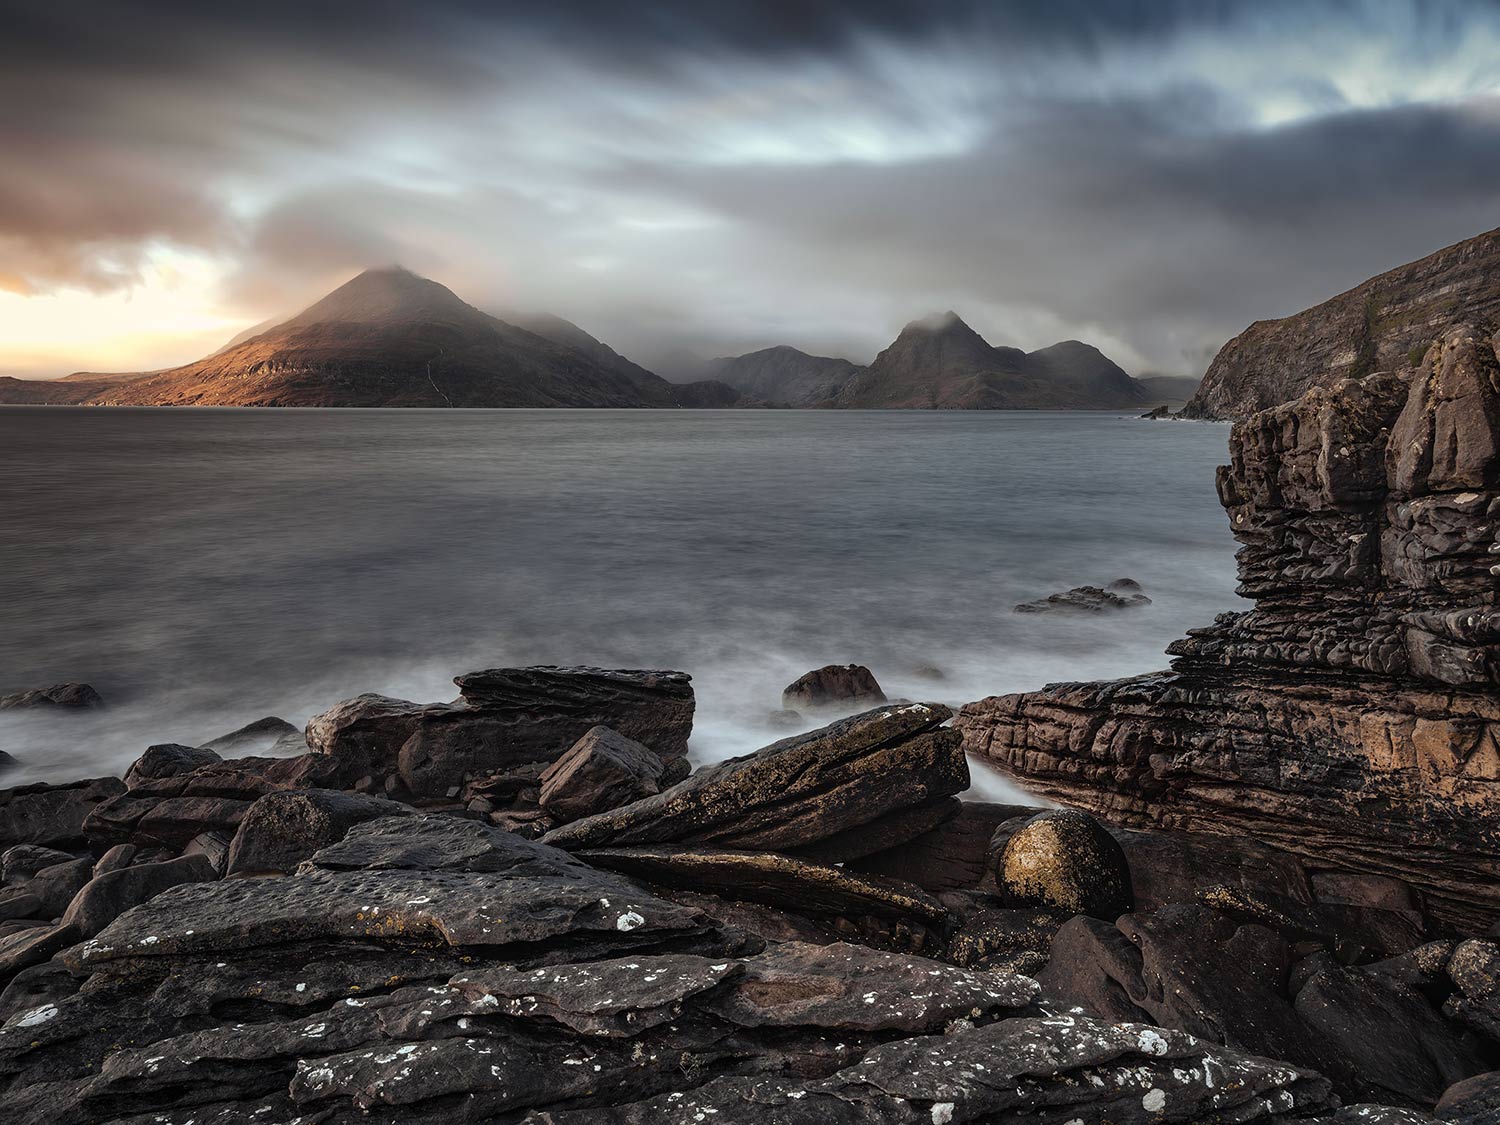
12-100 Pro @12mm f6.3 ISO200 25 Exp Live ND64 (6 Stop)
CONCLUSION
You should feel more comfortable with using Live Time for long exposure images and using the in camera Live ND’s. In the next section we will explore what to do when the dynamic range of a scene is challenging, and how to bracket exposures.
