
GEAR
A few tips and insights on gear and accessories I use and recommend.
Using the right gear is obviously essential and whilst things like bags are very personal I can at least give a few pointers in what to look for, you may get a few tips or see something you haven’t considered. There are tips for tripods, macro lights and a few accessories you may find useful too. These are all items I own and use so I feel qualified being able to recommend them. Please do note any Olympus gear I recommend is entirely my own opinion, I get no benefit whatsoever from it and you are free to purchase from wherever you like.
LANDSCAPE LENSES
The three main lenses I use for landscapes are the m.Zuiko 40-150mm Pro, 12-100mm Pro and 8-25mm Pro. Although I do have other lenses, the 100-400mm, 60mm Macro, 17mm 1.8 and 45mm 1.8 to name a few, the three below are the lenses I use most.
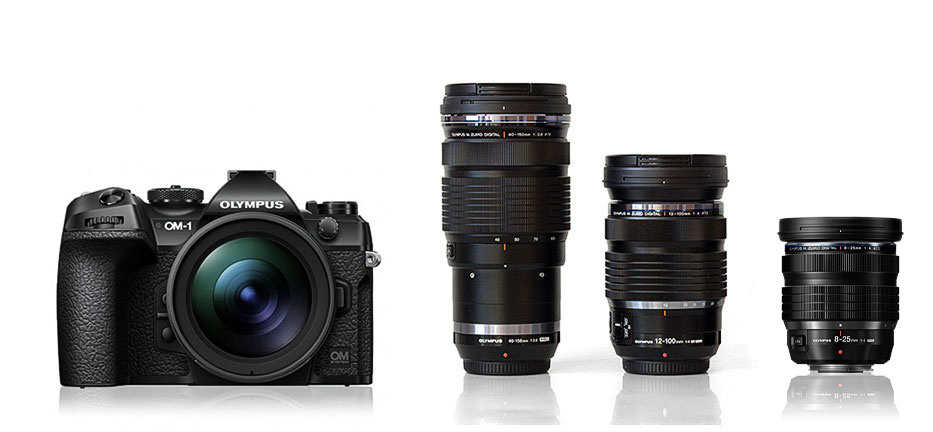
40-150mm f2.8 Pro, 12-100mm Pro, 8-25mm Pro
1) 40-150mm f2.8 Pro
The ideal lens for long landscape images, it has a great range and is not too long for landscape work and it can be used for wildlife. Other lenses like the 300mm Pro are I find too long and better served for wildlife. The 40-150 is razor sharp and is already firmly raised on a pedestal for being one of the great Olympus lenses. It’s also good for wildlife and combined with the 1.4 teleconverter it has additional flexibility.
The recent addition of the 40-150 f4 Pro may be more suitable. It really is a space saver at almost half the size of the f2.8. It is a little slow for wildlife and it cannot be used with teleconverters. I was tempted because saving space and weight is good, but not being able to use teleconverters was the deal breaker.
2) 12-100mm f4 Pro
One of the best all rounder lenses in the Olympus lens line-up, it has for me replaced the 12-40 because of the range, making it ultra flexible. Not the fastest lens at f4, but it is a general purpose lens and with an additional stop of stabilisation built in it makes up for the slower aperture. For landscapes it doesn’t need to be faster. For someone like me who loves wide angle lenses they do not suit every location. The Lake District for example I find the 12-100 much more suitable, images are in general less about close foregrounds and wide lenses will push background fells further away.
3) 8-25mm f4 Pro
Although I also have the 7-14 f2.8 Pro the 8-25mm has largely replaced it for landscapes. The 7-14 is now reserved for low light and night photography, not that I do a great deal. The 8-25mm has a better range, and for someone who loves wide lenses the slightly longer reach is useful. Wide lenses need a good foreground, a location like the Peak District is perfect for wide lenses, and without a good foreground a wide lens is wasted. The main reasons for swapping to the 8-25 is the filter thread, much more convenient for using filters than the 7-14 though of course it is possible, and the reduced lens flare. I do find the 7-14 flares easily because of the convex front element, and is prone to sensor flare which is a devil to remove. The 8-24 is very sharp, not quite as sharp as the 12-100, but a little sharpening in post makes up for it. It is slower that the 7-14 obviously, but its a landscape lens; they tend not to move too fast.
WILDLIFE LENSES
Long lenses for wildlife gives us plenty of choice. For serious wildlife photographers the king is the 150-400, the big white beast. It has been called one of the best wildlife lenses ever made which I don’t doubt but if you only dabble like me and find it hard to justify what are the other choices?
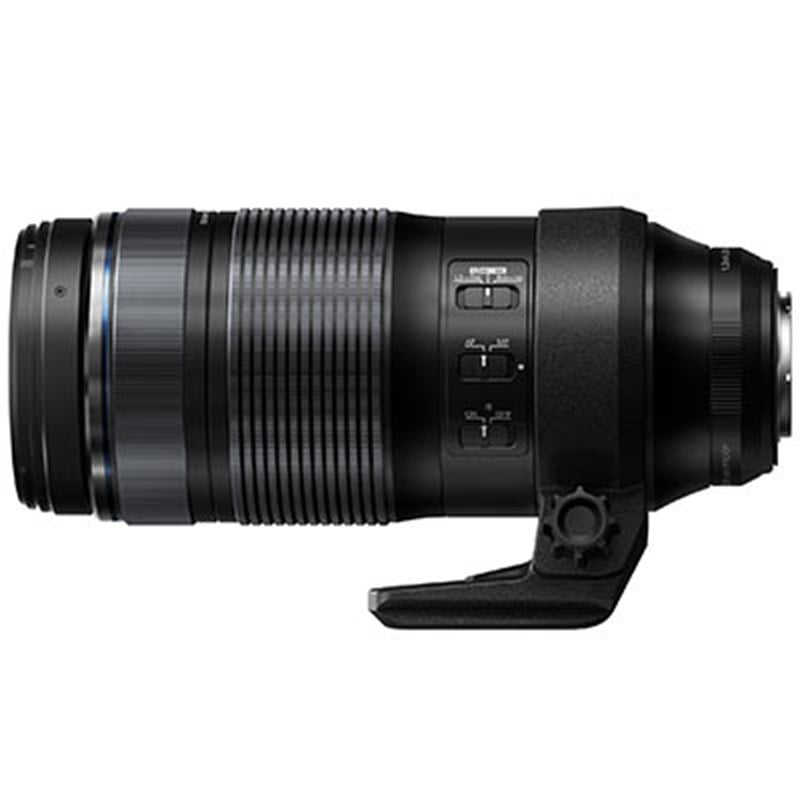
100-400mm f5-6.3 IS

300mm f4 IS Pro
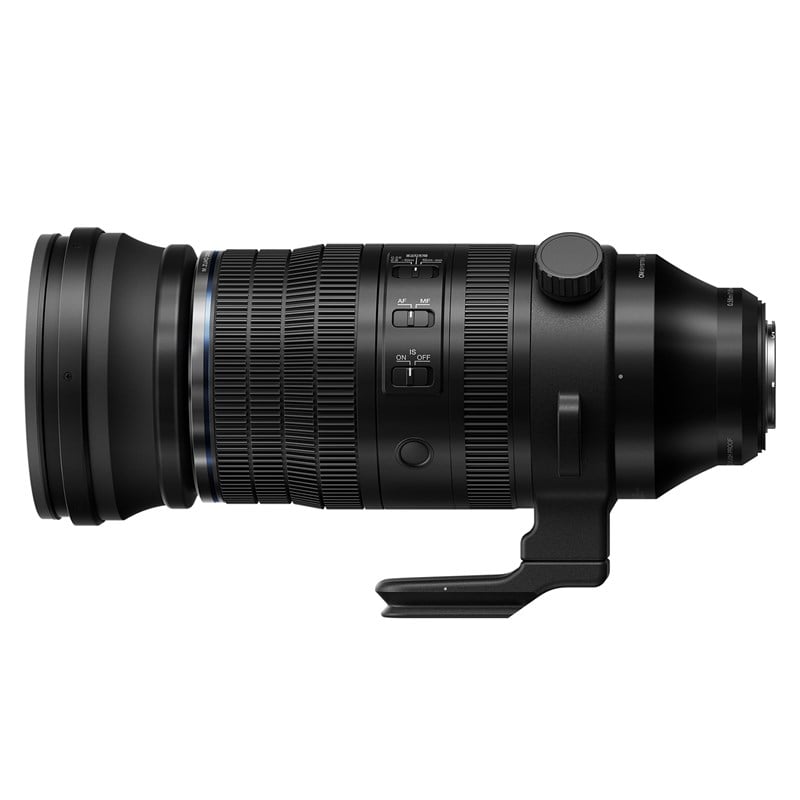
150-600mm f5-6.3 IS
1) 100-400mm f5-6.3 IS
The 100-400 lens is not a Pro lens, meaning it doesn’t have the same build quality or the sharpness of the Pro lenses. It is sturdy and very well built and it is dust and splash proof, it does feel the part, but I have to be honest it does lack in sharpness. Images can be sharpened, but at the long end that lack of sharpness is going to translate into less detail. It does have IS, but not full sync IS. For occasional use use a wildlife lens and very good light it is actually pretty good, and a bargain at around £1000, but you would be better with the 300mm for more serious wildlife images.
2) 300mm f4 IS Pro
Being a prime lens with a constant f4 it is also pretty fast. And as a Pro lens it is built like a tank with all the external buttons you need too. I find the image sharpness is spot on, it is razor sharp and is renowned for the sharpness. It also accepts teleconverters, although I would always say avoid the x2, image sharpness does degrade. The 1.4 is superior. The disadvantage with this lens is being a fixed prime, you lose the flexibility of a zoom. At twice the cost of the 100-400 you are getting better quality construction and image quality. I do love this lens, I just don’t use it enough.
3) 150-600mm f5-6.3 IS
I do not have this lens and I doubt I ever will, not being a dedicated wildlife shooter, so I include it just for consideration. I have handled it and it feels well constructed but it is not a Pro lens. At IPX1 weather-sealing it should robust enough. It is a Sigma lens, as the 100-400 is, but it is not simply rebadged, it has been re-engineered with new elements and construction for the Olympus/OM System line. It is big, just 40mm shorter than the white 150-400 f4.5 Pro, and it is actually 200g heavier. It does have full IS sync and it is compatible with teleconverters. At around £2500 at introduction there have been many comments about why it is more expensive than the Sigma Full Frame version. Check reviews for yourself, my feeling is it has been introduced as a budget version of the white 150-400 f4.5 Pro. That lens is the lens to have for the serious wildlife shooter, it has a built in 1.25 converter, a fast constant aperture, all the controls you could with for, full IS, and stunning sharpness. It is also around £6500.
MACRO LENSES
Two of the very best lenses available for Macro, the 60mm f2.8 with x1 magnification and 90mm f3.5 with x2 magnification.
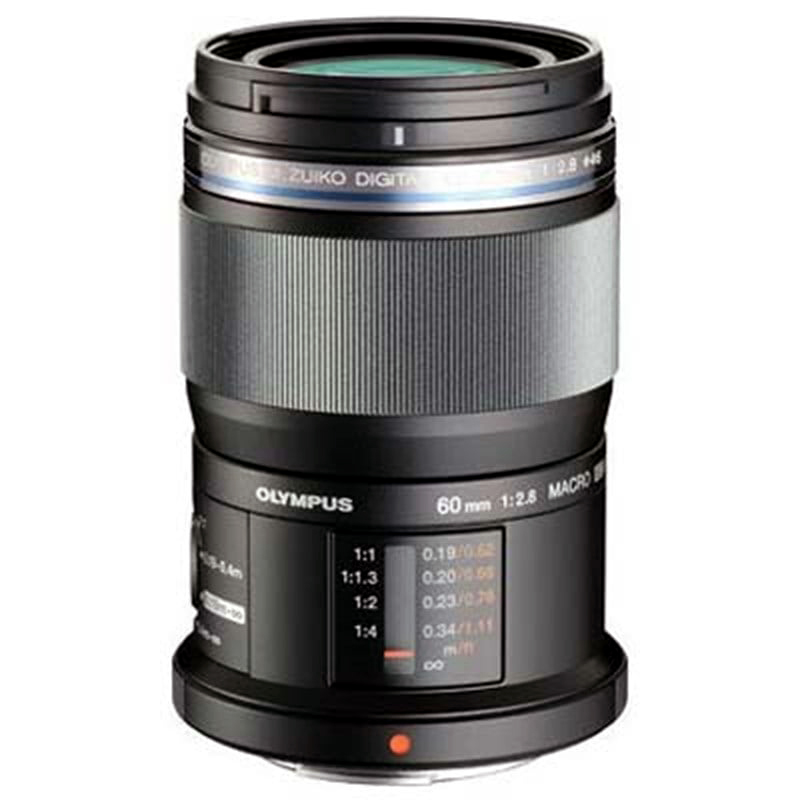
60mm f2.8 Macro
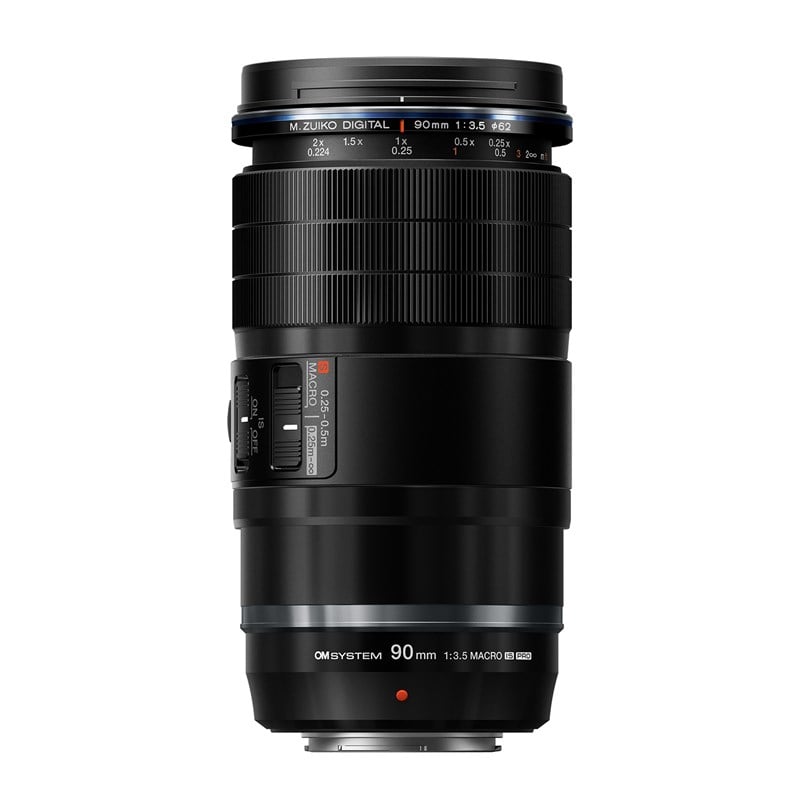
90mm f3.5 Macro IS Pro
1) 60mm f2.8 Macro
This is a great little lens, it is light, compact and very very sharp. In fact it does everything you could need for x1 life-size macro. It has a closest focus of 19cm and a lever for limiting the the focus making life easier. I use this a lot for my ‘Shrooms’ Images and it is also a great standard lens too. It is not a Pro lens and is a little plastic feeling, but there are some real bargains around for it. I had the 30mm Macro for a time but found it too wide for a macro lens and not suitable for my needs, so I parted company with it.
2) 90mm f3.5 Macro IS Pro
A fairly new addition to the lens lineup the 90mm is a true macro lens giving x2 magnification for larger than life macro images. If true macro is what you want the is the lens you should consider. Being a Pro lens it is built like a tank, it is weather sealed and it is also stabilised with an additional IS switch for hand holding capabilities. There is also a focus limiter as with the 60mm Macro. Being honest I have found x2 is a little more than I need, but it is fun to wander around the garden looking for bugs and tiny details. It is a Pro lens, meaning it is also three times the cost of the 60mm, so consider what your needs are.
CAMERA BAGS
My weakness, I love a good camera bag. Just like the cliche of women and shoes many photographers have far too many bags, I must have 10. Time to sell a few I think. The obvious pointers are storage and comfort, external pockets for sliding hats and gloves in, drinks bottle pockets and straps for attaching a coat or tripod. Personally I never strap a tripod on my backpack but I do often strap a jacket on for when it gets colder. What suits you will dictate the type of bag you go for, a backpack, shoulder bag or both depending on situation.
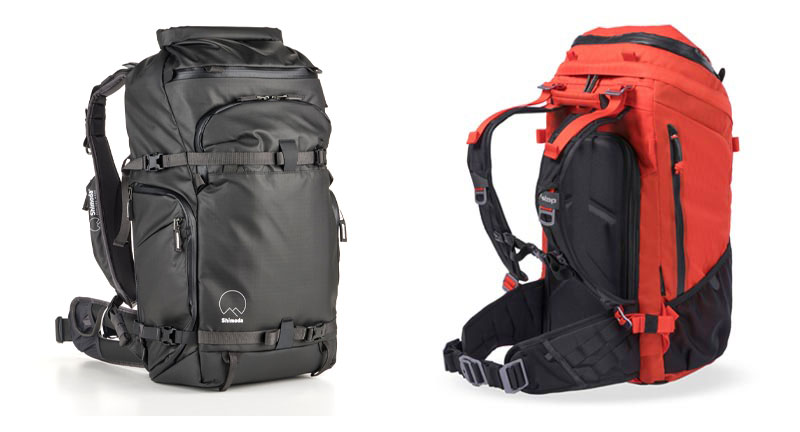
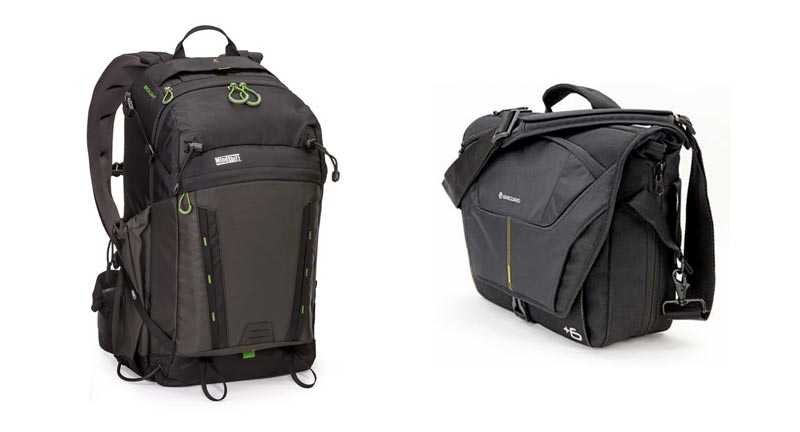
1) SHIMODA ACTION X30
Did I say I need to sell a few bags? Instead I added another, the Action X30. The X30 is 30 litres and it is more than enough for me. I started to feel that the F-Stop Ajna 37L was sometimes just a little big, and what really irritates me is the straps are not padded like the bigger Tilopa 50L. Not really a big deal but I cannot resist a new bag. The Shimoda has a roll top, handy if you want to stuff a jacket in, plenty of storage pockets and spaces to stuff thinks like gloves and hats. And the straps can be replaced with supper padded versions as an option which I did. It makes it the most comfortable bag I have ever used. The Tilopa 50L is just as comfortable but it is just too big. I still use it when I want to take two bodies and multiple lenses but those days are getting less. The straps have pockets for slipping my glasses in and a pocket too for a mobile phone. There is also an additional case as an extra which can be slotted on the waist strap for carrying another lens if you want to swap quickly, or even another body. The material is rubberised and waterproof and I have to say it is fantastic. Agin it is not cheap, the bag and a core unit is going to set you back around £400.
Criticisms, the front access to the roll top is fine for quick access to gloves etc, and there are a few additional zipped pockets, but I do miss the flip top of the F-Stop. The two side pockets have access to the internal ICU for quickly pulling out a camera. The problem is the arrangement of the ICU has to suit it and it hinders me. I don’t want how I arrange the storage inside to be dictated by having the camera where the quick access flap is, it compromises it. A minor thing. Water bottles can be stored in a pull out mess pocket from the side zipper. When pulled out the zipper pocket is open and there is no storm flap over the zipper, meaning water can run down the bag in heavy rain into the zipper. It is sealed from the rest of the interior, and it has not been a problem, but it is worth pointing out. I do love this bag, I just wish it was red and black!
2) F-STOP AJNA 37L
I am a huge fan of the F-Stop backpacks and use the Ajna 37L (shown) and the larger Tilopa 50L. Admittedly not cheap the Ajna will set you back £350 plus another £100 approx for the ICU. Based around a light outer shell with an aluminium frame different size ICU’s (Internal Camera Unit) can be inserted depending on your trip; insert a small ICU for a camera and lens and have the rest for clothing etc if you’re going on a long hike. Plenty of zipped side pockets and a large front storage pockets accommodate just about anything. The best thing is the top zipped lid which opens to allow quick access to a large storage space for gloves, hats, head torches etc, and a smaller top pocket for a map or mobile. Tip, get the straps with it, they can be fitted on the top, sides and or front and they are great for strapping a coat on. Buckles are now aluminium for strength and it will also accommodate a drinks bladder.
F-Stop Website – My Workshop Clients can get 15% off please contact me.
3) THINKTANK MINDSHIFT BACKLIGHT 26L
For a relatively small backpack the Mindshift Backlight 26L is one of the best I have used and one of the comfiest. The front pocket is huge and can easily accommodate a jacket or fleece which is what I look for in a backpack. There are dividers too to separate items. The interior of the main body can actually hold a huge amount of gear, easily two bodies four lenses and accessories. What it lacks is exterior zipped pockets other than the front, but it is still a great backpack. Rear access is a must for any backpack, when it is put down on wet ground it is the front that will get wet, avoid any that have front access or you get a wet dirty back.
4) VANGUARD ALTA RISE MESSENGER BAG
Messenger/Shoulder bags may be your thing, personally I don’t use one as my main bag because all the weight is on one shoulder or across the chest. The reason I have one is because they are great for on the coast when you know you will be standing in water and cannot put your bag down. Most rear access backpacks allow for you to spin it round and open the back but in winter with a coat on its never easy. Another good reason to have one is if just popping out for a few quick shots you can take just what you want and leave the rest at home.
It looks like at the time of writing the Alta Rise has been replaced with the VEO Select range which maintains the two best features, a top zipper access and internal unit which can be completely removed to turn it into a standard bag. And they make great tripods too.
TRIPODS
As someone who has owned and still owns too many tripods I’m pretty well qualified to advise. With the amount of image stabilisation in camera bodies these days including Olympus tripods seem less important, but they are. By all means enjoy the freedom of shooting hand held, I do more and more. But a tripod is still needed for Long Exposures, bracketing (although it can easily be done hand held too) panoramic images, and Macro. The main point of a tripod which is overlooked is to slow you down. Consider the scene and your composition, take your time, make adjustments and wait for the light.
There are hundreds to choose from, and an old addage still remains true today, tripods can be cheap, sturdy or light; pick two because you can’t have all three.
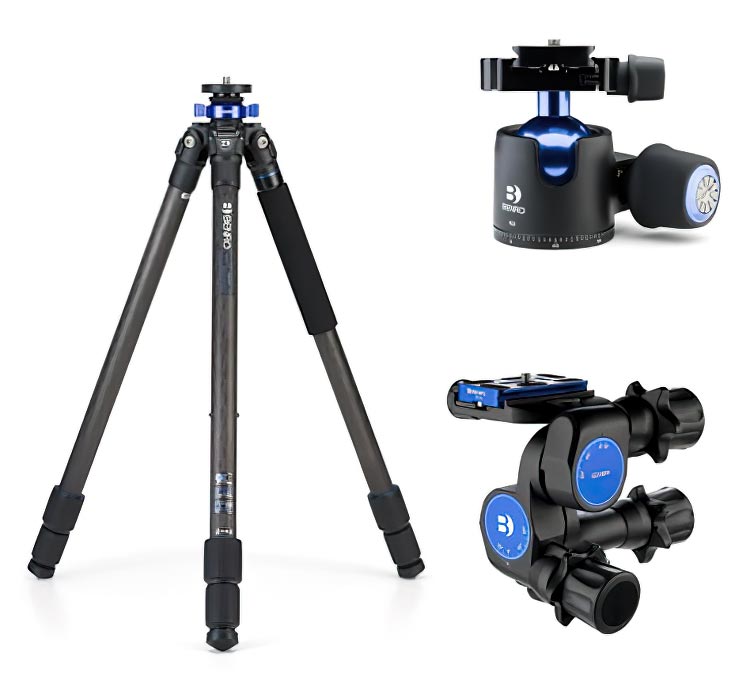
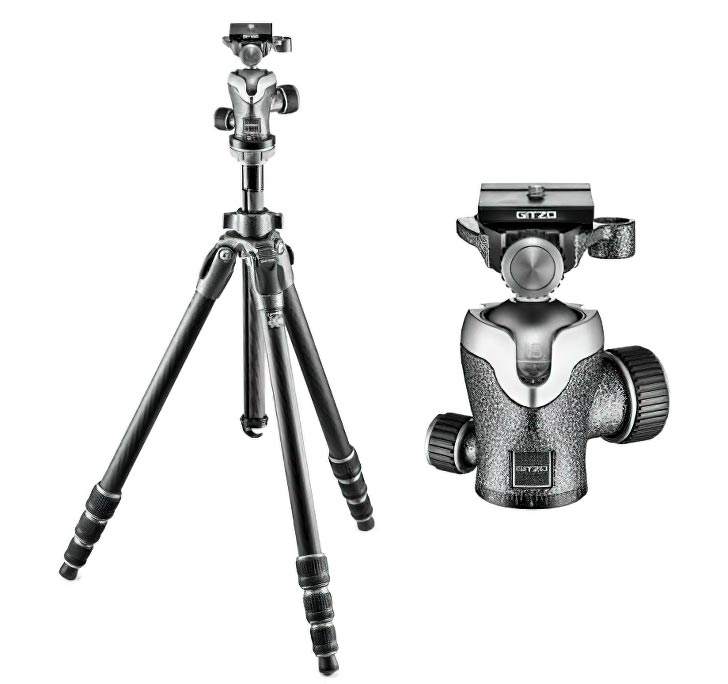
The main points to look for in a tripod are height, weight and sturdiness.
HEIGHT – Select a tripod with the greatest height excluding the centre column which should only be used as a last resort, it will introduce the most vibration. The higher the better without the centre column. It will also be more convenient when spanning across gaps.
WEIGHT – The least weight is obviously better but selecting a tripod based just on this is false economy, it probably will not be sturdy enough and a tripod a few hundred grams more really isn’t a big deal yet will be stronger. Carbon Fibre is lighter but at a cost. More leg sections means a tripod is more compact but is also heavier, not a great deal more but it will add to it. Travel Tripods are usually exclusively just for that, travelling. I would not rely on a travel tripod as my every-day tripod unless it is of significant quality and quality comes at a price. Better I think to have a main tripod and get a cheap travel tripod on Amazon that will do the job of a long exposure in St Marks Square and last quite a while because it gets little use.
STRENGTH – If is isn’t sturdy it isn’t fit for purpose and a waste of money. This really should be priority. Overall weight it will hold isn’t a good indicator either, a tripod that can hold 20kg may vibrate with just a breath of wind. Wind and running water are the enemy and legs that are not stiff will vibrate with the slightest movement transferring through to the camera. Number of leg sections also make it weaker, so less is better though it impacts the minimum length. When travelling ball heads and columns can be removed so the length never bothers me too much. Also the more leg sections the thinner the last leg section will be. I would avoid any tripod with leg sections less than 15mm diameter, they will vibrate like a guitar string.
ARCA SWISS COMPATIBLE – The top plate should be Arca Swiss type, a wedge shape, which opens up availability of tripod plates and brackets. Some brands like Manfrotto make the plates generic to their accessories, so if you want an L Bracket you have to pay for one of theirs, and you do pay though the nose.
1) BENRO MACH3 37C
Although I have a Gitzo Systematic I much prefer the Benro, in fact this is as near a perfect tripod for general use I have found. It has a height of 138cm and will extend 163cm with the column. The column can be replaced with a short column (included) for getting very low, it is very sturdy with the lower leg section being 25mm diameter, and Benro supply superb bags with their tripods. The Mach3 comes with tools and ground spikes too which I always use. At 1.7kg it really isn’t a great deal more than some travel tripods so for the strength and reliability of it I really cannot fault it. Leg locks too are a nice size and easy to grip, I can undo both on each leg at the same time with a short twist. Beware of some leg locks which have a rubber outer sleeve, they can slip when they get wet meaning you cannot grip them.
The Benro G2 Ball-head is one of the two very best engineered ball-heads I have ever used, the other being Gitzo. It is quality engineering. A large knob which has a friction control in the end is easy to grip and requires only very gentle pressure to lock solid unlike some which practically need a wrench. I avoid any that have right-angle levers, they are too easy to snag a coat sleeve on and undo. A knob at the back allows the base to rotate and it is Arca Swiss Compatible.
The GD3WH3 Geared Head is very good too with precise controls and a quick release function for making fast adjustments. Gear Heads are great for making very precise adjustments and I do use the geared head although I have to admit I am quite happy with a ball-head, it is lighter and less bulky.
Benro Website – Shop around because you’ll find better prices.
2) GITZO S2 MOUNTAINEER
A superb tripod and so it should be for the eye watering cost of it, but I found one believe it or not on Amazon with over a third off. This is a cross between a general purpose and a travel tripod. At only 1.6 kg including the very solid ball-head it is very good and has a max height of 176cm including the column. Despite being a 4 section tripod the last leg is 15mm diameter so it is strong and doesn’t flex. One of the best features is the quick release plate just under the ball-head; twist it and the centre column can be removed leaving a short column for very low level shooting. Whist this is a Rolls-Royce tripod with the price of the ball-head being around £300 I paid around £150 for the legs which was a bargain. Hunt around and you will be surprised what you may find. Benro also make very good travel tripods as do Three-Legged Thing, but those colours! Yuk. I only include the Mountaineer as an example of the quality to look for, just because a tripod is compact doesn’t mean it should be inferior. Compromise on quality and you may as well not bother. A good tripod should last a long long time.
The Gitzo GH1382QD Ball-Head is a marvel of engineering with similar qualities of the Benro G2, just to emphasise that the tripod head needs to be considered carefully. I’ve had cheap ball-heads fail on me or ended up having to tighten them so much they were a pain to use.
K&F TRIPODS
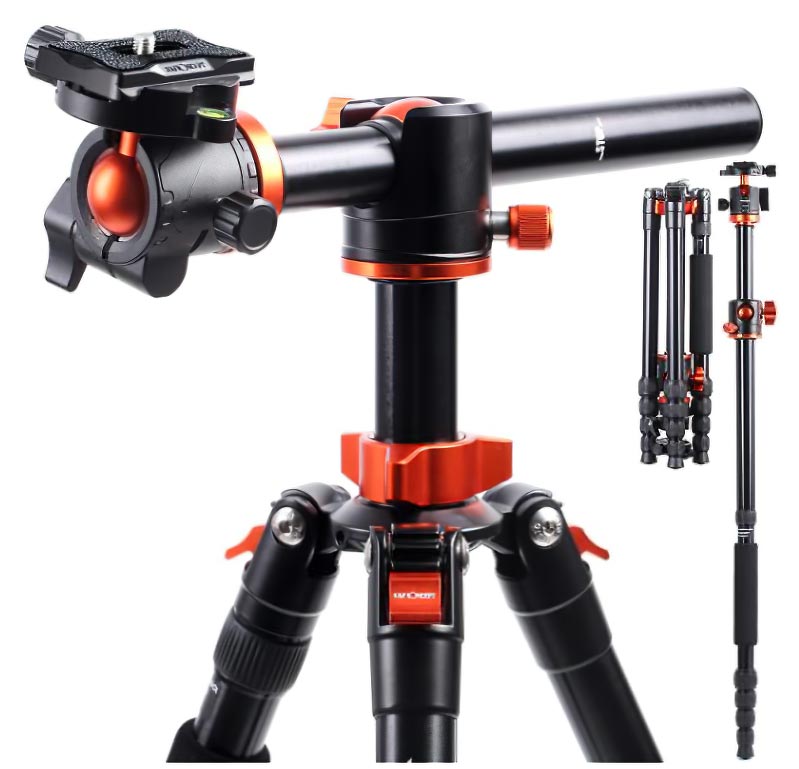
For more budget friendly tripods including aluminium and carbon fibre you really cannot beat K&F. I use this model the KF09 aluminium 170cm. It has centre column which rotates horizontally and it can be reversed making it great for getting low.
I use it for macro fungi images in the woods and use additional clamps to fit lights. For around £100 including the ball head it is very good value. Check out the carbon models too for something lighter.
L BRACKETS
For me personally an L Bracket is essential. They replace a standard tripod plate with an L shaped Arca Swiss compatible bracket making composition for portrait orientation much faster. I shoot many images in portrait, I’m fond of how a viewer’s eye can be drawn into in image this way. It is always such a faff altering a ball-head and even more so a three-way head, and it means the camera is off the tripod centre of gravity, not a good idea. Composition is maintained with only minimum adjustments needed between landscape and portrait too. And I have had a dropped camera saved by an L Bracket more times than I like to admit.
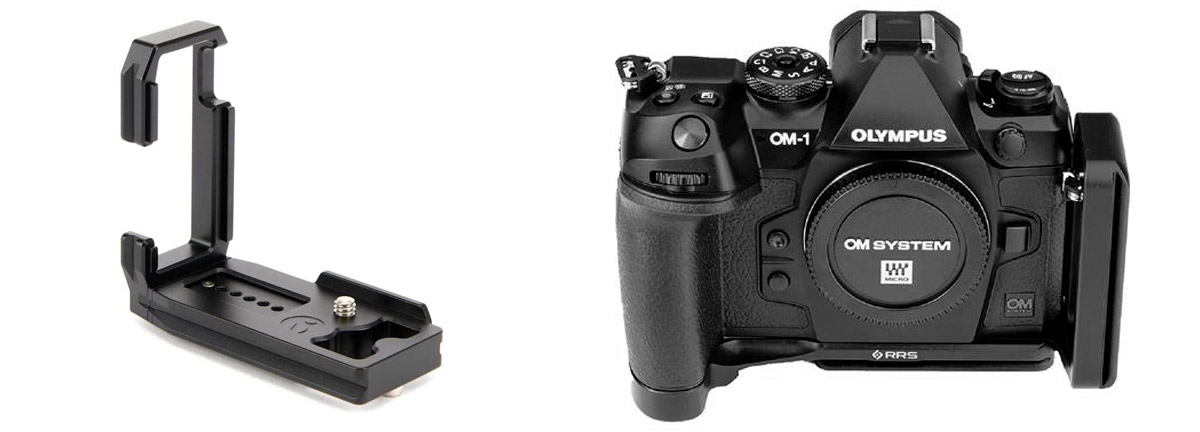
Manufacturers were so slow producing brackets for the EM1-MK3, it took China over 18 months. As such I bought the RRS plate which was superb, but so it should be for $200. It’s just an L-bracket right? Yes but it was so well engineered, so much so that you could just feel the attention to detail. Cheap generic L brackets are always terrible, they are just an L, have no lips or locations pins and just rely on some rubber on the base to prevent slipping. They always creep, especially with a lens like the 12-100 and you’ll be constantly tightening the tripod bush screw.
It was the same with the OM-1, nothing available at all other than generic rubbish. Probably 12 months after the OM1 release RRS finally produced a bracket, closely followed by Three Legged Thing. I ended up adapting one from Amazon before this, see below.
THREE LEGGED THING – OLLIE
The ‘Ollie’ is not bad, priced around £100, it is available in black, metallic green and the horrible TLT bright orange. They do like their tripods in bright metallic greens, blues and oranges, supposedly representing the landscape. Just black or grey for me thanks. The Ollie is more compact and it has a lip on the front to prevent movement by cradling the camera body. The vertical L section can be extended out if needed, although I have never needed to, the cable release socket is on the other side of the camera. What I personally do not like is that it is a short bracket, I like a full length bracket so my pinkie finger can also rest under it, and it doesn’t sit well if placed on a flat surface. A minor point, it may suit you.
REALLY RIGHT STUFF
The very very best L Bracket made for the EM1-MKIII was the Really Right Stuff bracket. It was so well engineered, it fitted perfectly and felt perfect with rounded edges just where they were needed, and more importantly absolutely no movement, not like generic L Brackets.
RRS have released their bracket for the OM1 which will also fit the OM1-MKII. There are lips on the base following the camera body meaning it fits perfectly with absolutely no movement. The ‘L’ has been moved forwards to give access to ports and allow the screen to be opened. It cannot be fully articulated, no more so or less than any other, although it can be extended out as with the TLT Ollie. The L section does not have a cut out as most do (it houses a concealed Allen key), which has consequences; The Three Legged Thing bracket allows the screen to be opened and tilted to around 45 degrees, but will go flat for direct viewing from above, the RRS bracket will allow around the same tilt but cannot be positioned flat because there is no cut-out in the L section. Which you prefer is personal choice. But the RRS is $175 and only available direct from their American website or B & H. If you’re in Europe you may find one with Photospecialists who sometimes have stock. I do not have one, my adapted Amazon bracket is still going strong and I will do another as my OM1 is now a backup.
DIY ADAPTED BRACKET
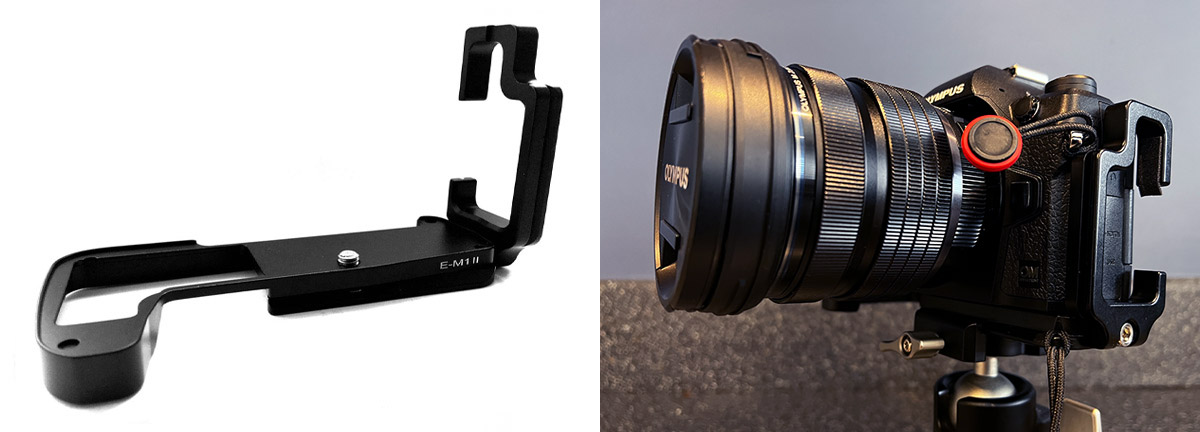
I ended up adapting a bracket for my OM1 having a need for one and being frustrated with the lack of options. The first image is a cheap Amazon bracket for the E-M1 MII which almost fits. The thin metal bar obstructs the battery door a small amount, so I cut it off with a hack saw. The lips do not fit the body because the OM-1 is slightly bigger but it is aluminium so they were no trouble to remove with a file. I also fitted a pin to locate into the hole on the camera base where the external battery grip pin locates to prevent twisting, and added some non-slip neoprene to the base for the camera to sit on. I added a strip the the L opening to protect the screen which came off so a dab of super-glue sorted that out. A coat of black spray paint and I’m quite happy with it. If you want to have a go there’s a link for it below or search EM-1 MK3 L Bracket.
You will find more details of how I produced this in one of my Blog Posts.
LONG LENS PALM PADS
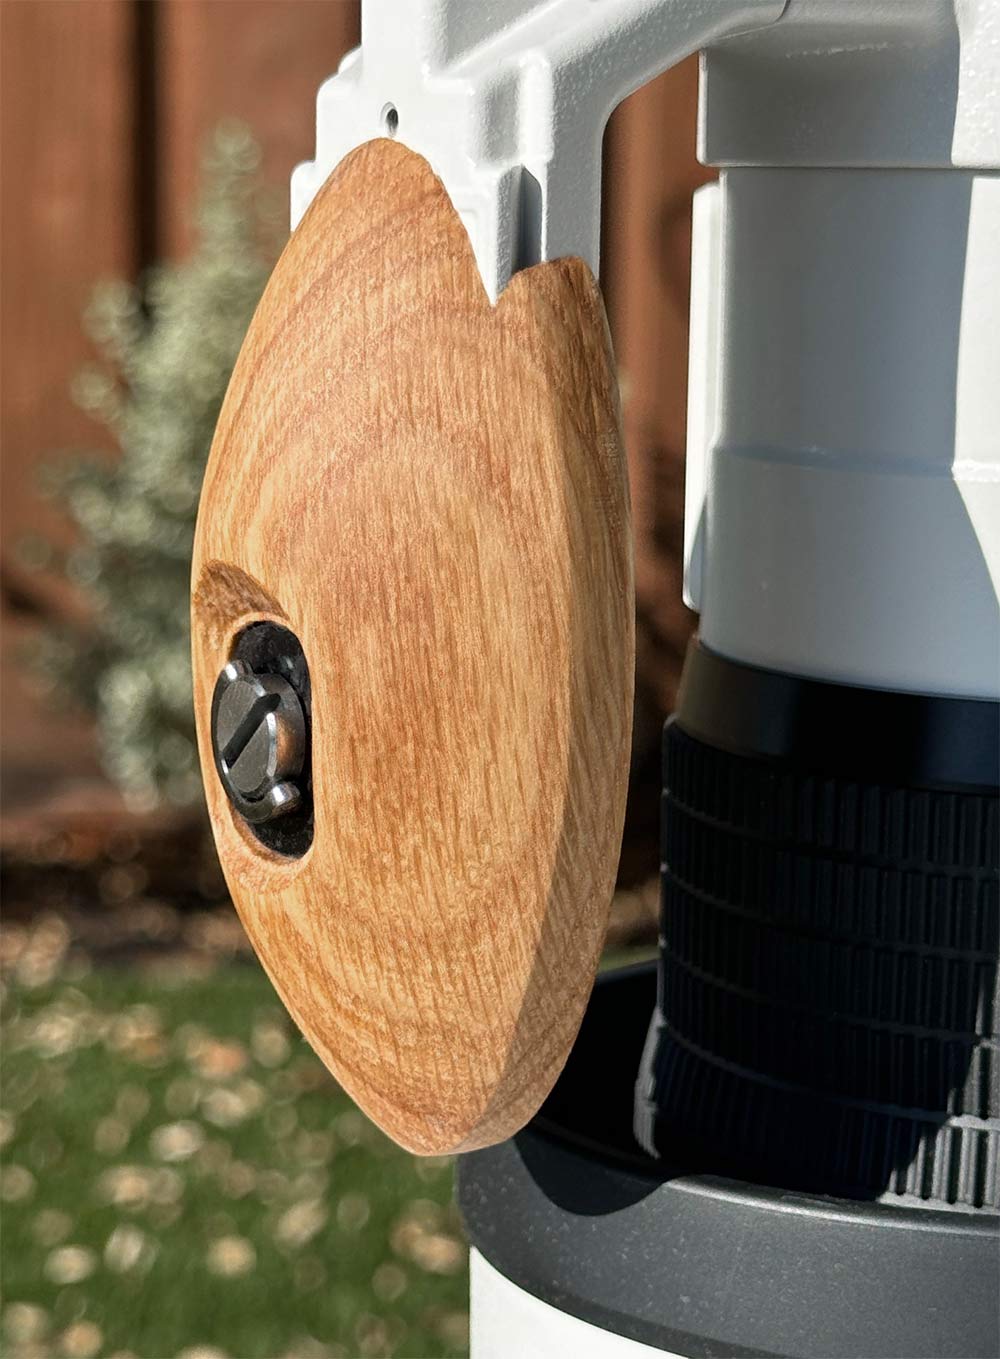
Produced by The Secret SignWriter in the UK, these are absolutely genius for long lens users. They help when hand holding long lenses being shaped ergonomically to fit comfortably in the palm of your hand. It also makes using the zoom and focus rings much more comfortable to operate.
Sanded smooth and finished with a natural wood oil finish to protect it, they also have a tripod bush screw for easy removal and a protective insert for strength.
The wood is hardwood, typically oak which makes it strong, and warmer to hold than steel or alloy, important for those cold winter days. And they make carrying easier with the foot being extended. I have one on my 100-400 and 300mm f4.
Available for all Olympus/OM System long lenses including the 40-150 Pro, 150-400 Pro, 300mm Pro, 100-400mm, and 150-600mm
Priced at £49 + shipping, they can also be sent overseas.
Contact The Secret SignWiter for more details below:
FILTERS
If you studied my website it will be no surprise that I use Nisi filters being an Ambassador and a stockist, and you will find a great deal of information about them on the relevant pages. But what are the benefit of using filters? Filters are used for two main purposes, balancing exposure and lengthening exposure.
1) NISI V7 FILTER HOLDER
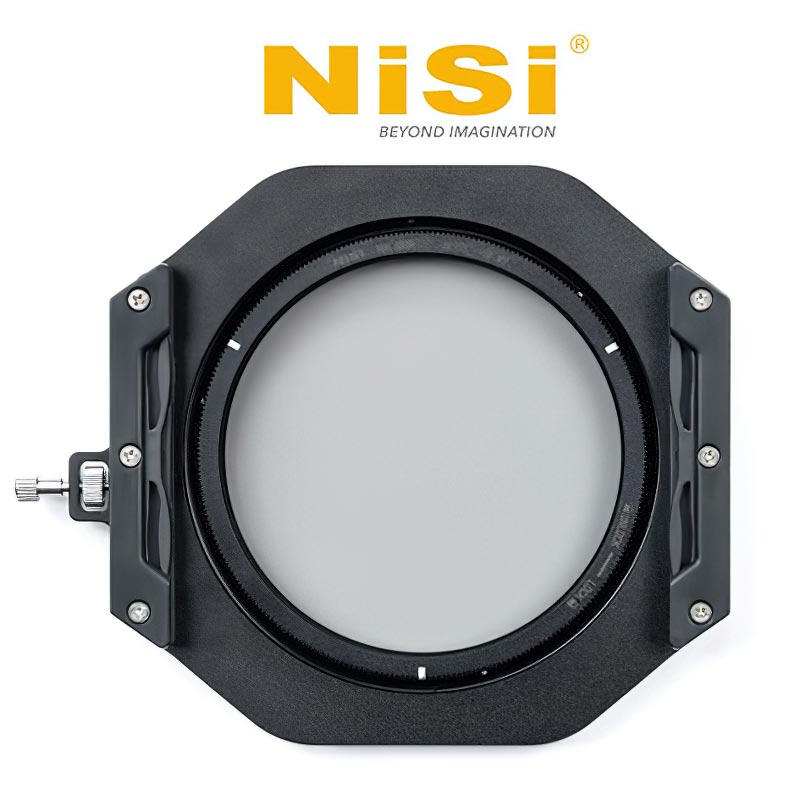
Comprising an adapter ring and step rings on the rear for different lens sizes the V7 includes a 100mm filter frame and a polariser. Polarisers are essential for landscape photography to remove reflected light from foliage and water, and for saturating colour although care must be used with wide lenses. Although some other filter sizes are available such as 75mm they will not suit wide lenses such as the 8-25 so you are better to use 100mm. The V7 is a great piece of equipment, and whilst circular filters are also available with less bulk you cannot use graduated filters. More flexibility is provided with a slot in system.
2) ND FILTERS
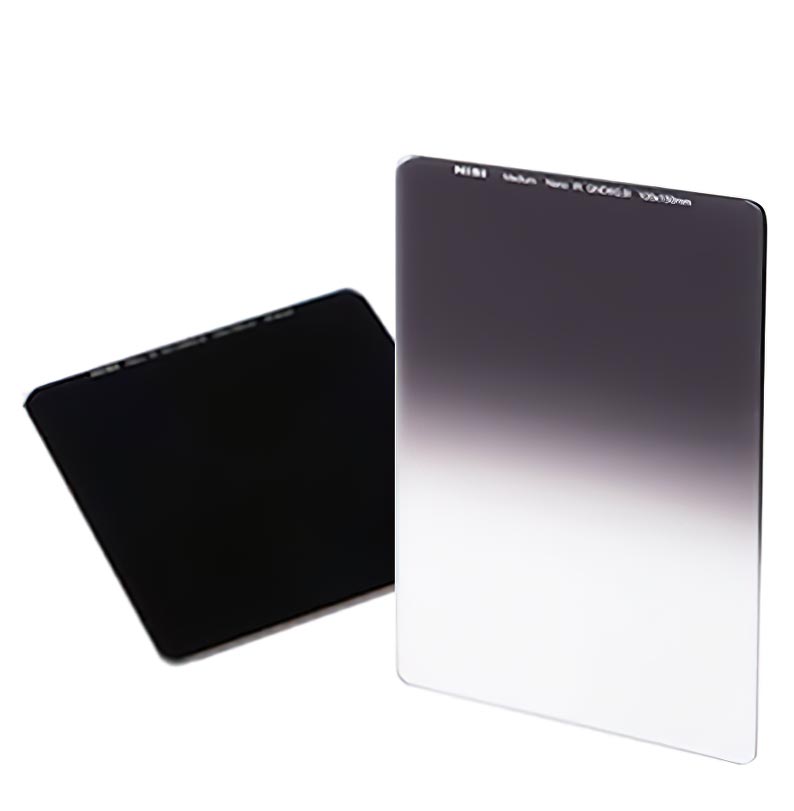
ND filters are a solid tone and reduce the light entering the lens, thus extending the shutter speed to create long exposure images. With the OM1-MKII having up to 7 stops built in a 10 stop is useful to have for longer exposures. A 3 or 6 stop is also useful to extend the built in ND, use an external 3 stop with the built in ND’s but remember when using Live ND the maximum shutter speed is 60 seconds.
3) GRADUATED FILTERS
A graduated filter will bring the exposure of bright skies down enabling the camera to better capture the dynamic range in a scene. At the same time as reducing the brightness of a sky the ground will also reveal more detail because the camera is not being dazzled, just as graduated sunglasses help us see the ground in front of use. Graduated filters are available in different strengths for 1 to 5 stops and different graduations, soft, hard, medium and reverse. The most useful filter to have I think is a 3 stop Medium Graduated, it will serve you well for just about all scenes and a kit of other filters such as a soft can be added as and when needed.
RELEASES & TRIGGERS
You need a cable release, you really do, no two ways about it. Many functions such as Long Exposures and High Res may suffer from vibration when pressing the shutter manually, and some features such as bracketing do not allow the Self Timer to be enabled. The Olympus I.O. App can be used to pair with your mobile and it works very well, not only can you download images but you also get a Live View too.
OLYMPUS IMAGE SHARE
The Olympus Image Share App can be used as a wireless trigger and for downloading images to your mobile too. It does the job very well indeed and the best feature is a live view of your camera screen on your mobile. Great if you want to be in the shot. It does have limitations, it only uses standard shooting modes and it cannot access your Custom Modes, connection distance can also be sketchy sometimes. It is worth trying though.
WIRED CABLE RELEASES
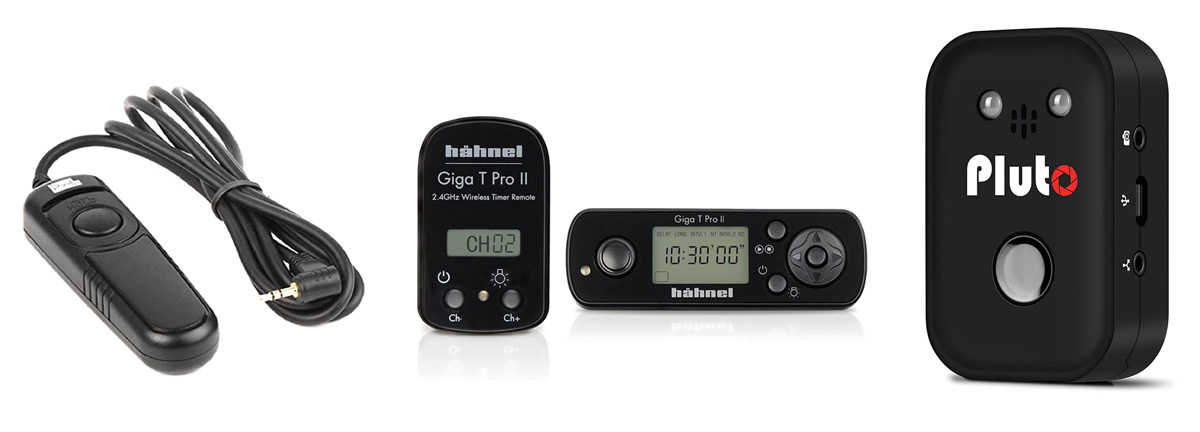
My preferred option, the image is a Pixel remote from Amazon costing £8. Wired releases are nothing more than a cable with an electrical contact button on the end so I see no reason to pay £50 for OEM releases. I tend to buy two at a time because I lose them. There are plenty available with different brand names, just look for any with a Canon E3 jack which is the same as Olympus.
HANNEL GIGA T PRO II
The Giga T Pro has been around a long time now and is half the price it used to be, around £30. Although the built in intervalometer is a little redundant because the OM1 also has it built in (Interval Shooting), it is a very reliable and easy to set up wireless trigger with a long range too of 100m. The transmitter fits to the hot-shoe and connects to the camera via an E3 cable. The cable can be connected to the trigger to use as a standard wired release. Other cables are available for different cameras too. I have one of these but prefer the Pluto because only one battery is needed.
PLUTO WIRELESS TRIGGER
The king of wireless triggers, and compatible with a huge range of cameras via suitable cables. The transmitter unit is rechargeable which is very convenient. Operated by a phone App there is little this little thing cannot do which makes it ideal to use for multiple cameras. Some features may be a little redundant because of the OM1 features, like shooting lightning with Live Comp. But this device will trigger a shot when it sees lightning. It can bracket up to 19 shots, shoot star trails, trigger a shot by sound, or by the included laser beam, run time-lapses and a host of other features, too many to mention. It isn’t cheap at around £120.
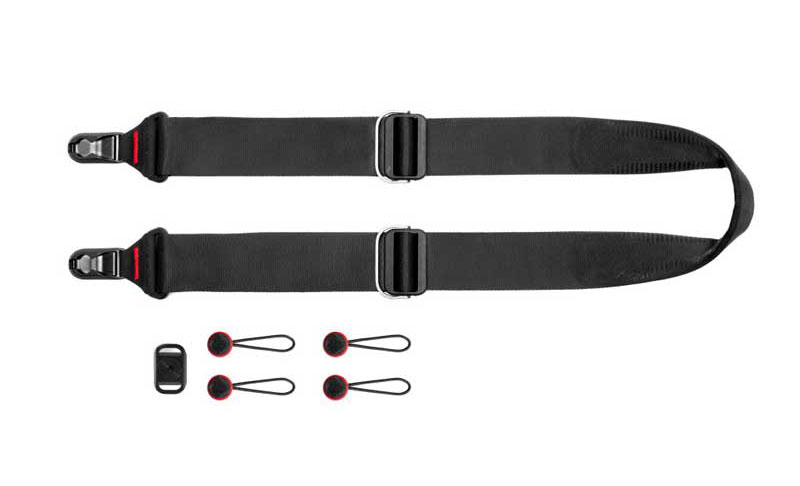
PEAK DESIGN CAMERA STRAP
Camera straps are a pain when using a tripod, they get in the way and flap about in the wind causing vibration.
The Peak Design Slide strap solves that with strong anchors that are attached to the body (they are strong!) and a strap with very easy to use quick release buckles.
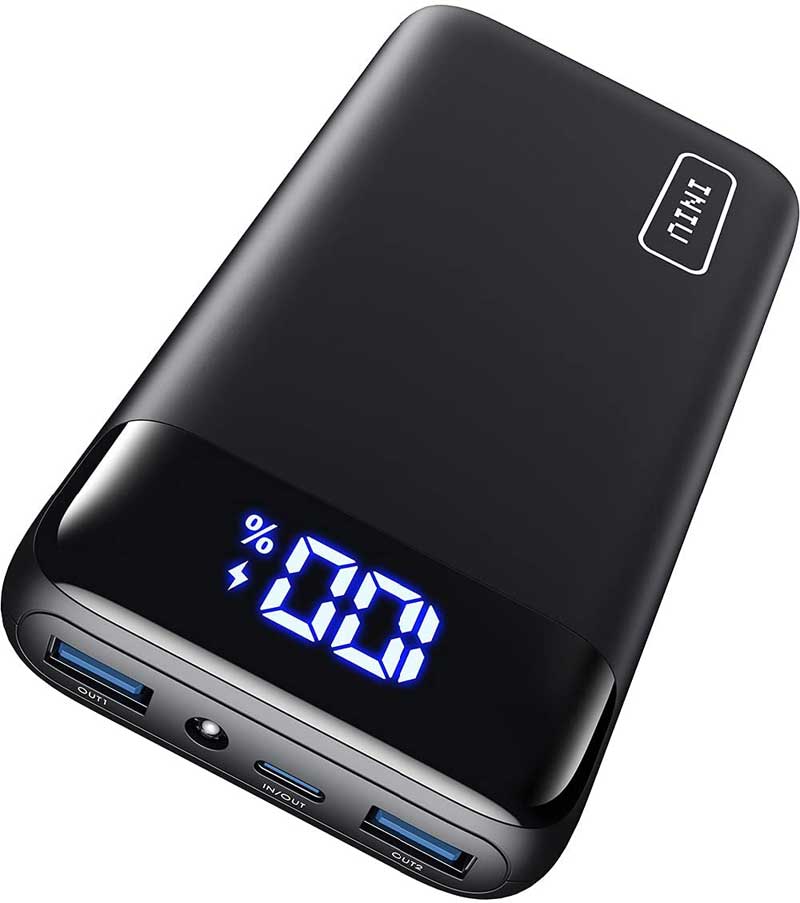
INIU POWER BANK
With the OM-1 having the ability to charge batteries in camera a power bank is a no brainer. The INIU is compact, 20,000mAh and 22.5w meaning it has plenty of capacity with x2 USB 3 and 1 USB C ports. The USB C port is in/out so it can be charged and also charge from the same port. An LCD screen shows power and it also has a torch too.
Power packs must be PD to power the camera which this is. There is another version which charges slightly faster but is lower capacity at 10,000mAh, so this is the better option. It charged a depleted OM-1 battery in camera in about 2.5hrs, around the same as a mains charger.
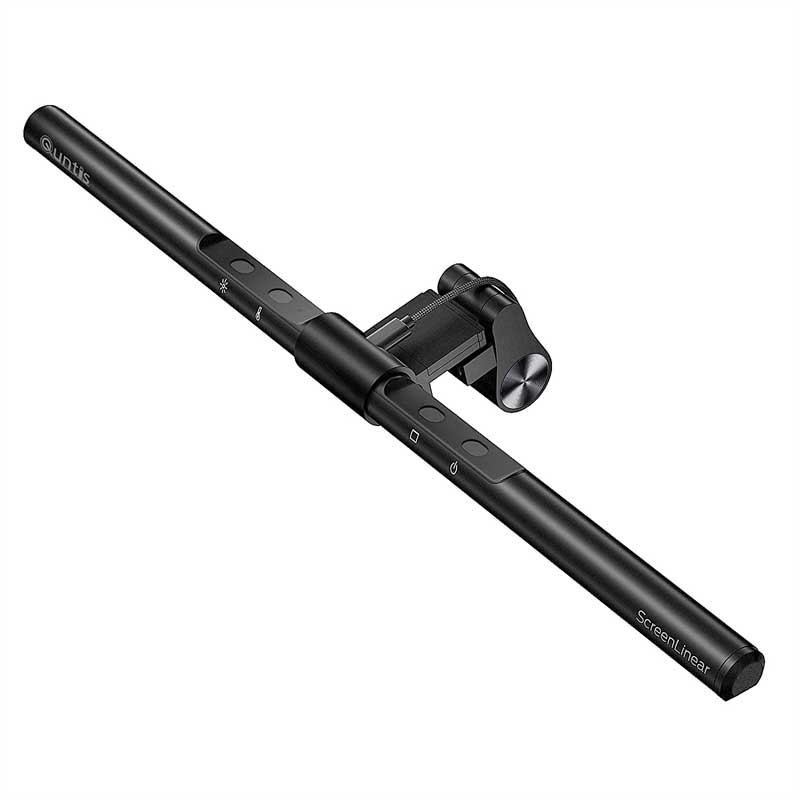
QUNTIS MONITOR LAMP
The best accessory I’ve ever bought for my computer, a 40cm LED strip light. It simply clamps to the top of my monitor and with directional light it illuminates the desk and not the screen so I can see my keyboard.
It uses no power being LED, it has manual brightness or auto sensors and colour temperature can be adjusted. At around £30 its also £100 less than the very similar BenQ monitor light.
TORCHES
It goes without saying being able to see at night is essential, these are my two favourite accessories for being able to light my way when out after dark.
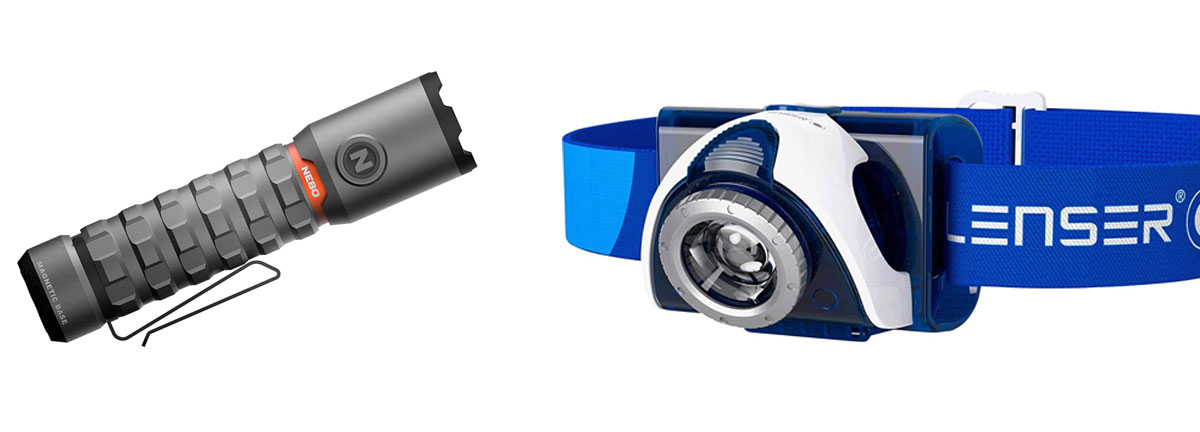
NEBO TORCHY 2K
My favourite LED torch because its so small at only 10cm long, and it packs power at 2000 lumens. Brightness is adjustable but it doesn’t have adjustable beam which for me doesn’t matter, I want something small to fit in a pocket without bulk with a wide bright beam. This does the job well and it is rechargeable so no more messing with batteries. Also weather sealed and still worked when I dropped it in a stream.
LED LENSER HEAD TORCH
LED and rechargeable, handy when you have a battery pack, it will last quite a few uses between charges and my experience is it has never lost charge when not in use. At 220 lumens its very bright for a head torch, light weight and has an adjustable beam width, adjustable angle and also adjustable brightness levels. For night photography it also has a red light mode to reduce glare. All pretty much standard these days but Lensers do have a good build quality and reputation.
GORILLAPOD & PANEL LIGHT
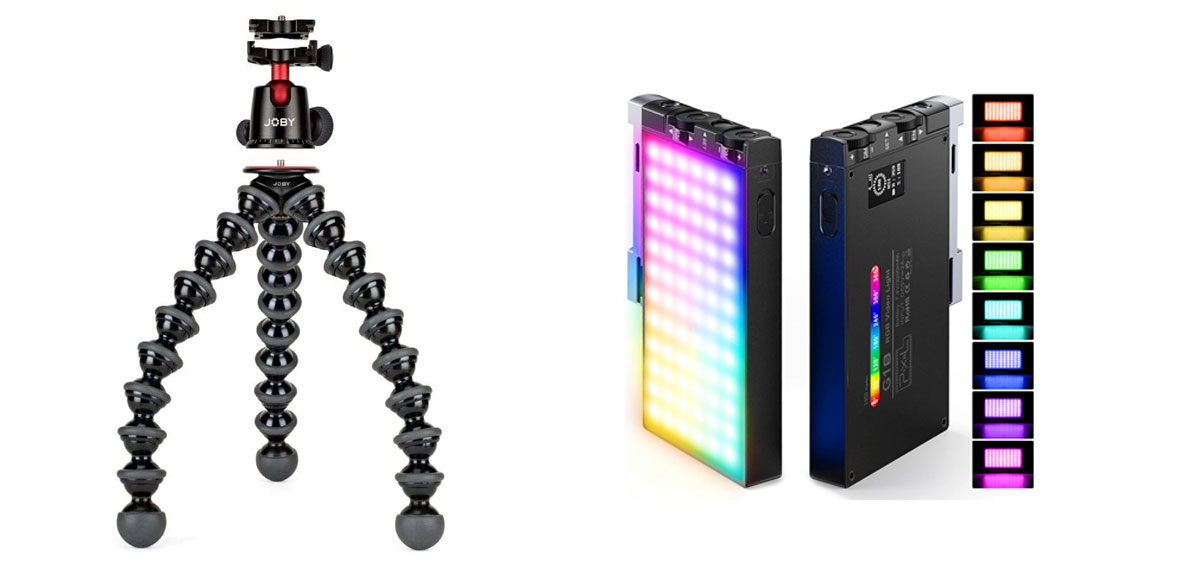
JOBY GORILLAPOD 5K
There are quite a few bendy tripods available these days but the Joby is still the original and best. Useful because they are so small and light and easily fit into a backpack side pocket, and they are great for getting really low or for wrapping around tree trunks, walls and fences etc. I use one for my ‘Glowing Shrooms’ series of images when I want an additional support for a panel light, torch or Macro lights like the Adaptalux below.
The 1K is around £30, the 3K £50 but it is worth going for the 5K for £20 more because the ball-head is far better and it is Arca Swiss so a standard tripod plate will fit as will an L Bracket. I had the 3K but ended up buying the ball-head separately for the Arca compatibility.
PIXEL G1S LED PANEL LIGHT
The Pixel Panel Light is a small unit about the same size as a mobile phone at 12cm. I use one when I want to add a little background ambient light to Macro images (‘Glowing Shrooms’ again). Along with white it has a full spectrum of RBG colours and brightness can be adjusted from the full 1500 lux to 0. The best feature of they unit is the build, with an aluminium case, easy to use wheel controls and a metal swivel base for angling it out. It also has a hotshot adapter and a small ball-head for more flexibility.
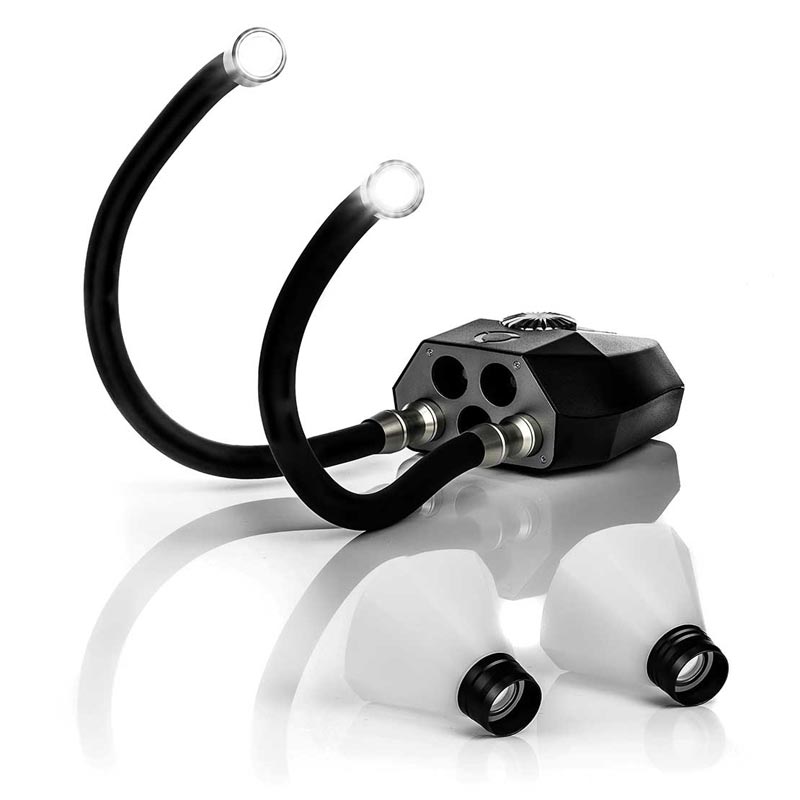
ADAPTALUX MACRO LIGHTS
What on earth, you are probably thinking. A friend recommended these to me and they are genius for lighting Macro Images. Instead of being behind the camera trying to run focus bracketing and stretching trying to hand hold a torch (see ‘Focus Bracketing’) or using a clamp, these bendy LED arms are powered by a control unit and can accept up to 5 arms. The whole set is controlled by a phone app which juts uses Bluetooth so doesn’t rely on a mobile signal.
They are not cheap at around £300 for a kit with two lights, but they are worth the investment. A tripod bush on the base allows it to be tripod mounted or used on a GorillaPod.
MACRO
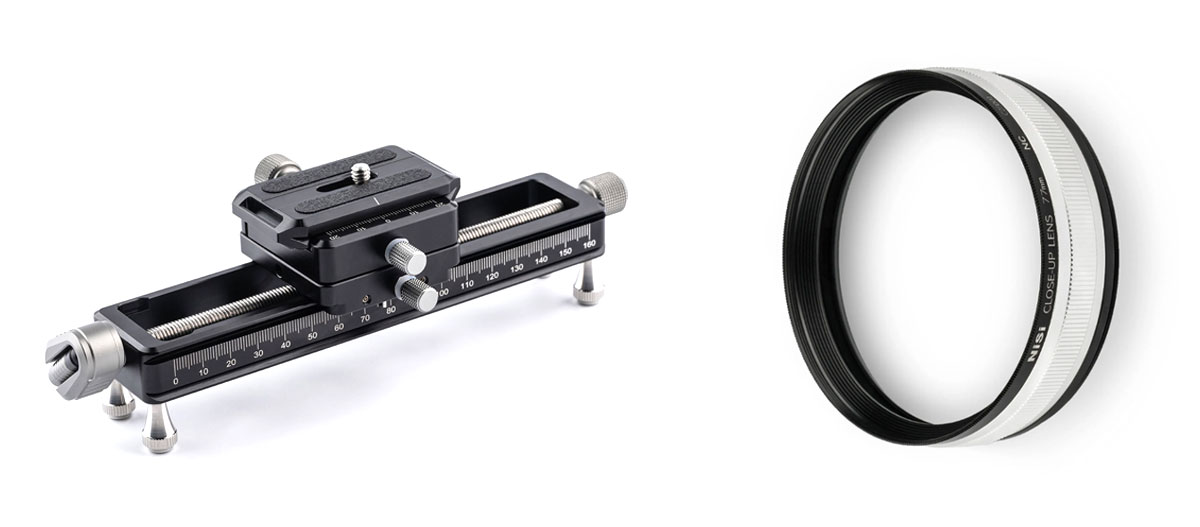
NISI MACRO RAIL
Incredibly well engineered the NiSi Macro Rail solves the problem of making minute adjustments in Macro photography. An Arca Swiss compatible rail with removable table top feet has a tripod plate which can be adjusted by a mechanical screw thread. Make minute adjustments with the rear thumb screw or for bigger adjustments pull the lever out to wind the mechanism faster. The top plate can also be rotated a full 360 degrees.
NISI CLOSE UP LENS
The Nisi Close Up Lens does exactly as the name suggests, giving a closer focus distance to longer lenses which do not focus very close and can provide up to almost 1:1 magnification. Designed for longer lenses such as 70-200mm (Full Frame) it is suitable for the Olympus 12-100 at around 50mm and over, and lenses longer than this. With a 77mm rear thread a 67 and 72mm step ring are also included and other threads can be accommodated with a suitable step up ring.
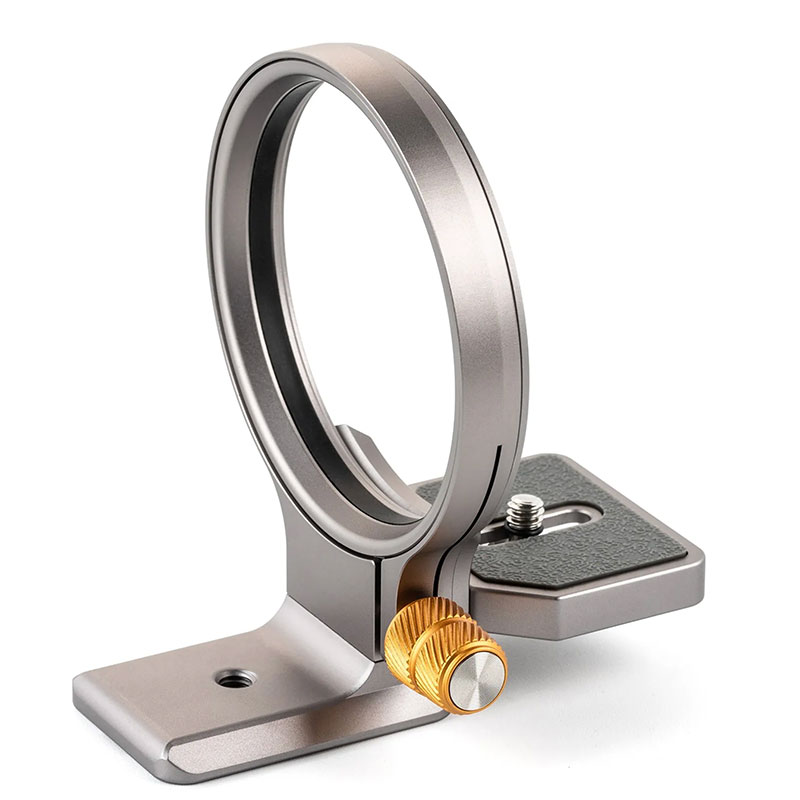
NISI WIZARD ROTATING BRACKET
Released in 2023, the Wizard is an L Bracket that rotates. Once fitted to the camera and then fitted to a tripod it can be rotated by releasing the knob. It is a little too cumbersome I find to replace an L Bracket and have it on all the time, but where it really wins is for getting close to the ground for Macro. Instead of reversing a column and having the camera upside down you can rotate it to the right way up! Genius. I’ve found it very useful. At around £70 it isn’t cheap but it will not break the bank either. There are a number available now, including Leofoto and Ulanzi, so search online.
BRACKETS
I’ve included these simply because it’s surprising how many people ask what I use when they see me posting Behind The Scenes images on Social Media.
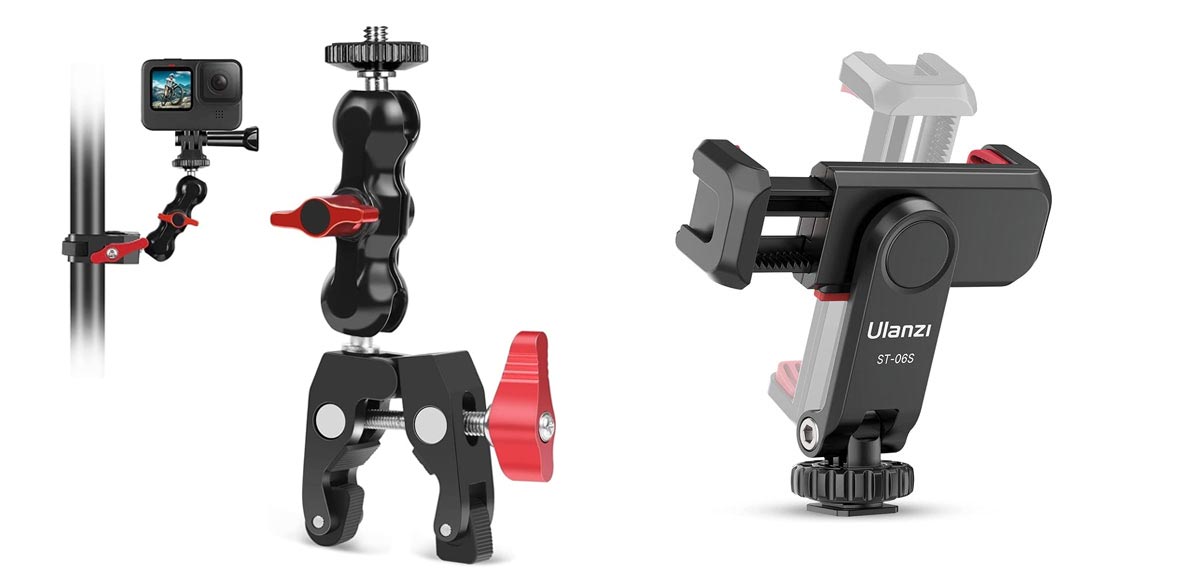
PULUZ ARTICULATED BRACKET
It’s amazing just how useful these are. With a 1/4 thread at the top anything that has a tripod bush on the base can be mounted to it and then clamped to anything. I used it for mounting a Go-Pro to the tripod leg for doing a time-lapse. I soon realised Go-Pros are not for me, for doing a Behind The Scenes or a time-lapse my phone does the job, so I just mount the phone bracket to it. As long as I’m steady I can carry on using the camera too because I’m not using the hot-shoe. It has also been useful to attach a manual light to a tripod leg too. The odd looking arm is actually a bonus because it will angle in just about any direction. It can be extended with longer arms too and for around £15 it really is a great accessory.
ULANZI PHONE BRACKET
Useful for hands free video or time-lapses from a mobile there are so many of these around now. I do like this one because it is light but strong, it rotates and the base is articulated so I can angle it. The base has a hot-shoe foot but also a 1/4 tripod bush so I can mount it to anything, the Puluz bracket or even a standard tripod plate.
CONCLUSION
I hope these have been useful. These are all items I actually use and whilst there are many more it would be hard to show everything. Please not that items with an Amazon link are affiliate links so if you wish to purchase anything I may just earn enough credit for a gift voucher and it is appreciated.
