
FOCUS BRACKETING
Bracketing images with narrow Depth of Field
How to bracket focus when Depth of Field is a challenge.
Focus Bracketing is the method of taking multiple frames for one image to increase Depth of Field, usually for Macro photography when shooting extremely close with a Macro lens and a wide aperture. Of course it can be applied to Landscape photography too.
This section explores the different techniques and when to consider using them. It is a complicated one so put the kettle on first.
FOCUS BRACKETING / STACKING
There are two modes for Focus Bracketing both serving different purposes.
Focus Stacking (Menu Camera 2>1.Computational Modes) shoots a number of frames depending on the settings you choose and merges them into one image. The merged image is unfortunately just a Jpeg, but it can be useful and some people prefer to just use Jpeg. Frames taken to produce the final stacked image will be Raw if selected. Part of the stacked image is lost, around 7%, due to the stacked image being cropped. Stacking produces superb results and the Jpeg can suffice sometimes, it is largely personal choice.
Focus Bracketing (Menu Camera 2>3.Bracketing) on the other hand produces the images according to your settings and will save Raw images but not stacked into one and need stacking afterwards. Usually associated with Macro Photography, Focus Bracketing is a technique useful to Landscape Photography too.
In the Depth of Field Section you will discover Hyperfocal Distances and learn how using a super wide lens DoF is rarely an issue. Using longer focal lengths it is easy to run into problems. Thankfully bracketing for focus is easy enough to do, albeit more work. Check your Hyperfocal Distances, take a test shot and then decide what you need to do.
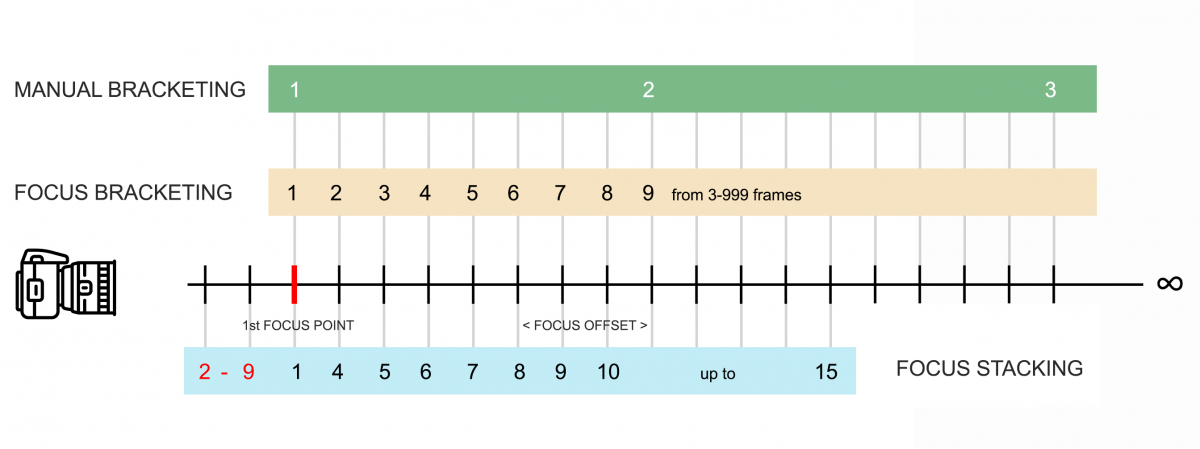
OLYMPUS/OM SYSTEM FOCUS BRACKETING AND MANUAL BRACKETING
2-9 Number of frames in front of 1st Focus Point when Focus Stacking, depending on Focus Differential or Offset, Aperture and number of frames. Thanks to Kim Holst for providing the details.
Number of frames is obviously the number of frames you thing are required for the image.
Focus Offset, or differential, is the step or distance the focus moves between each frame and is user selected.
MANUAL BRACKETING
All frames Raw/Jpeg according to your settings.
You choose number of frames and where to focus. ‘Focus Offset’ or distance between is your choice and the order of frames is under your control.
Will require blending afterwards.
FOCUS BRACKETING
All frames Raw/Jpeg according to your settings.
User selected 3-999 frames, with Focus Offset user selected from 1-10. Frames will recede from the first focus point back into the scene.
Will require blending afterwards.
FOCUS STACKING
Stacked image Jpeg only. Other frames Raw/Jpeg according to your settings.
User selected 3-15 frames with Focus Offset user selected from 1-10. Two frames are captured in front of the 1st focus point in the order show.
In-camera stacked image is Jpeg only* and will cropped by approx 7% but will have the original pixel dimensions. Raws are saved but not stacked.
WHICH MODE TO USE
You’re already puzzled right? Too many options and it isn’t clear which to use. Let’s pause for thought and take a look at what these actually mean.
MANUAL BRACKETING – You’ve determined where to focus either by using Hyperfocal Distances or just taking a test frame, and you know sharpness front to back will be hard. You’re using a wide lens but focussing on an object just cm’s in front, or using a longer focal length so DoF is challenged. Manually Focus Bracketing means you decide how many frames you need, 2, 3 maybe more. You also decide where to focus for each frame, you are choosing the ‘Focus Offset’ yourself. For General Landscape images when I really have to bracket focus I tend to use this method more. As it will be no more than 2-3 images it is quick to do. Simply take a shot, move the focus point and take another, then blend in Photoshop, checking Auto Alignment if necessary.
IN CAMERA FOCUS BRACKETING – Automated in-camera, set the number of frames and the Focus Offset, the camera will enter Continuous Silent and you’re good to go. The challenge is to make sure the Focus Offset is correct, or how far apart the focus will shift to cover the foreground and background. There are no set parameters for this, considering all the variables it would be impossible to have a chart expressing distances, offsets, frames, etc, so it’s guesswork and experience. It’s useful for Landscape work when your viewpoint is low and a challenge to keep moving the focus point, in which case I would set a wide number of frames, 8-10 and an offset of around 4. This should cover everything just in case and not all frames need to be used. As 999 frames can be set it’s fairly obvious this is well suited to Macro.
IN CAMERA FOCUS STACKING – As above, set the frames, the Offset and the camera will take all the shots in Continuous Silent. There are some major differences to Focus Bracketing, the main being that the camera will produce an in-camera stacked image of all the frames but in Jpeg only and the available frames are reduced to 15 as a result (all the frames are saved according to your settings Raw and/or Jpeg). The image is also cropped slightly to around 7% of the original (meaning part of the frame is lost) but is then resampled back up to the original pixel size, and at the time of shooting a frame will show as a guide for composition. This is to account for ‘Focus Breathing’ where as the focus is moved objects in the scene can change in size due to the field of view changing, which is more apparent in very close focus subjects such as Macro. It’s the reason it is important to ‘align’ image sets in post before they are blended. As Focus Stacking produces a stacked image a visible frame shows how the image will be cropped to remove the edges that will not align successfully. With Focus Bracketing there is no such guide frame so you need to be aware of it when composing your scene.
Note that a number of images in total is limited to 15, with a number receding from the focus point and a number in front of the focus point with the second shot stepping forwards first. The number of images in front of the focus point, 2-9, depends on the focus differential or how wide the ‘steps’ are, aperture and total frames set. Focus Stacking can be a little unpredictable, trial and error are needed and experience will guide you. The biggest challenge and the one most people do find difficult is working out what will be in focus when the frames step forwards, and where the initial focus should be.
THE ANSWER
It is personal preference and what you feel comfortable with. However if you just need an extra frame or two for a Landscape the DIY Manual Bracketing gives control and freedom. Focus Bracketing is useful when you’re in a tight spot and it’s awkward getting to the screen/EVF to focus such as really low angle, and it is the mode I find best for macro.
Focus Stacking is great if you need a stacked Jpeg. The focus is moved forwards by a number of steps, which can be useful if you can focus into the scene enough to allow for it, but get it wrong and you risk focus ghosting. This is when frames are completely out of focus but still get merged into the final image, resulting in halos around subjects. This is less of a problem when merging the Raws manually because the frames can simply be eliminated. Where I find In Camera Stacking most useful is for checking my Focus Offset to see if I’m close, or way off.
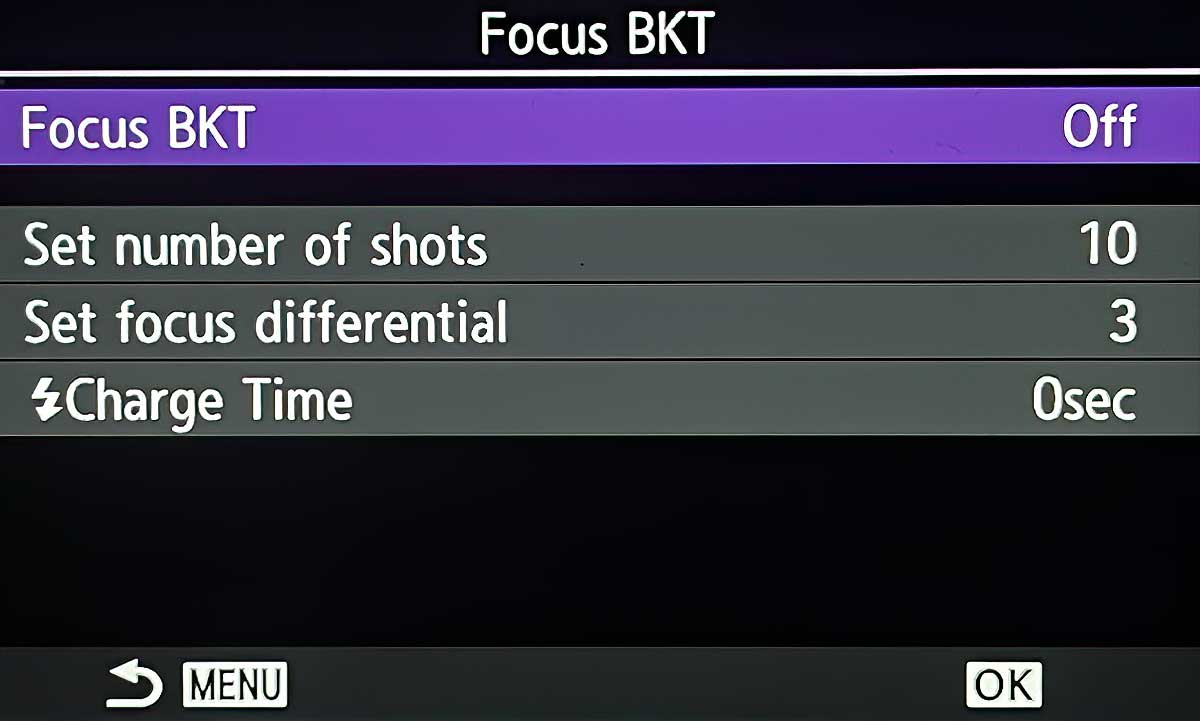
Focus Stacking Menu Camera2> 1.Computational>Focus Stacking
Focus Bracketing Menu Camera2> 3.Bracketing>Focus BKT
Each mode has an identical screen.
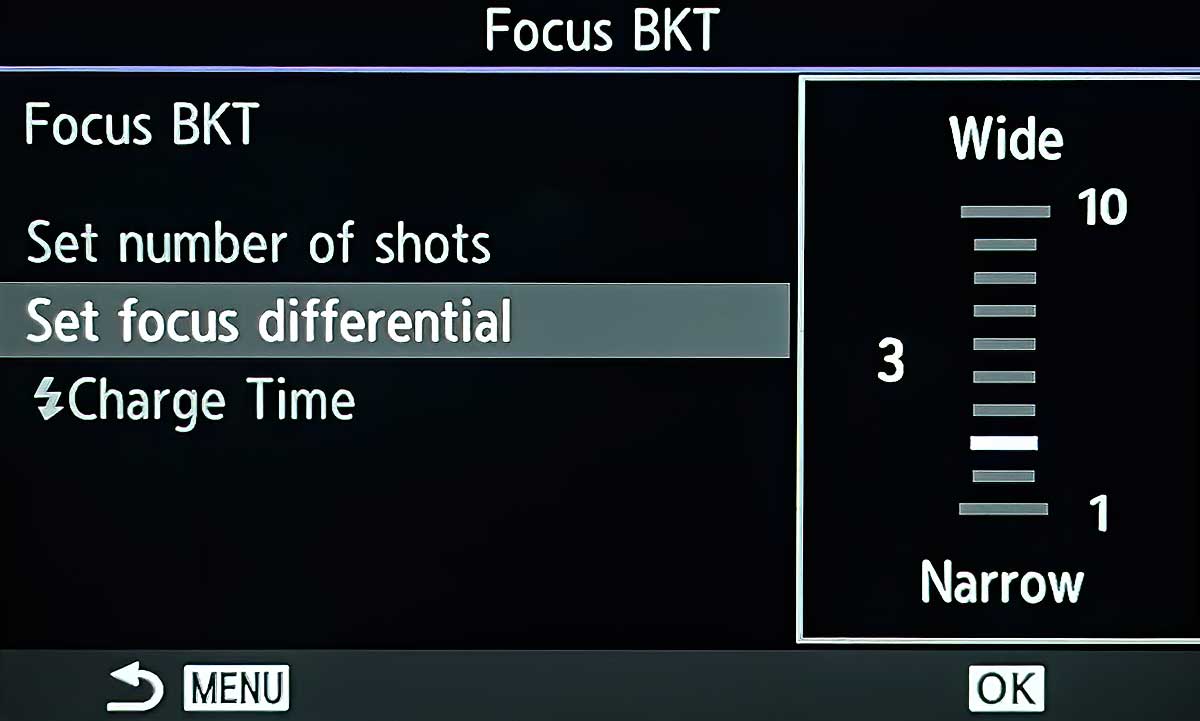
Enter each menu to set number of shots and differential.
Charge Time allows a delay if using a flash.
Remember to press ‘OK’ to set choices.
IN-CAMERA FOCUS BRACKETING-LANDSCAPES
Focus Bracketing is generally associated with Macro photography when you absolutely must bracket the focus to obtain the depth, otherwise it’s just too shallow. There are times when it is required in landscape photography too. We can use the In-camera Focus Bracketing or do it manually.
CHALLENGING POSITIONS
Both of the images below were a challenge to shoot because of the awkward location. Using the 12-100 pro lens and the 8-25mm so close to the subject, around 20-30cm in each, I know I am going to have to focus stack. In the first image, taken about waist height, I was using a GorillaPod flexible tripod but there is a tree trunk on the right, I could not open the screen fully and could not get to the viewfinder. In the second image the camera was on the forest floor, propped up in position on a dead branch and padded with a bunch of leaves. I could not get the GorillaPod in the position I wanted so I decided to wing it and use Focus Bracketing to avoid disturbing the camera because shutter speeds were quite slow.
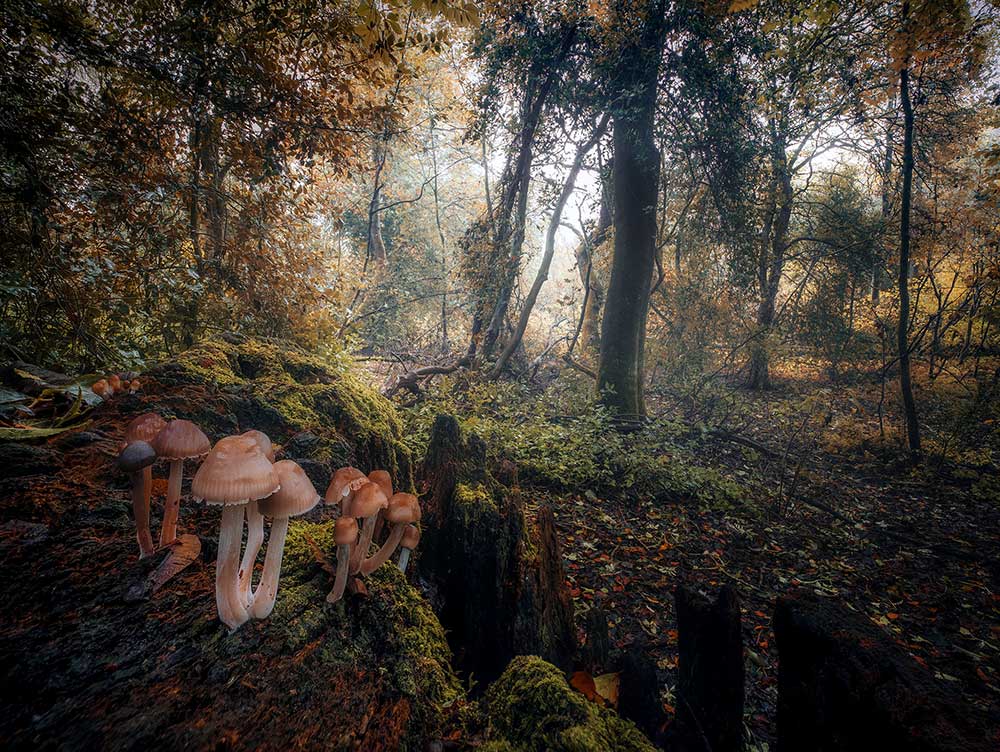
8-25 Pro @8mm ISO200 f5.6 1/4s Exp x3 shots stacked
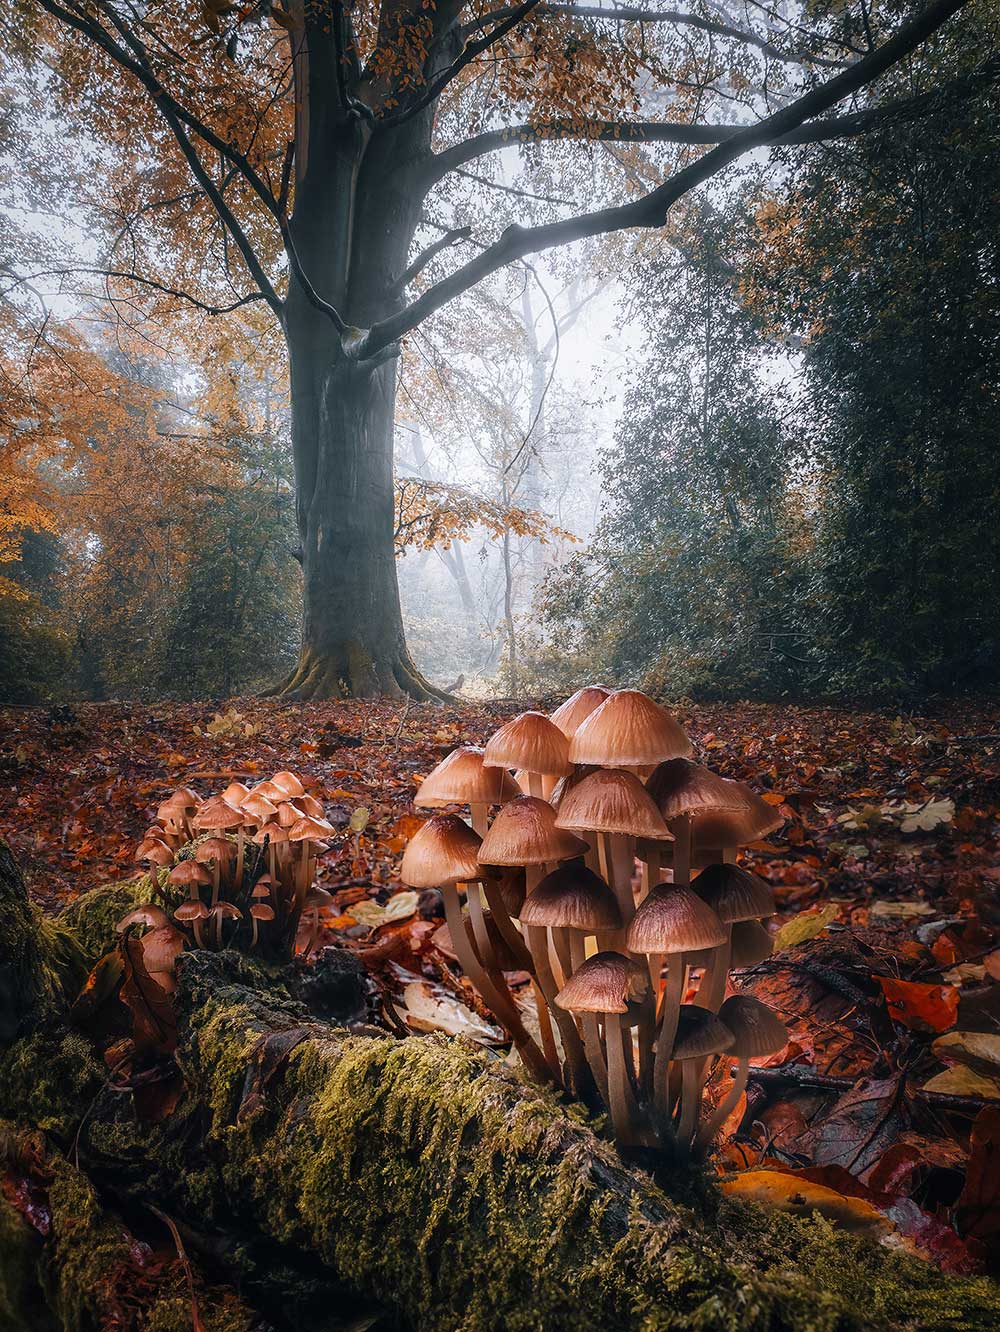
12-100 Pro @12mm ISO200 f5.6 1/8s Exp x3 shots stacked.
TECHNIQUE
Determining how many shots are needed and the step between each one is the challenge. I can forget about infinity because the background is actually quite close, so I need to have the foreground and the close background sharp.
Sharpness and ‘in-focus’ are two terms very misused; there was a light mist so there is little sharpness as such, but it still has to be in focus.
A test shot was done for a more convenient composition where I could access the screen, then checked. 5 frames with a narrow step of 3 seemed fine. I can then set the settings, recompose the frame, set the focus point and use a cable release so I do not disturb the camera trying to move the focus point again.
Inspecting the images it turned out I only needed three of the frames for each.
In Photoshop I stacked them in a layer (Lightroom>Edit In>PS As Layers), Auto Aligned them, then Auto Blend them. A few checks to make sure I do not have to correct any mis-alignment and then flatten it. Job done.
FOCUS BRACKETING MANUALLY
This example will use bracketing focus manually and also bending manually, both useful skills to understand. Focus bracketing manually is so easy, all it involves is taking a shot, moving the focus point and taking it again.
THE SIMPLE WAY
When using a longer lens DoF can be a real challenge especially when foreground interest is very close. But it need not be a difficult task if your’e prepared and aware of what needs to be done to collect the images for stacking. See the Section Depth of Field for more information.
In-Camera Focus Bracketing is an incredible feature to use and I think best used for Macro when quite a large set of images are needed with very small shifts in focus. For Landscape work it is also useful, although sometimes it’s easy to do it manually. The approach here is to keep things simple and we will also explore how to blend very simply too.
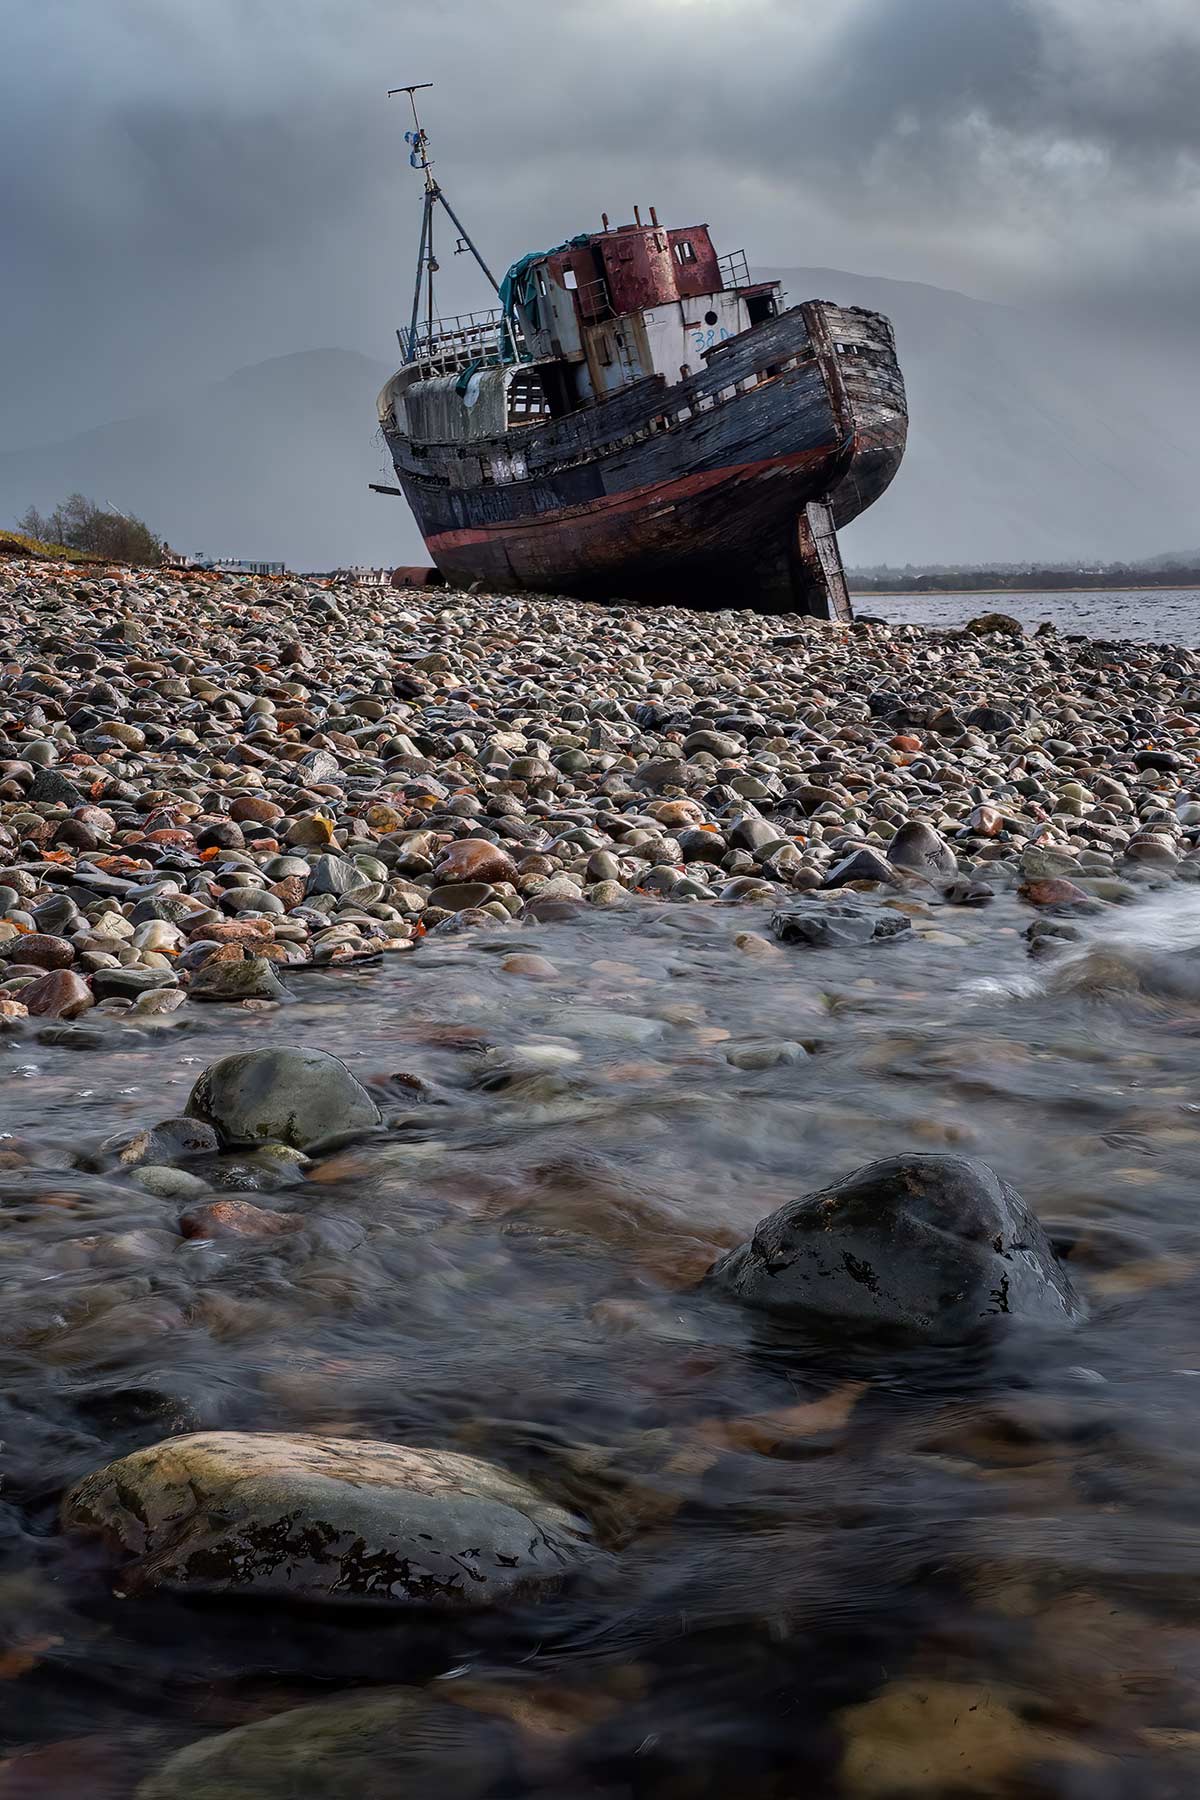
12-100 Pro @21mm ISO200 f8 1/15s Exp x2 shots
STEP 1 – THE SHOTS
I knew using the 12-100mm Pro at 21mm and using a foreground so close to the lens DoF would be a challenge. Once you get to know DoF and your lenses you just know.
Checking Photopills at time of writing this tells me that at f8 the Hyperfocal Distance is 3.68m with a closest focus from half that, 1.84m to Infinity. So I was right just by instinct. The closest rock was around 80cm, too close. Being honest it doesn’t take a genius to work that out, just a test shot would prove it.
I’d need to be using f20 to get the DoF, but then Diffraction will be an issue and detail will be soft, eliminating any gains in DoF. Given this information I know I have to focus stack.
Staying with F8 because the shutter speed at 1/15th second gives just what I want on the water, not sharp and not too soft, I can take a shot with focus on the second rock. DoF extended from the first rock to a few feet behind the water line, and forwards to include the first rock.
I could have opened the aperture a little more and used Live-ND to get the same shutter speed, but I’m not overly concerned about diffraction at f8. And I was getting wet.
Taking a second shot a few feet behind the water line will give me good DoF forwards to overlap the first image, and then all the way back to infinity. The background is soft therefore the only detail I need be concerned with is the far shore line.
All of this was done in the matter of a minute or two, being so low water was splashing the lens and my footing was precarious on sloping slippery rocks.
With the images complete I just have to merge them.
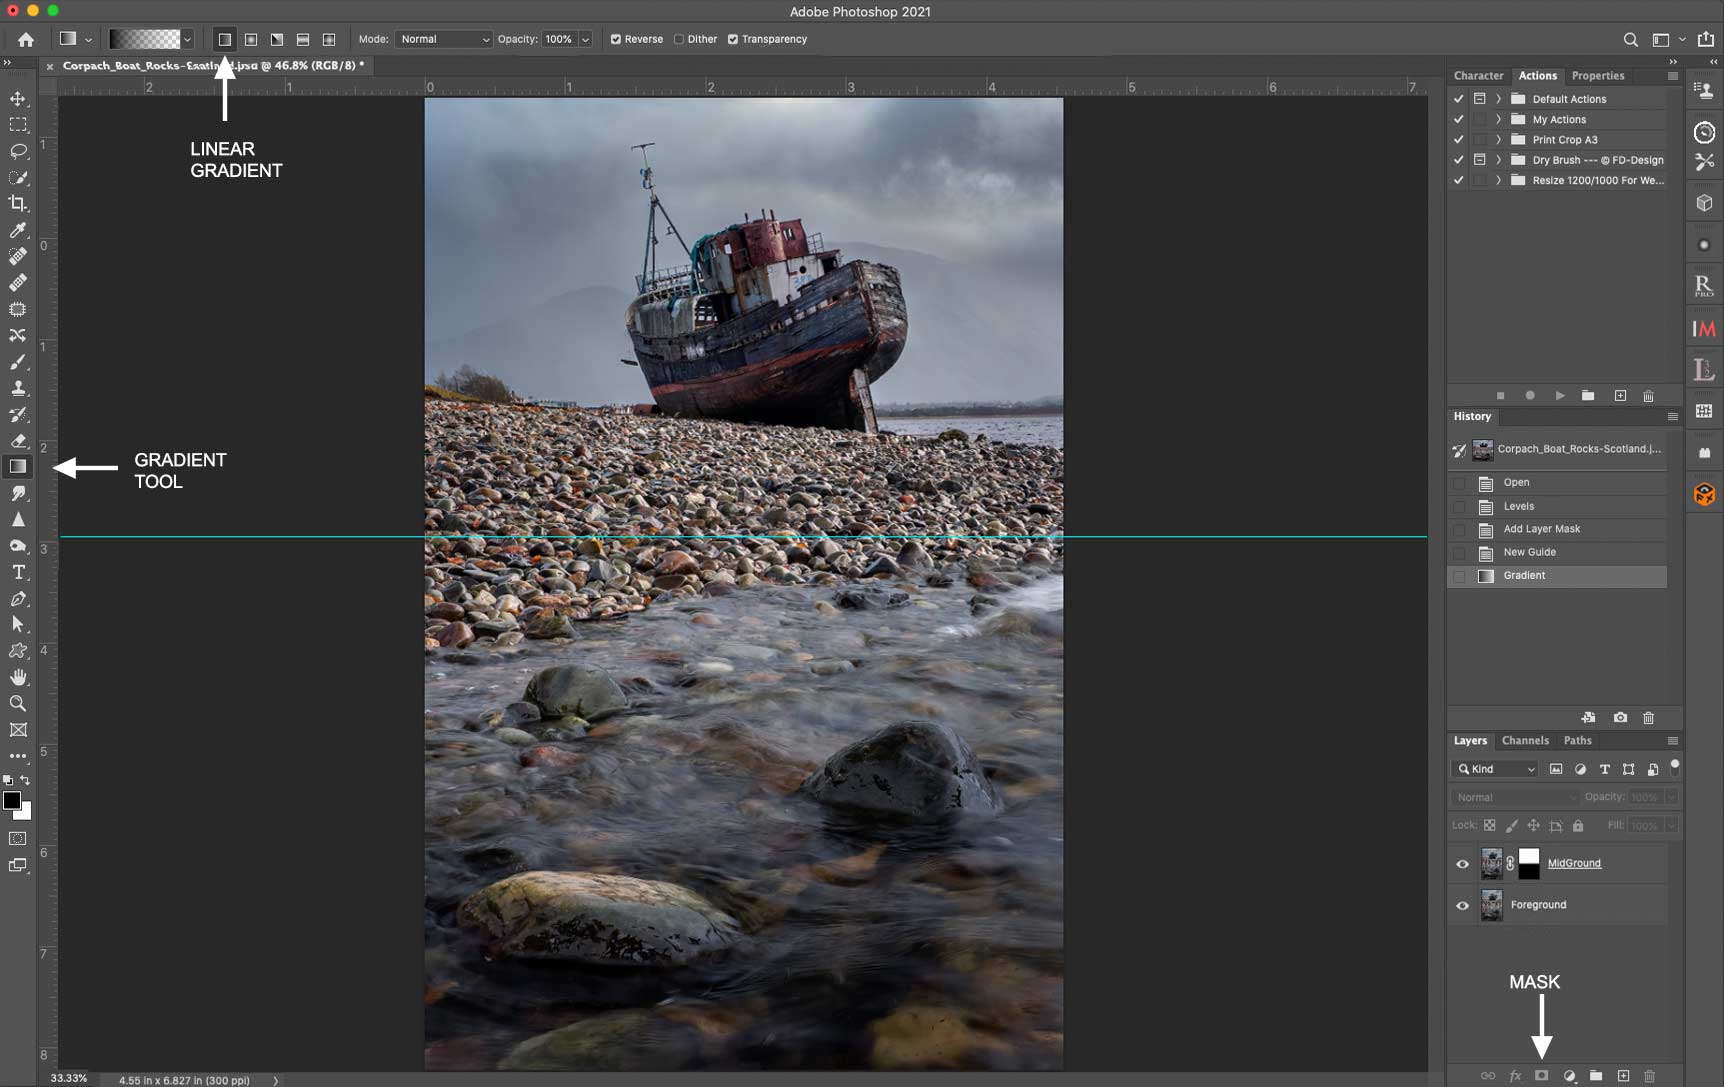
STEP 2 MANUAL BLENDING
We saw in ‘Bracketing’ how easy it is to blend images for exposure. We can use the same technique again, the only difference being the images have a different focus.
Open both images from LR as layers in PS. I have the sharp foreground as the first layer and the sharp background as the top layer. If for any reason your images are not aligned properly go to Edit>Auto Align (click the ‘eye’ off and on to hide the layer and see if there is any noticeable shift in alignment). As your focal point changes the field of view can be affected so it is important to double check. Clicking the Mask tool I could then just paint with the Paint Brush (with black) over the foreground to hide it and show the foreground from the image underneath. Instead to speed it up click the image thumbnail in the Layers panel (always make sure the layer you want to work on is selected by clicking it), make sure black is the foreground colour and click the Gradient Tool. A Gradient tool bar will show at the top, ensure Linear Gradient is select, then just click (hold down) and drag on the image. This is going to add a Gradient to the mask, as we know the DoF is around the water line click just behind it. I’ve shown a guide line where I start the graduation, all you need to do place it where you know there is overlap in the focus of the two layers.
With a Gradient added notice the top is white (visible) and the bottom is black (invisible) and the bottom layer is now showing through. Now just zoom in, check the focus and use the brush if you want to refine the mask. You have a great deal of control here by using the brush to pick out areas in white (visible) or black (invisible) in more complicated scenes. Now flatten the image (Layer>Flatten) and hit Save to save it back to LR for further work or save it to your hard drive with a new name.
CREATING SELECTIONS FOR MASKS
A general note about masks and creating selections. Most of the time Focus Bracketing in Landscapes is straight forward and creating selections is easy enough. In PS simply using the Quick Selection Tool which acts as a brush (Under Lasso) is good enough. You can add/subtract in the tool bar, in Selection expand, contract and feather it, even invert it. These give you great control over simple masking. Other methods are using Sky Select and Luminosity Masks.
These tools are expanded in Select>Select and Mask which allows you to show overlays, show a dark background, use more refined brush tools and have a little more control. The down side it can be time consuming although blending images for Landscapes should be quite straight forward with simple masks.
An App such as Topaz Masks is a dedicated app just for creating masks and separating elements of a scene, but at £99 it isn’t cheap. In the image above if I really needed to separate the boat along with the railings, the mast and all the intricate detail to blend into another focus bracketed background image (there is actually a mountain there but it was obscured by cloud), I would be better Auto Blending images rather than all the work of complex masks and selections.
PHOTOSHOP AUTO BLEND
Photoshop has it’s own blending tool for merging images, Edit>Auto Blend. It is very effective for blending focus bracketed image sets togther that are a little more complex and beyond simple masking. It is also useful for Macro when larger sets of images are required to be blended.
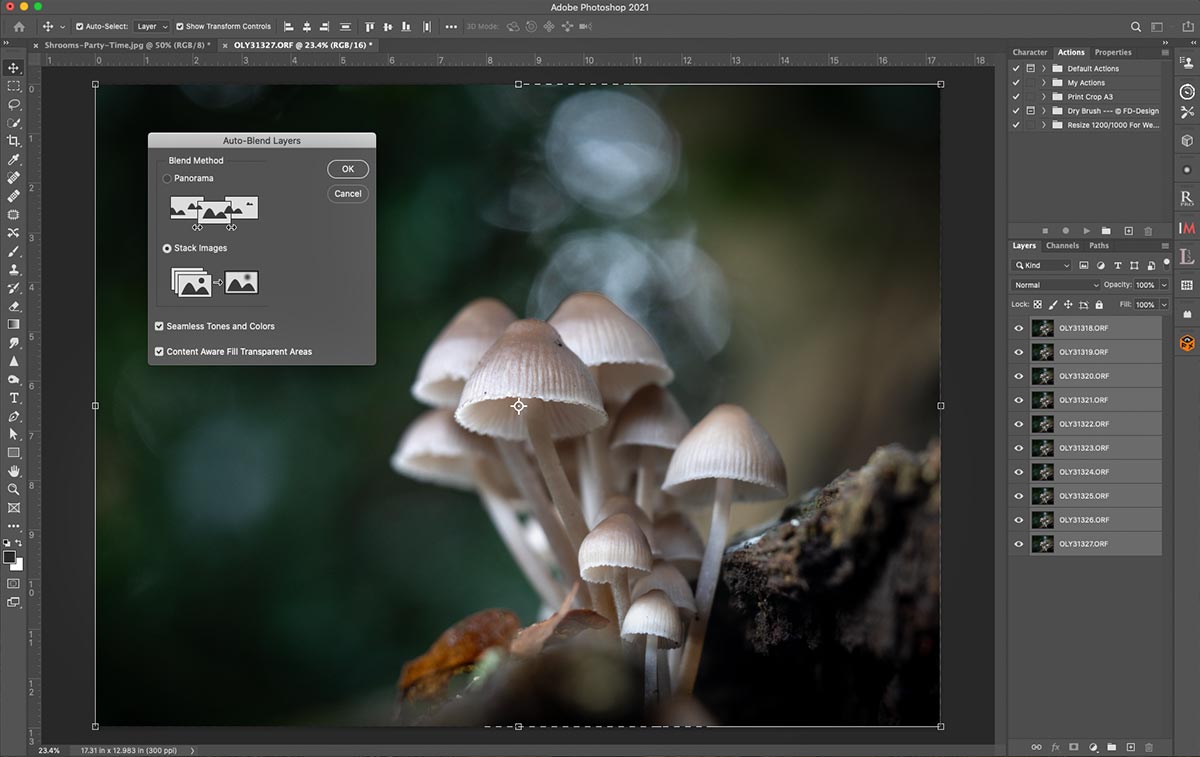
Just select the layered images then go to ‘Stack Images’ and select ‘Seamless Tones and Colours’. PS will analyse the images, apply masks so that only the in-focus areas show and then create a top layer of the images flattened into one. Just in case something goes wrong copy the layers first by selecting them and dragging all down to the ‘+’ icon, or just above the layers panel click ‘Create New Document’ to just make a copy of the whole document.
LUMINOSITY MASKS
There are of course even more ways to merge images and/or create masks. Luminosity Masks allow masks to be created from tones in an image, or to target parts of an image to apply processing such as reducing bright areas.
There are many Apps that can be used as plugins to PS, Lumenzia and Raya Pro just to mention two. I find Pro Panel (by John Weatherby) to be one the most useful and use it as a plugin to PS.
These are a little beyond the scope here, to find out more search online and watch a few tutorials to see how you can integrate Luminosity Masks.
ANOTHER SIMPLE EXAMPLE
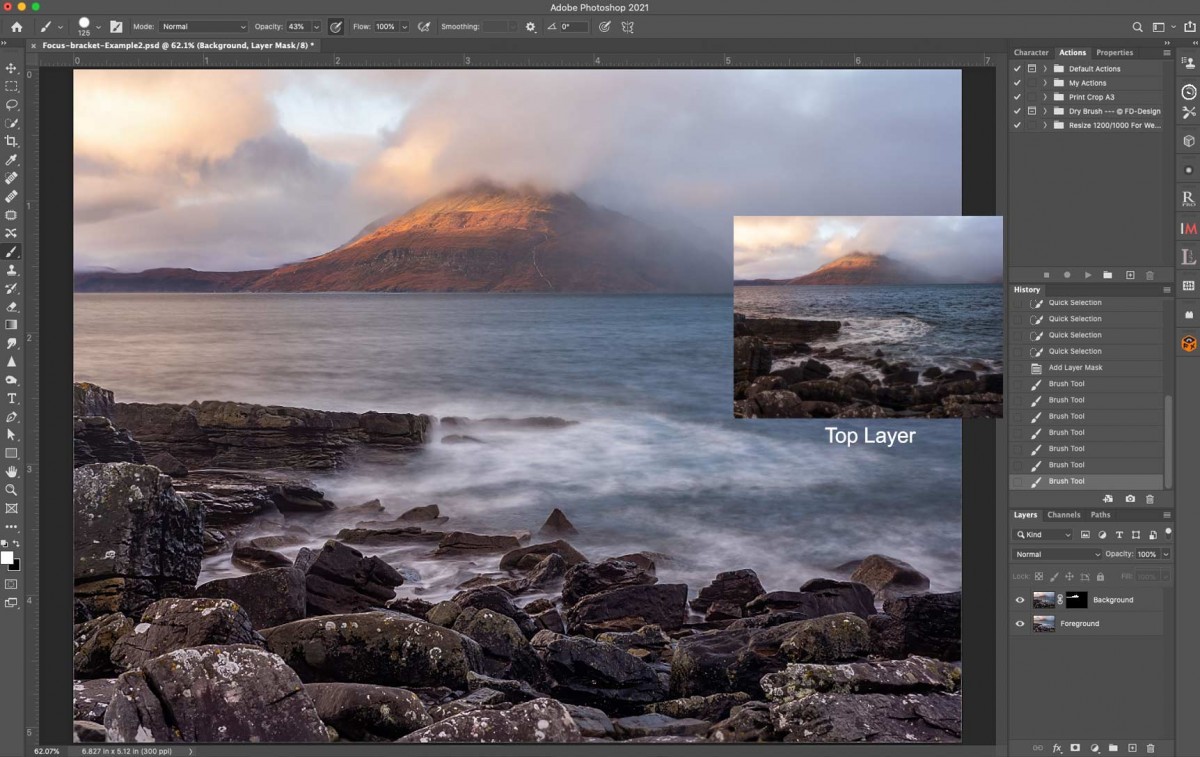
The image below is a good example of blending two focus stacked images and keeping it very simple. Taken with the Olympus 12-100mm at 40mm, f7.1 and a shutter speed of 6 seconds in Elgol, Isle of Skye. The background detail of the Black Cuillins was a little soft as the clouds started to part so another frame was taken with focus on the mountain. The In- Camera 5 stop ND was disabled and aperture opened up to f5.6, I didn’t need a slow shutter DoF just for this so I maximised the settings for sharpness.
Opening both images in PS, I made a selection over the mountain with the Quick Selection brush on the background, ensured the foreground pain colour is white and then clicked Mask. The background detail was showing with the rest of the frame hidden so it was blended into the main frame. Using the paint brush I could then go over the mask layer and make any refinements I need. Flatten and save and the job is done in less than a few minutes.
As a test I also tried Auto Blend. The problem here was the water was much sharper in the second image (Top layer) and the auto blended image tried to include parts of the sharper water. The clouds were not an issue because they ware barely moving. The lesson here is be careful blending images with movement, whilst Auto Blending is often more appropriate for larger sets of images being able to do simple blending by hand will give more control.
HAND HELD FOCUS STACKING
Don’t forget to try Focus Stacking hand-held
Don’t forget to try Focus Stacking hand-held. With the improvements to stabilisation it is even easier to get good shots.
Both of these images were taken with the 40-150 Pro wide open, with a narrow step of 2 and 6 images. They are just Jpeg images, however the ability to shoot quick grab shots whilst out and about is quite remarkable. And hand-held!
Not all lenses are compatible with in-camera focus stacking, nearly all the Pro lenses are but a few non-Pro are not. The current list is below, for update when new lenses are released check on the OM System website.
M.ZUIKO ED 30mm F3.5 MACRO
M.ZUIKO ED 60mm F2.8 MACRO
M.ZUIKO ED 90mm F3.5 MACRO
M.ZUIKO ED 12-40mm F2.8 PRO
M.ZUIKO ED 40-150mm F2.8 PRO
M.ZUIKO ED 7-14mm F2.8 PRO
M.ZUIKO ED 8mm F1.8 FISHEYE PRO
M.ZUIKO ED 8-25mm F4.0 PRO
M.ZUIKO ED 300mm F4.0 IS PRO
M.ZUIKO ED 12-100mm F4.0 IS PRO
M.ZUIKO ED 12-45mm F4.0 PRO
M.ZUIKO ED 100-400mm F5.0-6.4 IS
M.ZUIKO ED 150-600mm F5-6.3 IS
M.ZUIKO ED 150-400mm F4.5 TC1.25X IS PRO
Both 1.4 and x2 TELECONVERTERS
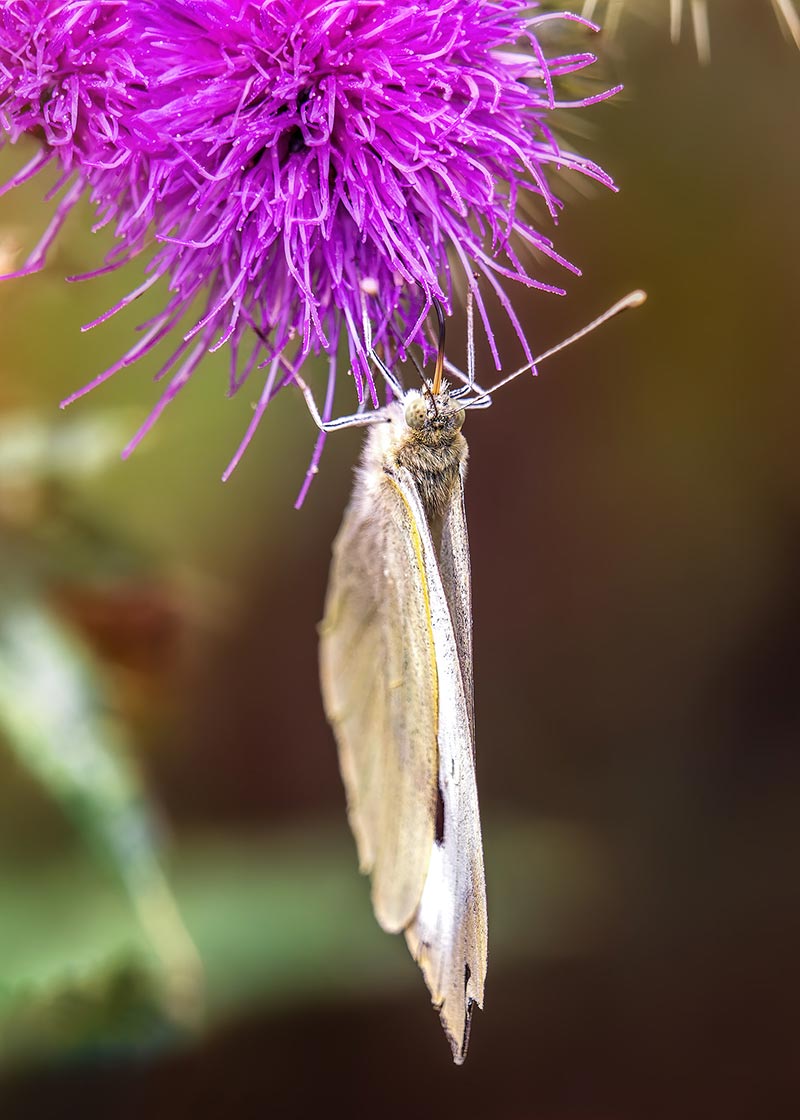
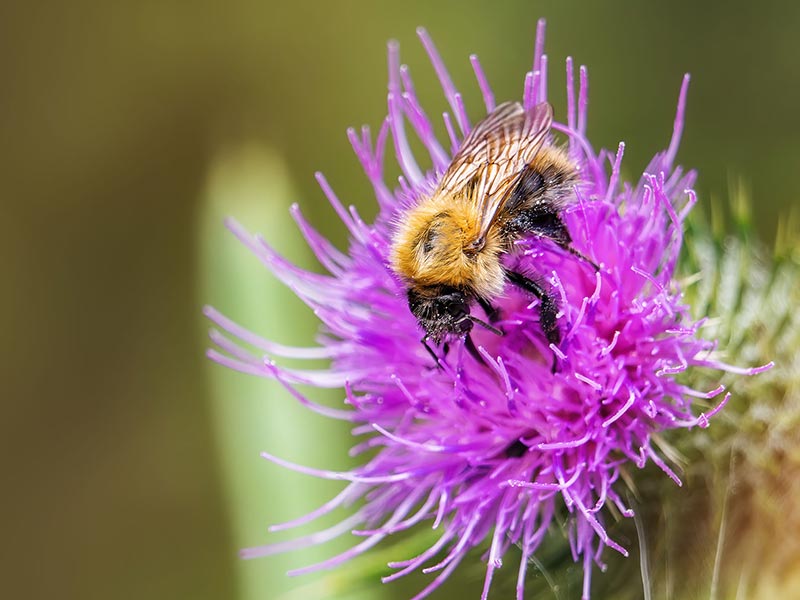
FOCUS BRACKETING-MACRO
In this example we will explore using the in-camera Focus Bracketing and also blending images automatically in Photoshop.
“SHROOMS”
I don’t do a great deal of Macro photography, but during Covid like many I was forced to try new things, and I discovered I had a fondness for Fungi macro photography. I started an ongoing series, ‘Shrooms’ which surprisingly combined well the technicalities of Macro and the freedom or artistic expression.
The premise behind the images is Fungi at twilight which glow as though communicating each other. By manipulating artificial light, and being creative with processing and colour balance I could produce images that look a little ethereal, whilst at the same time being very challenging and technical to capture. Let’s see how I went about an example and how the images were focus bracketed.
I don’t want to dwell on gear too much here (check the ‘Gear’ Section) but suffice to say you’d need a tripod that can go very low, centre columns that flip horizontally work well such as with Vanguard and K&F, a cable release, a high power LED torch and of course the Olympus 60mm f2.8 Macro lens. Also very useful is the NiSi Macro Rail.
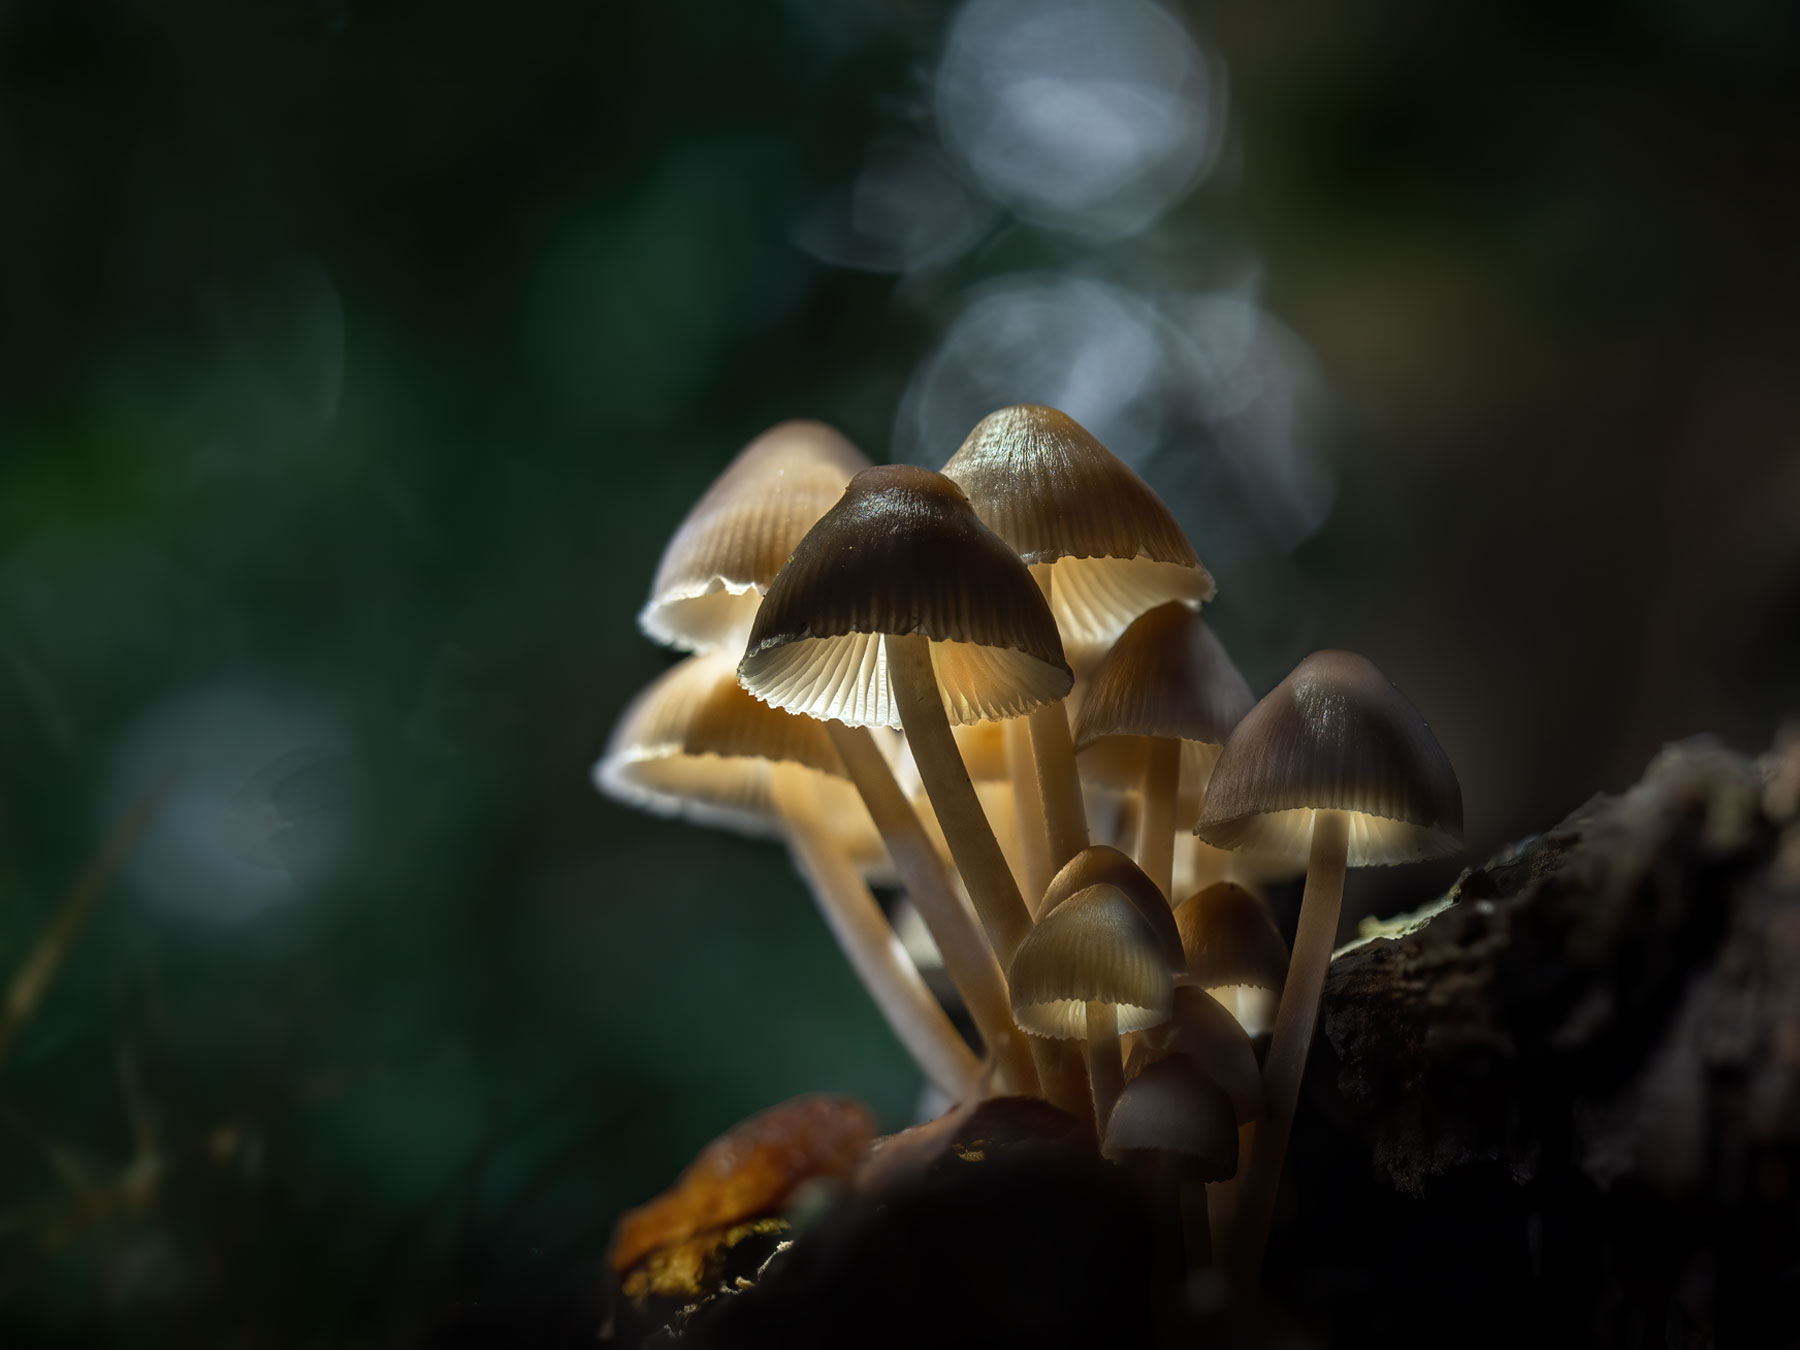
“Shrooms”-Various sets of Focus Stacked images
Producing an image like this is complex. First you have to find them, decide if there is a composition including a good background, whether the background bokeh is important, and take some tests shots. Test shots allow you to work out the number of images needed and the focus offset, and how well light will transmit through the fungi.
A non-illuminated set of focus stacked images is needed, then wait until twilight for them to light up. Not really. Additional sets of focus stacked images are needed with the Fungi illuminated by a torch, in this case I needed 2 sets. Each set are then individually aligned and merged, and then the resulting images are stacked in Photoshop, aligned again just in case, and merged with masks manually for more control. Let’s take a look step by step.
SHOOTING TECHNIQUE
The actual shooting technique depends on whether you are Focus Bracketing or Focus Stacking. They are similar but also different. As already said there are differences with the number of frames available, (Stacking 15, Bracketing 999) and differences with the step size.
With BRACKETING you determine how many shots are needed and the step size, or Differential, is needed, focus on the closest part of the subject and take some test shots. Once you are satisfied you have covered the subject with enough overlap and they are all sharp, it doesn’t matter so much if you have too many, frames not needed can simply be deleted before you stack them in post processing
With STACKING however, you will have to consider that the there are a number of shots taken forwards of the first focus point (See the diagram above). The actual number is variable, it depends on the Differential, the Aperture, and the number of shots, which has 15 at the most. So, considering there are only 15, you may have to set a greater differential to cover the subject. The issue is the number of shots taken in front of the first focus point, and as it is impossible to predict because there are so many variables there are no charts or tables to follow. It is trial and error. the danger is one of the frames front focused is included in the stack and leads to ‘ghosting’ or Focus Breathing.
TIP→ FOCUS GHOSTING, OR BREATHING
A blurred edge to part of the image, almost as though there has been some camera movement usually indicates that the Focus Offset is too large, and there are too many images that are out of focus for the subject that have been included in the stacked set.
This is particularly evident if images are included where the the focus step has been moved forwards too far. The final stacked image should ignore images that are out of focus, but not always.
The only way to avoid this is to set your focus point a little further in to the subject instead of on the front. But how far? How many steps will there be and how do you compensate? No-one knows, it is trial and error.
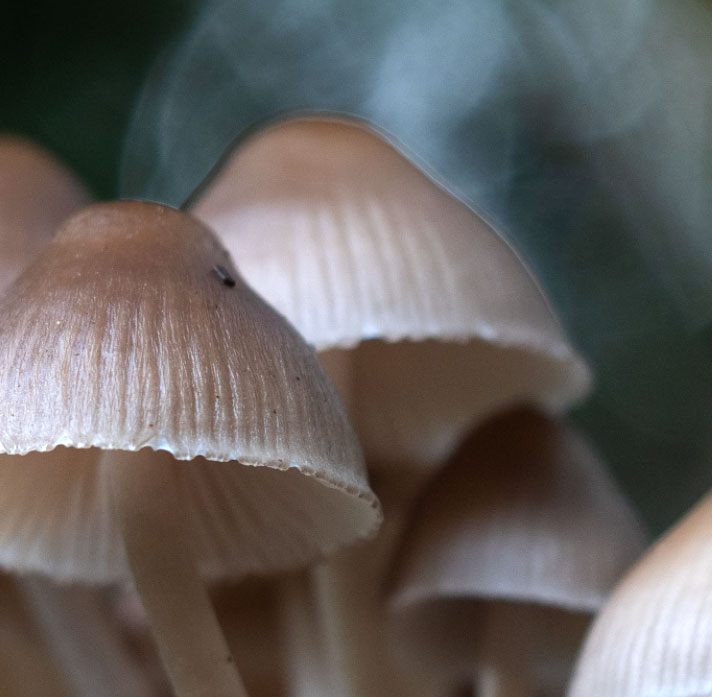
Focus Stacking In Camera can be very successful, other times not so much. Do remember you will have each of the frames as Raws if you set Raw as your quality setting, so you can stack those later and eliminate any troublesome frames. And it can be handy if you want a quick shot and a stacked Jpeg is all you want. For serious Macro images the best way forwards is Focus Bracketing, it is actually easier to work out and you have more control
Make sure your tripod is very stable. A tripod with a centre column that will angle to 90 degrees is a big help, as is a tripod with a reversible column for getting close to the ground. Using a Macro rail can also help, such as the Nisi Macro Rail but it is not essential.
Any shooting mode is suitable, whether Aperture Priority, Shutter Priority or Manual. I tend to favour Manual because I know the exposure will not change between shots.
Usually you will use the widest aperture on a macro lens such as the 60mm or 90mm Macro for sharpness and to maximise the amount of light entering the lens and therefore shutter speed; faster will avoid movement.
Focus can be tricky if there are no well defined contrasty edges, so manually focussing with Peaking and Magnify can help. If you use AF it is essential to lock it to MF to prevent refocussing between frames.
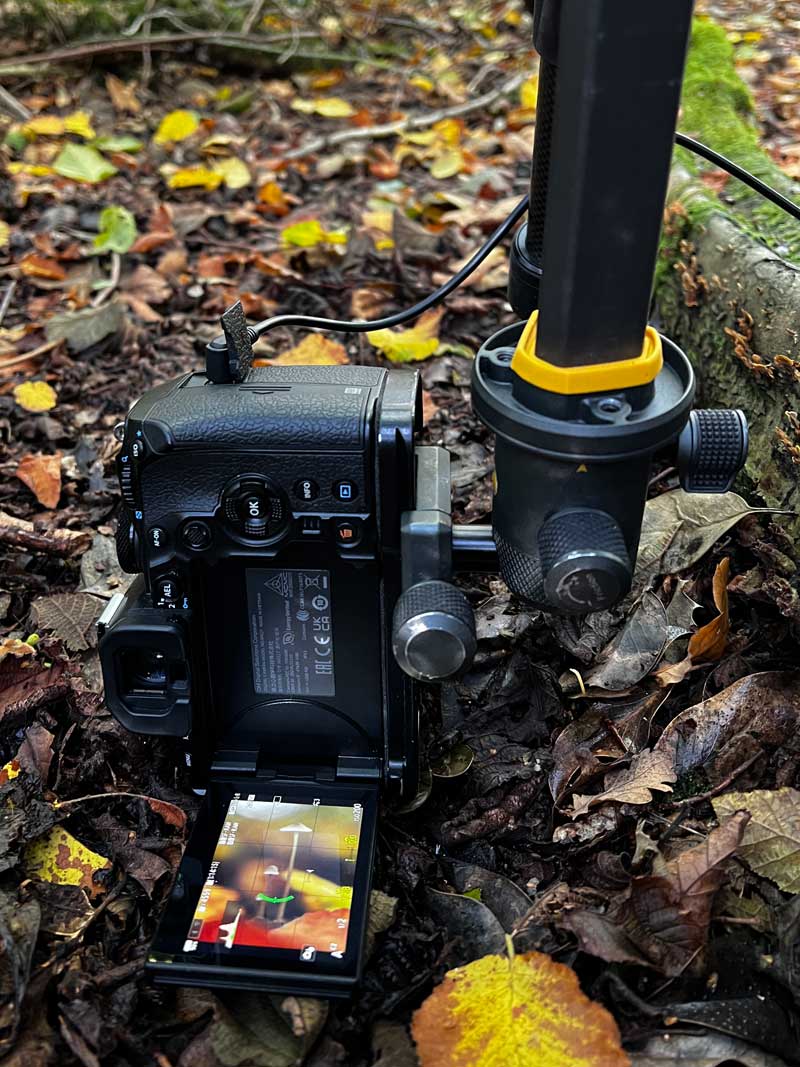
Determining the number of frames and differential is the hard part. Take some test shots, using a cable release of course, not the shutter button. Usually once I have determined what settings I need I will then recheck my focus, it may have been disturbed with all those button presses changing settings, and take a final set of images.
TIP→ FOCUS OFFSETS
There are no hard and fast rules regarding the number of frames required or the focus offset, it is largely trial and error. I normally start of with around 10-15 images with an offset of 2 and work it out from there.
As there are so many factors involved I imagine producing a calculator to be very difficult. As the focus point changes the field of view changes and the true focal length of the lens changes, not so critical with landscape images but for Macro it is.
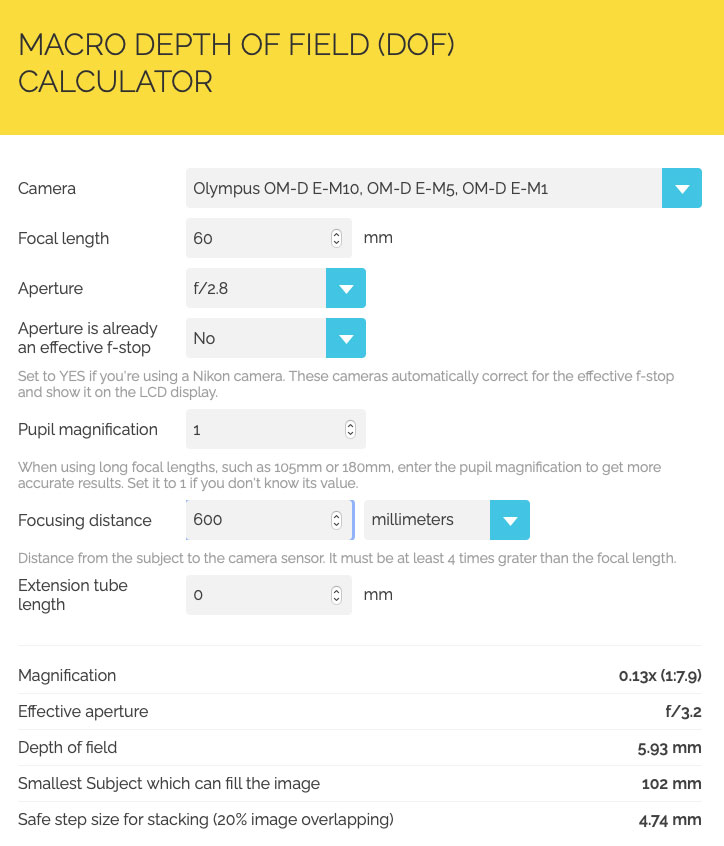
Photopills have a Macro Calculator (online only here). The issue is it will show ‘Safe Step Size’ for stacking, but not Focus Offset which is what we need. Safe Step Size is what you would move the camera using a Macro Rail. Still, it is useful to judge just how narrow the depth of field is and make more informed guess-timates. Save it to your mobile bookmarks or to your home screen.
STACKING THE SHOTS
1- SORTING IN LIGHTROOM
In LR Library the images are colour coded (Yellow) so I can filter them. I had to experiment with the number of images and the steps, in the end settling on 12 frames with a focus offset of 3 in Focus Bracketing.
I did not want focus to extend from the front right to the back, preferring to have the back fungi a little out of focus to enhance the visual aesthetic and depth; I removed a few of the last frames from the set before merging.
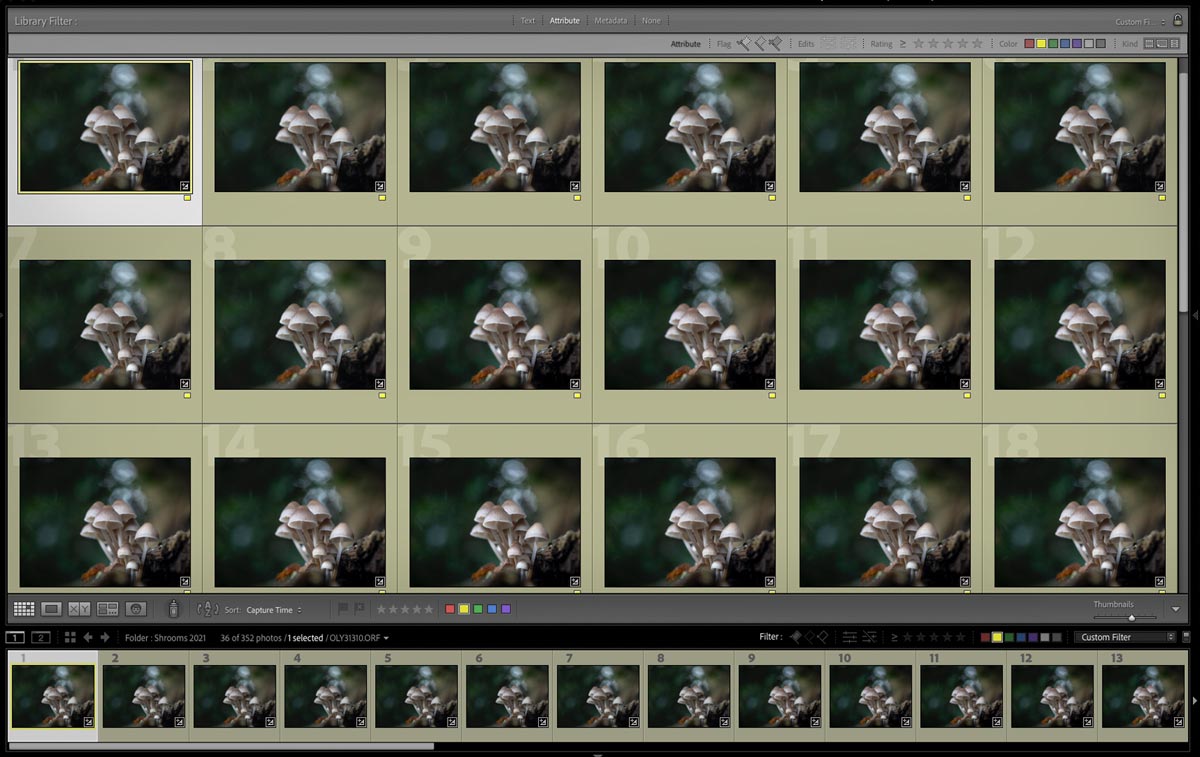
Numerous sets taken 60mm Macro f2.8 – Differential set was 3
2 – LAYER IN PHOTOSHOP
After inspecting the images apply any basic processing. Start with the first image in Develop Module correcting White Balance, Exposure, Colour Saturation etc, then select the other images and Synchronise the settings.
Then select the set, right click and go to Edit>Open as layers in Photoshop.
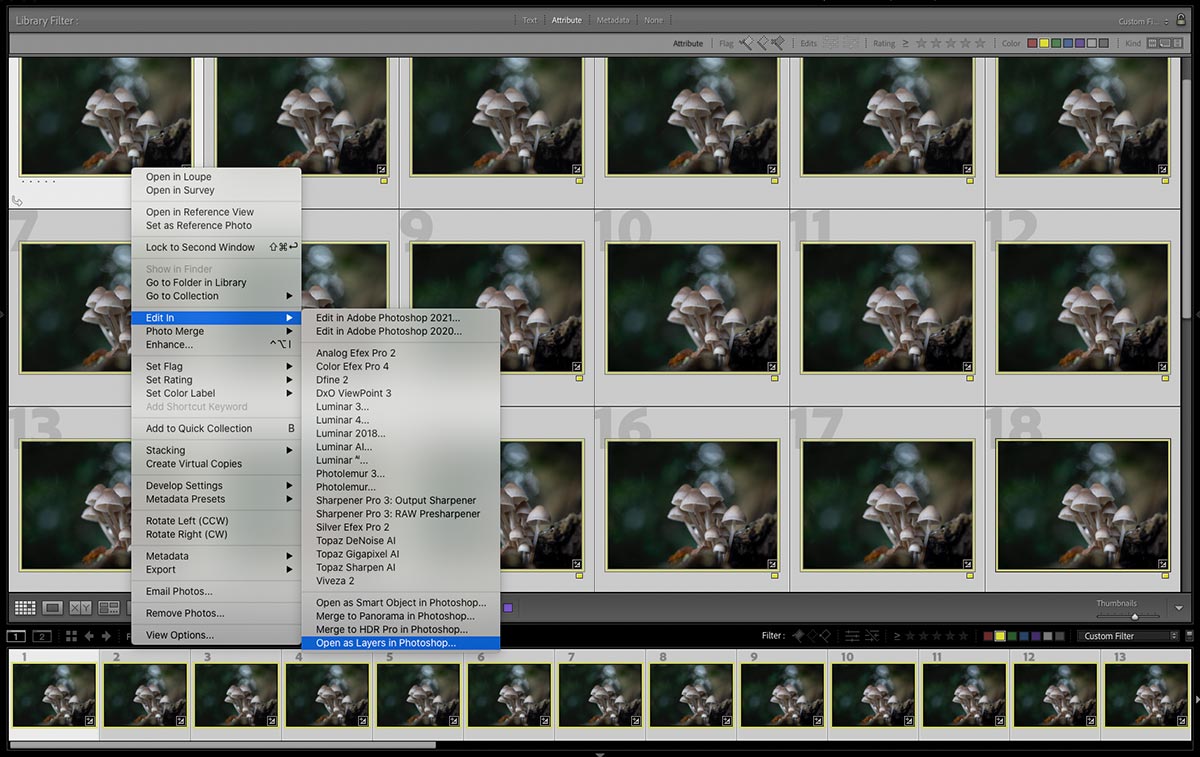
3 – AUTO ALIGN
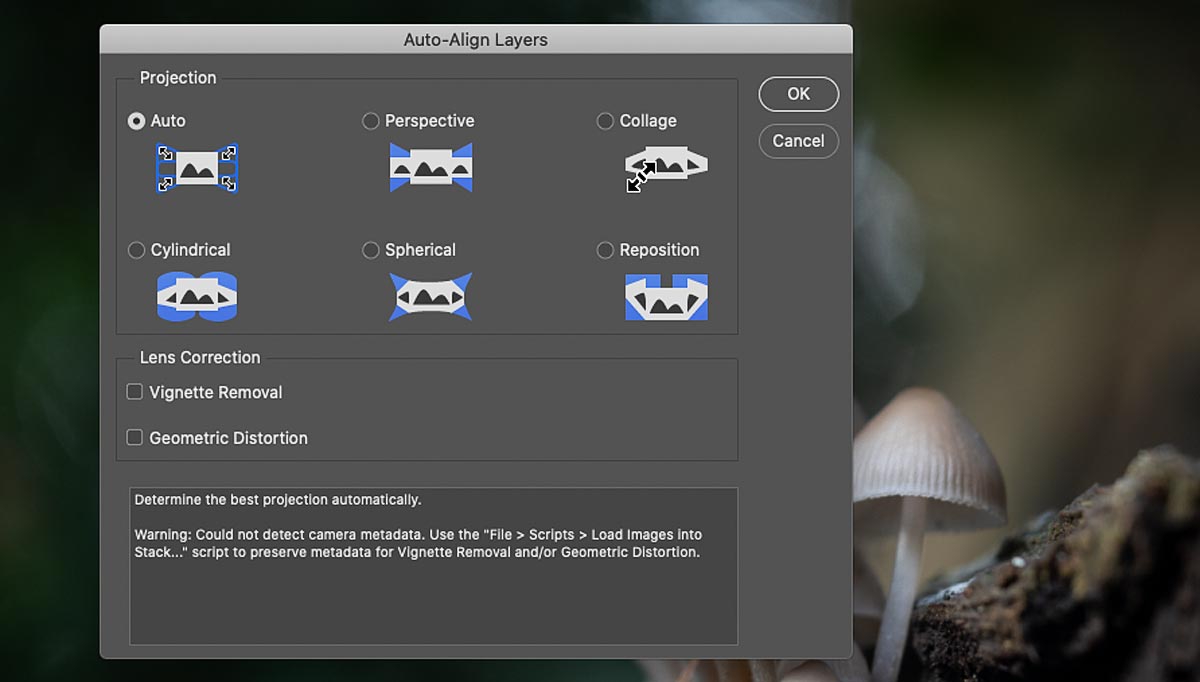
With all the layers selected in Photoshop go to Edit>Auto Align Layers and select Auto.
Ignore Lens Correction since this is already applied in Lightroom with the Olympus’ lens built in correction.
4 – AUTO BLEND
Note how there is a very slight mis-alignment on the top and left edges due to the focus point moving, or ‘focus breathing’. Easy to fix with a slight crop.
I would normally make a copy of all the layers at this stage (drag all layers to the + icon) or duplicate the document just in case.
With all the layers again selected in Photoshop go to Edit>Auto Blend Layers and select Stack Images.
Note this is where you would also combine images for Panoramics.
5 – FLATTEN & SAVE
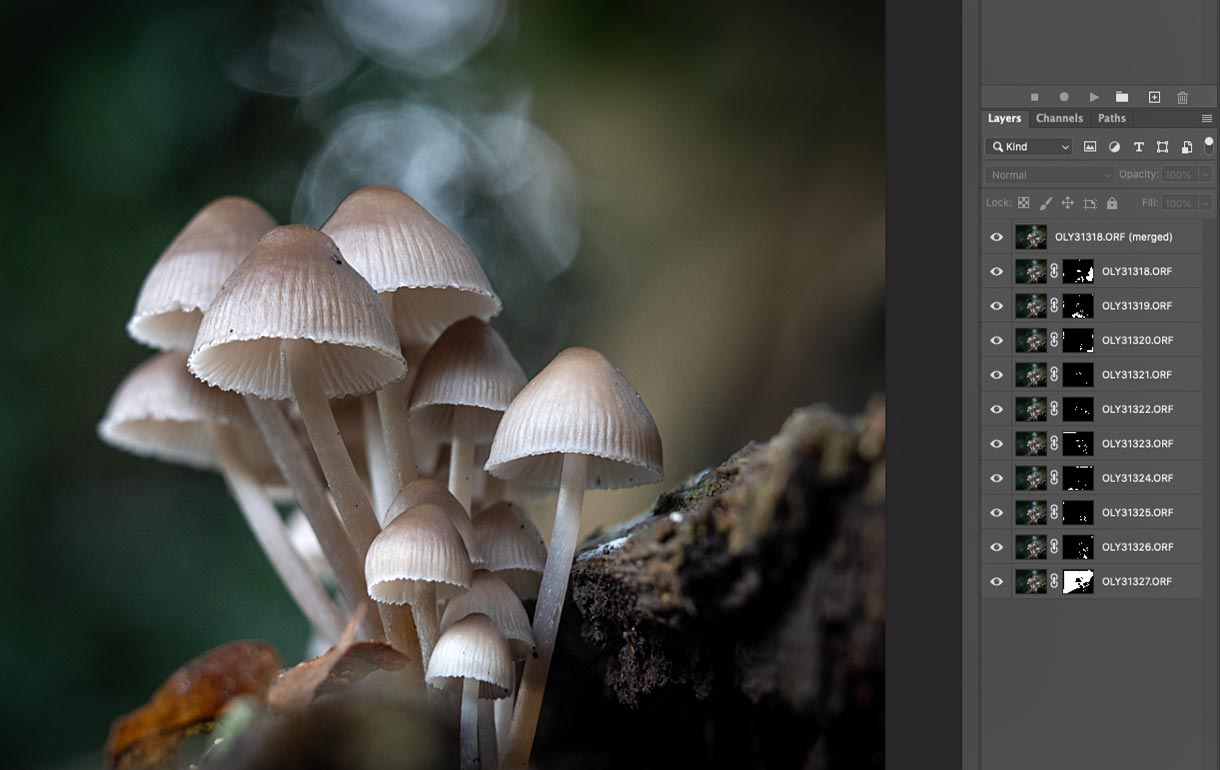
Photoshop has done its thing, producing masks for all layers and creating a top layer with all the images merged.
The focus front to back is just as I wanted, sharp and detailed at the front and soft at the back which adds visual depth rather than the whole group being sharp.
The centre rear fungi head has a dark edge, switch off the top layer, find the particular layer and carefully edit the mask to soften or remove it. Flatten and save.
GLOWING SHROOMS
The images above were part of a whole series of images used to create a ‘Glowing Shroom’. Additional sets were captured with the subjects illuminated, then stacked, and then all merged to create the final image.
If you would like to learn more I have a separate guide which includes illumination techniques, shooting tips, and full processing from start to finish.

EXAMPLES
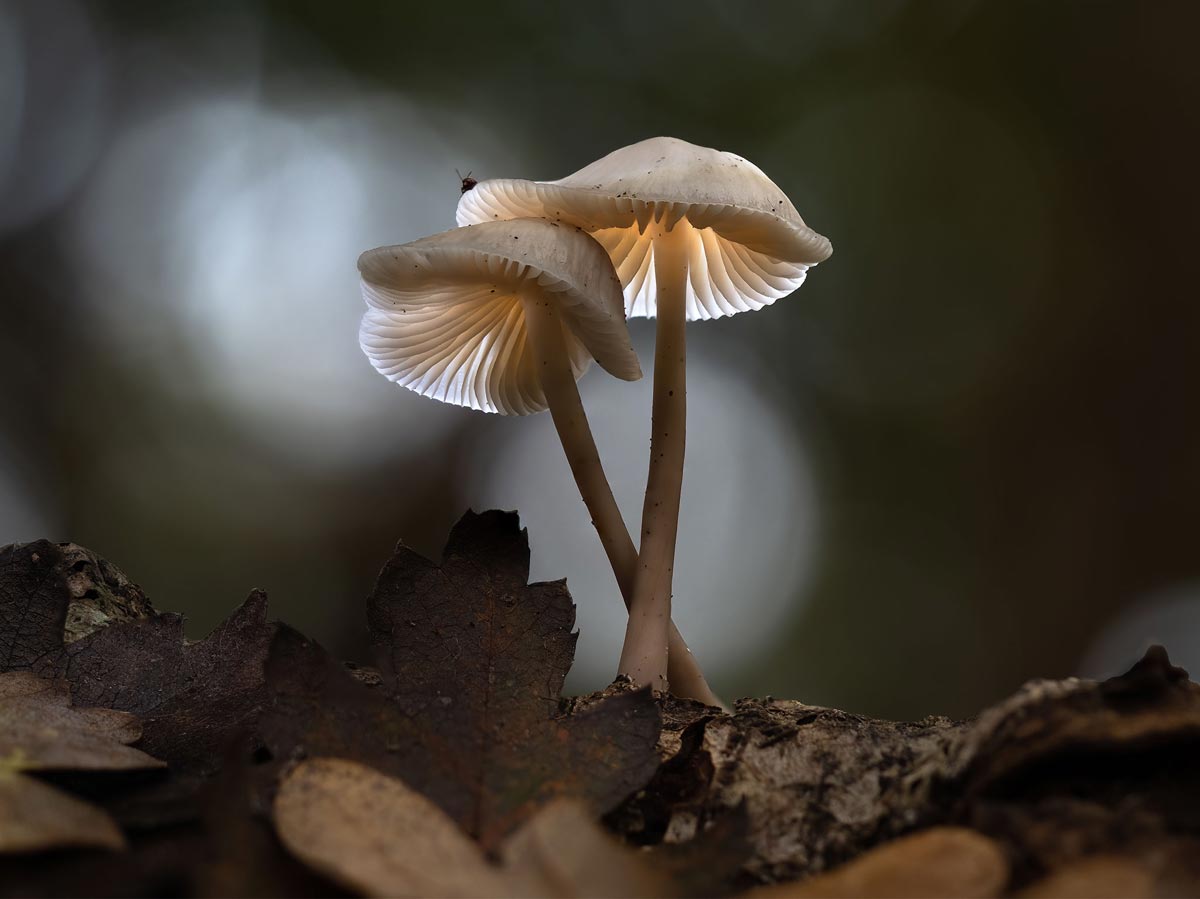
60mm Macro @ f2.8 Focus Bracketed 3 Sets Merged
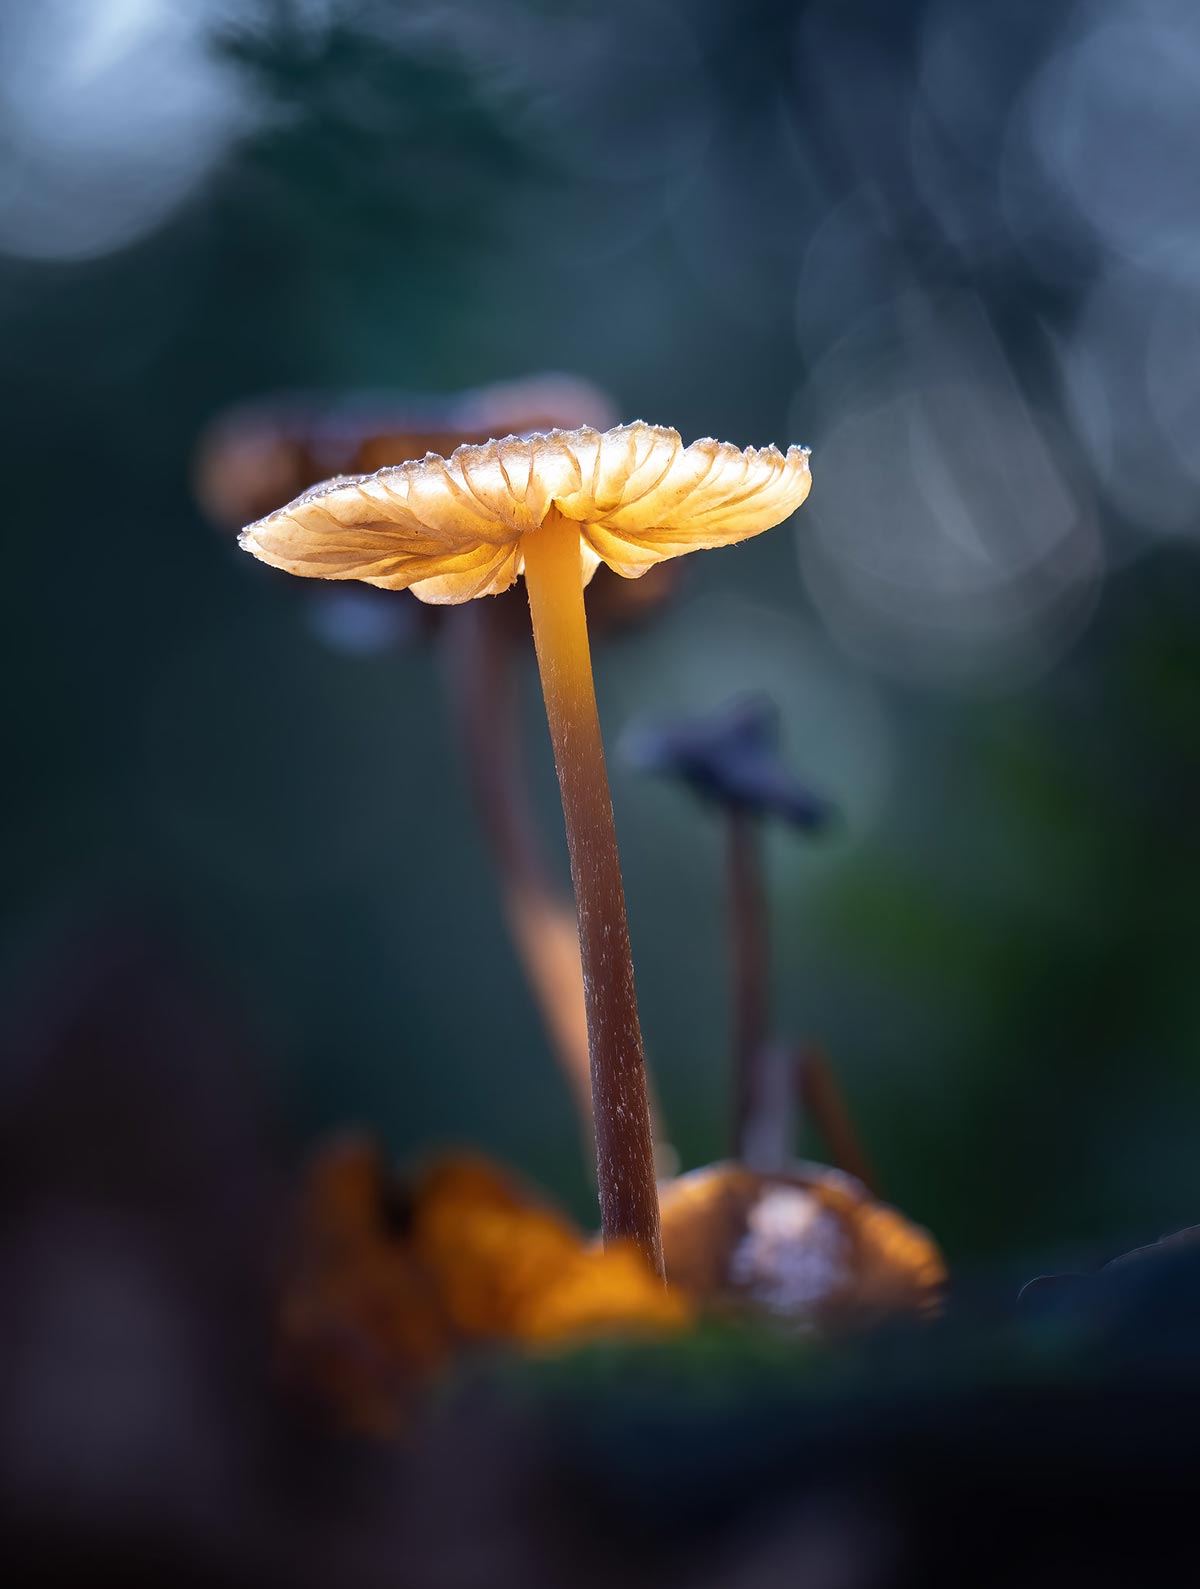
60mm Macro @ f2.8 Focus Stacked 2 Sets Merged
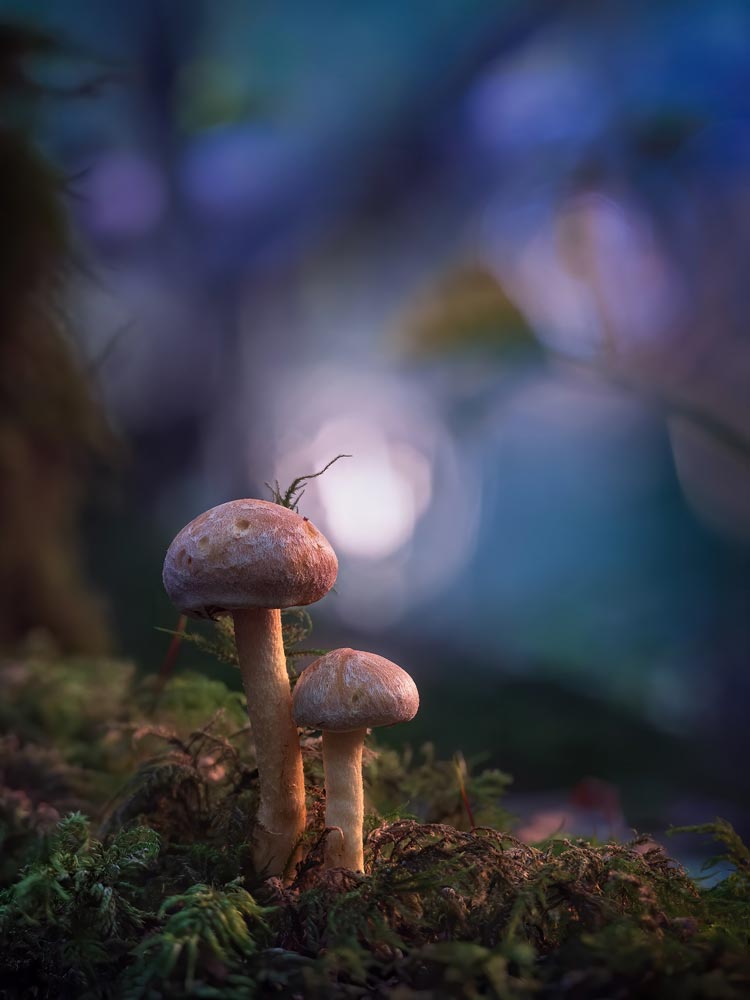
60mm Macro @ f2.8 Focus Bracketed 1 Set Merged
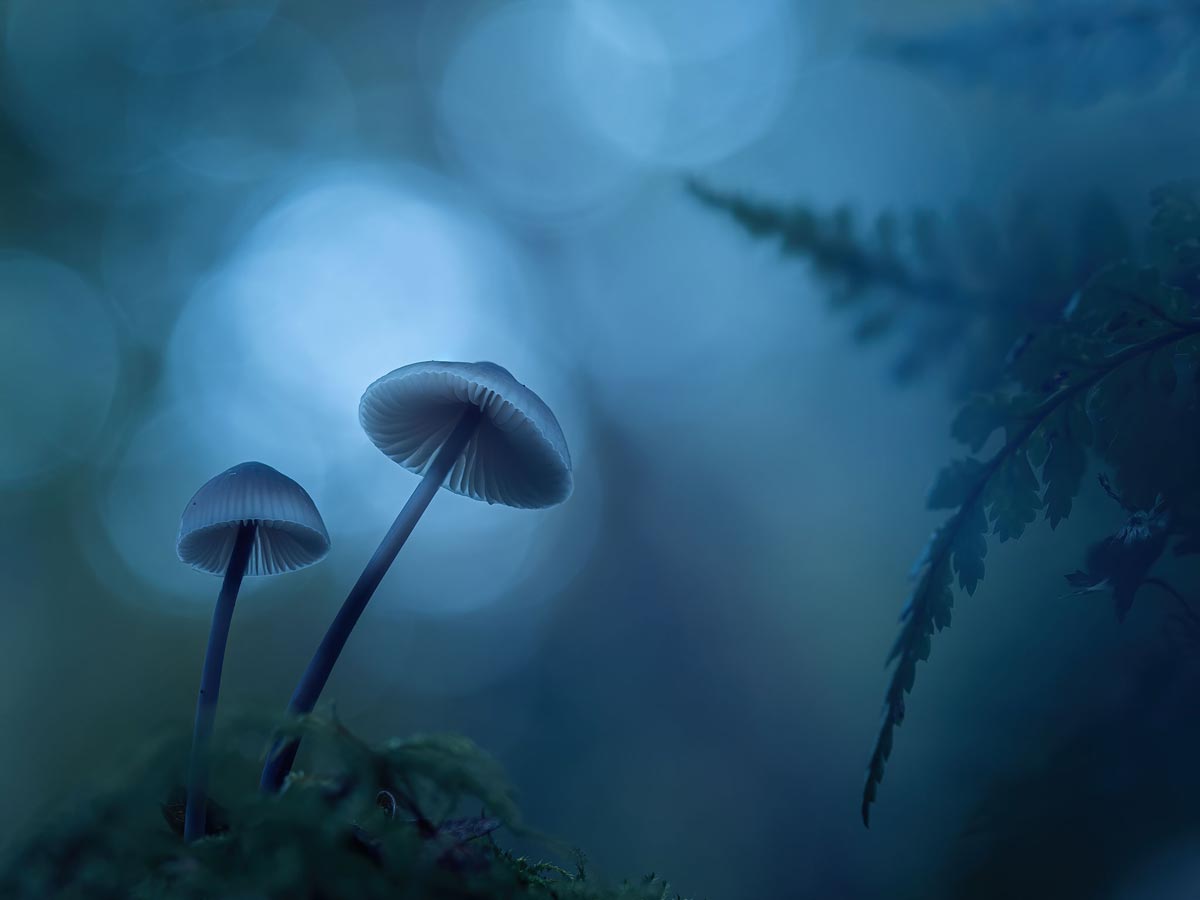
60mm Macro @ f2.8 In-Camera Focus Stacked
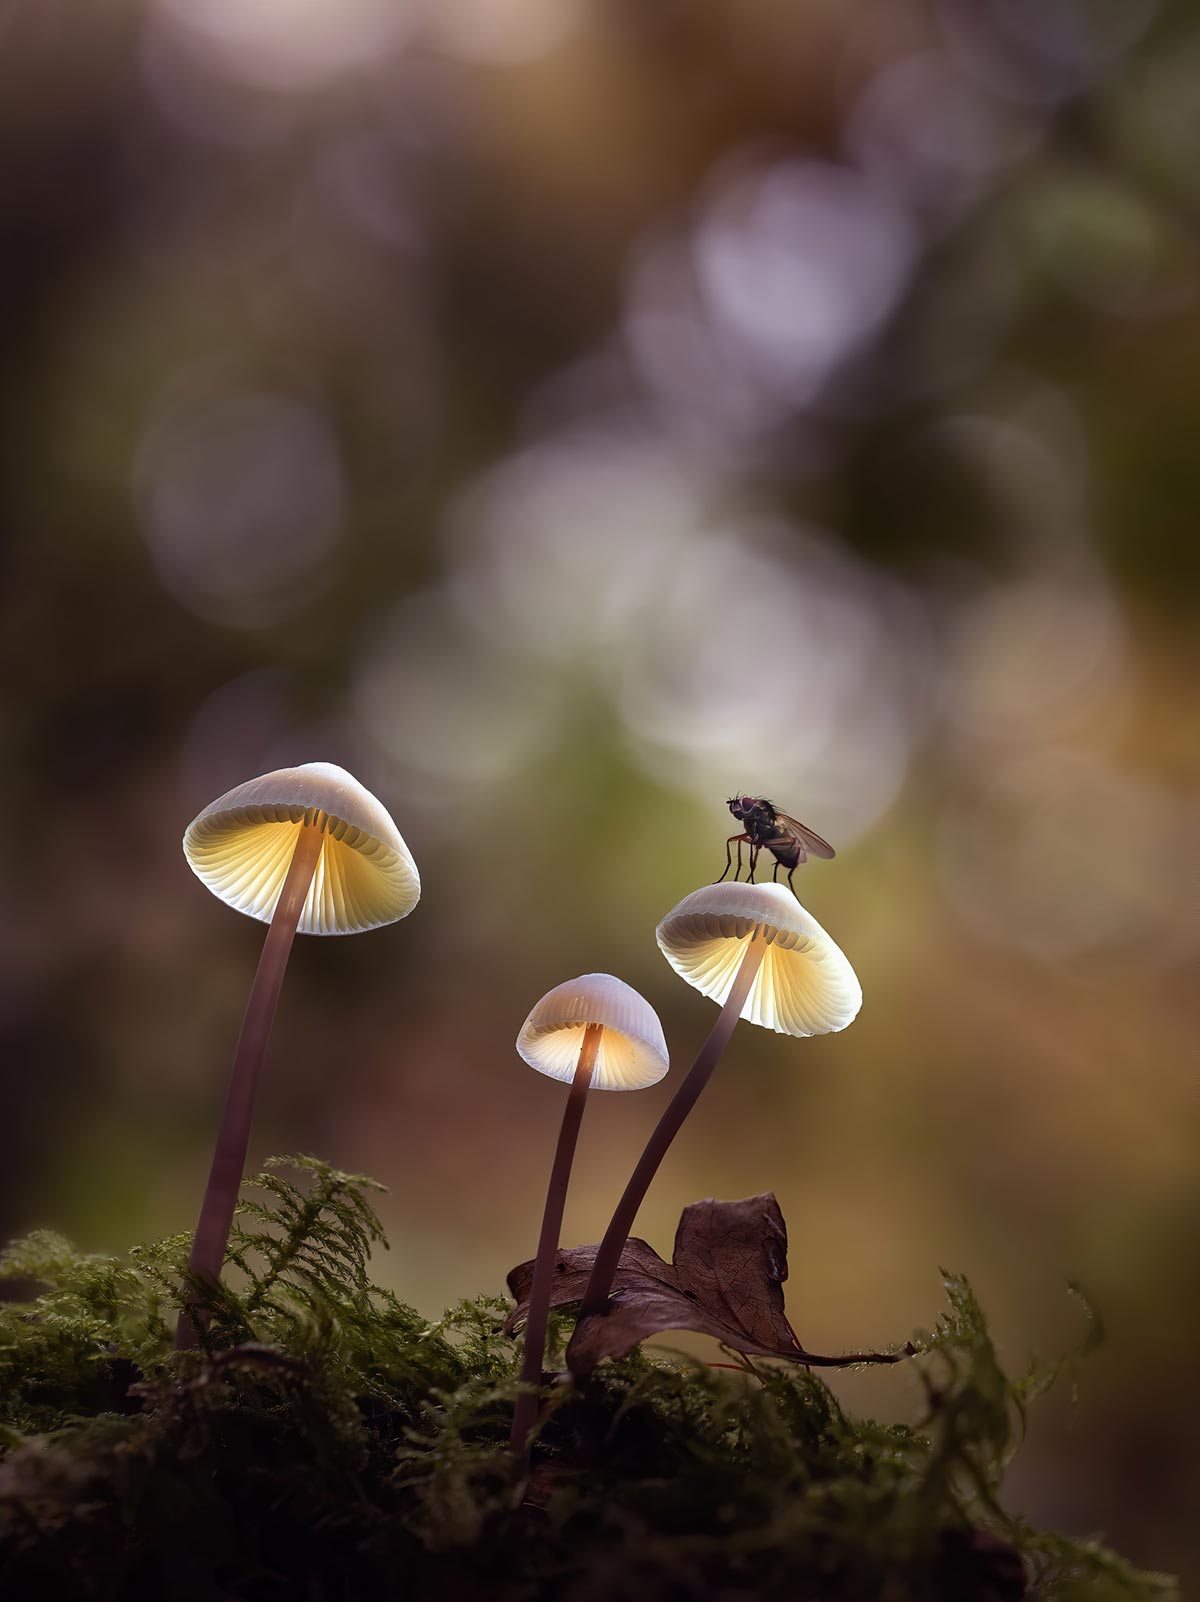
60mm Macro @ f2.8 Focus Bracketed 4 Sets Merged
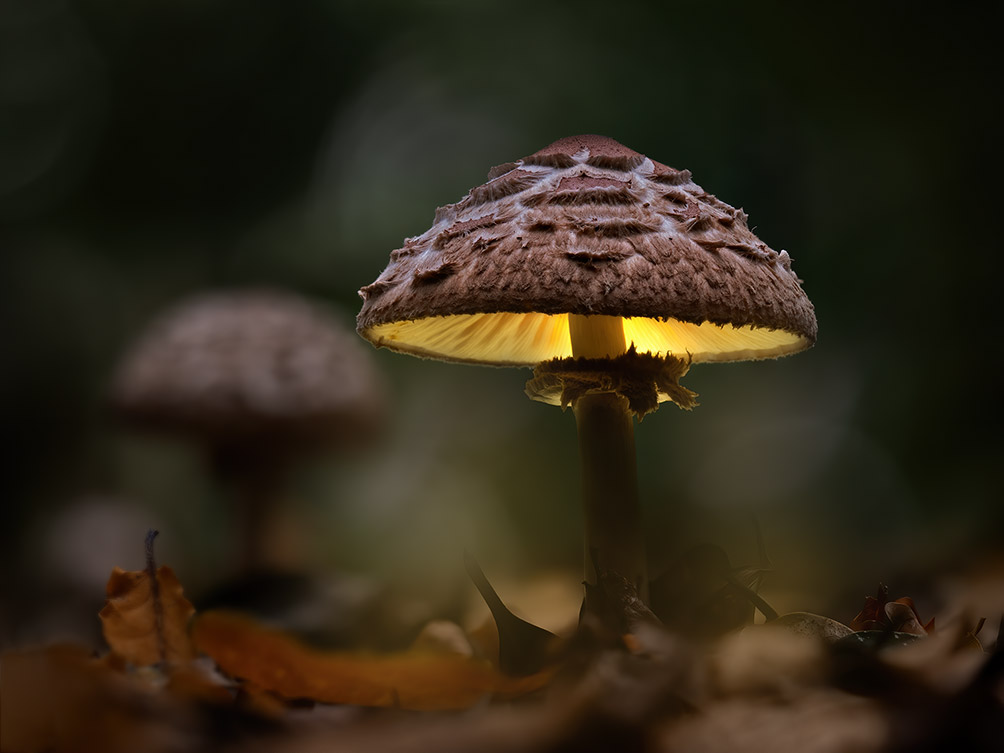
60mm Macro @ f2.8 Focus Bracketed 2 Sets Merged
CONCLUSION
We have looked at two ways to Focus Bracket, both manually and in-camera using Focus Bracketing and Stacking, and different ways to merge the images. Trying all the techniques for yourself should give you the skills to progress further with your photography. Next we will look at the High Resolution feature to produce images with high resolution and detail
