11 – STITCHING PANORAMICS
A panoramic image taken properly is not just a crop, it is multiple images merged together.
Stitching panoramics with Lightroom
Stitching panoramics with Photoshop
A Panoramic image is multiple images captured and then ‘stitched’ together in Photoshop or Lightroom. A tripod is best to make sure images align, and for precise shooting using a panoramic head with a nodal slider will allow shooting around the Nodal point, or the exact centre of the lens. And with PS and LR being better than ever we can even shoot hand-held effectively.
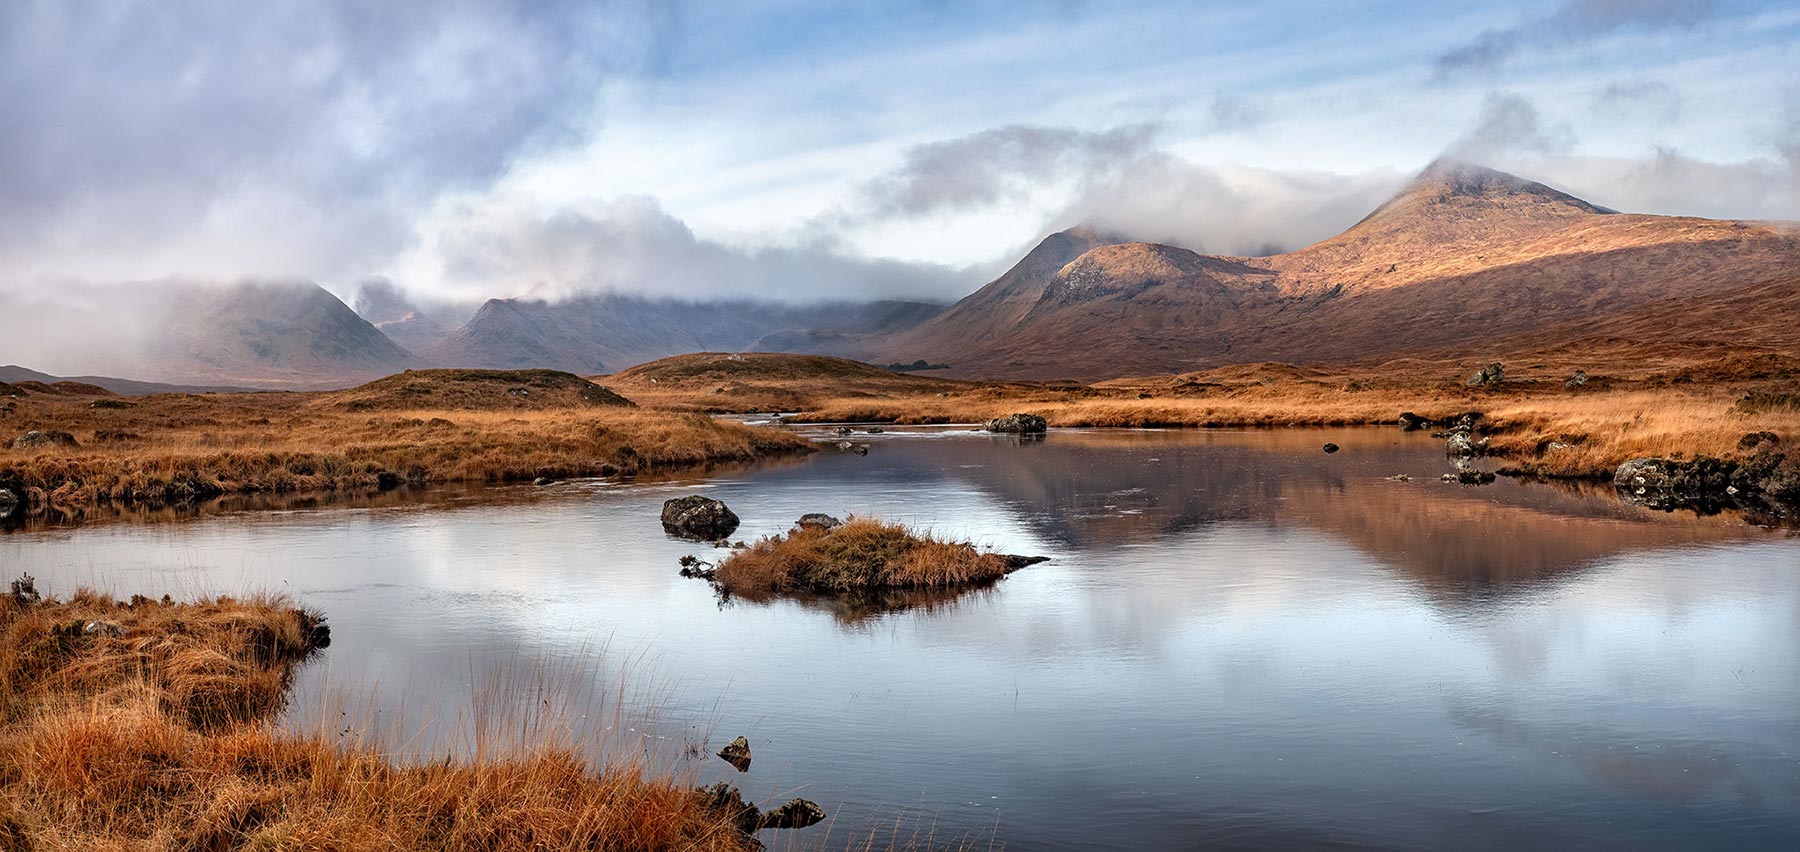
4 portrait image panoramic of Rannoch Moor, Scotland
This is a guide on the basics of stitching the images together, rather than the shooting technique. However a few tips:
A wide angle image may provided the field of view required but looses a lot of pixels cropping it to a 16:9 to mimic a panoramic. For more resolution consider shooting it as a panoramic with a longer focal length with a number of portrait shots, or even just a couple of landscape shots.
Use a tripod for better accuracy, although simple panoramics can be created hand-held.
Be aware of foreground. Close foreground will suffer distortion due to parallax, the distortion that occurs when an object is seen from slightly different viewpoints, especially with a wide angle lens. You would need to consider shooting around the exact centre of the lens using a Nodal slider.
Shoot in Manual, it is really important that the exposure doesn’t change. And use manual focus, or at least auto focus and lock it to manual; changes to the focus plane can cause focus drift.
If there are verticals in the scene try to keep the camera level, not tilting it up or down. This is not so easy because it may compromise your composition, so bear in mind there will be distortion that can be hard to correct It is even more of a challenge shooting a vertical panorama, or a portrait created from multiple landscape shots.
Overlap images by around 30%, any less and there may not be enough for LR to overlap and merge.
OVERLAP IMAGES
It is crucial to ensure images overlap, around 30% is best. A little less will be ok but once you get down to 10% LR will start giving errors that there is not enough to align and merge.
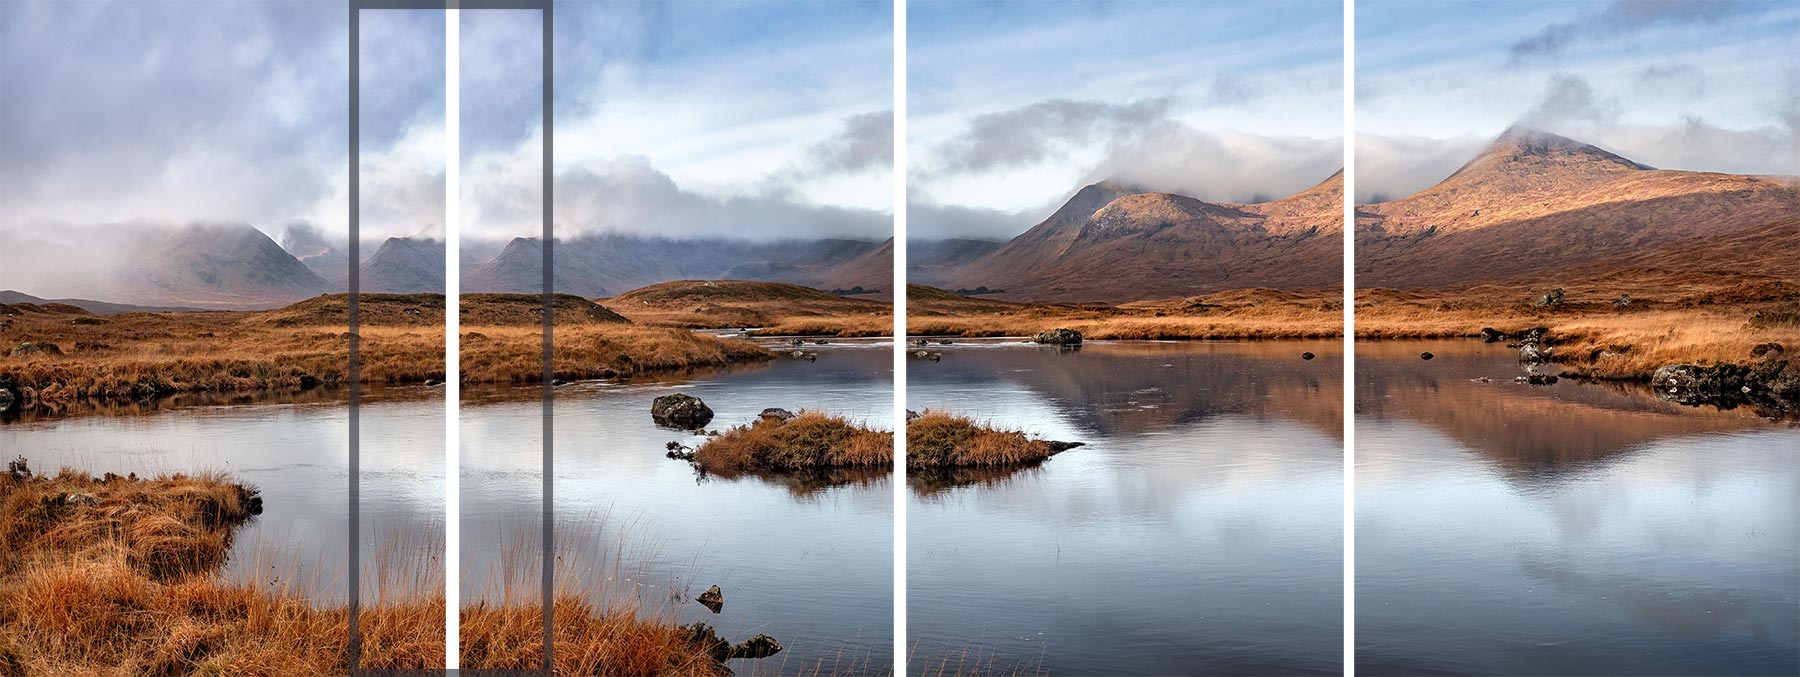
30% Overlap
LIGHTROOM PANORAMIC STITCHING
I have a preference for LR to PS for stitching panoramic images; the workflow is simpler, previews are shown for the projections and the resulting image brought back in is a DNG raw for further processing and Denoise if needed.
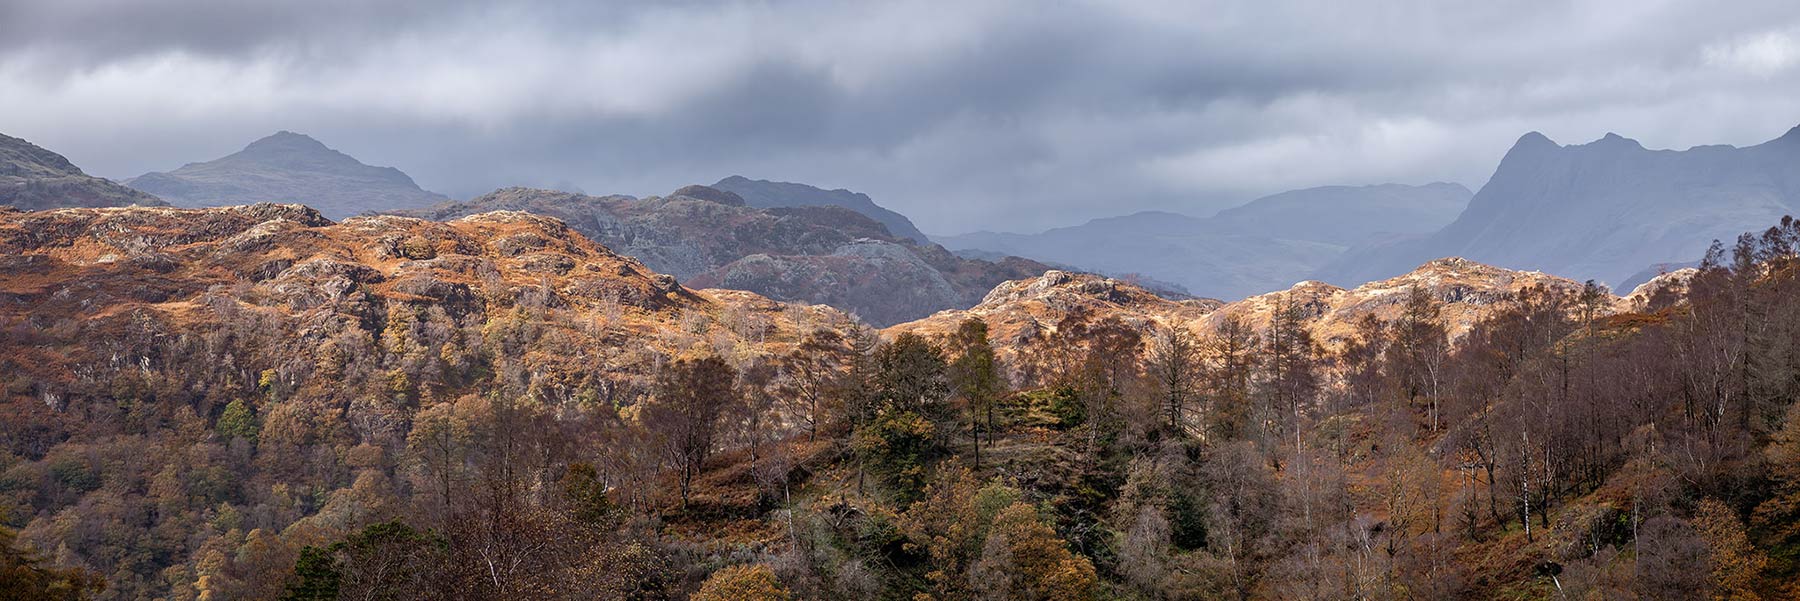
Tarn Hows Lake District, Autumn 2024, 3x landscape images stitched.
A shot of Tarn Hows in the Lake District. I was interested in the different layers created by the light so I decided to shoot a pano. The detail across the whole image is incredible; of course it is lost when displayed in such a small sizes as this.
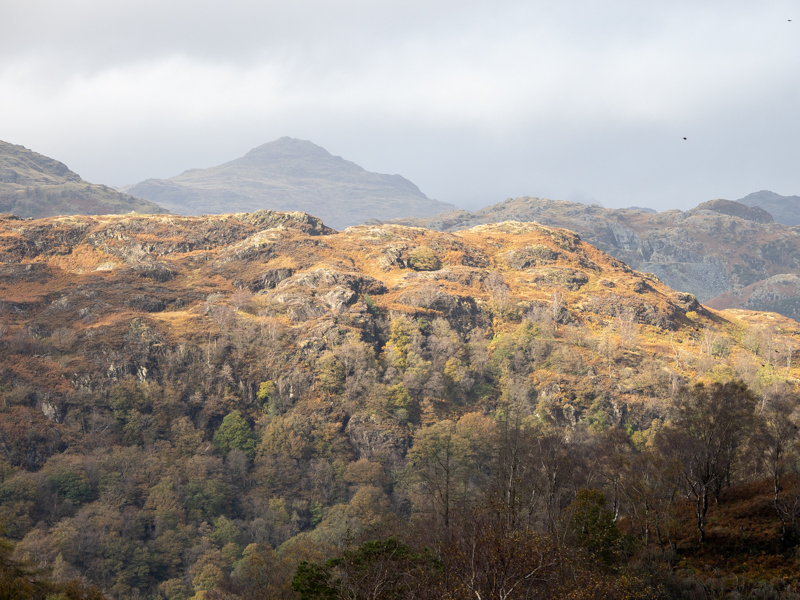
Raw one
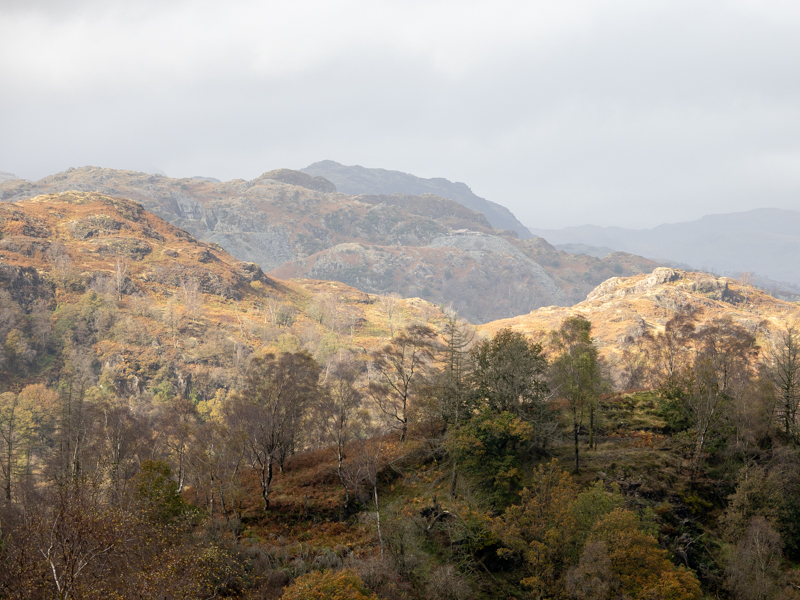
Raw two
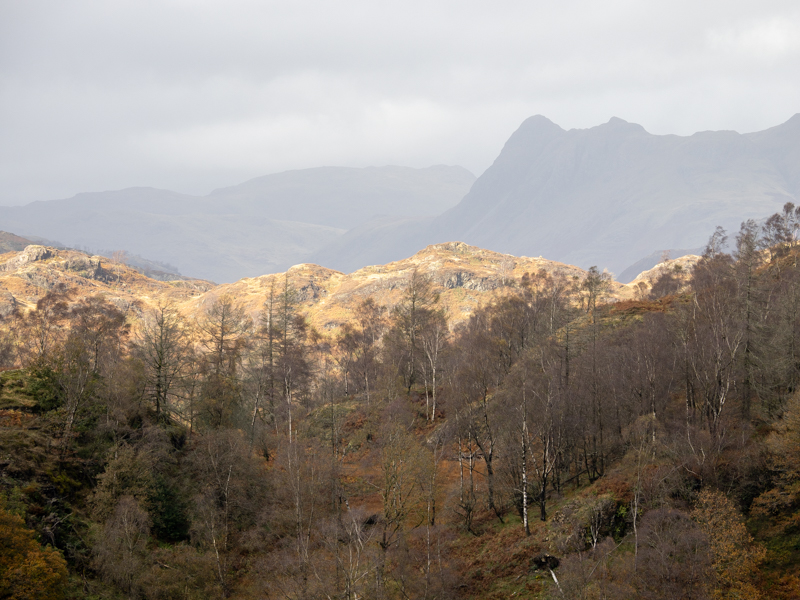
Raw three
RAW FILES
All the raw files are fine. The stitched image will be a DNG so there is no need to process any, I can do it on the stitched image. All I did was set the black and white point (Alt+click blacks then whites). There’s a slight difference with blue tones in the first image but I will see if LR corrects it before I manually adjust it. I actually shot these hand held, there is little issue with distortion from Parallax, I just need to make sure I am reasonably level.
PANORAMA MERGE PREVIEW
With all the raw files selected right click and select Photo Merge>Panorama. The Preview Dialogue will open with a number of setting to adjust the stitching. First I can see the white edges around the files, indicating just how uneven I was taking these hand held which is normal. There is also a very feint join in the centre of the sky between two frames. I can see it has come from the left edge of frame three which seems slightly darker. Not to worry, rather than trying to fix the individual frames I can fix it easily in the stitched image with a little Cloning. I thought frame one could be an issue but LR has done a great job merging it.
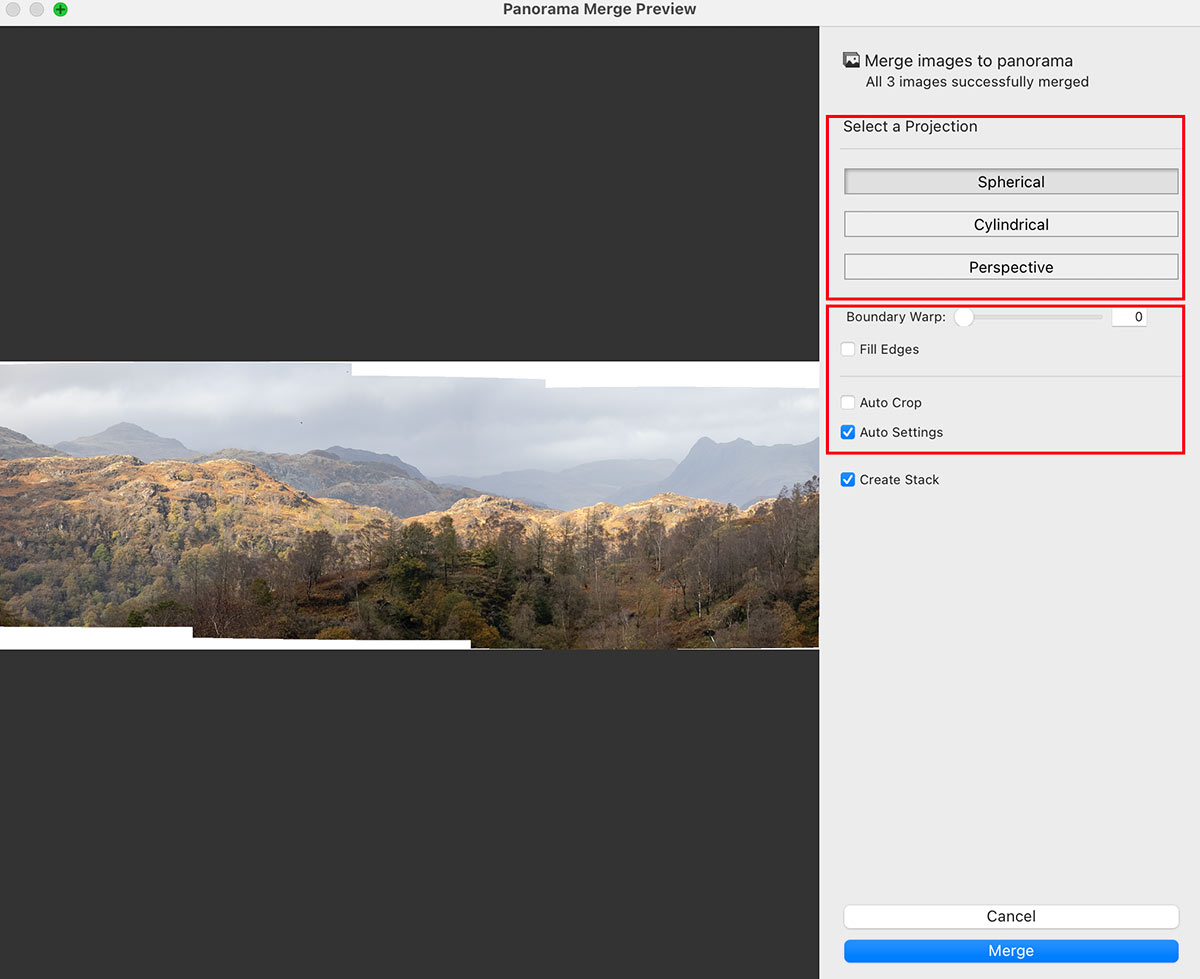
LR Panoramic Merge Preview
Select a Projection – Projection defines how LR stitches the images together:
- Spherical – Aligns and transforms photos as if they were on the inside of a sphere. This mode is good for wide or multi-row panoramas, and 360 panoramas.
- Cylindrical – Projects the panorama as if it were on the inside of a cylinder, best for wide panoramas and attempts to keep vertical lines straight.
- Perspective – Projects the panorama as if it were on a flat surface. This mode is good for architectural photography, but may not work well for very wide panoramas.
Click through each and see which works best for your image. The great thing in LR is the preview updates in real time unlike in PS.
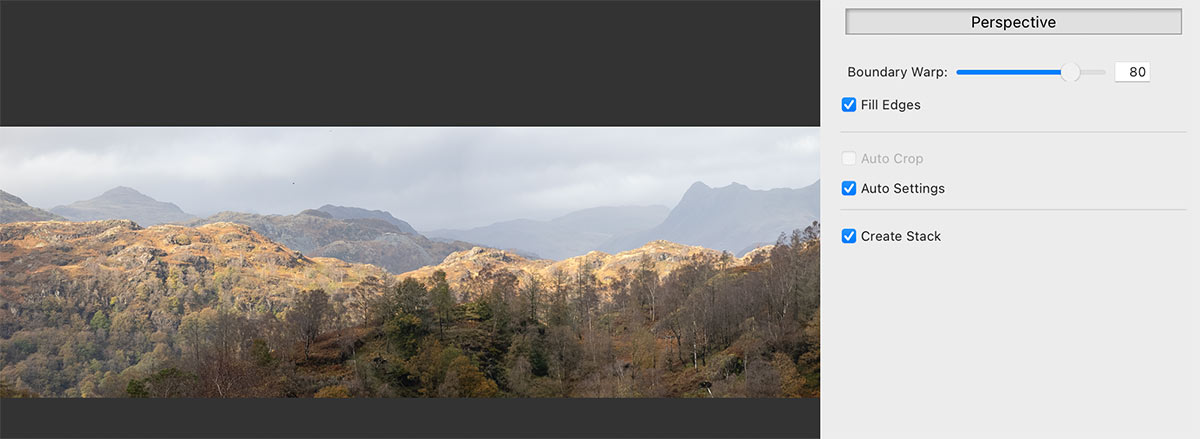
Boundary Warp – Boundary warp attempts to fill the white areas by stretching the pixels into them. It can be very effective and is not detrimental to the resolution but it can lead to distortion if there are vertical objects dominating the shot like a building.
Fill Edges – LR will attempt to fill the white areas with Content Aware Fill. It is very successful for small areas. If there are larger areas I would prefer to deal with it afterwards in PS using a combination of Content Aware Fill, Cloning and maybe even Generative Fill (be aware Generative Fill works very well but will not have the same resolution of pixels and it is obvious in large areas with lots of detail).
Auto Crop – Instead of filling white areas LR will crop instead.
Auto Settings – Applies Auto develop settings, useful for a preview. Deselect if you wish to apply yourself, or just adjust afterwards.
Create Stack – Obviously, the combined DNG image will be stacked with the original Raw files.
→ TIP LR doesn’t have a function for stitching images into a vertical panorama, or a portrait. The simple solution is just rotate the raw images sideways, stitch, then rotate the finished image back again. Simple.
I chose perspective for this after checking each one. I used Boundary Warp at 80 after carefully checking none of the pixels are too distorted, and after satisfying myself it was the maximum I could do just used Fill Edges for the small amount remaining. It is usually a case of balancing each of the setting including Auto Crop to find the best compromise to keep as much of the images as possible.
FINAL STEPS
The image is returned to LR as a DNG where I can process just as I would with any image. I wanted a little more blue in the sky so I used a Sky mask, and then continued with other settings mainly in the Basic panel and the Curves. For the foreground I used a Luminosity mask and a Colour Range mask to accent tones and colours. Finally I sent it to PS to clone the slight edge in the sky, blending it in in both direction, and then removed two spots which are actually birds. They are so small they look more like dust so they are not worth retaining.
PHOTOSHOP PANORAMIC STITCHING
Photoshop Panoramic stitching is a little different to LR, find it in the File>Automate>Photomerge menu. You cannot just send images to PS, they have to be saved first. The images will not be DNG raws so that means either processing each file in LR first, or processing the final image but remember it will be a Tiff. You’re better to process the images first and just do refining on the merged Tiff.
Photomerge will tell you it needs saved images. Export them from Lightroom as Tiffs, then browse to locate and load them. Or send them to PS (not stacked), save each one to your desktop as a temporary place where you can delete them afterwards and click Add Open Files.
People that only use PS will open the raw files directly with Browse. Camera Raw will launch allowing each file to be processed and then opened as a Tiff in PS. Files still have to be saved before they can be added.
There are some new options here, we now have Auto, thankfully because PS does not have a preview. If you want to check each projection you’ll have to carry out the steps one at a time. There are two other projections which are not for panoramic stitching so ignore them, Collage and Reposition.
We no longer have Boundary Warp or Auto Crop either although we still have Content Aware Fill. There are two lens corrections available which could be useful, however we have already corrected those in the Raw files.

PS Photomerge Dialogue File>Automate>Photomerge
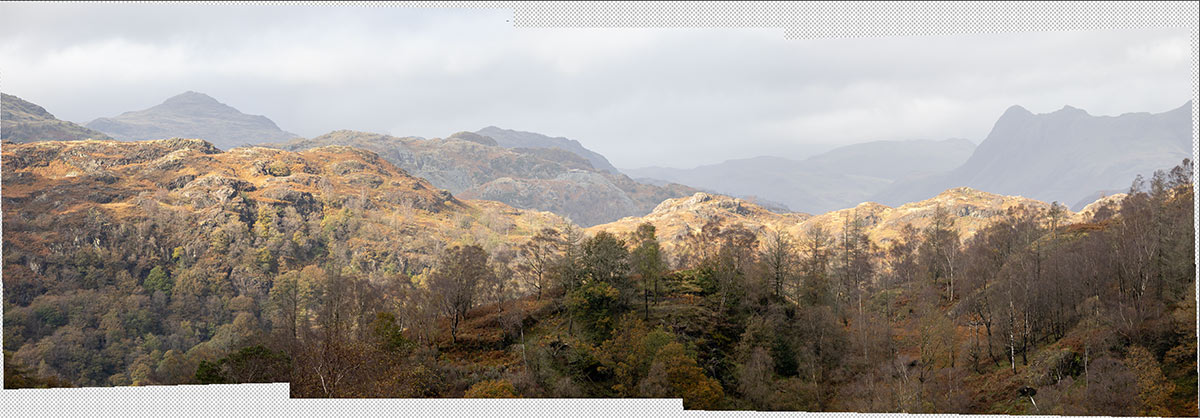
Choosing Auto the images are stitched together and a new document is created. It is in three sections and three layers, and there are gaps at the edges because there is no Boundary Warp, Fill Edges or Auto Crop. That is not necessarily a bad thing because I can do those steps myself if I wanted. I’m pretty sure Auto has used Cylindrical as a projection, so I checked each one to confirm it. I preferred Perspective in LR. I can see straight away it has done a better job on the sky with no join as LR did.
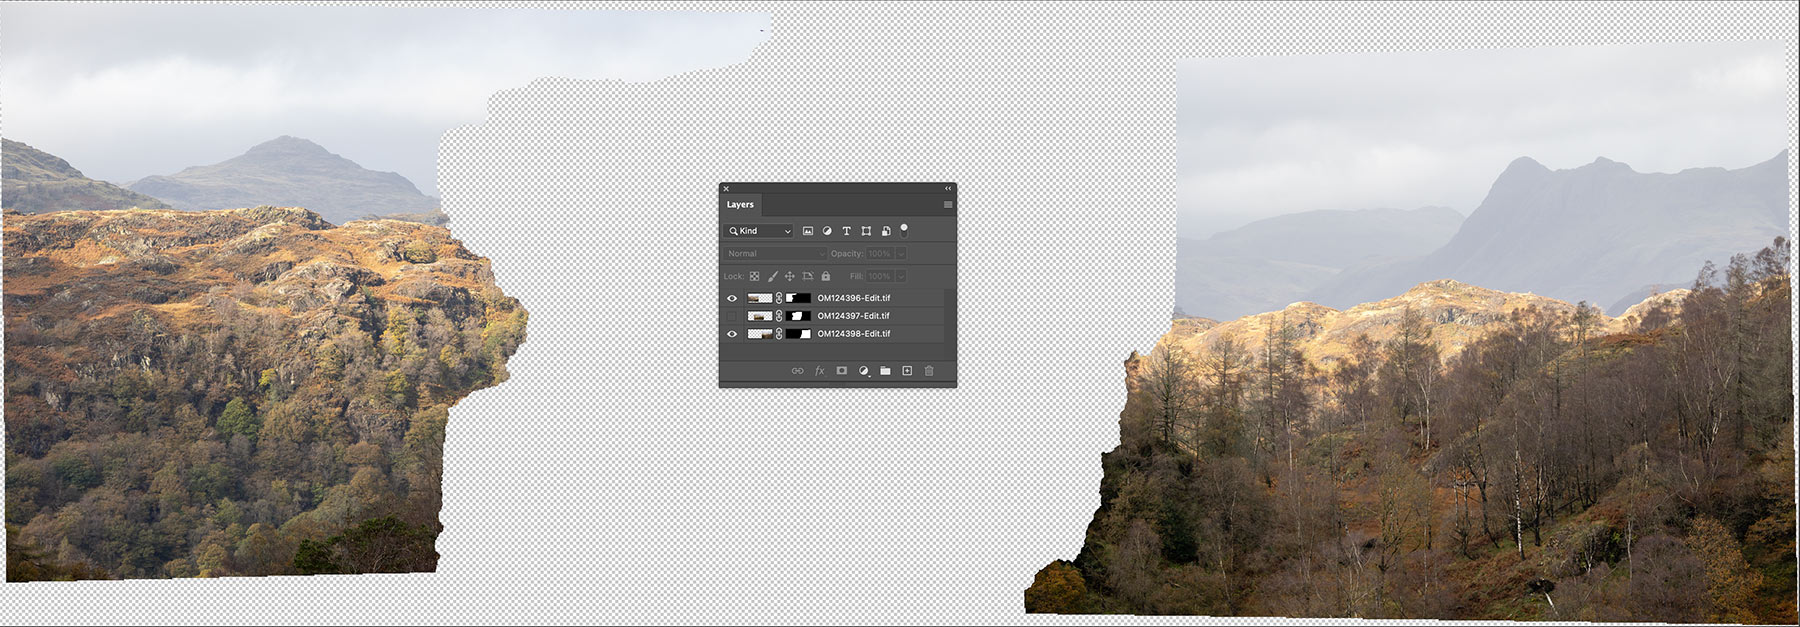
In this screenshot I moved the Layers Pallet into the middle and turned a layer off to show how PS has merged the files. It analysed each one, produced layers and added a mask where it saw fit to give the best merge. I would have to flatten this or stamp it into a new layer.
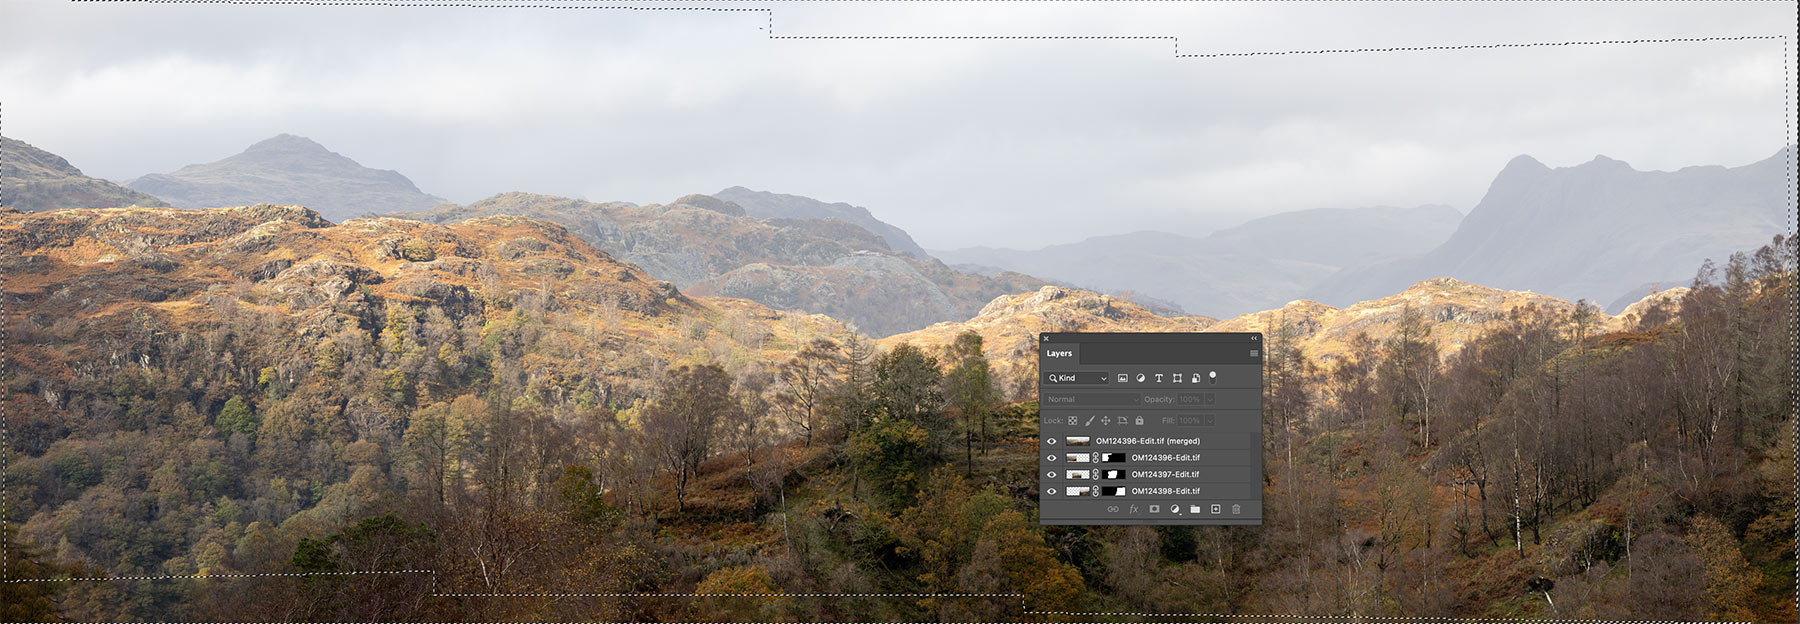
Doing the same process again this time I selected Content Aware Fill to fill the edges. The three layers are created plus an additional layer, a stamped layer of all three and then PS has filled the missing parts. Content Aware as the name suggests analyses the nearby pixels and fills areas with pixels it thinks should be there. And it has done a very good job. Checking a few areas I can see it looks like some parts are clone stamped because they are repeats of other details which is a dead giveaway. It is a good start though and I could go over parts and clone stamp other bits to disguise it.
Once the panoramic is merged I can the carry on processing in PS, going back to Camera Raw, using Adjustment Filters, Brushes, selections etc until I am happy with the finished result.
WHICH IS BETTER?
The Million Dollar question, PS or LR? Are there any benefits to one or the other? It comes down mainly to workflow and what you intend to do after the image is produced.
In LR I can work on the raw images, process or not, and then use the DNG file to continue which has benefits. It is a more seamless experience. And there are a few really useful tools, plus a Preview which is a huge bonus.
Then again we saw just in this one example how PS did actually blend the sky a little better. It is a pain having to save files first and not having the preview is a bore. The lack of DNG is limiting too. But it can sometimes produce a better merge because despite the Projections being the same the underlying engine is not the same; having different results shows that. For me the answer is to use LR and if I don’t get a satisfactory result I’ll then use PS.
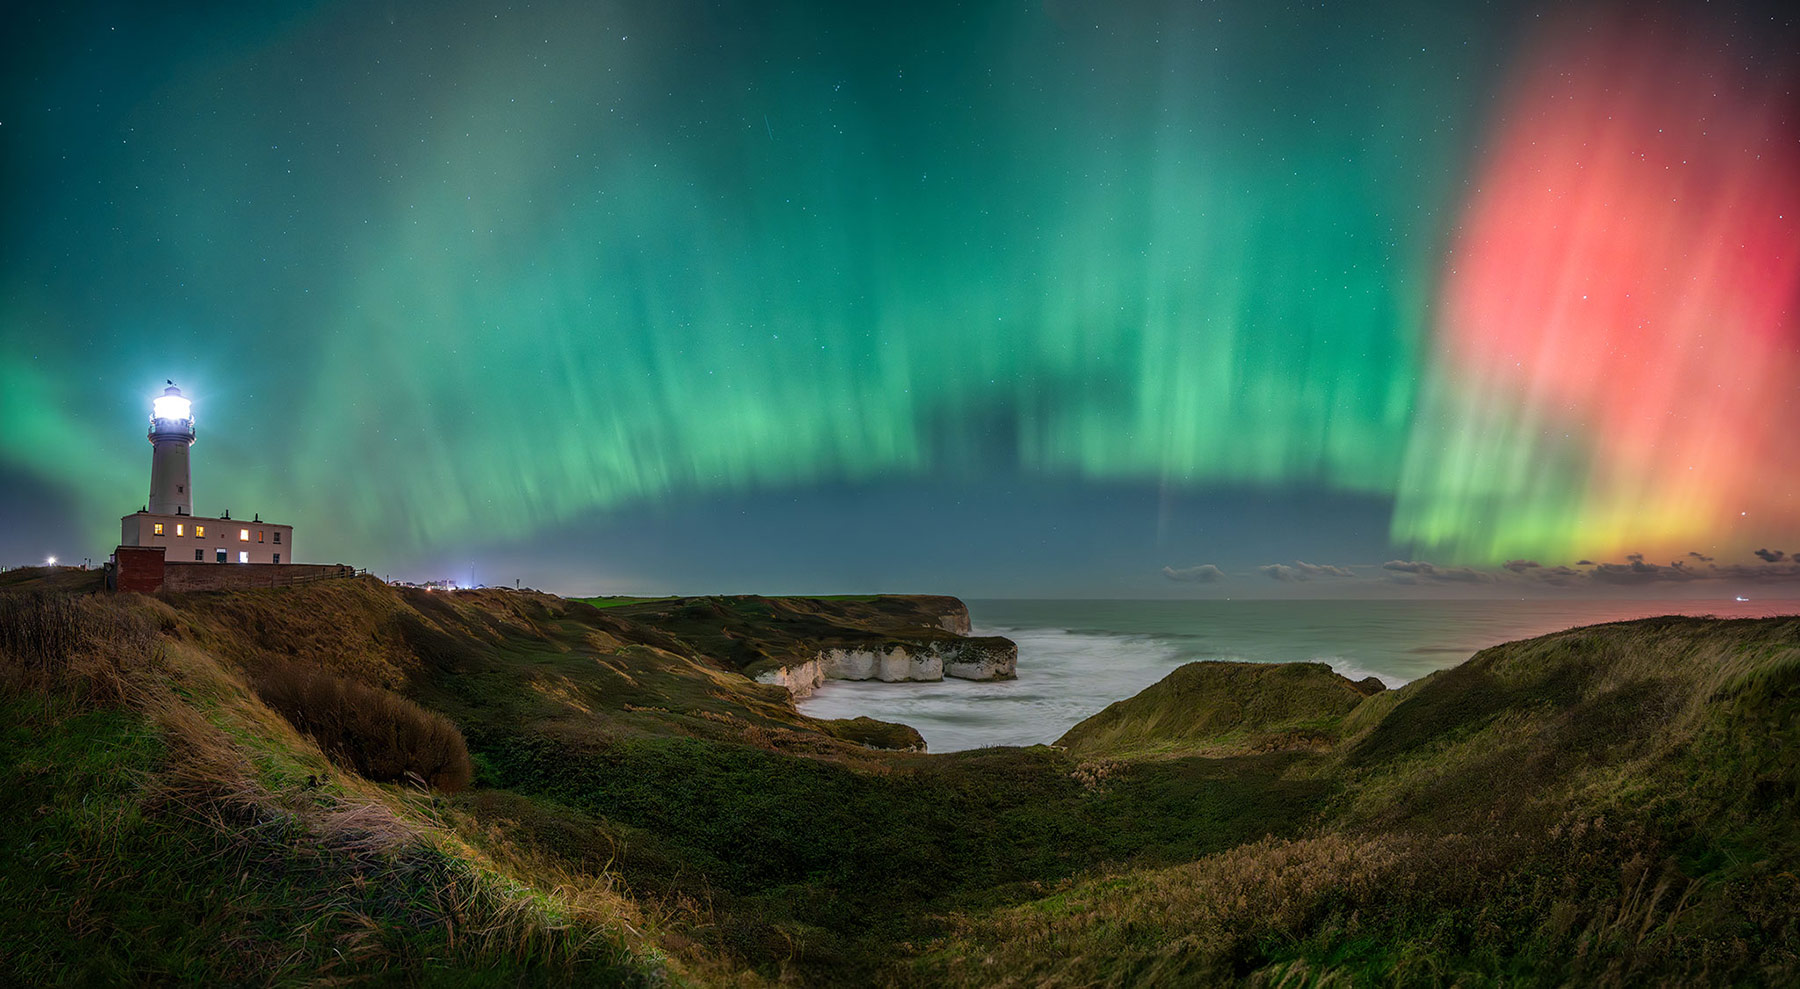
This was a three vertical shot panoramic taken at Flamborough Head on the east coast of Yorkshire, a place close to my heart and a joy to see the Aurora above it in 2024. It was rushed because of my own eagerness wanting to catch the light before it vanished. As such my technique with the frames could have been better. LR did not blend them so well, leaving artefacts on the horizon line and the sky, and leaving quite some distortion in the lighthouse. PS did a better job, sometimes it’s worth taking the time to explore which will produce a better result.
COMPLETE
This section is complete and you should have an understanding of using of using LR and PS for stitching panoramic images, and the differences with each. In the last section we will briefly look at creating black and white images.
NEXT – 12 CONVERTING TO BLACK AND WHITE
