9 – EXPOSURE BLENDING & HDR
Revisiting Exposure Blending with a simple image and merging with HDR.
In this section we will revisit Exposure Blending and how easy it is, explore some of the other options to blend images together, such as HDR, and when to use one or the other. There are other applications available too, Aurora HDR, Photomatix Pro to name two. More advance options include using Luminosity Masks with apps available to use as plugins which take considerable time to master. I want to keep this simple and use the tools we have.
SIMPLE MANUAL BLENDING
We saw in the Photoshop Processing Section how to stack two different images for the sky and merge them using layers and masks. This is very simple exposure blending where we take two images and merge them in part together. It is simple to do once the technique is mastered and it has so many uses as we will see in other sections. We have already used blending so you should understand it. We can use manual blending for, just for example:
Merging Different Exposures
Focus Stacking
Removing Sun Flare
Blending Different Shutter Speeds
The great challenge with landscape photography is capturing the dynamic range of a scene. Sometimes the difference in light is just too great for the camera to cope with, the sky can be much too bright, or shadows too dark. We will have to take more than one image to capture the dynamic range, or use a filter. Without getting into the debate about filters I say use both, why not.
Capturing different exposures is Bracketing. It can be done manually, or with in camera settings. Using a tripod is best so shots align although these days software is getting so good at aligning images they can be done hand held too. A really simple image is below.
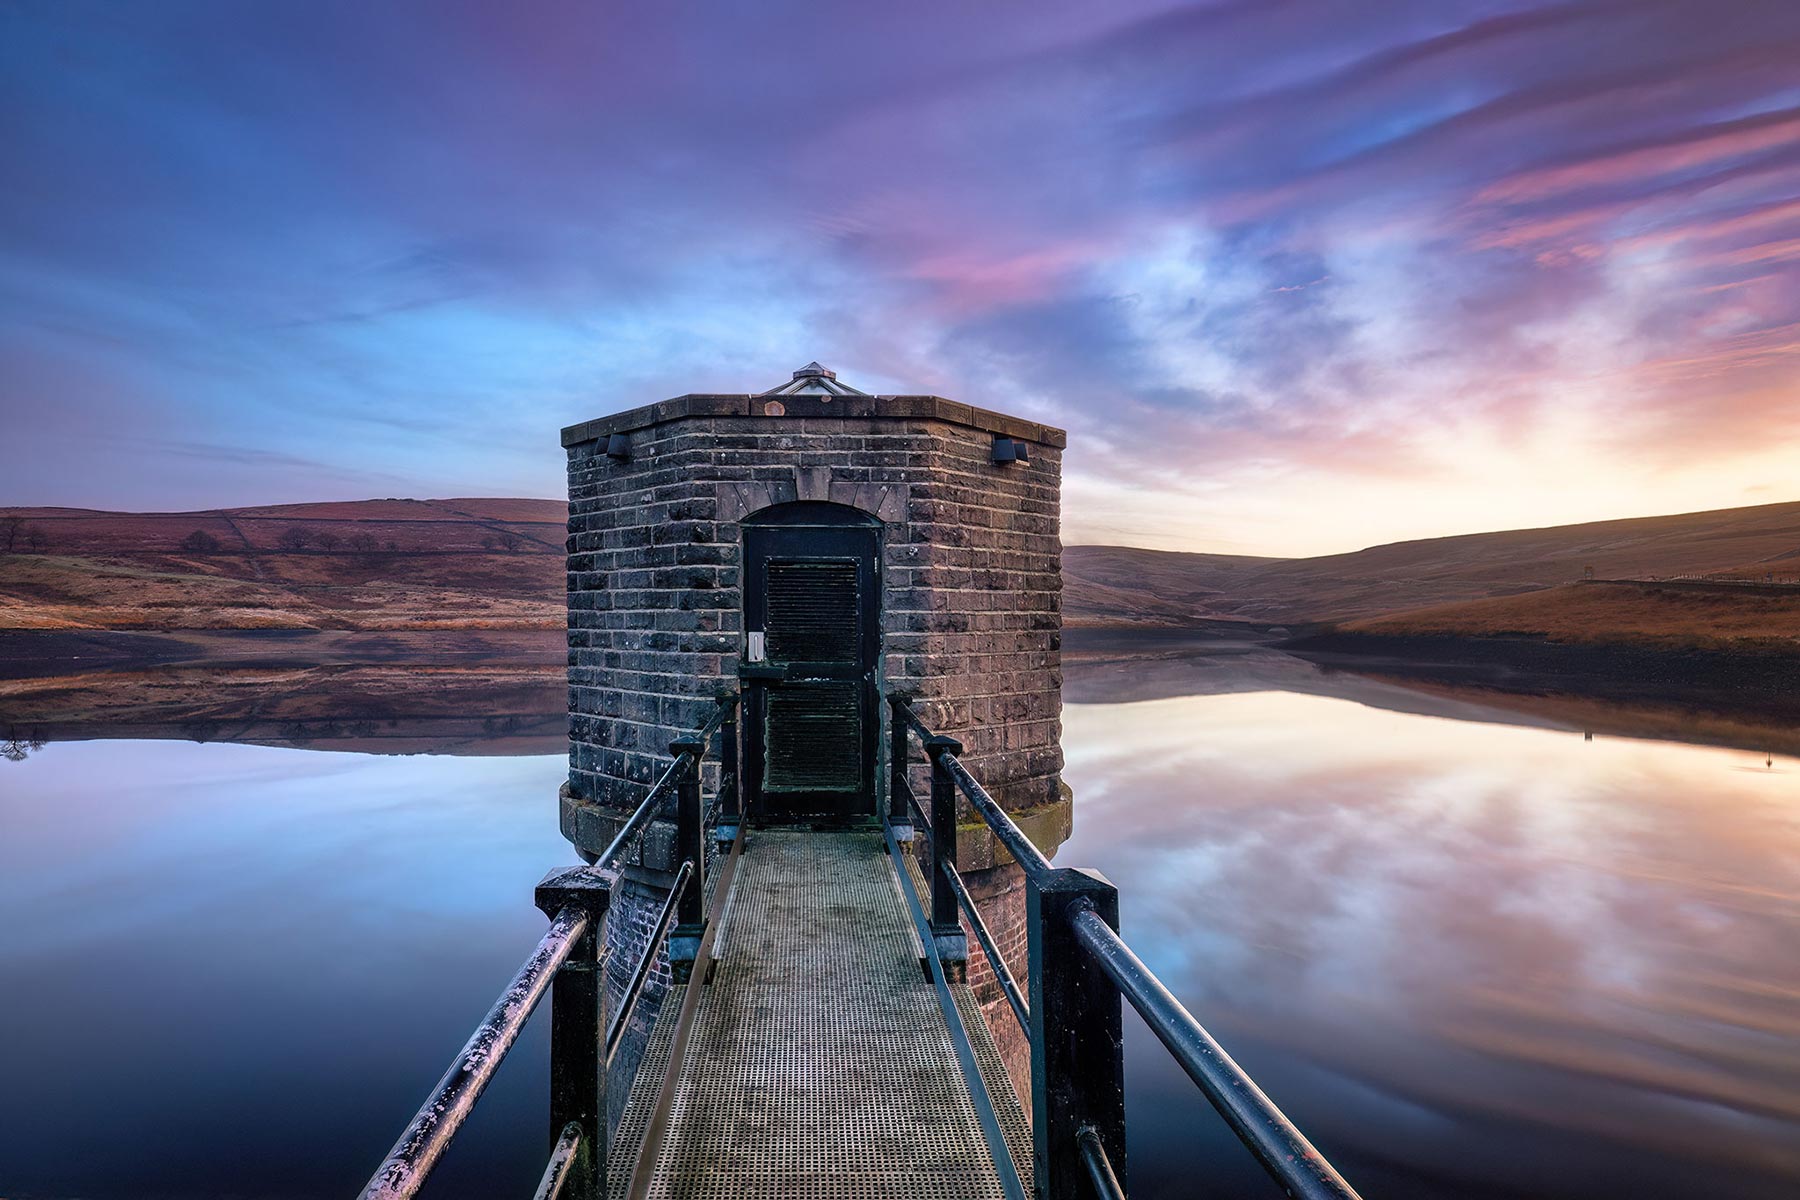
A stunning dawn recently at Dowry Reservoir, Saddleworth, Yorkshire. I captured this image with my OM1.2 and 8-25mm to demonstrate simple exposure blending.
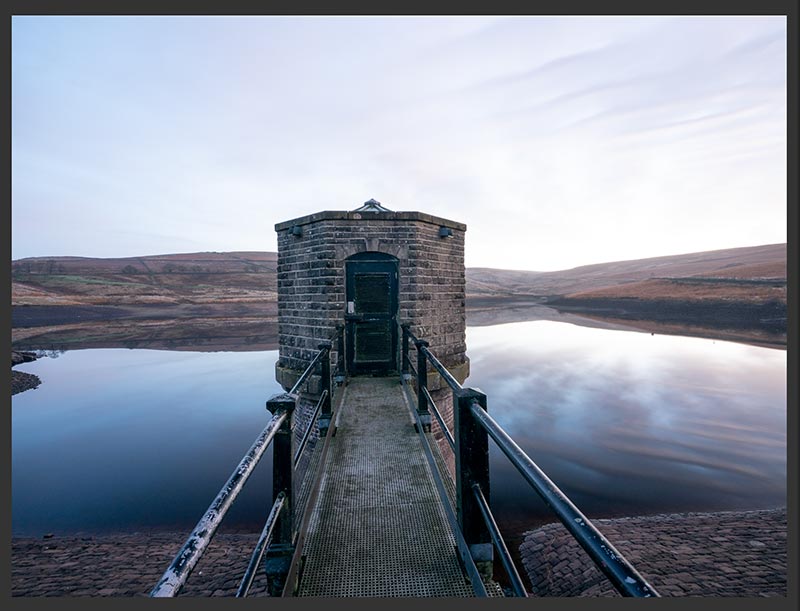
Raw 1 – 8mm 8s @f5.6 ISO200
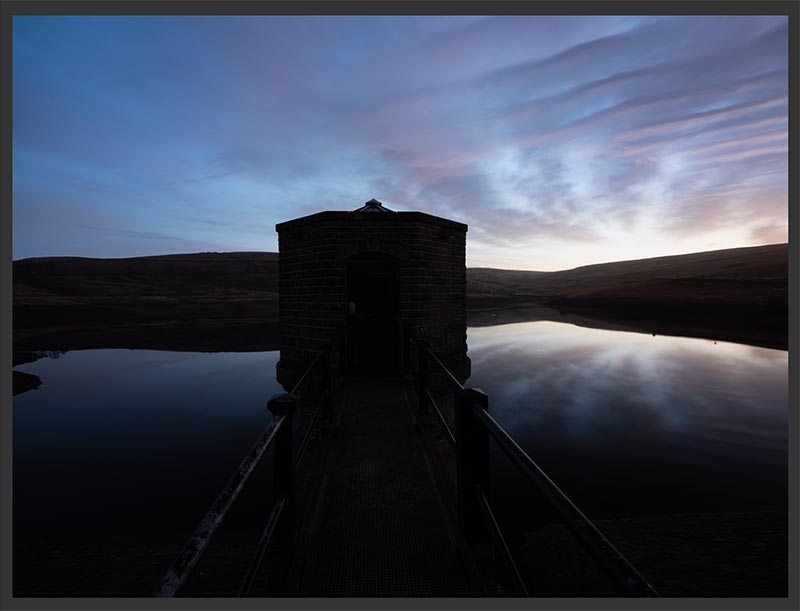
Raw 2 – 8mm 2.5s @f5.6 ISO200
The raw files as shown above, one was taken for the foreground and one for the sky. The foreground was taken exposing to the right and making sure that my histogram told me the bright parts in the foreground were not blown even though it looks like it here. The sky image was taken to capture the brights. I need to merge both of these shots together in Photoshop.
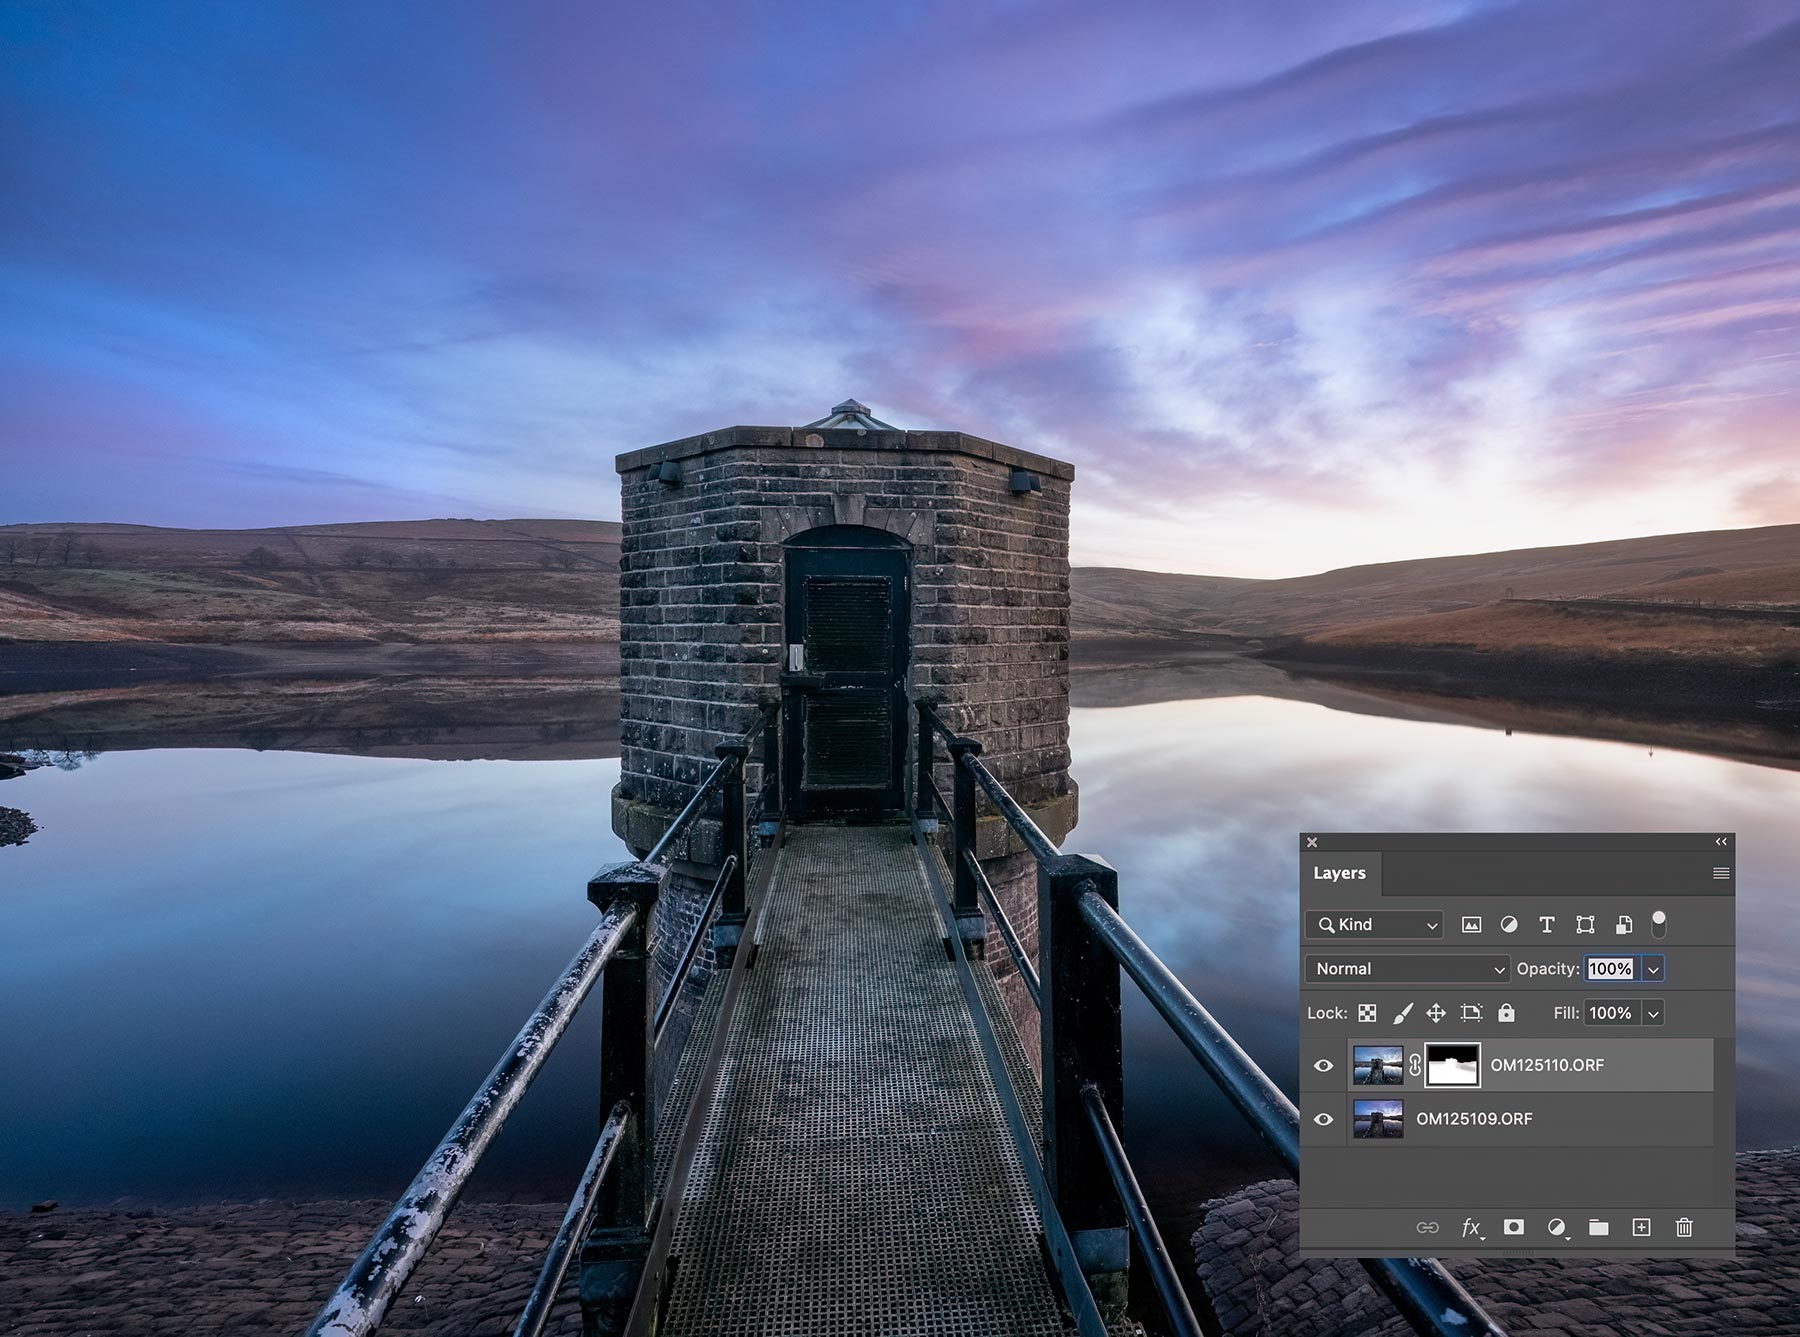
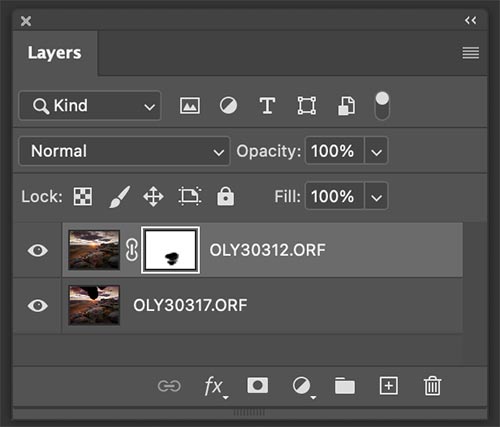
Both images merged together as layers in PS. Note the layers and the mask.
The steps are pretty straight forward and just as you would when processing any file in Lightroom.
1. Make adjustments where needed to the foreground frame, basically process it to your preferences. Recover highlights in the water. I can ignore what happens to the sky.
2. I processed the sky frame to my liking. I’ll open shadows on the hills just because I don’t want them to be so dark, I might want to blend it a little so I will open them, ignoring what happens to the rest of the foreground because it will be redundant anyway.
3. In my haste I noticed the walkway is distorted. I’ll ignore that because I will crop it to remove the brick embankment I decided in hindsight I don’t like. For now I just make a slight adjustment to the horizon level with the Transform Guided Tool in LR (# icon). Copy it, deselect all and just select Transforms to be copied, and paste to the other image.
4. Remembering I cannot access AI Denoise after the images are sent to PS I run it on both images,. Send to PS layered into one document by right clicking and Edit In>Open as Layers in PS
5. Once open in PS I make sure the bright frame is the top one. Use the eye icon to make sure they are aligned; if not use Edit>Auto Align. Add a selection just with Select>Sky. The selection also included a little of the peak on top of the pump house roof so I used Quick Selection to subtract it. Remember you could refine it if needed by expanding it, feathering it, or whatever is needed.
6. On the mask notice I added a very slight brush with black. As the images are different exposure lengths the reflected clouds did not quite match up so I just brushed over lightly to bring back some of the layer underneath. The beauty of blending yourself is the control you have being able to pick out details or tones and not have HDR make decisions.
That’s it. I can now flatten it (or stamp layers if you want to preserve layers) and proceed making my adjustments. I cropped it a little, then changed it to 3:2 aspect to get rid of the foreground bricks I thought were ok at the time. I made sure the layer was unlocked and with Move I dragged the bottom right corner handle out to correct the walkway. Then I completed it by editing the colours and tones as I wanted.
APPLY IMAGE FUNCTION
Another way of adding a mask really quickly is to use the Apply Image function. With the images open as layers make sure the brighter image is at the bottom. Add a mask to the top darker image and with the mask selected click Image>Apply Image. Accept the defaults (Merged, RGB, Multiply, 100%). A mask is applied based on the image, and it will be a very accurate mask too. PS analyses the image and produces a greyscale mask which can blend tones very effectively.
It is not selective unlike manual blending above, but you can use it to refine more with selections. The drawback is that unlike HDR it does not try to reduce movement or misaligned areas. Try it though, in some cases it could be all you need.
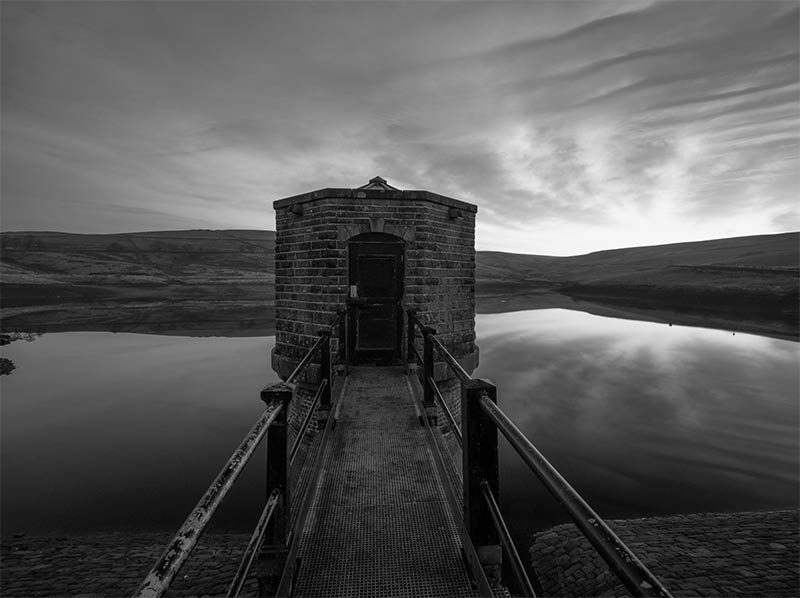
Mask created with Apply Image. Alt/Click the mask to view in the main workspace. It becomes almost black and white. Black hides, white reveals, grey reveals to a lesser extent.
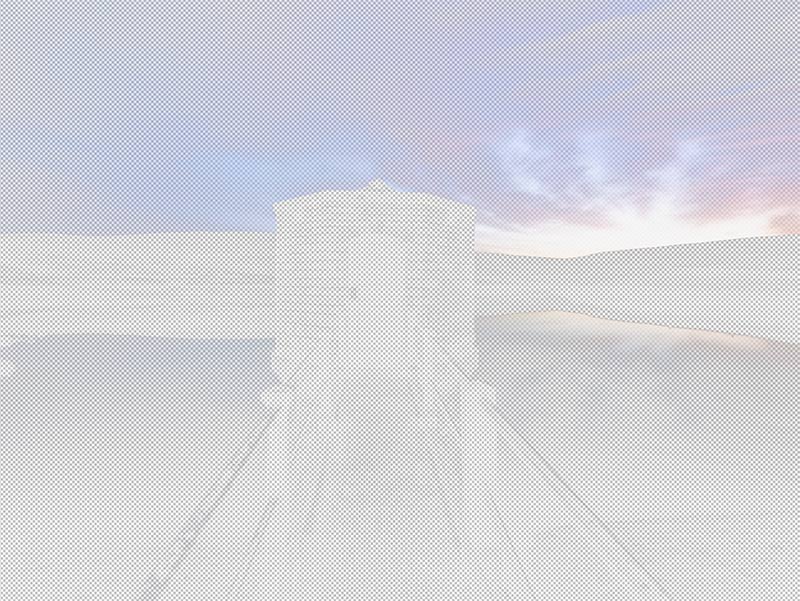
Switching off all the layers to view the effects of the mask only. Here we can see exactly what has been included and excluded.
WHEN IS MANUAL BLENDING MORE SUITABLE
Considering there are ways to merge images together in LR and PS with HDR, when is manual blending more suitable?
- When it is a simple scene and only a couple of exposures were needed.
- When you want more control over which parts will be blended, such as in the first example of the River Brathay image, only a part of a sky was merged.
- When there is too much movement and you want more control.
- When you want to blend another part of an image in which is nothing to do with exposure. For instance removing a moving object.
- Moving Object. A person, car etc is in your fame. PS is so good at removing such things but not perfect, especially if there is complicated detail adjacent. As long as the object is moving take another frame, then stack them together, with a mask brush out the object to reveal the image underneath. Because the object was moving it will be hidden in a different part of the frame under the top layer.
- You took several waterfall shots at different shutter speeds; the light is better in the background in one but the shutter speed on the water is better in another. Merge them together.
- You have a fantastic sunset shot but with lots of flare. Take another shot covering the sun with a finger to remove the flare and merge them together.
- Focus stacking. There are ways to focus stack, although sometimes you have two images and one is great, but one area is sharper in another frame. You do not have to focus stack, just manually merge it in.
Manual blending becomes much more complicated with scenes where multiple images are needed to capture the dynamic range. Perhaps you took 3 or 5 frames and need to merge them together. It is possible of course; each frame will have its own mask and you’ll blend in the parts needed with the selections required, or even start to use more advance techniques such Luminosity Masks. In LR and PS we have easier ways to merge multiple frames, HDR.
HDR (HIGH DYNAMIC RANGE)
HDR is the combination of different images with different exposures into one image to maximise the dynamic range. It has good points, it is fast, it will find differences in alignment and auto align shots, and it is also very clever at finding movement between shots and reducing it. It also has bad points, the results can look very over-processed just like the typical HDR’s you’ve seen that make your eyes bleed, and you have less control over what parts of an image are merged. There are also different ways in LR and PS. When is HDR more suitable?
- When the dynamic range is wide and more than two shots are needed to capture it all.
- When there are complicated tones that will be difficult to blend manually, even with just two images.
- When you can’t be bothered to blend manually.
LIGHTROOM HDR
Lightroom has its own built in HDR function which is very effective and simple to use. It is more suited to sets of bracketed images, 3 or 5 shots, when you want to combine all the tones or dynamic range into one image. Of course you can also use it with just two images and see how well it merges the shots.
→ TIP Don’t confuse HDR merging with the HDR Mode in the Basics panel. This mode is incredible; it basically extends the dynamic range (see the histogram extend when in HDR mode) and shows what those tones you expected from the raw should look like, especially brights. Unfortunately you must have an HDR capable display which mine is and many now are. The main issue is that wherever you show images online only the Standard Definition image will be displayed because HDR is still largely unsupported. See the next section for more information.
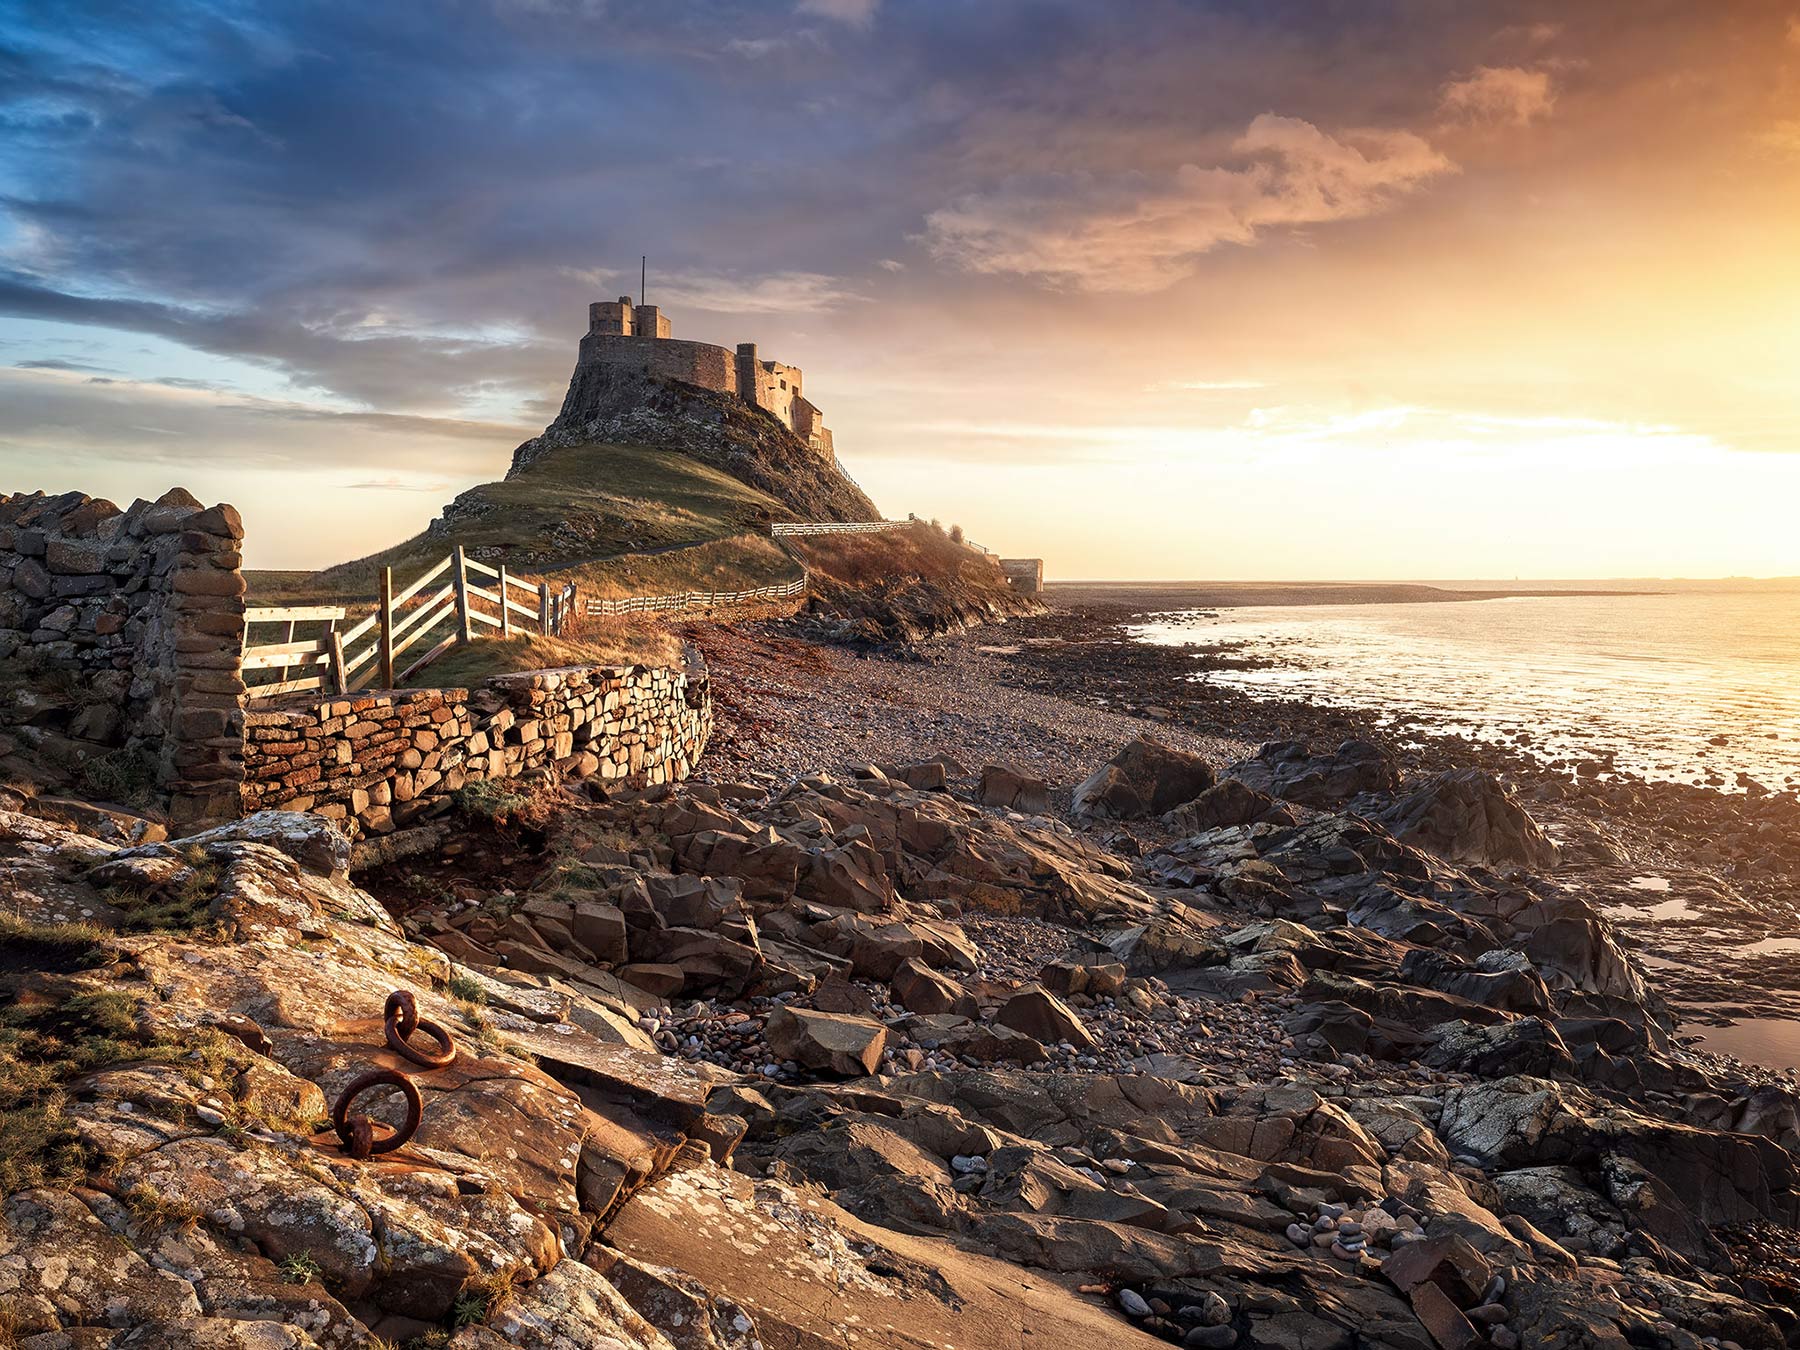
Lindisfane Castle at Dawn, Holy Island Northumberland
I’ll start with this image of Lindisfarne Castle on Holy Island captured at dawn. As the light became quite intense I captured an exposure bracketed sequence of 5 frames 1 stop apart. The brights were fine just one stop over so I exposure shifted them down 1 stop so I had -3, -2, -1, 0, +1.
Reviewing the images I saw I did not need the darker frame, all the tones are in the next frame. Better to have too many captured than not enough. When I merge them I simply omit this frame.
I can also tell that whilst the brightest frame has much of the sky blown as you’d expect, the next frame has enough to enable me to process a good image just with that frame. I would introduce noise opening shadows too much, so I am better to merge the shots.
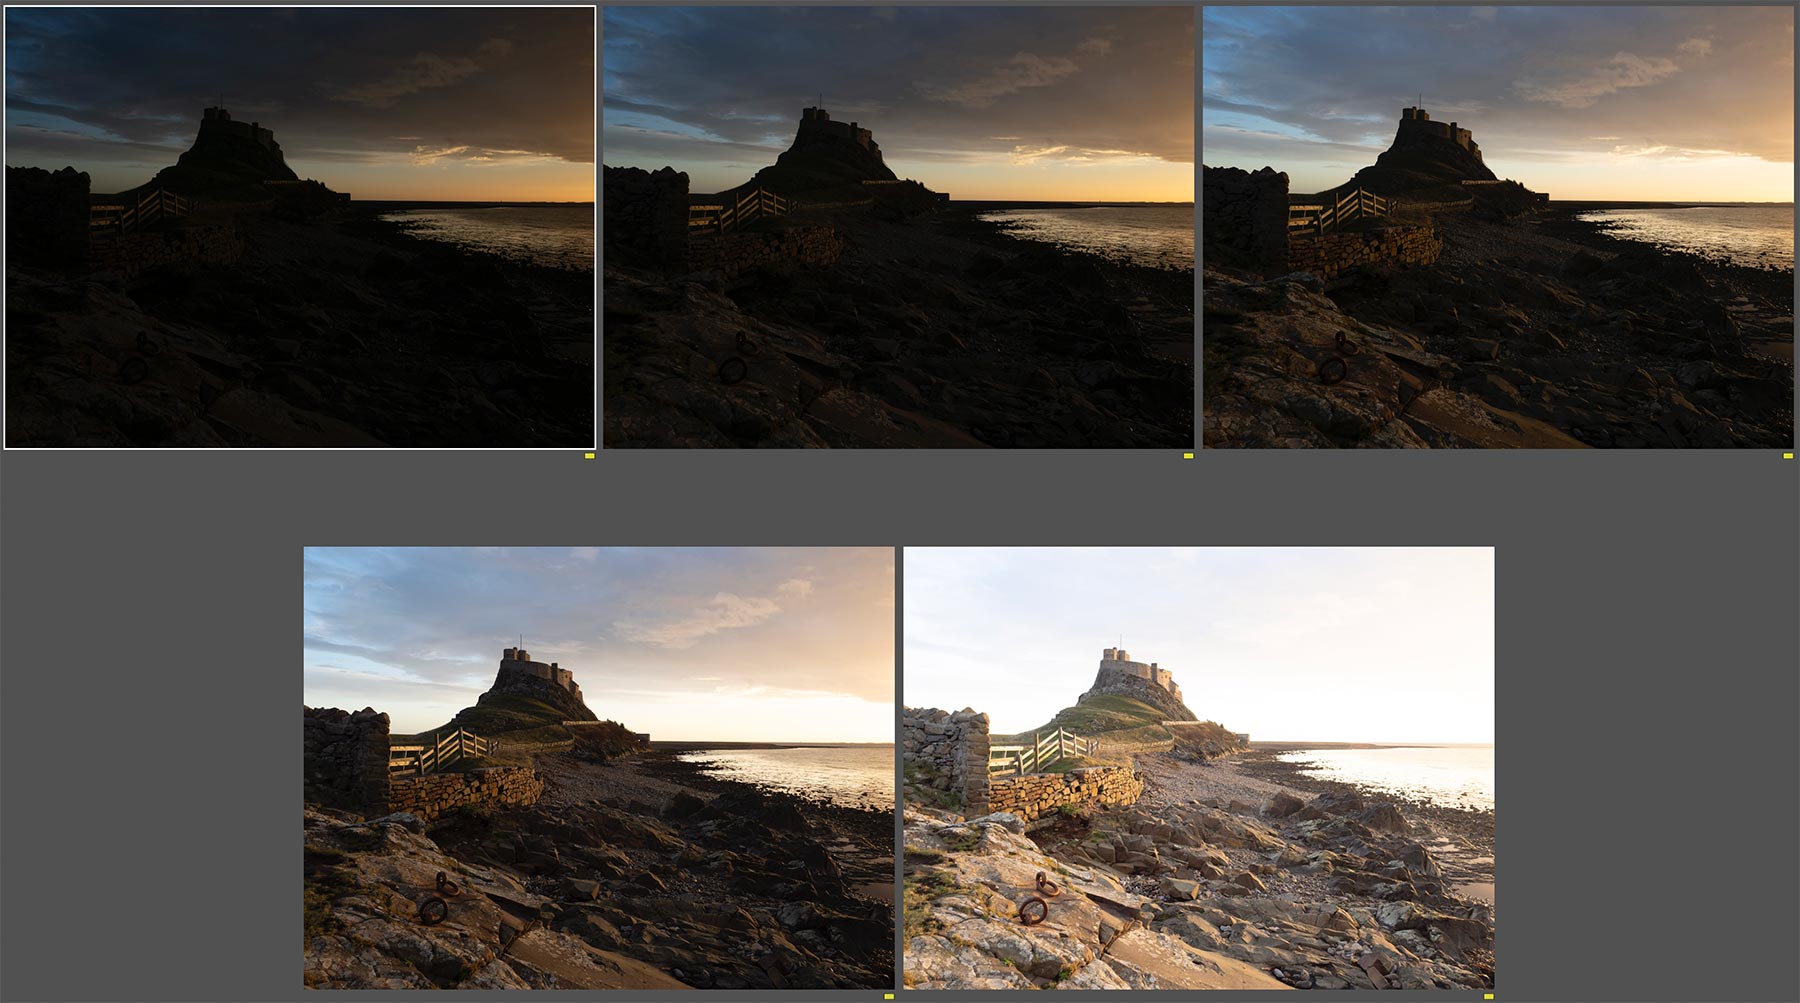
Raw images from the captured sequence one stop apart.
With your images selected right click and select Photo Merge>HDR. There is no point processing any of the images because most of it will be ignored. Enable Auto Align and create Stack. Auto Settings shows a preview of the auto settings LR thinks should be applied after analysing the images. Accept it and you will see all the sliders adjusted accordingly which you can fine tune or reset.
Deghost Amount is important. If there is movement Deghosting will tell LR to select the best frame to reduce or remove it. Select the amount required if necessary and check the image by zooming in. There was movement here in the water however selecting ‘None’ it was fine. It is very sophisticated and most times it does a great job.
And that’s it. You now have an HDR image with all the tones merged into one file.
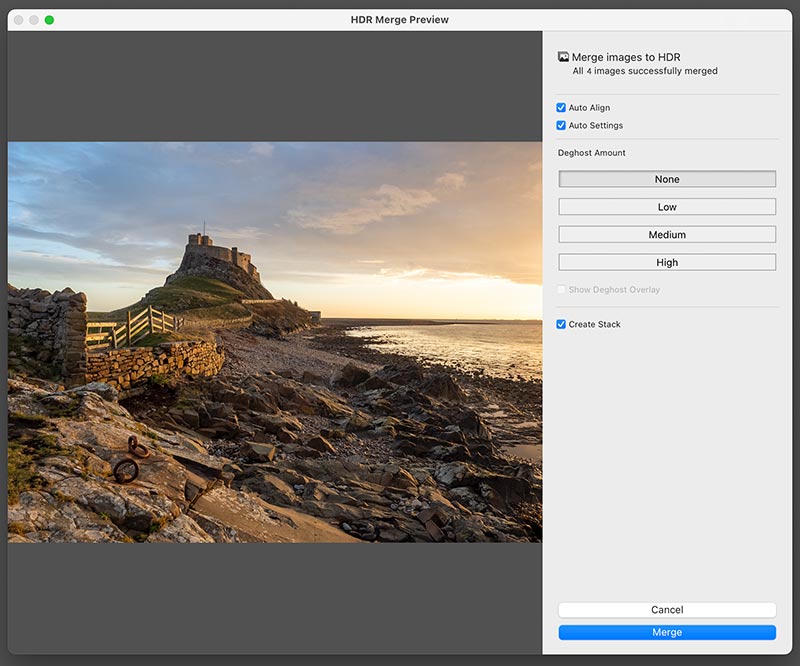
HDR Merge Dialogue
A huge advantage with LR HDR Merge is your image will be brought back into the Library as a new DNG file which is a raw format and you can then run AI Denise on it. Previously you could not do this so each frame would need to be denoised first and then merged, or run noise in another app. You can then add additional processing to this as you would any other image. The key is to not make it look HDR, the last thing you want is for highlights and shadows to be the same luminosity. I brightened the light on the water and horizon, maintained some depth in the shadows, and then adjusted brightness where needed on the foreground, the rings, fence and wall and also on the castle where it faces the light with a few selections and freehand too.
PHOTOSHOP HDR PRO
Photoshop also has its own HDR merging function. It can be accessed from LR; just as in the previous step select images and right clicking use Edit In>Merge to HDR Pro in Photoshop. The images are sent to PS and layered into a stack, then the HDR Pro dialogue will open.
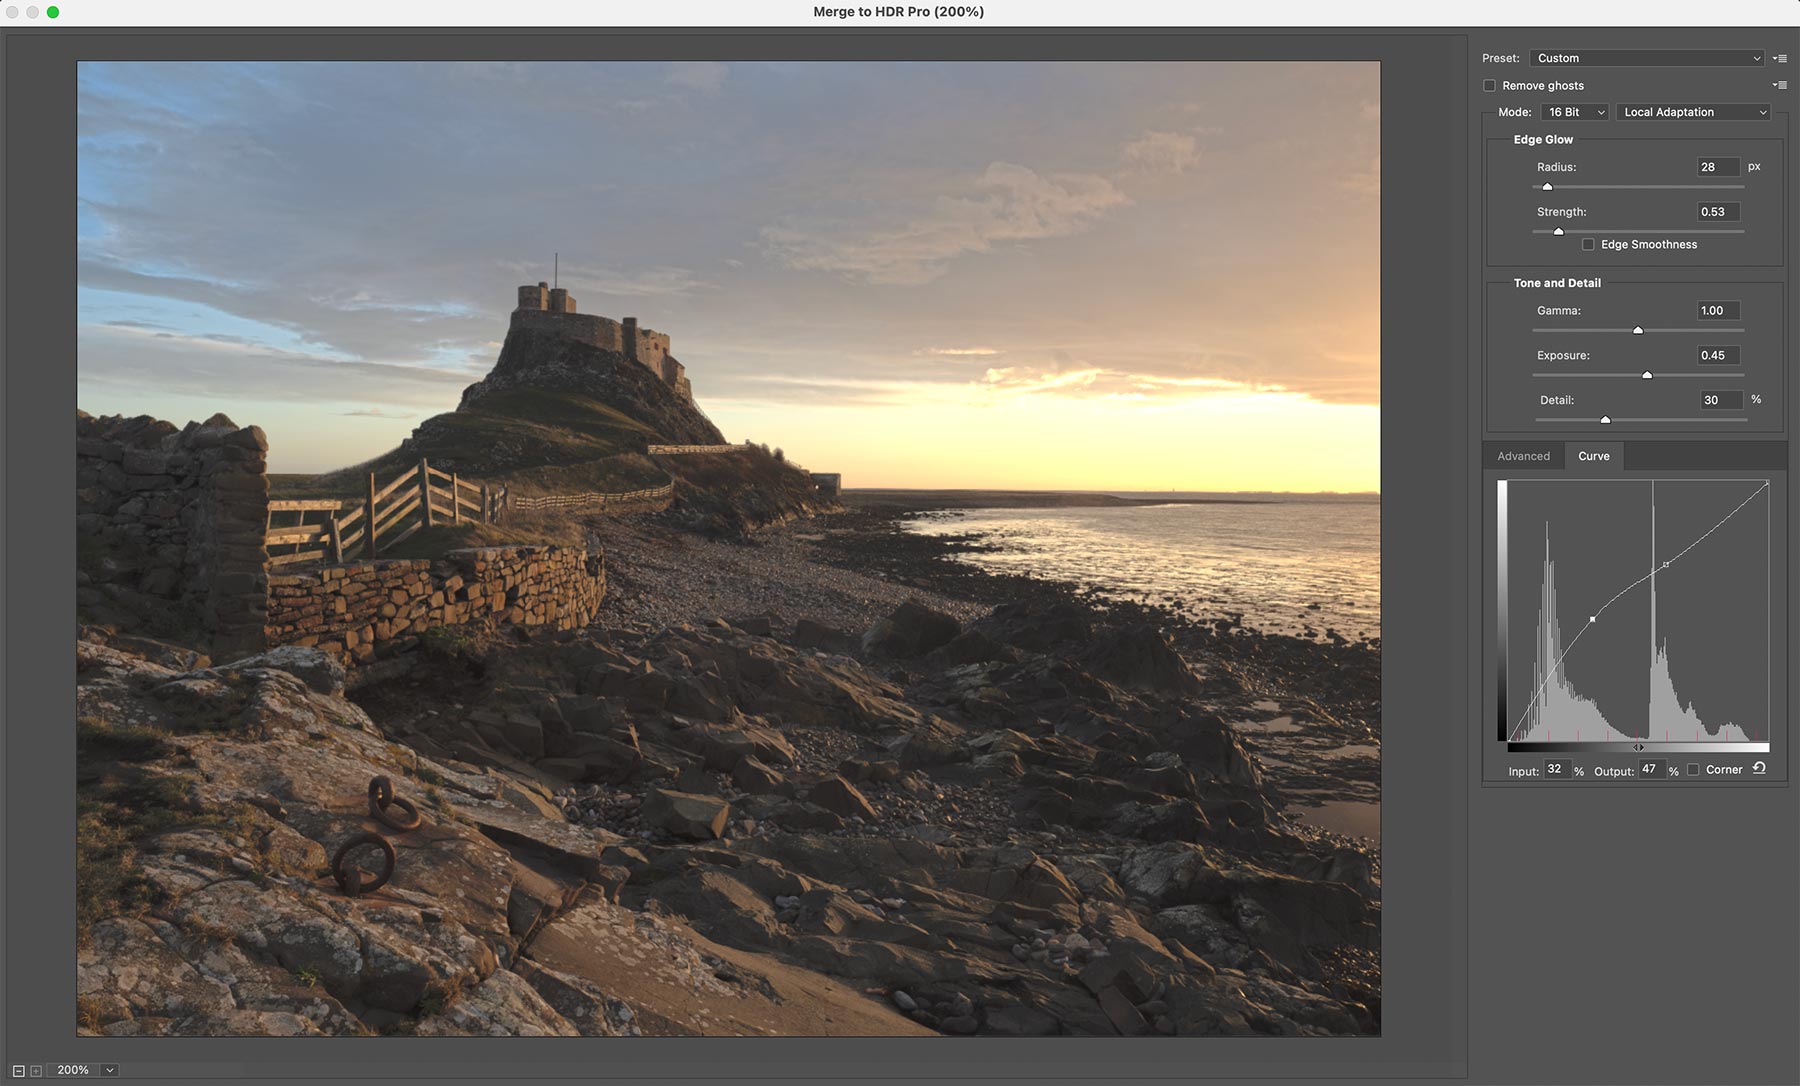
PS HDR Pro merge.
PS has more options than LR however I always find the tones to be very flat. It will find all the tones and merge them into one and as a consequence it loses quite some contrast. LR will do the same if you leave ‘Auto’ off; however I always find LR to do a better job, do not be fooled my the ‘Pro’ moniker. Here I accept all the defaults and then brighten it with the curves tool which are more sophisticated than the standard sliders. Photoshop has an advantage that the layers are intact under the merged layer which you can use if you want to blend in one of the other frames, but it is easy enough to open any image in LR as a stack in PS.
Once the image is merged I can then start processing using the tools in PS. Remember you can also access Camera Raw from Filters so you have all the tools available in LR.
There is an important distinction, the image now in PS is a Tiff (if you correctly set this in the options we changed earlier), whereas the image merged in LR is a DNG raw. The image has been merged but still needs more processing and it is always better to use a raw file. I made a few basic adjustments here, personally I prefer the DNG in LR.
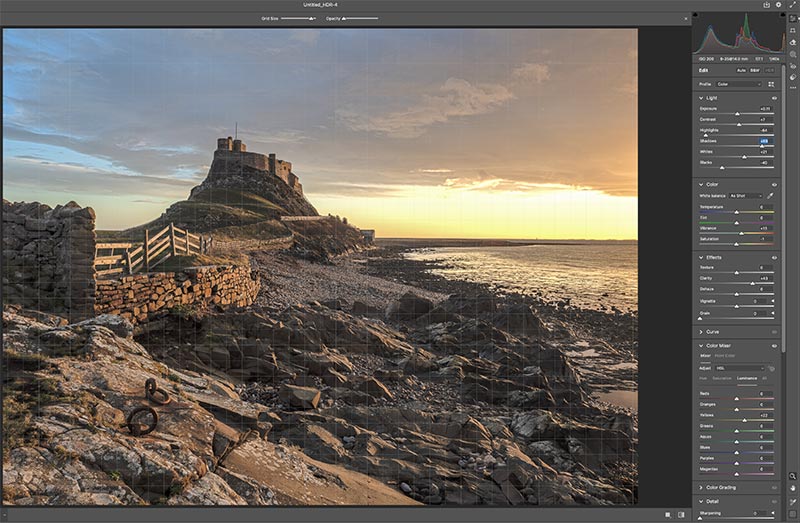
PS Camera Raw
Which is better, LR or PS? My money is on LR, the results have an edge and it produces a DNG Raw file. I can Denoise it, process it as a raw file with the greater latitude of tones and then send it to PS for using masks and selections if needed.
APPLY IMAGE
I briefly mentioned the ‘Apply Image’ function in PS as a way to merge images. It does not have to be limited to two images, it can be used for any number of images too. Each frame is analysed and a mask can be created based on the tones. A key difference is each of your frames need some processing although you can copy and paste or synchronise them. Not too much though, we just want to maximise each one.
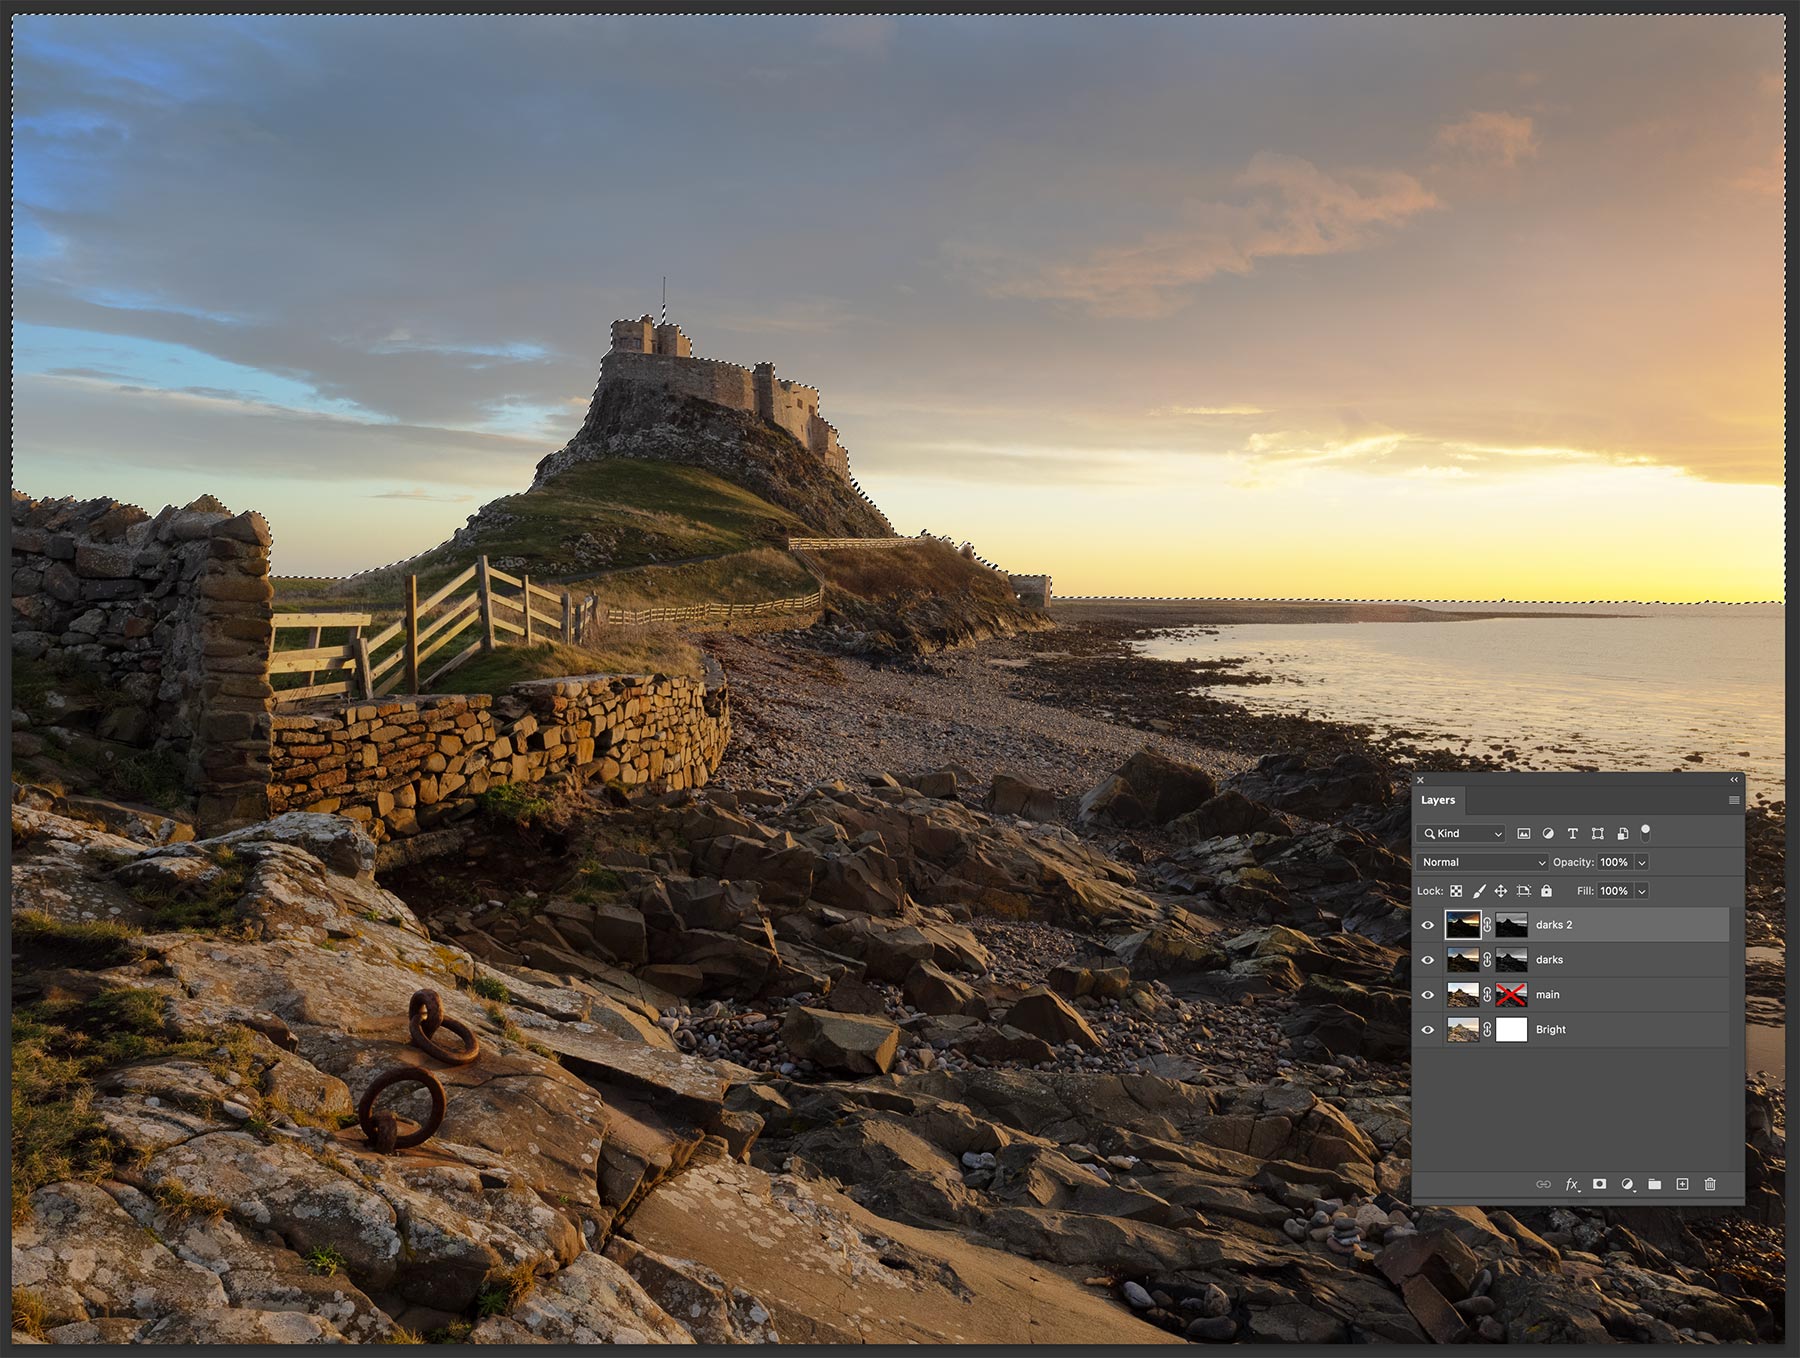
Apply Image function, with layers stacked and make applied.
Each image is sent to PS as layers stacked into one document. Make sure the darkest are at the top with the brightest at the bottom. Auto Align to check they align. Apply a mask to each and select Image>Apply Image, accepting the defaults as before (Merged, RGB, Multiply, 100%) to each except the bottom layer.
The advantage of this technique is you can then switch off layers, alter the opacity of the mask or disable one you don’t need. Masks can be refined with selections, for instance I made a sky selection here, refined it with a Curves Adjustment and with the selection still active painted on the mask over the sky to include more of the detail. The disadvantage is again unlike HDR there is no automatic merging of parts to try and remove movement.
It is a powerful way to edit an image and gives quite some editing control. With that control comes a payoff; time. It is going to take longer. With layers and masks you have such an amount of control, however you can end up with some many layers and masks it can be difficult to locate the one you need and find which areas you need to improve. This is in a way similar to Luminosity Masking.
MORE MERGING SELECTIVELY
REPLACING WATER
With the flexibility of layering images in PS we can blend any parts of them together as we have seen. And this gives us power to do manipulate images creatively. I mentioned blending different shutter speeds together. In the two examples below the same scene was taken at different shutter speeds, 1.3 seconds and 1/13th second. The first on the left is my choice, I wanted it soft and dreamy to create the atmosphere. Normally I aim for 1/4 or 1/6 for waterfalls, there is no right or wrong just personal choice.
What if I want the first image as it is but I want the water with more detail from another frame. Maybe the light was better in one, and the water better in another? Or you had to under-expose water in another frame?
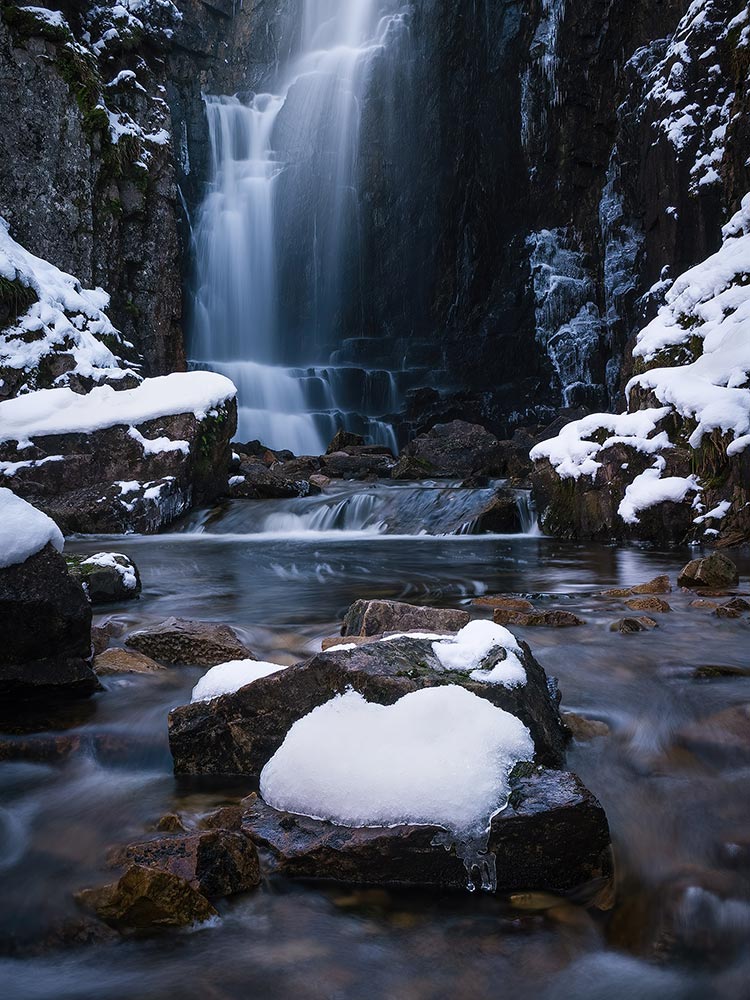
Wailing Widow Waterfall – 1.3s Exposure
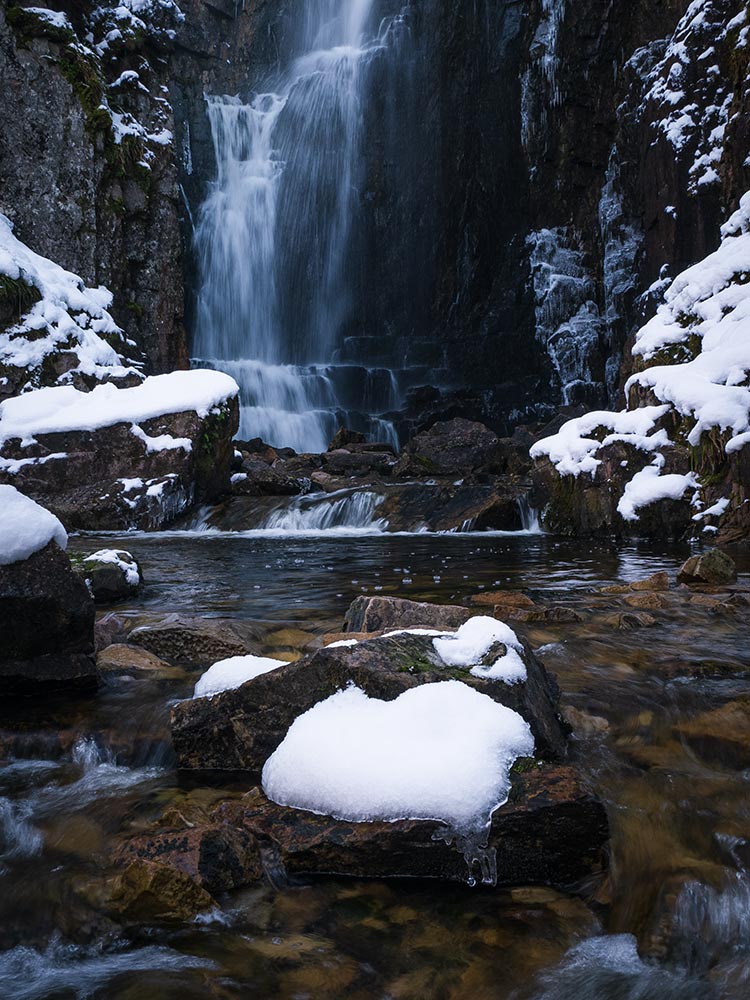
Wailing Widow Waterfall – 1/13s Exposure
Send both images to PS as layers, and check with the layer eye icon they are aligned. If not use Edit> Auto-Align. The water detail I am going to bring in is the top layer so I add a black mask and then with white just paint over the area to show it. For this I didn’t even have to use selections, I could just do it freehand. In other images you may have to make selections if more precision is needed.
Once images are layered it doesn’t matter which order they are in. Just think logically about it, sometimes it can save time to get the order the most convenient way. Here the second layer is on the top so I add a black mask (Alt) and use a white brush to reveal the area underneath.
If they were the other way around I would add a white mask and then use black to hide the area to show the image underneath.
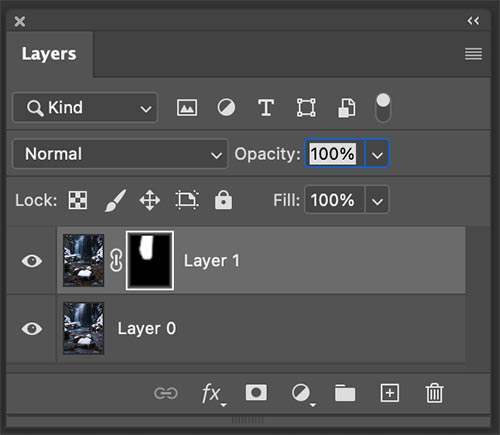
Both images layered and a mask added.
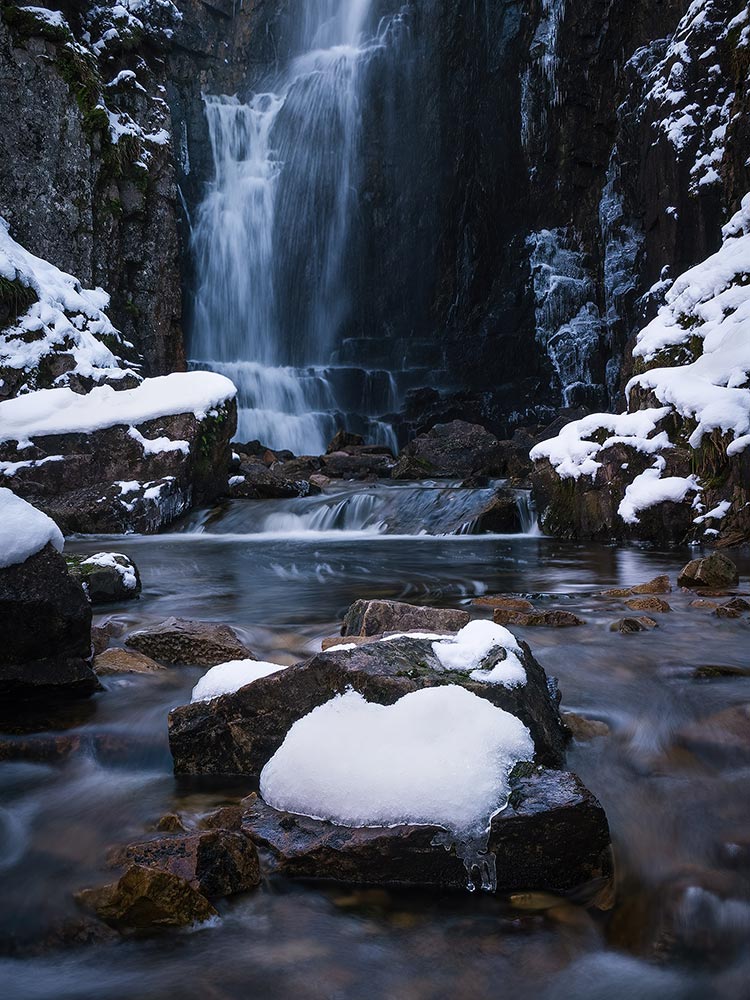
Wailing Widow Waterfall – Both images merged.
REMOVING SUN FLARE
Flare in an image is a common issue when the sun is in the frame. Using a wide angle lens can induce flare even when the sun is just outside the frame too. PS is now getting so advanced that it’s pretty easy to remove flare but still not so easy when there is sensor flare, large blobs that you can bet lie directly over important detail that is hard to clone or remove even with PS’s AI.
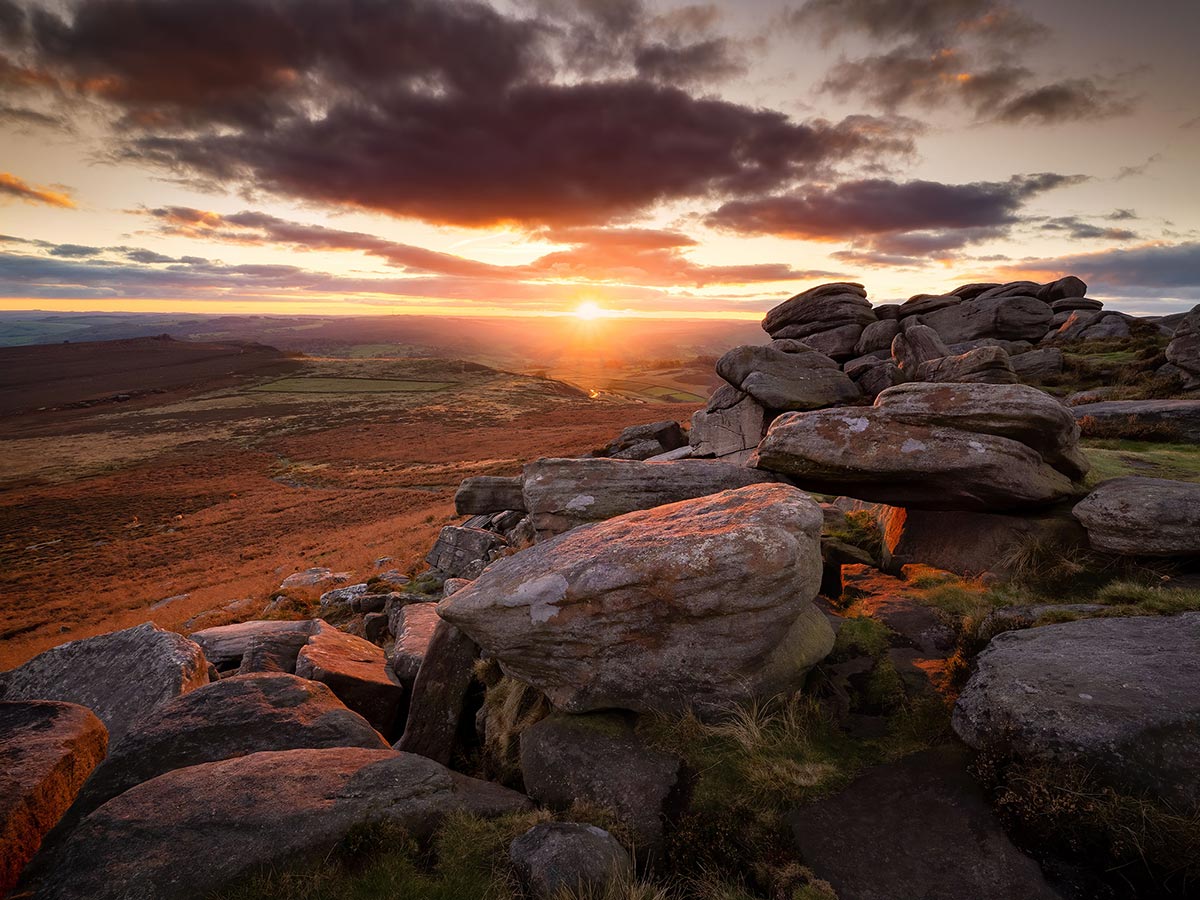
Peak District Sunset with no sun flares.
A simple solution is to take another frame obscuring the light source and thus removing the flare. Luckily you have a tool you carry around that will do the job, a thumb. The first frame shows the flare, a bright red spot. There are more challenging spots too, they are larger , and there’s also some magenta colour cast bleeding into the shadows. Covering the light source with a thumb eliminated the flare. The important part here is making sure both images are the same exposure; when the light source is obscured the image will be brighter so you will need to under-expose a little to match it.
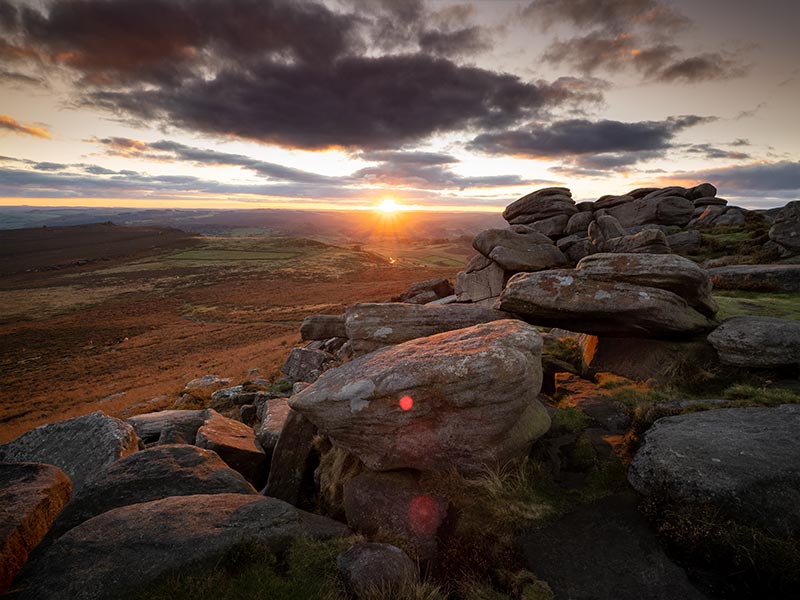
Original image with flare.
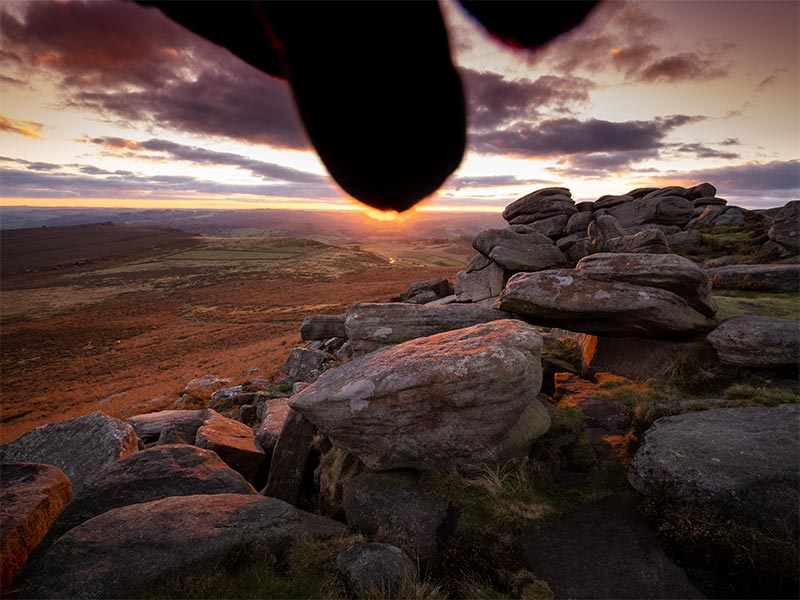
Obscuring the light source.
Both images need to be processed. They do not need to be exact, just the areas that will be merged need to similar. There’s a magenta colour in the sky in the’thumb’ shot but it doesn’t matter because I’ll retain the original shot.
With both images layered in PS I just add a mask to the top image with flare and paint with a brush to reveal the image underneath. I can then flatten it and carry on processing the finished image.
Both images layered and a mask added.
OTHER USES
Now you understand how to merge one part of an image with another, either accurately with selections, or loosely just with a mask and a brush, you can see how powerful it can be.
1 Light is constantly changing and while you have a shot where it is fabulous generally, another shot had just one highlight on a mountain or peak which was even better. Blend them together.
2 You shot a long exposure and the cloud movement, water, light and tones were great, but the foreground isn’t sharp. Another shot you took is sharp because the shutter speed was shorter and the wind died down. Again, blend them together.
3 A person is in your scene; it looks like they will be there a while and you think it will be hard to remove, Photoshop is good but not perfect. As long as they are moving take another shot with them in different positions. Stack the shots together and blend the top sections out to reveal the space underneath.
4 Focus Stacking two shots. You were not quite sure the background is sharp; take a shot with focus on the background and blend them together. We will explore focus stacking in the next section.
As long as it is the same scene, and you are not completely changing detail for another shot of another location, or even worse cheating with something you downloaded, it’s fine in my book. It is just the same as exposure bracketing when you think about it. Some photographers even ‘focal length bracket’, taking a wide shot and a longer shot of the background and merging them, although I think this is borderline.
COMPLETE
This section is complete and you should have an understanding of using HDR to merge images together, and using manual blending not just for exposure. There are many editing tasks we can carry out by blending images. Which is best? Personally I will manually blend if it is simple or use LR HDR, making sure that I alter tones to my liking, which usually means closing shadows a little more.
Note – There is a further section after this exploring HDR Mode Editing (completely different to HDR blending). If you do not have an HDR compatible screen please skip it and go to Focus Stacking.
Next we will explore another important technique, Focus Stacking. We can focus stack the easy way just by manual blending, and using Auto-Blend.
NEXT – 10 FOCUS STACKING IN PS
