8 – SELECTIVE EDITS IN PHOTOSHOP
In this section we will explore some selective edits.
The last section was quite long, in this section we will look at a few quick edits that will help refine your processing in Photoshop, and steps you cannot do in LR, or are easier to perform in Photoshop.
Selective Editing and Removal
Manipulate a Foreground
Remove Edge Halos
Selective Detail Enhancement
IMAGE PREPARATION
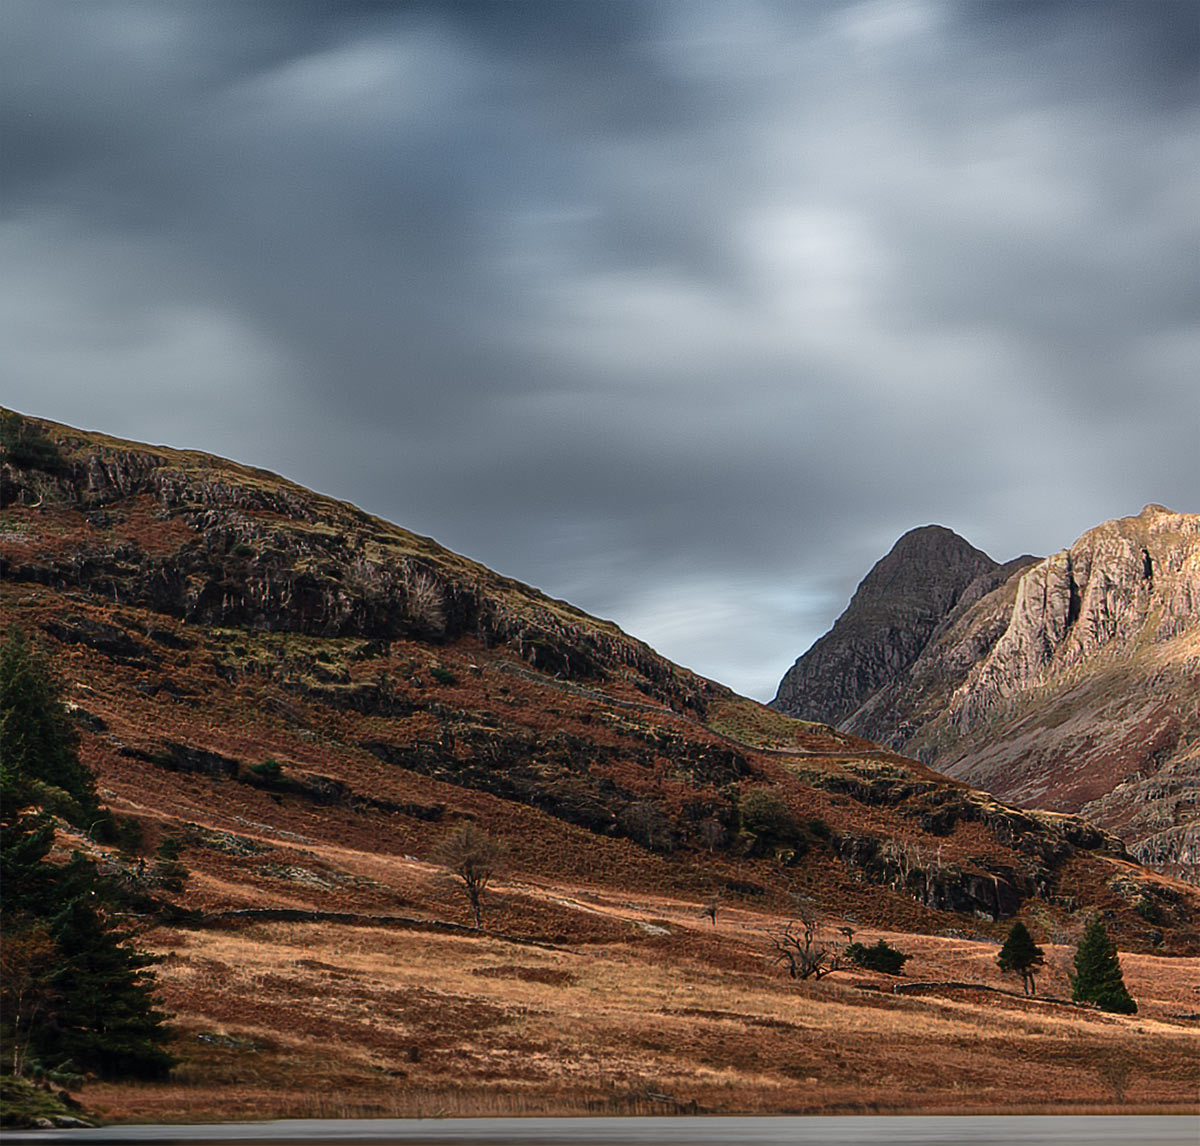
I do like this image from Blea Tarn, it is dark and moody just as I like, and there is some wonderful light dancing across the mountains in the background. It was taken as a long exposure of 15 seconds and the Raw file came out rather nice.
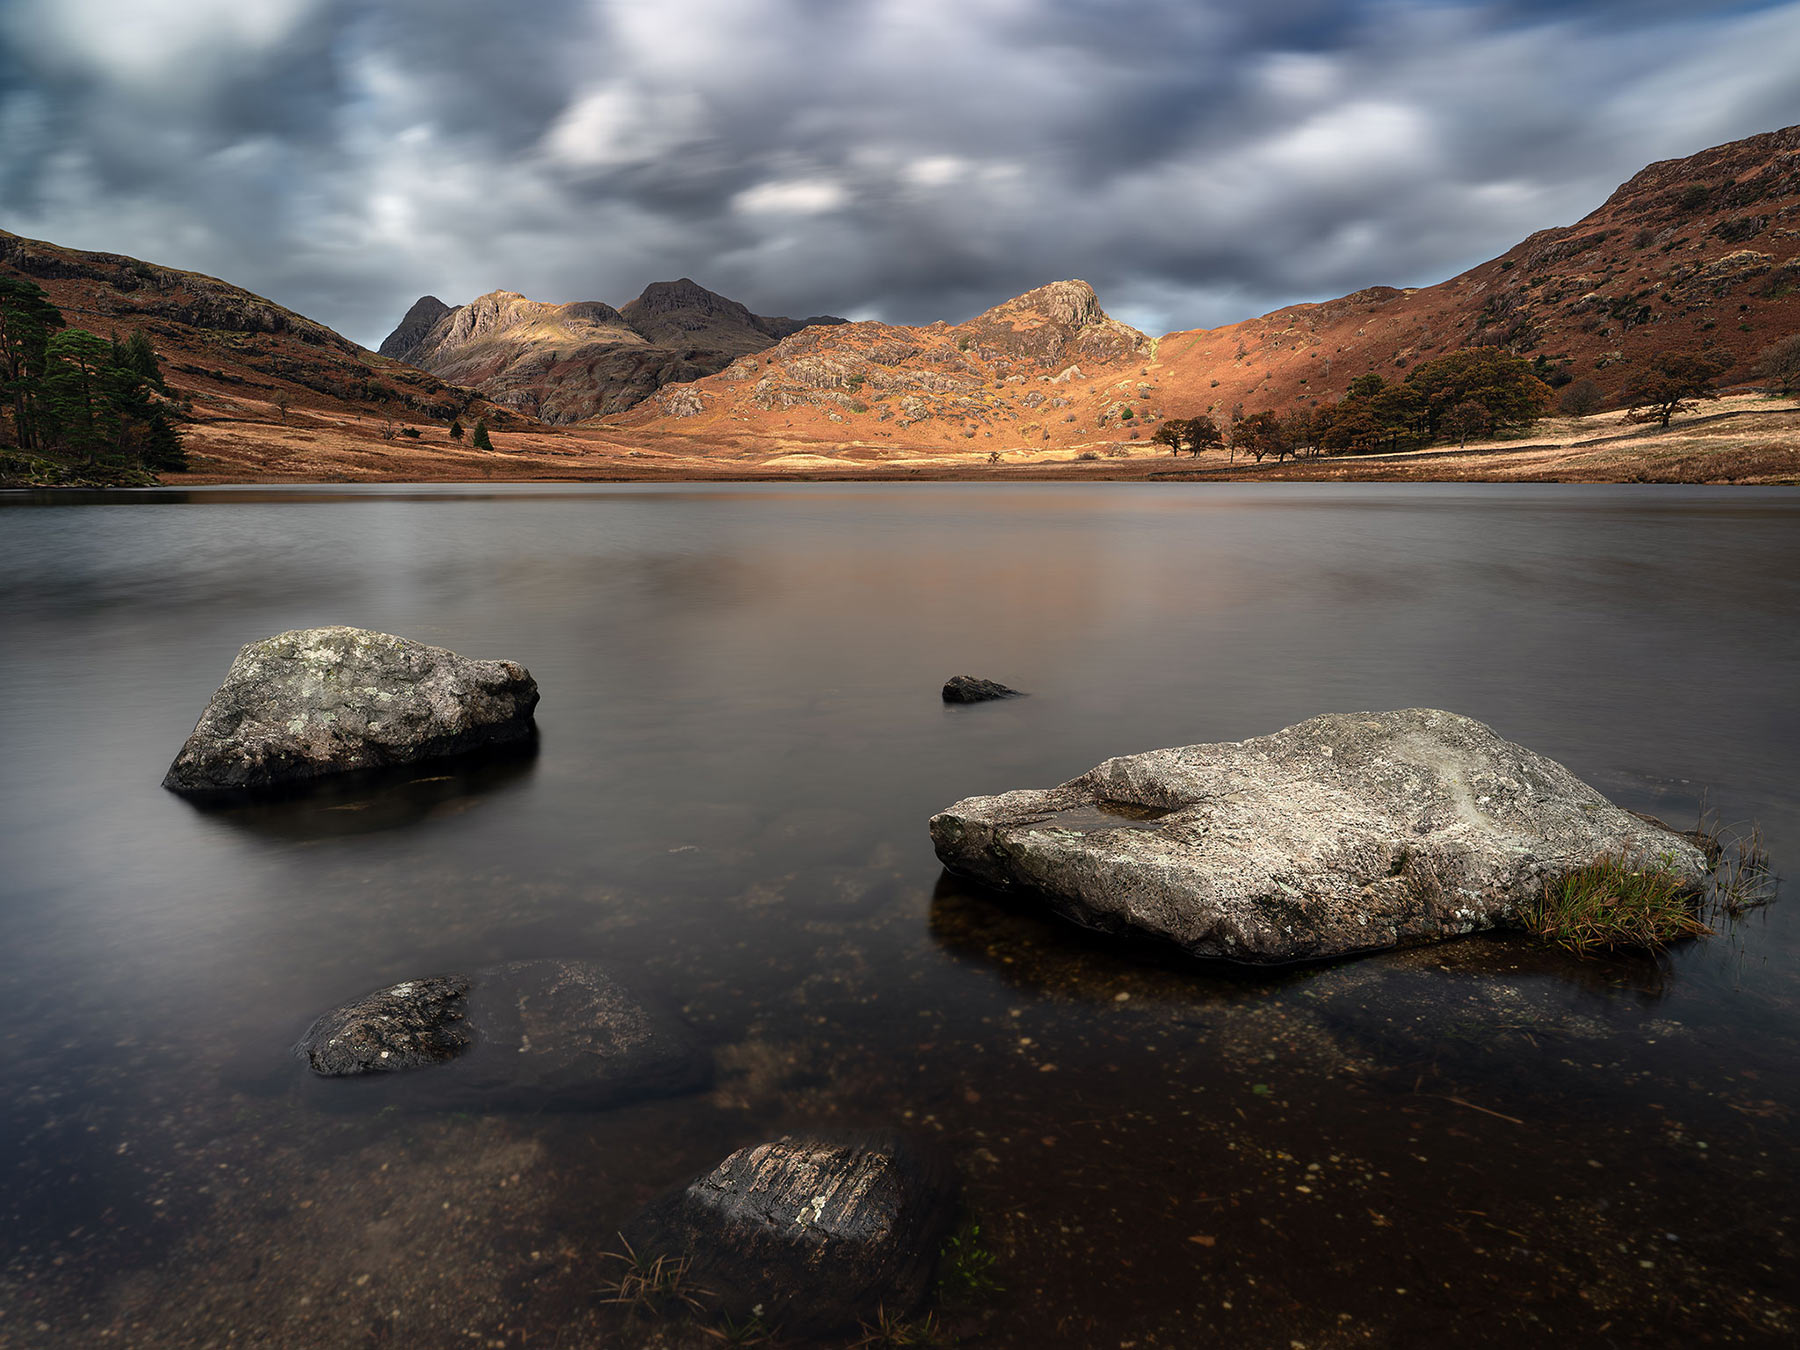
Blea Tarn Lake District 10mm 15 Seconds f7.1 ISO 200
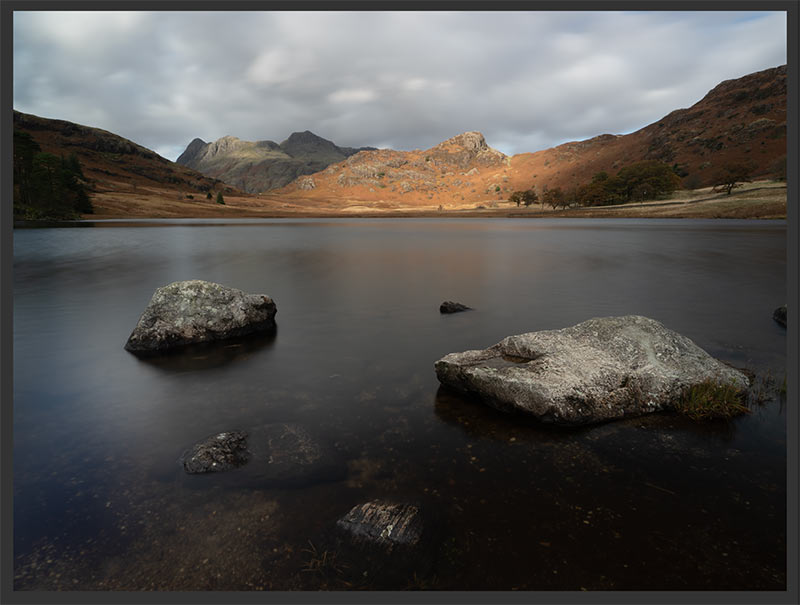
Raw File

Processed from LR
The Raw file is quite flat as is normal especially in an image like this. It is actually better to be flat, all the tones are there which I can highlight in LR before I send it to Photoshop. There are some issues I want to fix; there was an annoying rock on the right I could not avoid because of one on the left out of frame, the foreground is actually a little dark, and there are halos around the edge of the mountains. I can fix all these easily. First a rundown of the edits in LR:
1. In the Basic panel I check overall exposure, whites, blacks, highlights and white balance. I set white and black point with Shift+ double clicking the label.
2. In the background I opened the shadows a little with a mask and a brush over the area with ‘Auto Mask’ selected so it detects the edges.
3. Using the same mask, I boosted saturation, brightness and a little clarity to bring out more detail. I do not increase clarity globally because I do not want it affecting the water.
4. It is too dark in the bottom right. Anything I do will affect the left corner so to balance it I use a Linear Grad Mask and drag it up on an angle. I can then open shadows a little to match the left.
5. I want to increase drama on the sky. I could use a mask and select Sky, instead I used the new Adaptive Preset ‘Blue Hour’ which adds a mask with a few edits applied. Next I go to the mask and selecting it I added some Dehaze, and reduced saturation to reduce the blue. The Adaptive presets can work fine sometimes although you’ll need to make changes. If one is not suitable it’s easy to create a new one.
6. Finally after checking sharpness and checking other settings to make sure I’m happy, I run Denoise to get a new DNG raw file with noise removed.
I can send it to PS now by right clicking the thumbnail and selecting Edit in Photoshop.
→ TIP This was a long exposure, just 15 seconds, nonetheless what happens if light, and shadows, are moving across the landscape quite quickly? The shadows will be soft as they move, as movement in trees. Take another shot as a normal exposure and merge it in. I was prepped for another shot but as it happens I didn’t need it.
REMOVING OBJECTS
Duplicate your background layer first as a precaution.
There are far more tools in PS for object removal that the LR Remove, Heal and Clone that are just clunky to use sometimes.
We have standard tools in the toolbox such as Remove, Heal, Spot Removal, Clone and Patch, and we can also create selections for more accurate and details changes too. PS now has a way to detect objects such as cables and even people to remove. It is basically a case of trying out tools and seeing which works best.
For this I used the Lasso selection tool drawing a selection around the offending rock and used Generative AI. The Context Sensitive Task bar updates because it is aware of the tool you are using. Don’t type anything, just hit generate.
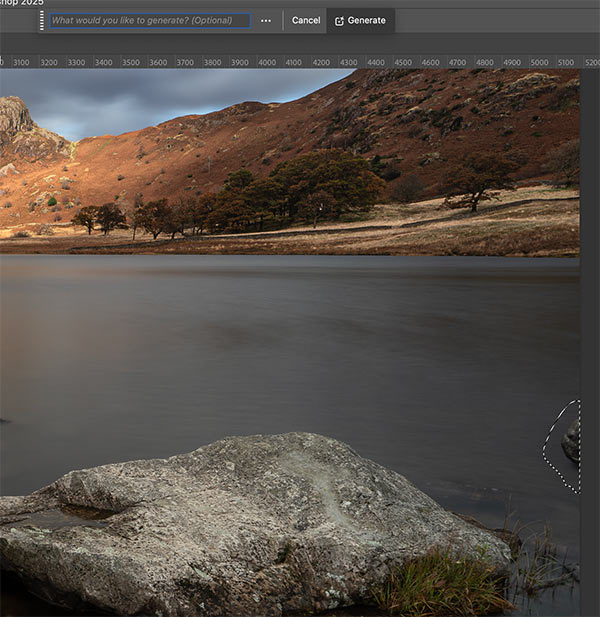
Lasso Selection
Three variations are produced allowing you to select the best. If one isn’t quite right select the best and hit generate again for the best. A new layer is produced with the change.
Next I want to remove a little of the grass next to the rock because it is going out of the frame. Using the Lasso again Generative AI struggled, it got confused which can happen with something close to the edge so I delete the layer. I can try one of the other tools to see if they work best but first as I have a Lasso Selection I right-click inside the area and select Fill>Content Aware. PS fills the area with matching pixels around the area. That was successful so I hit Cmd+D to remove the marching ants.
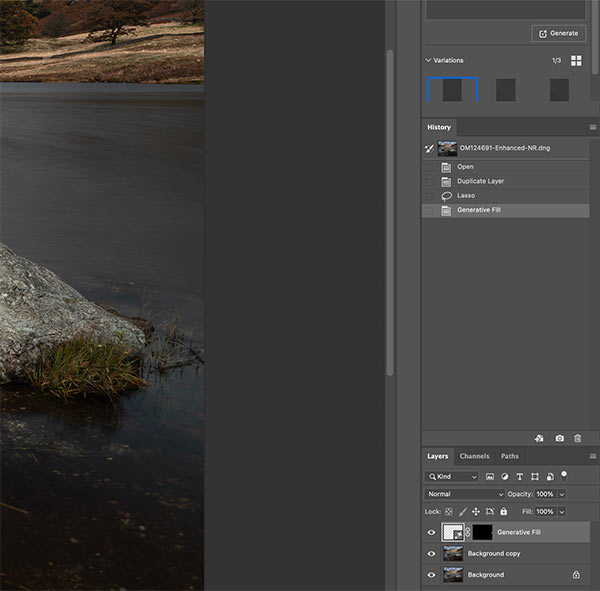
Generative AI Removal
EDIT BACKGROUND, ROCKS AND SKY
Next I want to work on the background and the foreground rocks a little, increasing the contrast, brightness, colour and making the tones pop. First I make a selection of the background mountains and the rocks. I use the Quick Selection tool and make selections on the background and the rocks. The rock selection is quite rough at the bottom, I am not concerned, all I want is the bulk selected and the top edges accurate. Similarly with background I am not concerned with the bottom, it is accurate enough. I am concerned with the top edge. There is already a halo and I don’t want to make it worse.
I go around the top making selections and use the + and – where needed. I can also swap tools if needed, using the Magnetic tool or Polygon, keeping in mind to make sure I vane the Add or Subtract enabled, and that when using tools such as this that are ‘drawing’ I have to complete it; the last point has to be back on the first point.
In Select>Modify I will then feather it by a pixel to avoid a hard edge, and then save the selection in case I need it again.
I go around the top making selections and use the + and – where needed. I can also swap tools if needed, using the Magnetic tool or Polygon, keeping in mind to make sure I have the Add or Subtract enabled, and that when using tools such as this to make points, I have to complete it; the last point has to be back on the first point.
In Select>Modify I will then contract the selection by a pixel and then feather it by a pixel, and then save the selection (Selection>Save) in case I need it again.
I can now use the selection to edit the tones and colour.
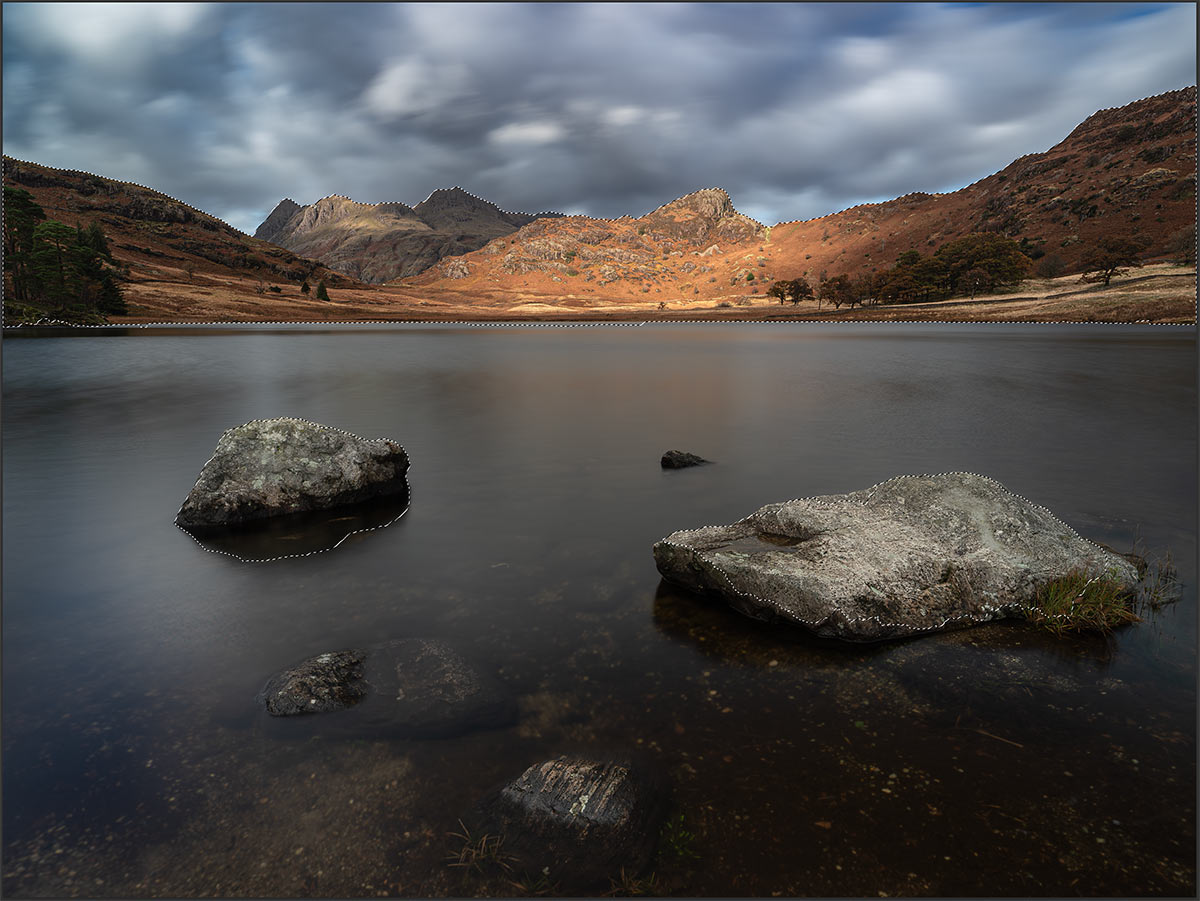
Selection Created
→ NOTE
I have not mentioned layers. Should we use Adjustment Layers for the next steps? Or Brushes? Or History Brush? It is up to you. I would just use History Brush, because I can swap and change rather than one adjustment at a time. I can brighten the selection, undo it, then paint back very easily with more on the background and less on the rocks by altering the opacity of the History Brush, then edit colour and do the same.
With an Adjustment Layer I can do the same by painting on the mask altering the opacity of the brush to give more to one area and less to another. It is not as fast, but possibly better until you build up confidence.
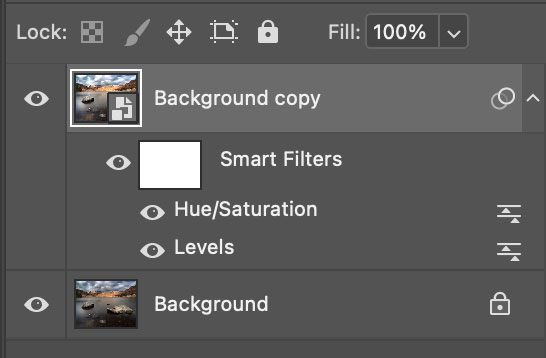
Smart Object
With a Smart Object, I can convert a layer to a smart object, make a Curves adjustment and then a Hue adjustment and they are added as Smart Adjustments. I can edit each as I need, and come back at any time. But notice there is only one mask for both adjustments. I cannot reduce the adjustment in different areas of each separately, it would be both. I would need a smart object for each making it redundant, I may as well just use an Adjustment Layer/Brush.
MAKE THE CHANGES
Ensure you save the Selection. What you do now affects the mask that is added when you add an Adjustment Layer. Add a Levels or Curves layer; because a selection was already active the mask automatically fills inside the selection with white and the non selected area in black to hide it. Neat. Proceed to adjust the brightness and darkness and watch it update. Usually you adjust to the maximum you need first, because then you can use a brush on the layer mask and reduce where you want less. You have plenty of flexibility.
The marching ants will vanish when a mask is added, so for the next adjustment you can simply reload the selection, than add another adjustment, Hue/Saturation for example.
In the steps above the mask is automatically created because the selection was active. We can then paint on the mask to reduces the adjustment if required.
I prefer to work by painting adjustment in, not removing them. The simple way is when the mask is created, paint over the white areas with black, roughly and quickly to fill it again, then switch back to white and paint again to reveal the changes with more control.
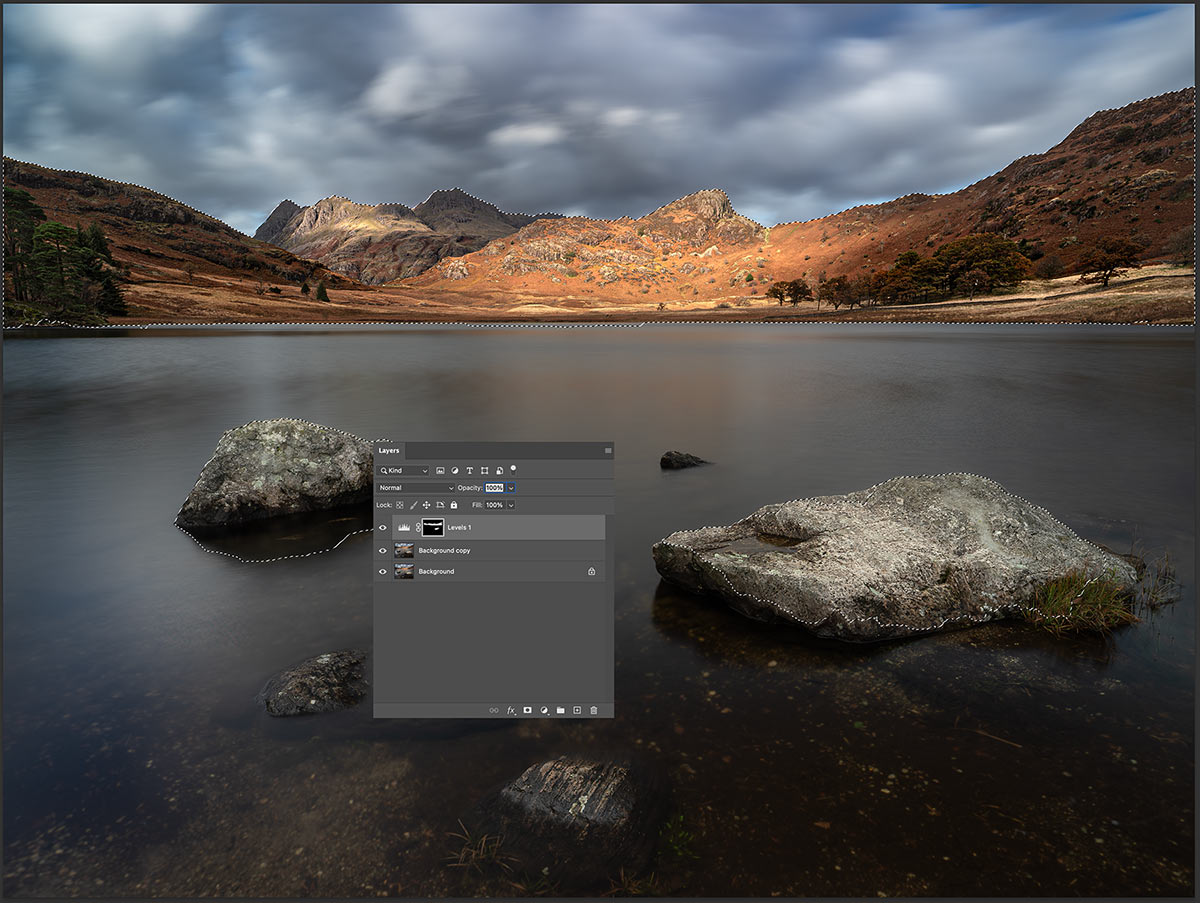
Selection Created
COPYING MASKS
I did the same again but this time with Hue/Saturation Adjustment Layer to alter the hue of the warm tones a little. I can reload the selection, add the adjustment layer and do the same as I did above. A little time saving trick, what if I want the mask to be exactly the same. Instead of reloading the selection I can just click the mask below, hold Alt and drag the mask up to the new layer. The mask is then duplicated exactly the same. This can really save time.
THE SKY
Manipulating the sky is just the same as above, except the selection we created was for the mountains and rocks. Reload the selection and then Invert it. Hey presto the sky is now selected saving all that time. And it was feathered so it should be fine. Pay careful attention to the edges when working on the sky, we do not want hard edges. The water is now part of the selection because it is inverted, just use a Quick Selection or Lasso and with Subtract selected, remove it. Save as a new selection.
You could just use PS’s Sky Selection, it is very good. It sometimes needs modifying but for a quick selection it works well. If you took time making an accurate selections for anything always consider if you can invert one and reuse it first.
I made an edit to the sky brightening it a little with curves and reducing the blue again.
PS SELECT AND MASK
PS Select and Mask (Under ‘Select’) is another way of creating and refining masks. Go straight to it, or use any tool and then select it to enter the mode.
There are some selection tools missing in this mode such as Magnetic. What it is really useful for is being able to show an overlay and access tools to refine edges.
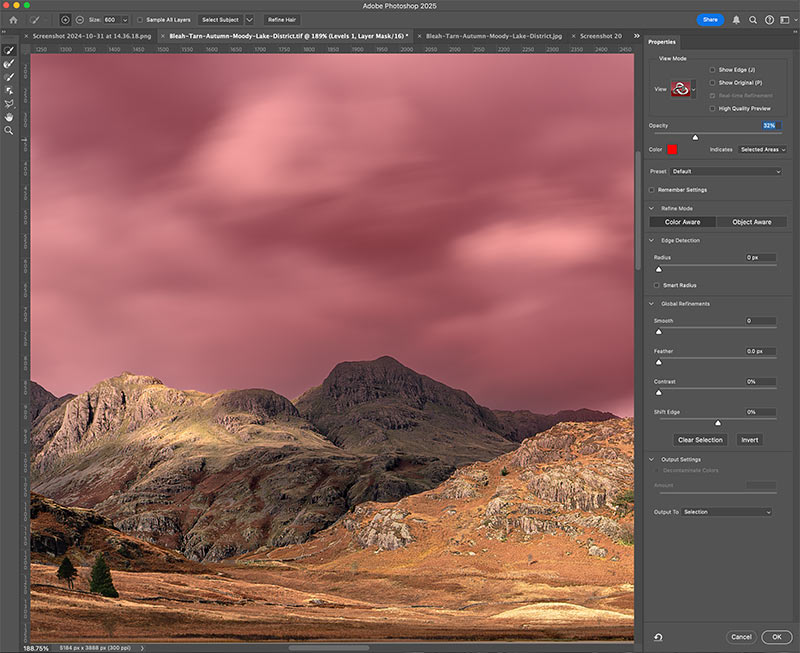
PS Select and Mask mode
LR MASKING
In comparison whilst LR masks are very quick and powerful there is currently no way to alter the edges with a feather or expand/contract it. The only way is to add a subtraction and use a brush which is painful at best
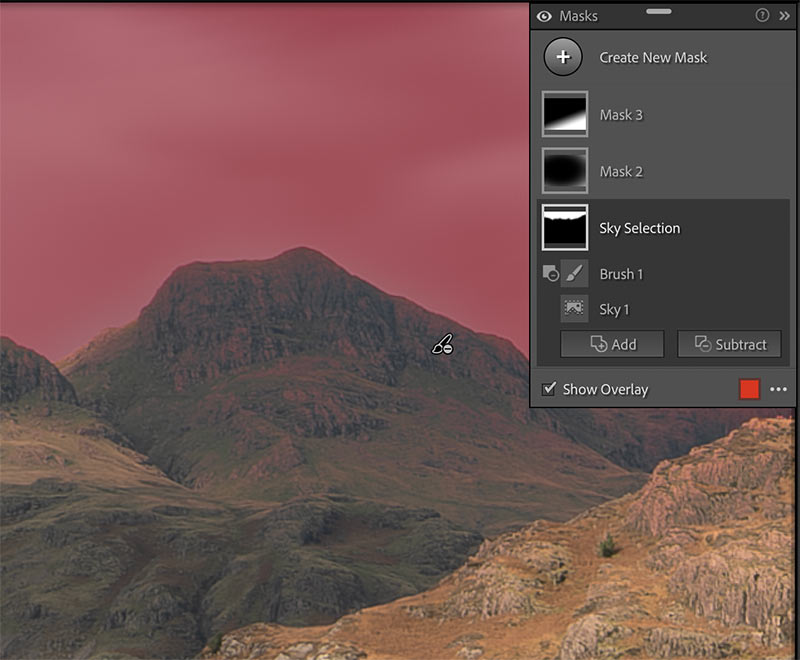
LR mask subtraction
EDIT FOREGROUND
Sometimes you just get it wrong. Don’t beat yourself up too much, just try harder and look if there is a way it can be corrected. Obviously it is much better to get it right the first time. I was constrained with the foreground because the rock on the left was too close to the edge but there was another just out of frame on the left making it awkward to recompose. My attention was on that and I neglected the space on the left, there’s too much. I can correct it a little but I cannot overdo it. Note-Compare to the raw image to see the comparison
First, I used a Rectangular Marquee Tool and drag a rectangle around the bottom half of the image. Then inside the rectangle right click and select ‘Layer Via Copy’.
A new layer is produced from that selection. Being observant here matters because of the reflections of the mountains in the water. Using the Transform Tool, I click the layer and drag the the centre handle (hold Shift) to stretch the layer. I cannot go too far because the reflection will not be under the mountain, just enough to reduce the redundant space on the left. There isn’t anything that will indicate a distortion, I just have to be aware of the reflections matching.
Next I add a mask to the layer and using the Paint Brush with a soft edge and medium opacity paint over the edge of the layer to blend it. Check the finished image and see if you can tell. I can’t. Flatten the image or keep layers intact.
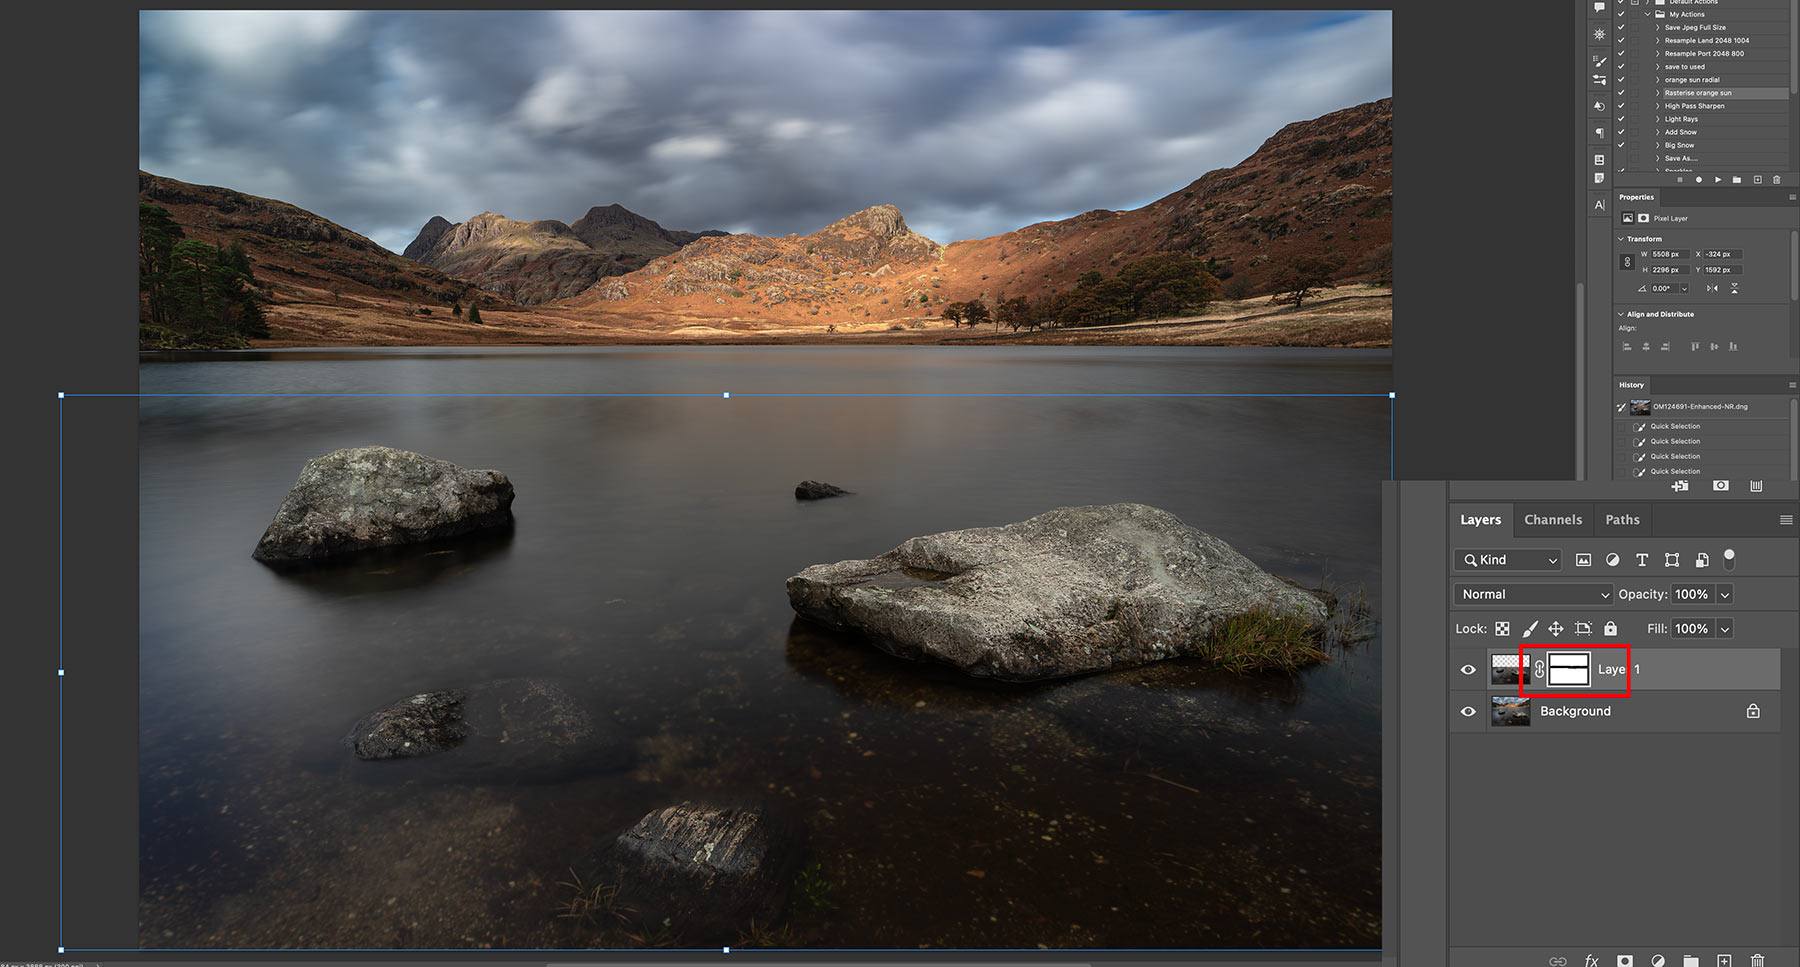
Foreground copied and stretched.
I need to brighten the water a little. If you have layers intact you would need to Stamp them again for a new layer. I just flatten mine. There are a few options now:
Add an Adjustment Layer and use Curves or Levels. Invert the mask to black so the changes are hidden, then load the Water selection (see below) and use a white brush to reveal the changes.
- Add an Adjustment Brush. Remember when using Adjustment Brushes a black mask is added. In this case load the selection first and then add the brush.
- Load the selection, use whichever adjustment you want, undo it and repaint with the History Brush.
I also used Shadows/Highlights to remove a little more of the shadow in the bottom right corner. An issue with Shadows/Highlights is that it is not available as a Layer or Brush, so it is far easier just to use the History Brush (or you’d have to stamp a layer again, adjust it and use a mask to control it).
→ TIP I will want a selection of just the water. Rather than starting again I can just reload my original selection of the mountains and the rocks, which means the top outline of the rocks will be the same. Then Invert the mask Select>Inverse. The sky is now part of the selection though, I can use the Quick Selection tool to remove it, or even faster drag a Rectangle Marquee box around the sky ensuring Subtract is selected. The sky is removed and I can save the selection as ‘Water’.
ENHANCE DETAIL
I will enhance detail, deciding first if I need it. It is not always necessary. Again there are a number of ways in PS. Below I used a High Pass Filter (Filter>Other>High Pass). Just as previously stamp a new layer and run High Pass. Set pixels to between 2-3 so just some detail is showing. Change the Blend Mode to Soft Light and alter Opacity to suit, without overdoing it. I can control it more by using a mask and loading my selection if needed, making sure black hides where I do not want any details enhanced. If there is no detail it will not be enhanced, but using a mask allows control however you want.

Enhancing Detail
CLARITY & TEXTURE
Remember Clarity and texture in LR? I can access those again if I want to. Stamp a layer and then use Filter>Camera Raw. Adjust Texture or Clarity to suit and accept the change. Add a mask and blend in the changes just as above.
→ TIP Make any edit you want from Camera Raw. The key as you are probably understanding by now is to use masks to control where you want changes to appear, and control how much too. Made it too aggressive? Alter the layer opacity or brush it away more.
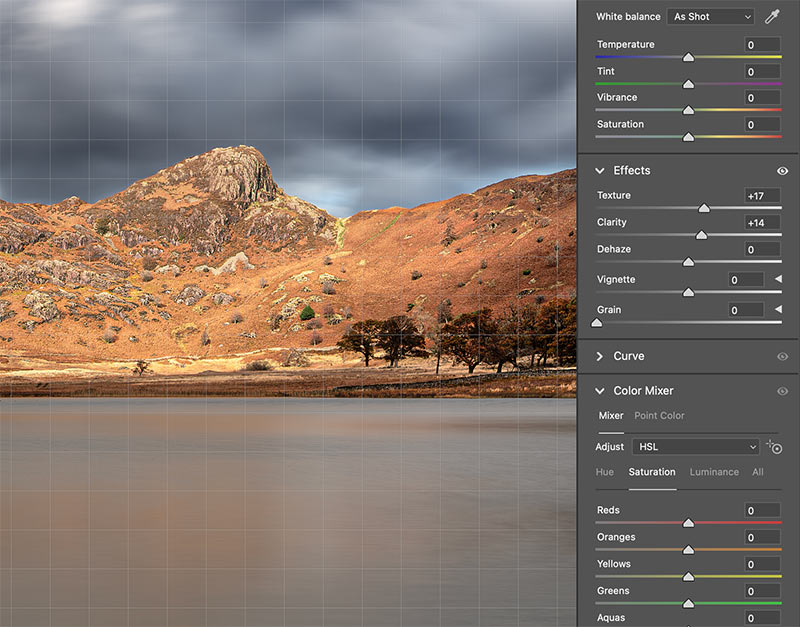
Accessing Camera Raw again
REMOVING HALOS
Last is to remove halos which are the horrible white edge usually around horizons. They are awful, and usually a sign that processing has gone too far on the image or a mask, or sharpening/detail has been too aggressive. The halo here is caused by making the sky darker than it was originally and being too aggressive with it. I should be very careful with how much overlap there is between such high contrast areas when making a selection. Masks with too defined edges are a thing to watch out for. Halos are a devil to remove until you know the easy way.
Halos-200% Crop

No Halos-200% Crop
An issue with halos is they become more pronounced with low resolution images; in my main image at the top I can see what look like a few on the mountain edges because it is a lower res image to save bandwidth. I was very careful at every stage so trust me there are none. The two images above are higher resolution images at 200% crops. I went back to LR and added too much sharpening, too much clarity , and generally pushed the sky mask just a little too much to exaggerate it. Resampling this image for a web or social media post and it would look obvious and not great on a print either.
The technique is actually simple, use the Clone Stamp tool, set the blend mode to Darken and adjust opacity to suit.
It takes a little practice. Stamp your layers for a new one. The size of the brush depends on the image, I try to use a slightly larger one to start and reduce it for fine areas like the crevice between mountain peaks.
Press Alt and the cursor turns to a Target allowing you to sample pixels (tones and colour). Sample pixels near the offending halo and brush over it. The key is to try and match the surround area and follow the flow, for instance if clouds have an obvious direction.
Sometimes you can be quite aggressive with it, other times a gentle approach is needed. It depends on the image, you will soon find find those white edges disappear. The darken blend mode tells PS to find pixels lighter than the tones sampled and replace them.
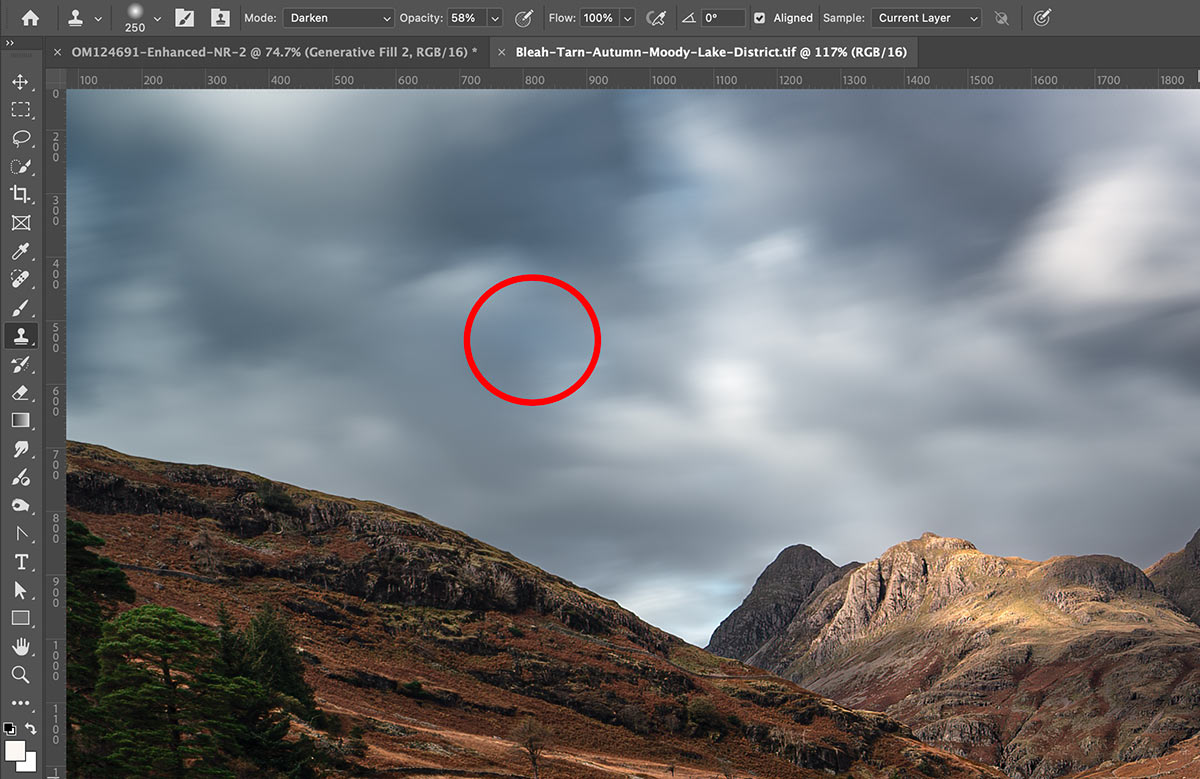
Clone Stamp set to Darken. Red indicates a brush size to start with.
→ Tip Most times you do not even have to use a selection for this technique. If I have an area that is very detailed or highlights I need to protect I may use a selection, but be very careful; if your selection does not include the halo you’re achieving nothing. I would expand the selection by two pixels and feather it a pixel.
COMPLETE
This section is complete. Next we will revisit Exposure Blending as a reminder of how quick it is to merge two images and compare it to different methods such as HDR in LR and PS.
NEXT – 9 EXPOSURE BLENDING / HDR
