
LIVE GND
Using the In-Camera Live Graduated ND Filters
Using filters to balance exposures in camera
Graduated ND Filters have been available for a long time and I often use them. In landscape photography the sky will usually be much brighter than the ground, usually three stops or more, leading to over-exposed skies and under-exposed ground. The challenge is how to balance the exposure to give a good image.
The challenge is how to balance the exposure to give a good image. There are three ways to approach this;
- The first is to take a shot balancing the light as best as possible knowing what highlights can be recovered and how far darks can be opened in post-processing which requires a good understanding of your sensor’s capabilities. This is not always possible depending on the light.
- The second is to capture multiple exposures and blend them in post-processing. It involves taking a shot with correct exposure, one or more shots for the brights, the sky, and one or more for the darks, the ground, or Bracketing.
- The third is to use Graduated ND Filters. Grad ND’s are available in different densities or ‘stops’ depending on how much light needs to be reduced, usually 1, 2 or 3 stops, and different levels of edge density for different situations, Soft edged, Medium, or Hard. We now have the opportunity to use them in-camera.
GRADUATED ND FILTERS
Normally an external Graduated ND is fitted to an external holder on the lens and positioned over the bright area. The brightness level is reduced, meaning the camera is less ‘dazzled’ by the light, bringing it back into the dynamic range of the sensor. In turn it also means the under-exposure of the ground is now better exposed, bringing back the colour, details and contrast.
Determining the density factor is simply a case of trying it out, and experience. It will be mostly 3 stops, 2 stops can be useful, although I do not think I have ever had the need for a 1 stop.
Levels of Graduation have their uses:
Soft Graduated- for uneven horizons and when parts of the scene extend into the sky.
Medium Graduated-similar to above with less of the scene extending into the sky, and providing a stronger effect. A 3 stop Medium will be stronger in effect than a 3 Soft.
Hard Graduated-For very flat horizons with no parts of the scene extending into the sky such as at the coast.
Graduated ND Filters also have their own challenges, when a part of the scene or object extends into the sky using a Grad is going to affect the top part of the object too, so care is needed. The last thing you need is trying to fix a part that is too dark instead of fixing a part that is too bright. You’ve just reversed the problem. This is when selecting the right Grad is important. For the image below a Soft Graduation would be fine. I call it ‘over filtering’ when the wrong Grad is used or too dark a density. Experience has taught me to under-filter, pulling back highlights just enough to give a better chance of recovering them in post-processing.
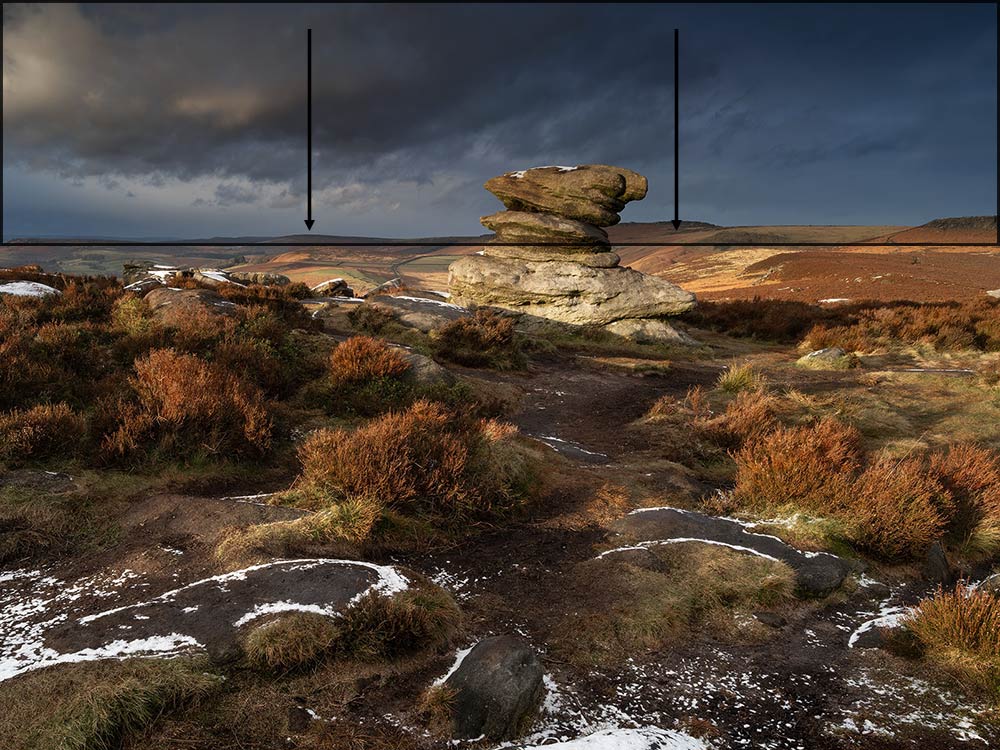
Simulated effect of a Graduated ND. The wrong filter will have consequences.
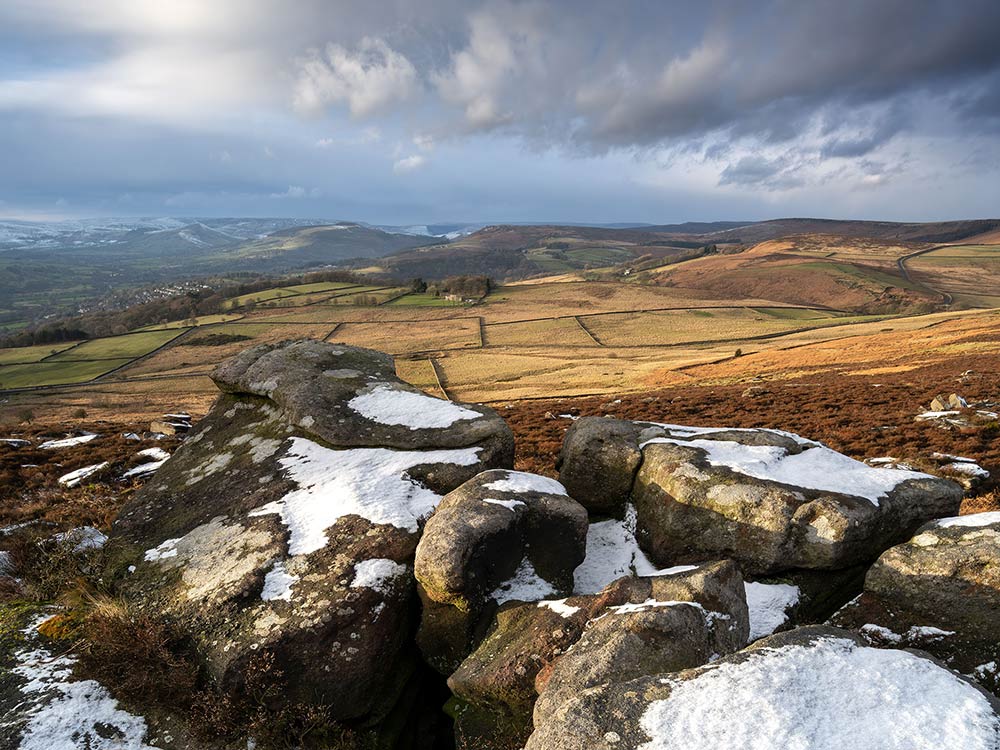
A scene such as this would be suitable for a Medium Graduation where the horizon is fairly straight but uneven. The coast with a straight horizon would suit a Hard Graduation.
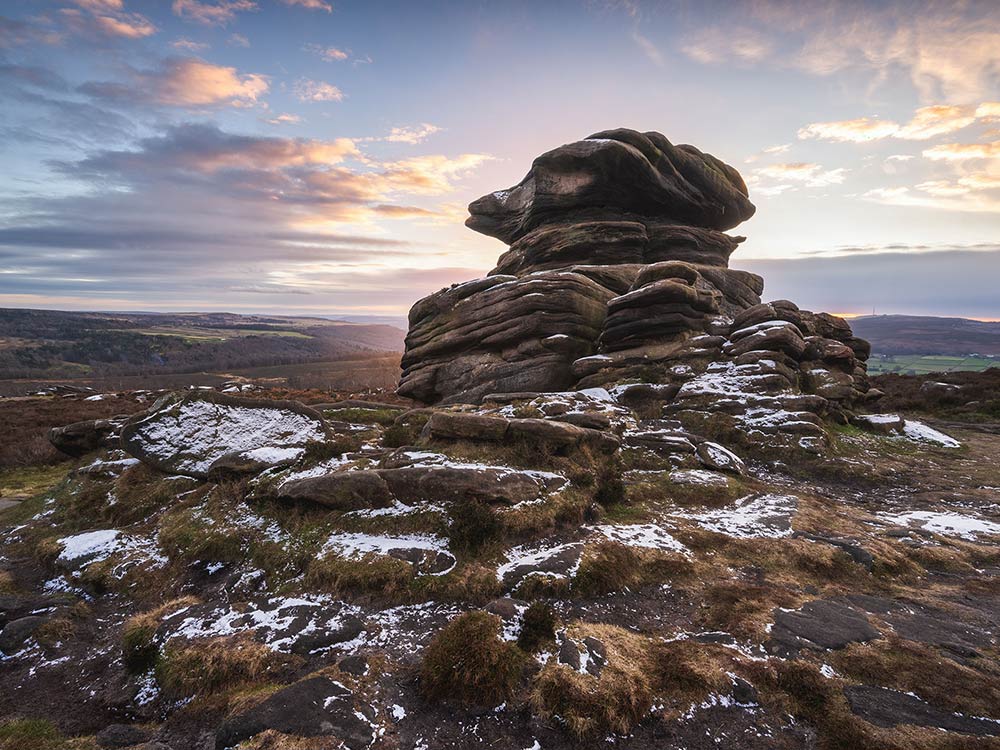
When not to use a filter. The sun was setting behind the rock giving huge differences in brights and darks. But as the rock dominates so much of the sky the best solution is to Bracket images and merge in post.
USING IN-CAMERA GND
Using the GND’s in-camera has been implemented very well, allowing the ND factor and the type of ND to be selected, and the position and even angle to be adjusted on screen. The rear screen can be used using touch controls, or the viewfinder using the front control wheel and arrow pad buttons. It is much easier to use and access if it is mapped to a button, I use AEL (see Buttons Section).
This is a computational mode, a number of images are taken, then combined to provide the settings you have selected and processed by the camera into a final image. Therefore unfortunately they cannot be used with any other computational modes such as Live-ND or High Res. Nor can it be used with Bracketing or Focus Stacking. Processing of the image takes around 1 second so there is a short delay.
One thing to bear in mind, the GND screen used for positions etc is a live screen showing the effect of the filter and it overrides the normal Live View screen with settings etc. You will not be able to change settings this screen, but it is just an initial set-up screen.
To adjust the shot settings such as aperture and focus point just quit the Live GND by pressing INFO, change settings and re-enable it by pressing INFO again. One issue is how many settings you have enabled on the Info Button, for instance main information, Histogram, Shadows/Highlights, displayed with each press of Info. It means you may have to press it quite a few times to enable or disable Live GND.
It is so much more convenient having it mapped to a dedicated button. In Custom Modes I suggested AEL. Now one press enables the GND, and the rear Arrow Buttons/Joystick and Control Wheels set the height and angle. Press/Hold the button to access the sub-menu for filter type (Soft, Medium, Hard) and the ND Factor.
Now press AEL (or your chosen button) and the settings screen defaults back to the normal Live screen with the GND enabled. All normal functions can be performed, changing Aperture, focus point etc. LONGPRESS AEL to quit the GND, or press to enter back into the settings screen. The implementation of it is actually very well thought out.
Assuming Live GND is set to AEL (or your button choice)
- Press AEL = Activate the GND Settings screen. Use Arrow Pad and Control Wheels for positions.
- Press/Hold AEL = Adjust filter type and density with Control Wheels
- Press AEL = Press again to go back to the main Live shooting screen. Another press returns back to the GND Adjusting screen.
- Longpress AEL = Quit Live GND
MENU SCREENS
The Menu screens below, located in Camera 2.1 Computational Modes. As said before in the Custom Modes section it is much easier to access and use when it is mapped to a button. When mapping such features to buttons make sure they are off by default. When accessing the CM you created it is probably a multi-functioning CM so features are best saved off, then they are enabled with the press of a button.
In these screens we can see the GND Number, or density is selectable from 1 to 3EV or stops, and Filter Type Soft, Medium or Hard. Auto Rotate means the GND will rotate from Landscape to Portrait.
→ TIP Annoyingly there are different naming conventions for Density, usually an ND number, ND4, ND8, ND16 etc, or EV which means the number of Stops. Lee Filters set a convention for 0.3, 0.6, 0.9 etc. Thankfully OM have had the sense to include the EV Factor.
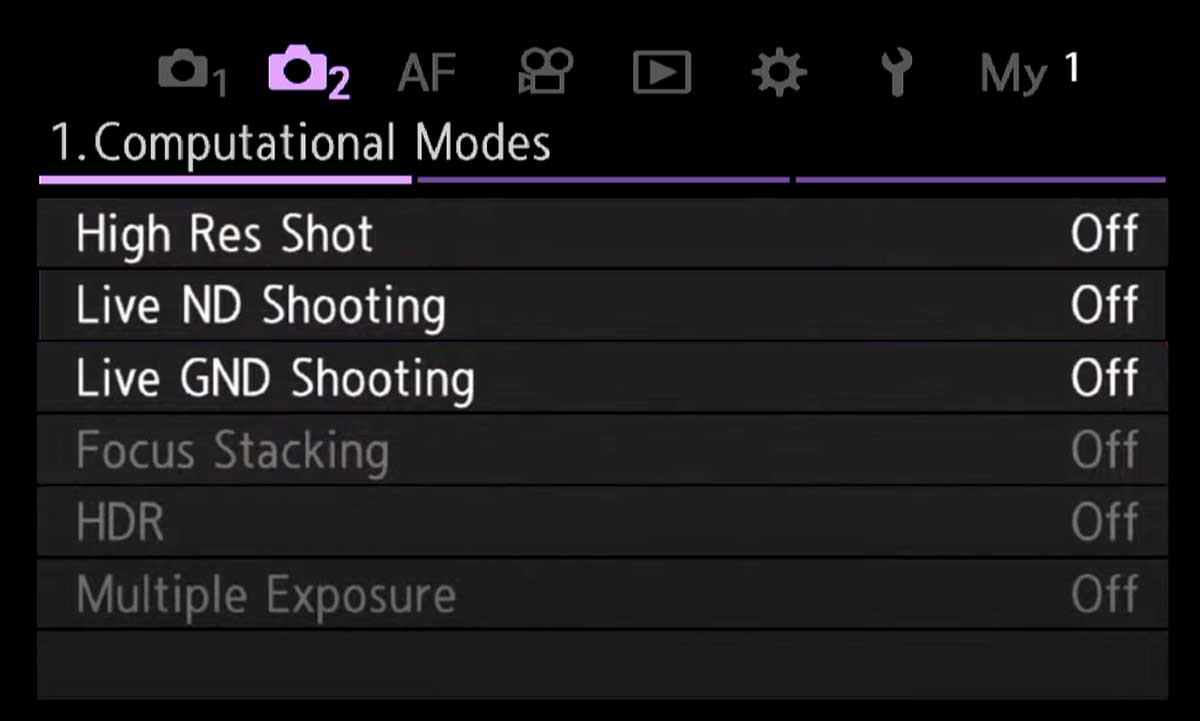
Computational Modes Screen
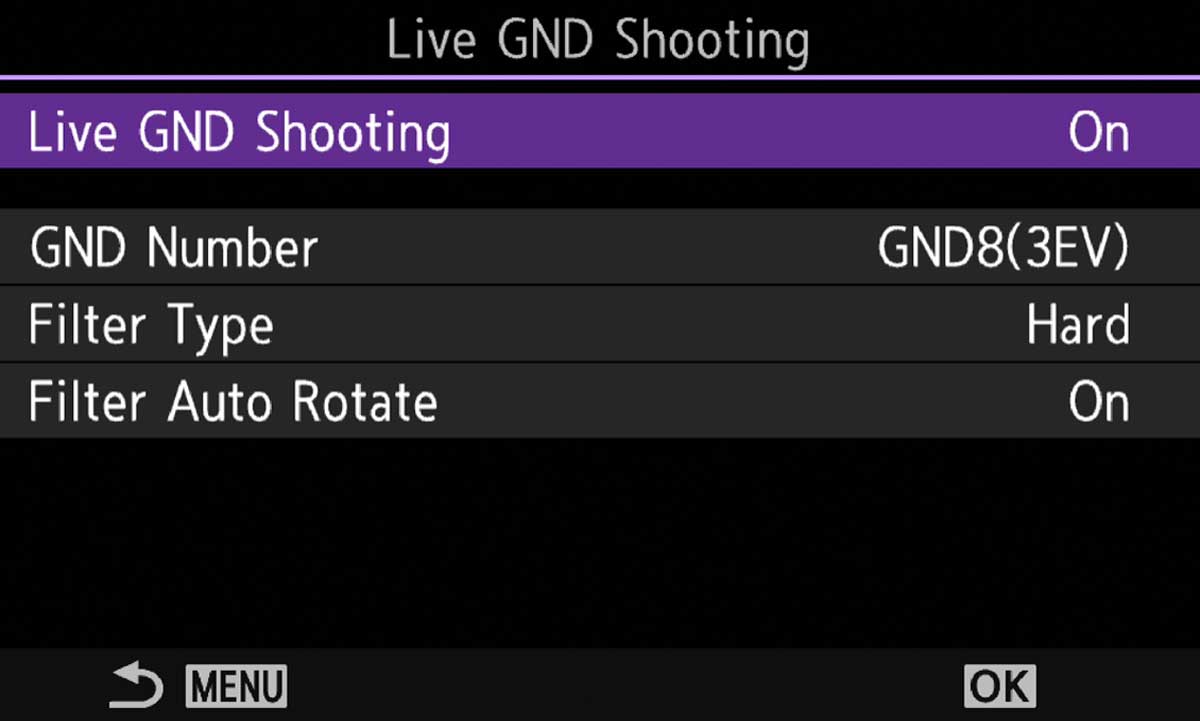
Menu Camera2> 1.Computational Modes>Live GND Shooting
OUT IN THE FIELD
I’ll start off by saying I absolutely love the Live-GND in camera, it is a game changer, for me anyway. The flexibility to use GND’s in camera adds such a lot of convenience especially if applied to a button for use on the fly. And after some pretty extensive testing I can honestly say that the differences between Soft, Hard and Medium, and the ND factors, do pretty much mirror using real external filters.
They are very easy to use. I took a day out on what was forecast to be a bright day to take test shots and really find out what the pro’s are, and also what the con’s are too. The day didn’t start off so bright…
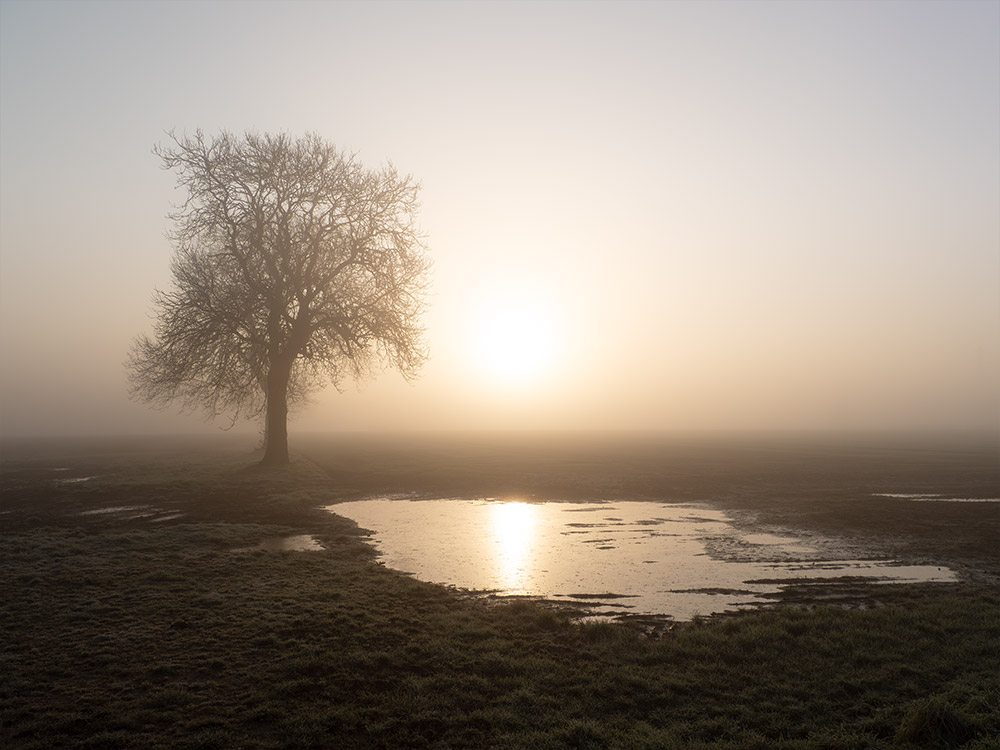
No GND – in-camera ESP metering
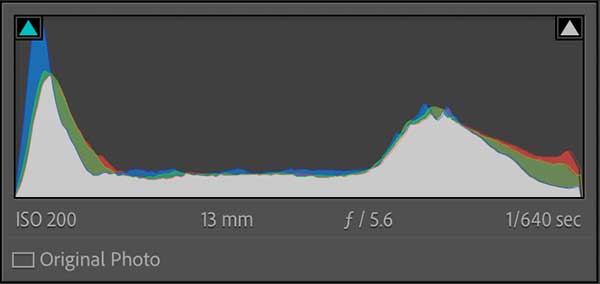
High contrast with deep blacks
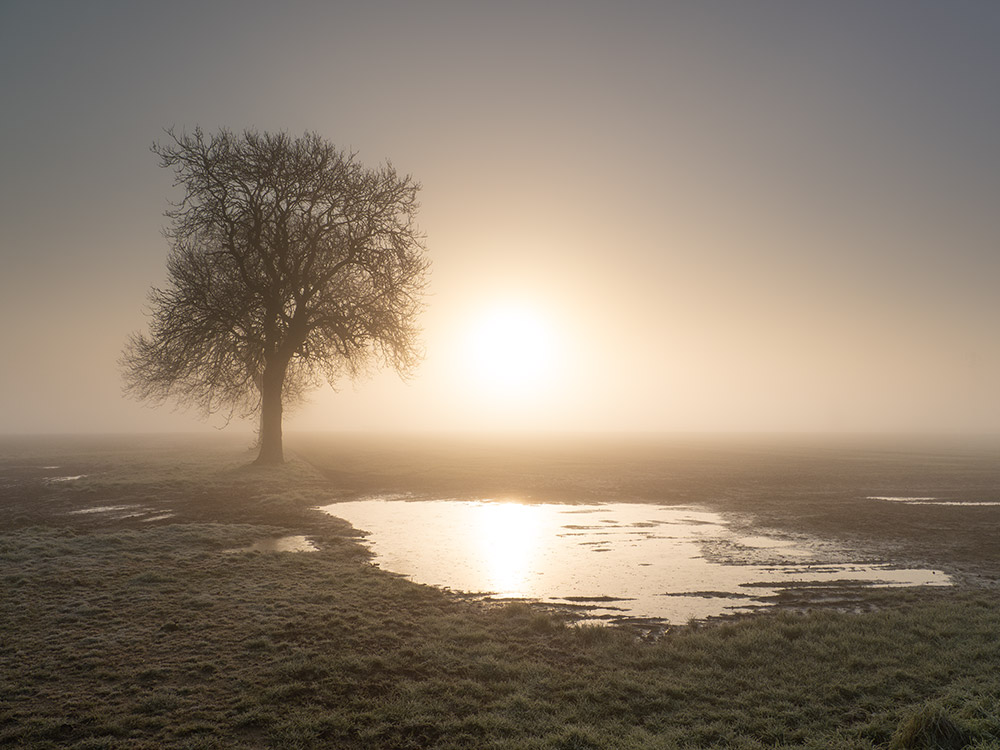
Live-GND 2 Stop Soft
Less blacks, much wider mid tones
The images above are Jpeg’s straight out of camera with no editing. All I did was layer them in Photoshop to align them and give a slight crop so they are equal because they were taken hand-held. The first thing to notice is just how well the Soft GND 2 stop has balanced the exposure. The first image is ESP or Average metering with the camera doing it’s best for the whole scene, it tries to find an average. The sky is not so bad at all. Highlights on the water are clipped but that was going to happen anyway. The ground is almost, but not quite black.
The second image shows just exactly what a GND will do, just as a pair of sunglasses shields your eyes the brightness of the sky has been brought down which in turn allows the camera to see much more of the ground; it is not being dazzled so much. There is so much more detail in the ground and the overall exposure is more balanced.
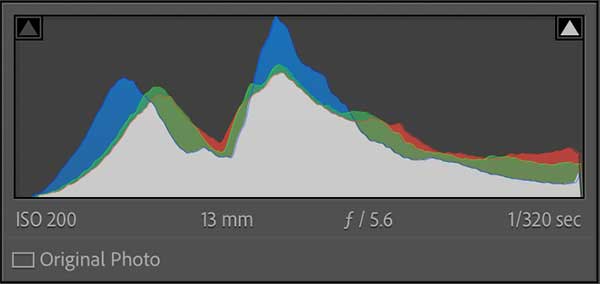
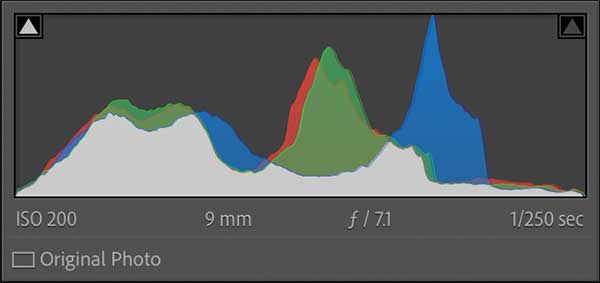
We can see this in the Lightroom Histogram, the first has pretty deep blacks on the left, a flat mid area for mid tones indicating quite strong contrast between bright and dark and no mids, and a high ‘hill’ for the brights, the sky and the sun. The second Histogram has the tones moved centrally, the deep blacks have gone and the brights have been reduced, all moved into the mid-tones which have much more information and therefore tones and detail.
OUT IN THE FIELD 2
I headed off to the coast to North Landing at Flamborough Head. With it being early morning I knew there would be deep shadows and lots of contrast with the bright sky, and also cliffs either side interrupting the sky line. I would not usually bother on such a bright harsh day, but it is useful to test out how effective Live-GND is.
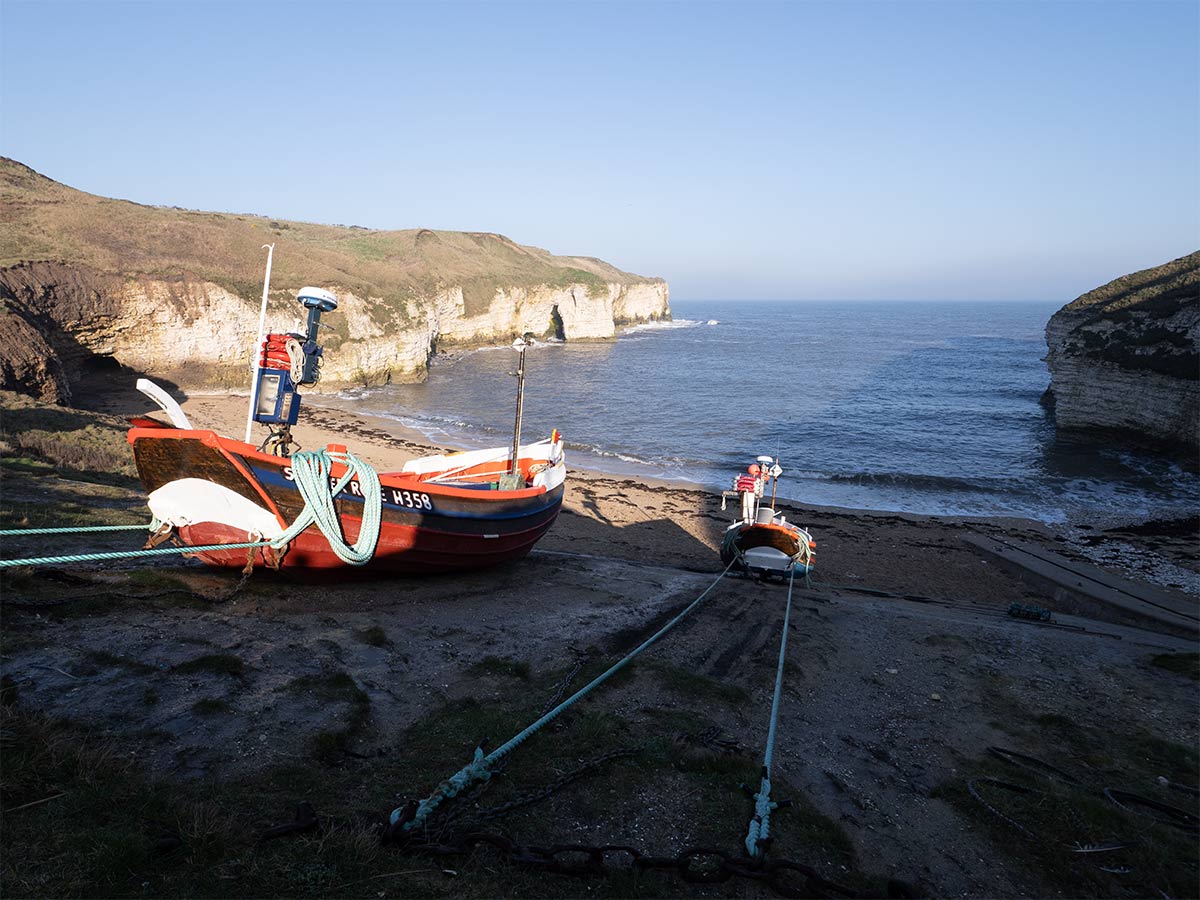
No GND – in-camera ESP metering f6.3 1/320s
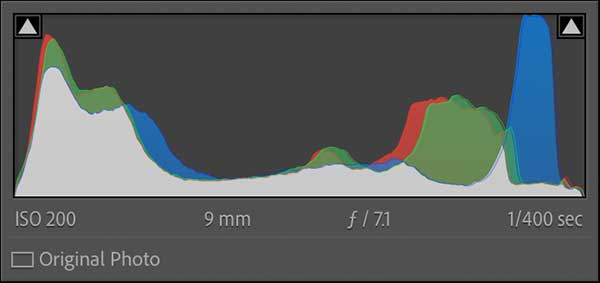
High contrast with deep blacks
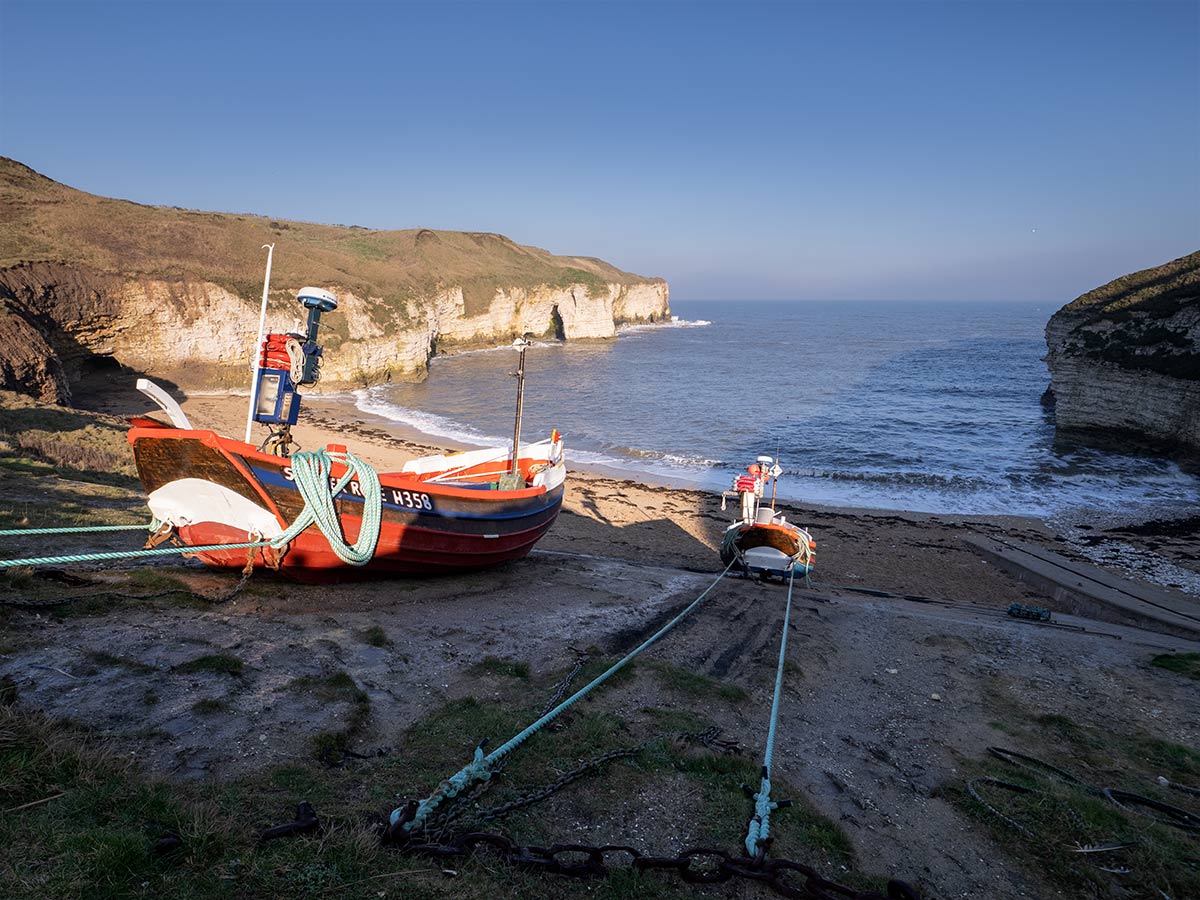
Live-GND 2 Stop Soft f6.3 1/200s
Less blacks, much wider mid tones
The images above are Jpeg’s straight out of camera with no editing, other than a little colour temperature. Again the soft GND has balanced the exposure out very well, as we can see in the Histogram too with the blacks moved up and opened much more. I would be very confident in the processing latitude of the first image, other than the darks which would introduce noise opening them.
Using a soft 2 stop GND has not affected the cliffs too much at all. The right cliff is still dark which is fine because it was dark, what matters is that it has not darkened it even more. Careful consideration of the ND factor and the graduation type is needed.
We can again see the changes in the Lightroom Histogram, where there were very deep blacks in the first image with the darkest being very close to the left, in the second image they have been moved further right, showing there will be more information. The bright peak in the first image is probably the white on the boat, in the second image the brights have been moved left a little to indicate it has reduced the brightness of the sky.
→ TIP Notice the shutter speed changed from 1/320s to 1/200s because of the GND, something to bear in mind and use creatively (it will slow movement, something we will look at below). There is no predictable and definitive relationship between the ND factor and shutter speeds, it depends on the type of graduation, soft, hard, and the position it is placed at too.
LIVE GND IN USE
Using Live-GND has been implemented very well. By default it needs to be enabled from the Menu, and then a series of pressed of the Info button to switch between screens. It is far far easier and convenient to set on a button, I use AEL.
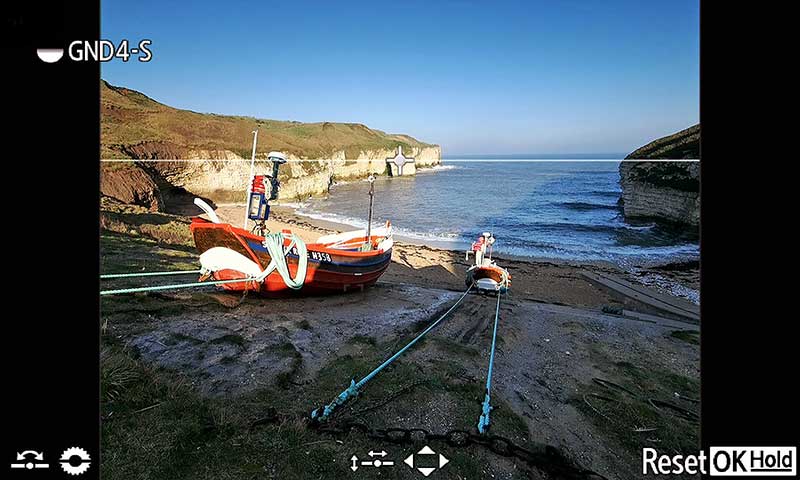
Live-GND Overlay Screen
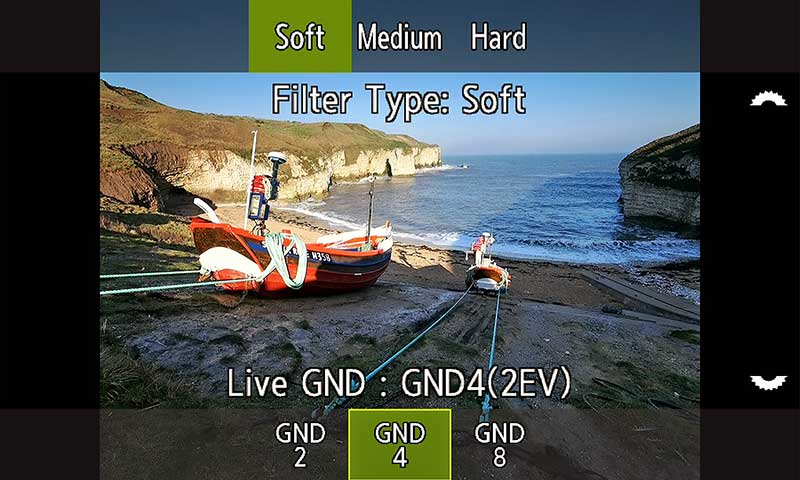
Live-GND 2 Stop Soft
Press AEL (or any button you map it to) and the overlay screen appears with the last used GND enabled. Turning the front wheel changes the angle in large increments, the rear wheel in fine increments. Only focus can be used whilst in this overlay screen, aperture and exposure cannot be adjusted. The Arrow Pad Up/Down arrows or the Joystick move position vertically. Press/Hold the button and the wheels default to selecting the Graduation type and ND factor.
→ TIP LONG PRESS the button you have mapped to Live-GND (ie AEL) to quit it completely, then just press again to re-enable. It makes it very quick and convenient to use.
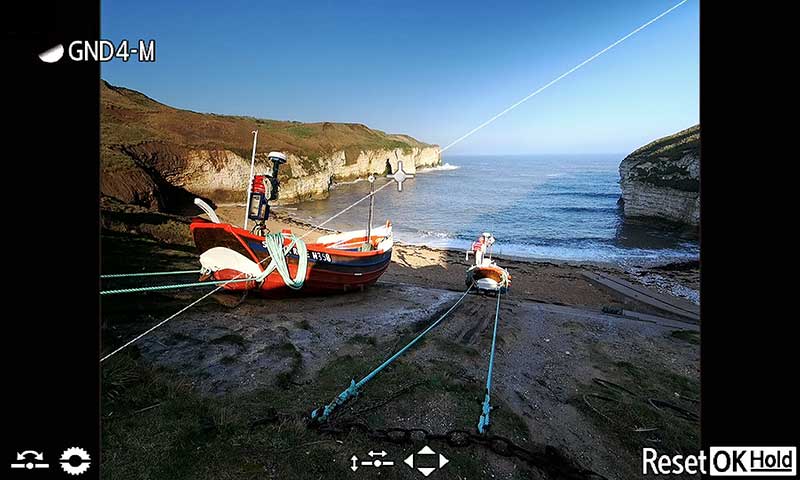
Angled Medium GND
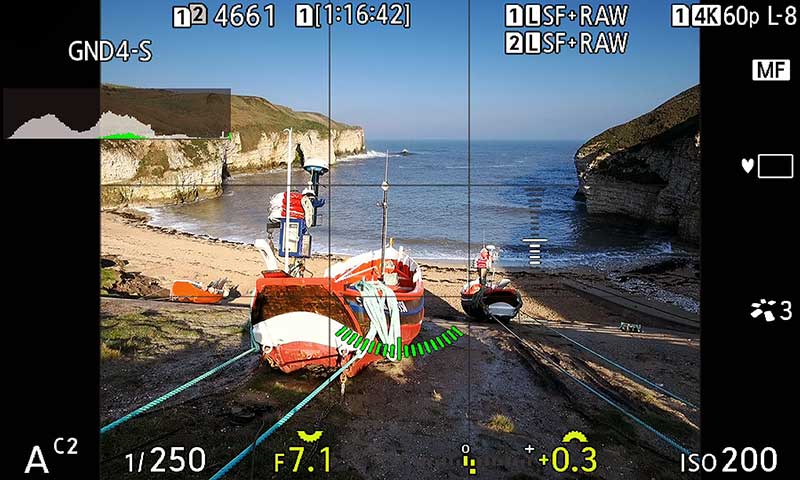
Live View Screen
The first image shows a live Medium GND 4 2 stop on an angle to show just how effective it is. Notice a small icon updates to reflect the angle too. The second screen shows the camera view back in Live View on the rear screen and the same view in the viewfinder. The line indicating the GND vanishes and you are back to full normal control of all settings. Even changing composition the filter is still active until you quit it with a long press of the button. To adjust it just press the button and change position, type etc.
→ TIP In the second screen notice my shooting mode is A (C2). As we saw in Custom Modes I have Aperture Priority set with Live GND applied to the AEL button and saved as a Custom Mode. Live-GND works in all modes except Bulb, but not combined with any other Computation Mode such as Live-ND. I have Live-ND set on AEL again in a C3 Custom Mode. Live-ND is only available in M or S, so you could have a CM created (in Manual) with a button for each feature and the camera will just quit one and enable the other according to the button presses.
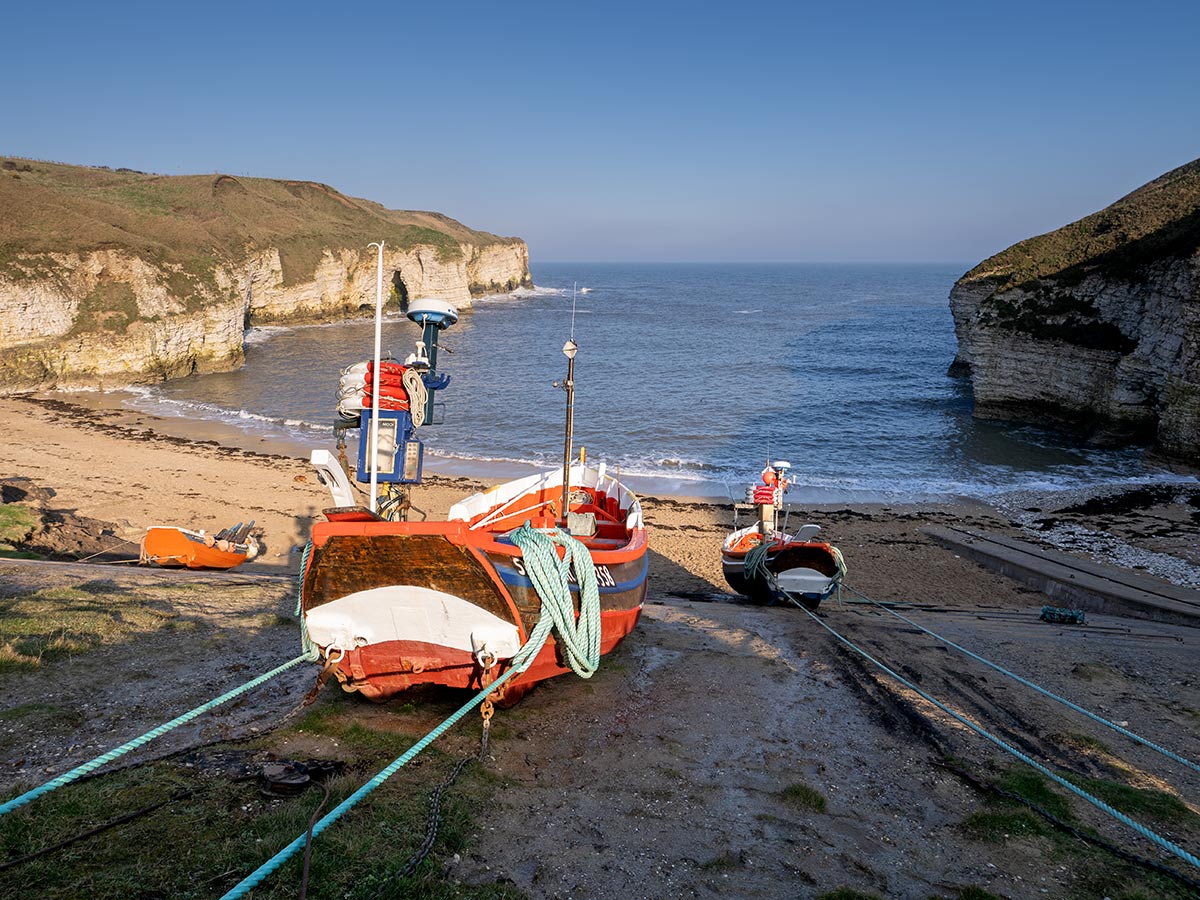
8-25mm @ 11mm f6.3 1/250s Live-GND4 Soft
DARKENING BACKGROUNDS
Graduated filters have always had one issue; darkening parts of the landscape which project into the sky over the horizon. Care is needed and a careful choice of filter, even so sometimes the only option is to bracket and blend images. For this example I used a Medium Graduated, too strong obviously, to exaggerate the problem.
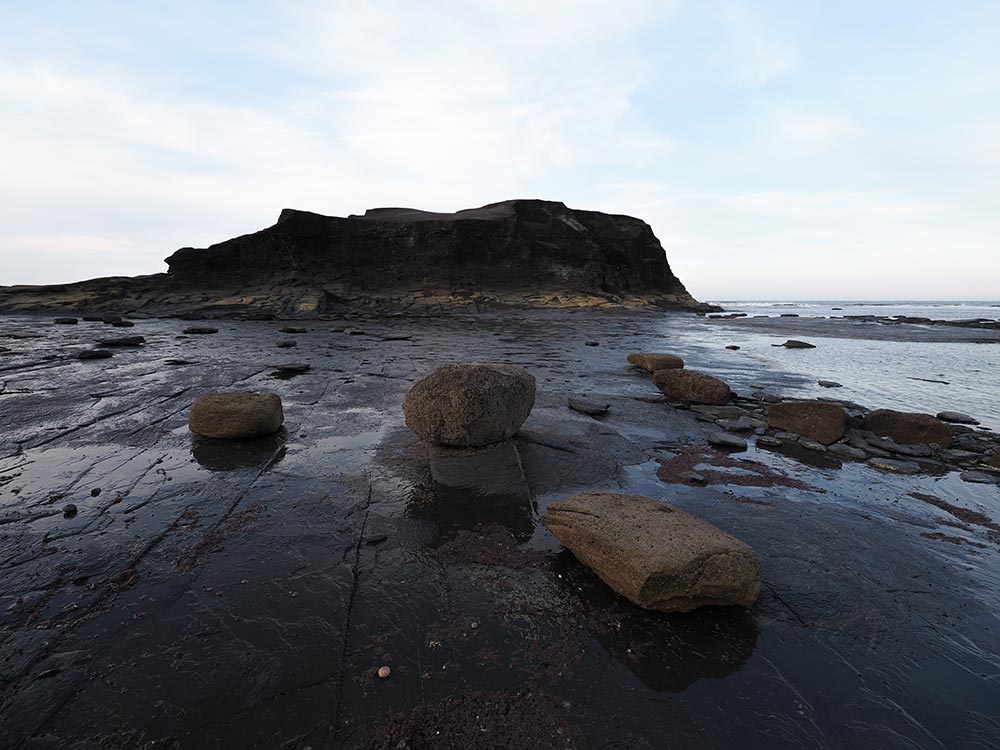
No GND – in-camera ESP metering
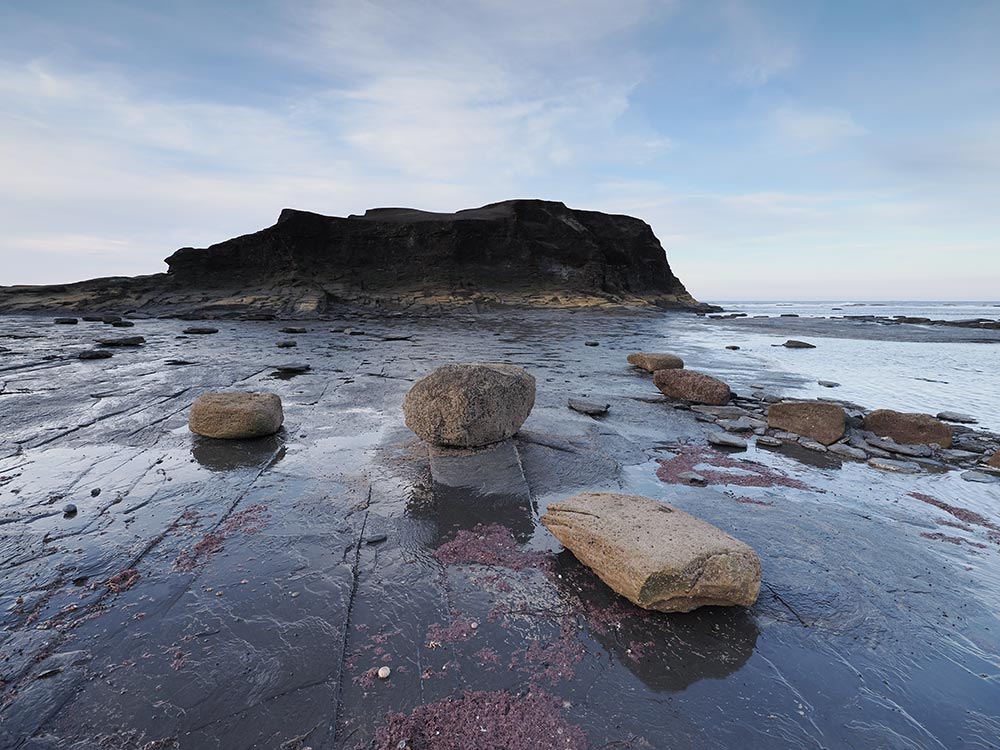
Live-GND 4 Medium
The first image is ESP metered by the camera. The sky would recover but the ground is a little dark, and the landmass, Saltwick Nab on the Yorkshire coast is almost black. The second image has a much better exposure, with the foreground brighter and more colour rendition, and the sky has much more tone information. But the GND has overlapped the Nab and is still very dark. A soft GND would have been more appropriate, but to reduce the highlight on the horizon the Nab would have still been affected.
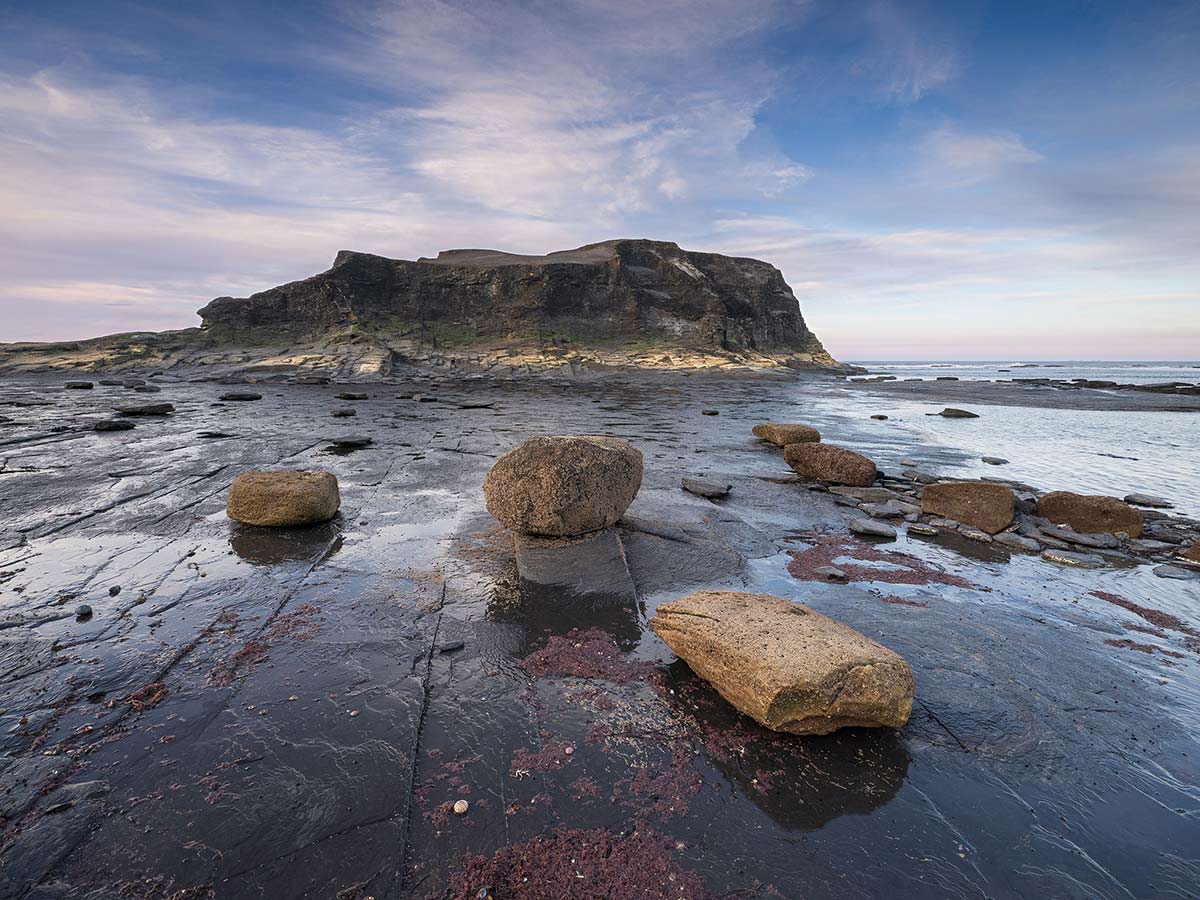
Live-GND 4 Medium (2 Stops) 8-25mm @ 8mm f6.3 1/40s
That being said, where I would have normally bracketed this image, this is the Raw of second image. All I had to do was process the image as normal in Lightroom, and use an object selected mask on the Nab itself and open shadows with the black point reduced too. Best practice would be to bracket, but if the sky is over-exposed more than can be recovered you may be able to open shadows introduced by a GND successfully. I am actually convinced the Raw files have slightly better noise control than even with the OM-1.
COMPARISON TO PHYSICAL FILTERS
How well do the Live-GND Filters compare to real physical filters?
Pretty well. All manufacturers produce filters slightly differently. Lee for example produce Medium that tend to be a little harder than NiSi, or the graduated area is narrower, and Kase are different again. Soft Graduated are different too, with Kase being stronger, or less soft, than Lee and NiSi. It is not a bad thing at all, just do not expect the Live-GND’s to be an exact match for your physical filters, experiment and get to know them. Soft Graduated tend to have the least differences.
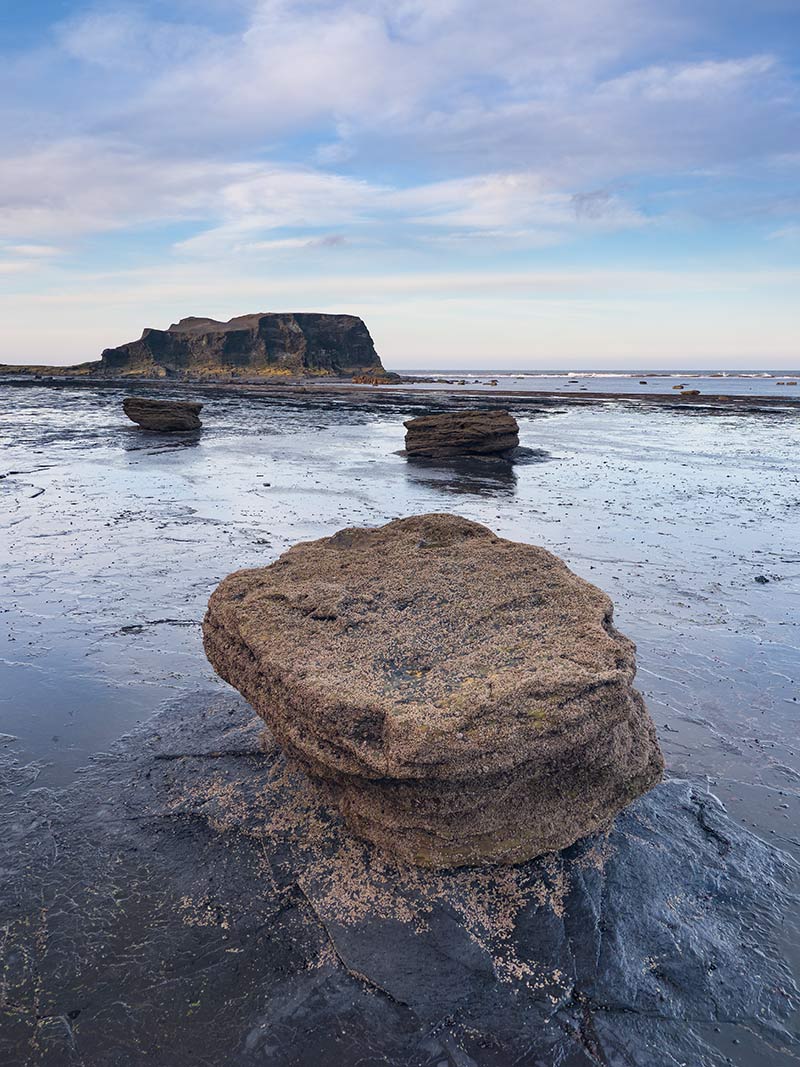
Real or Live-GND?
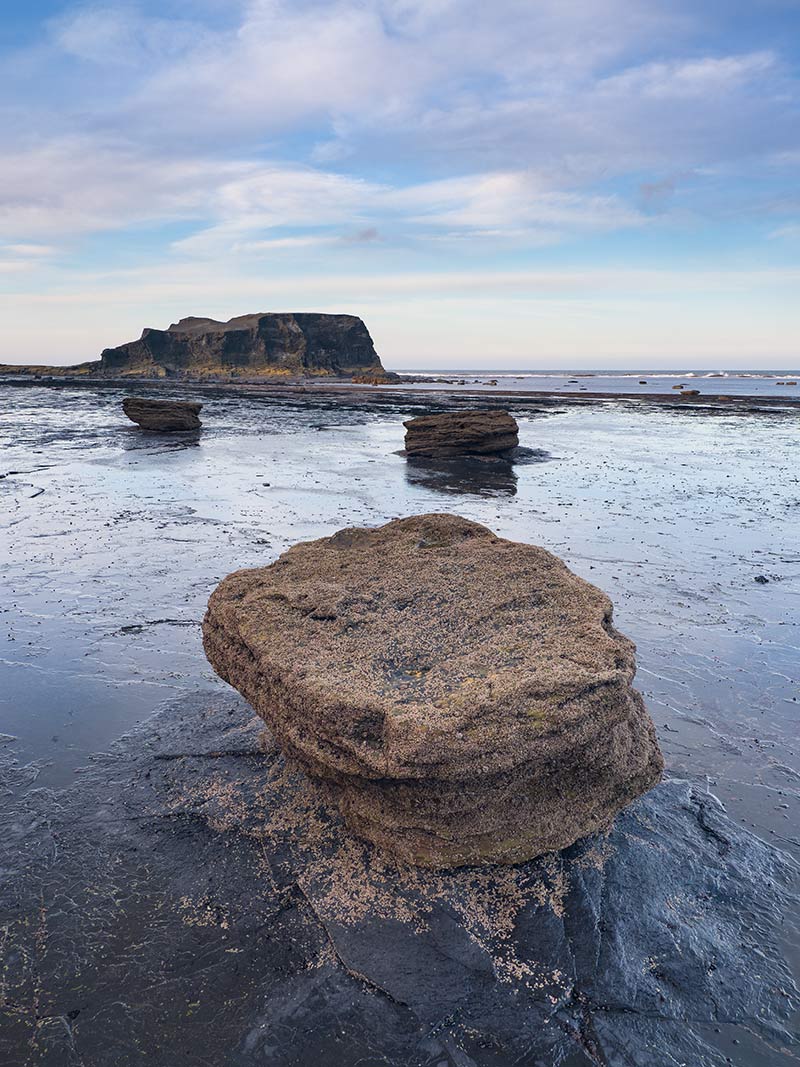
Real or Live-GND?
One of these was taken with a physical NiSi Soft GND8 (3 stop) and one with Live-GND 8 Soft, but which is which? I had the filter holder ready so I could swap quickly, only the very small grey cloud and the distant waves give them away that they are different images. I did test both first to make sure the positions would be equal before taking the comparison images. Both are Raws with minimal processing, the first processed then copied and pasted to the other.
The left image is a physical filter, the right Live-GND. That is pretty impressive! I do find there are differences with the Medium GND, the Live filter is a little different in graduation to what I am used to but as I said, you would adjust accordingly.
AUTO BRACKETING
Auto bracketing cannot be used with Live-GND. That seems a shame but then the whole point of using it means you should not have to bracket. You can manually bracket of course by adjusting exposure compensation.
Thankfully if you have a button set for AE-BKT it will just cancel the Live-GND and set bracketing, there are no warnings, no ‘sorry computer says no’ nonsense or digging into menus. It makes it quick and efficient to switch between the two.
OTHER POINTS
As already said Live-GND cannot be used with other features such as Live-ND, which is such a shame. It would be impossible to configure, but maybe one day. Other points to remember:
ISO is limited to 3200. Why would you want more anyway?
Drive will be Silent Single. Timer is still available.
Fastest shutters available are GND2 1/16000s, GND4 1/8000s GND8 1/4000s, not something that really matters for landscapes.
MOVEMENT
It is curious how Live-GND works, the obvious assumption is that a number of images are taken and combined just like Live-ND. The Official manual says ‘The camera combines a series of exposures to create a single photo’. I reached out to OM System to ask exactly how it works and I was told it does not take a series of images. Clearly there is some secret sauce going into the mix which remains a secret but there are a number of exposures or images combined because movement is evident.
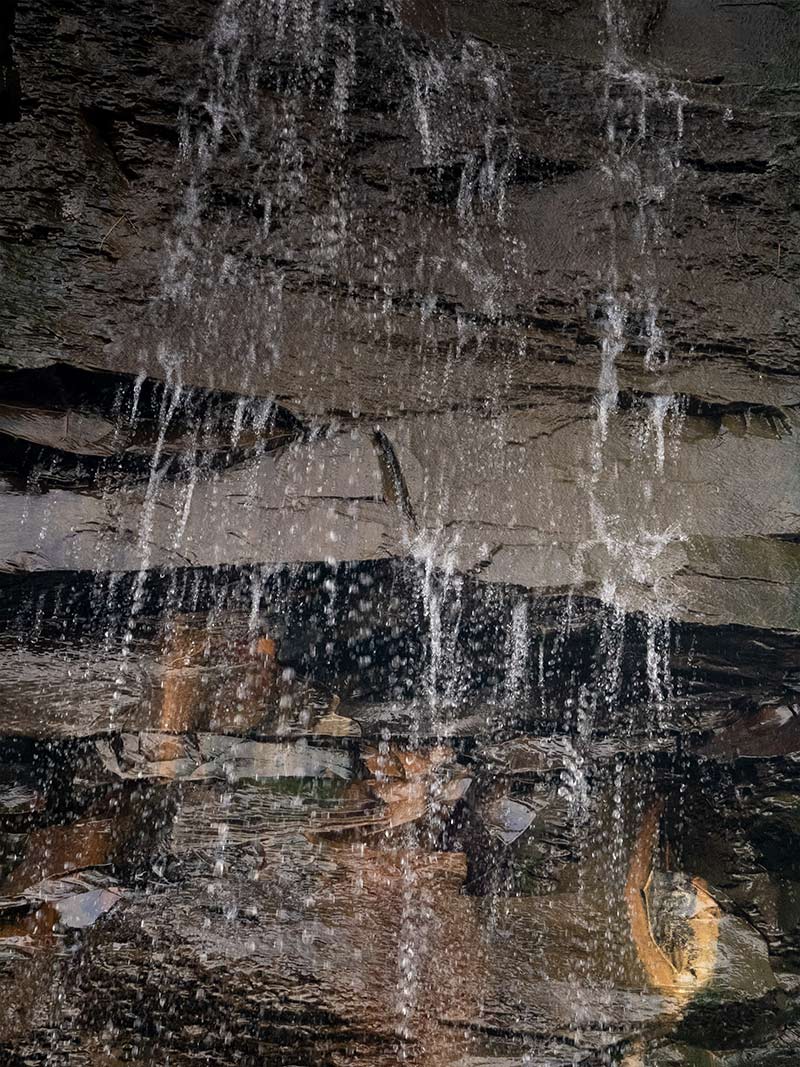
Below are some test shots to explore how evident movement is when using Live-GND.
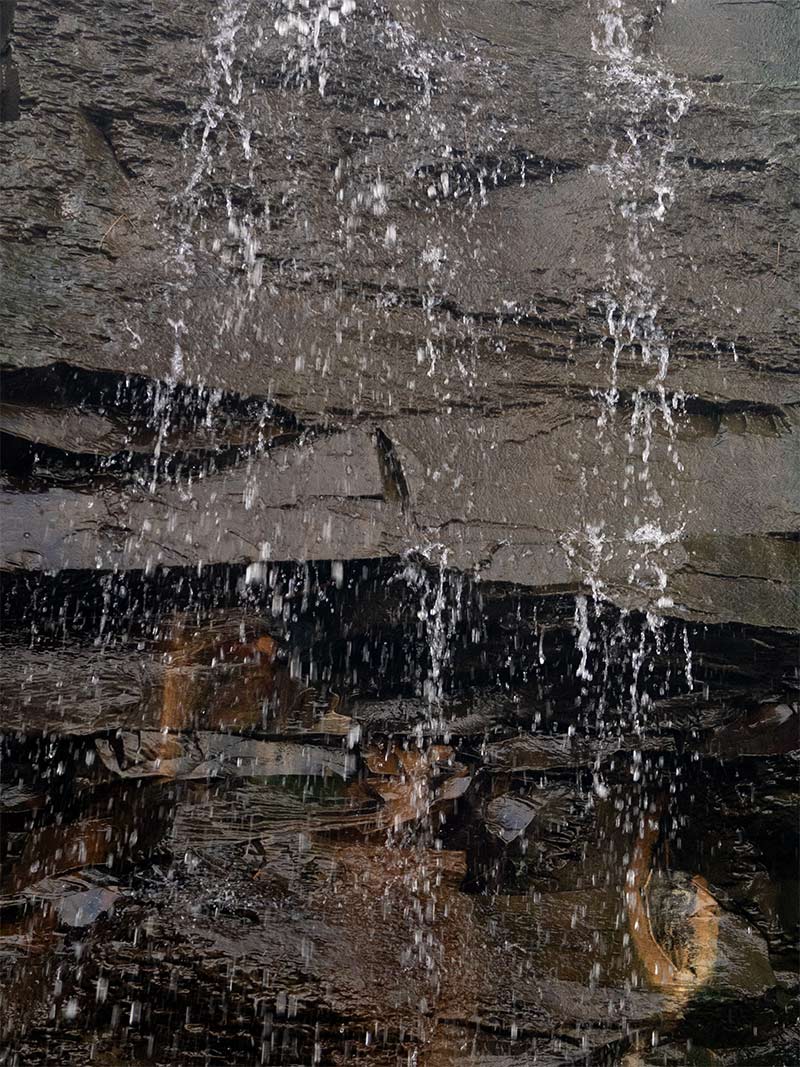
No GND 1/200 s
GND4 Medium 1/200s
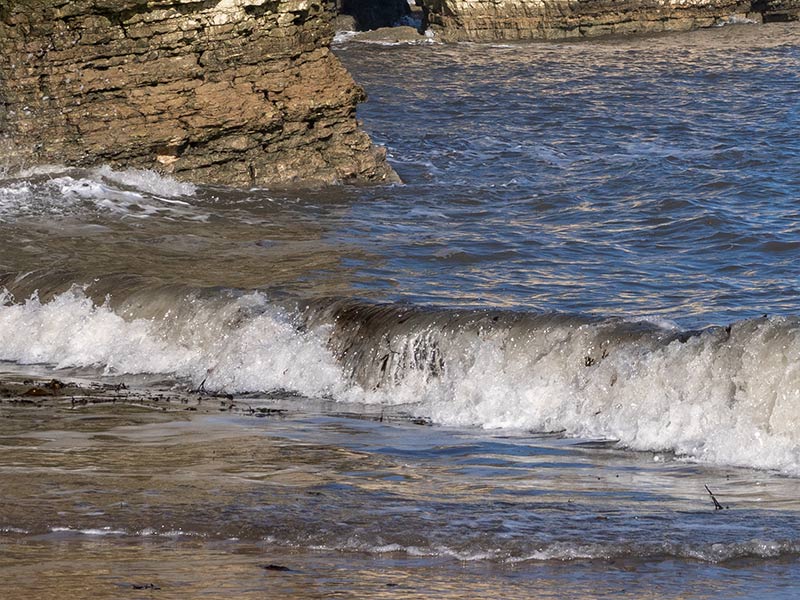
In these two tests (cropped around 30%) both were taken at 1/200th second shutter, one with no GND and the other with Live-GND4 2 stops. The GND was positioned half was so it did not cover the bottom half of the image to see if the movement is influenced just where the filter is placed. ISO was changed to maintain the shutter speed to make it equal. You can clearly see movement is an issue, the water is recorded in a number of ‘blobs’ indicating a number of images are combined.
No GND 1/800s
GND8 Soft 1/800s
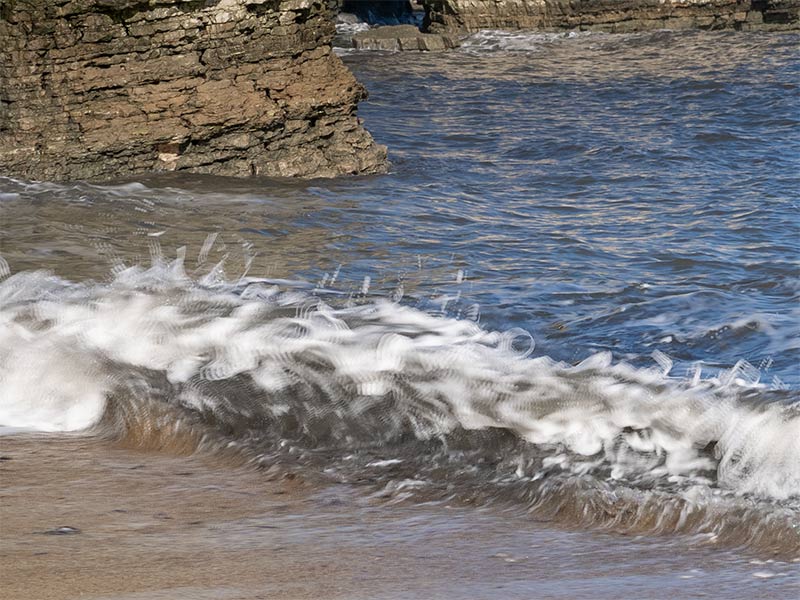
These images are a large 150% crop. What happens when there is moving water with a faster shutter? Again ISO was altered and an image taken with and without a filter applied, this time a 3 stop Soft. The filter is not visible due to the crop. The filtered image has multiple almost double exposure details very visible. These are obviously with fast shutter speeds, so what happens with slower shutter speeds?
No GND 1/8 s
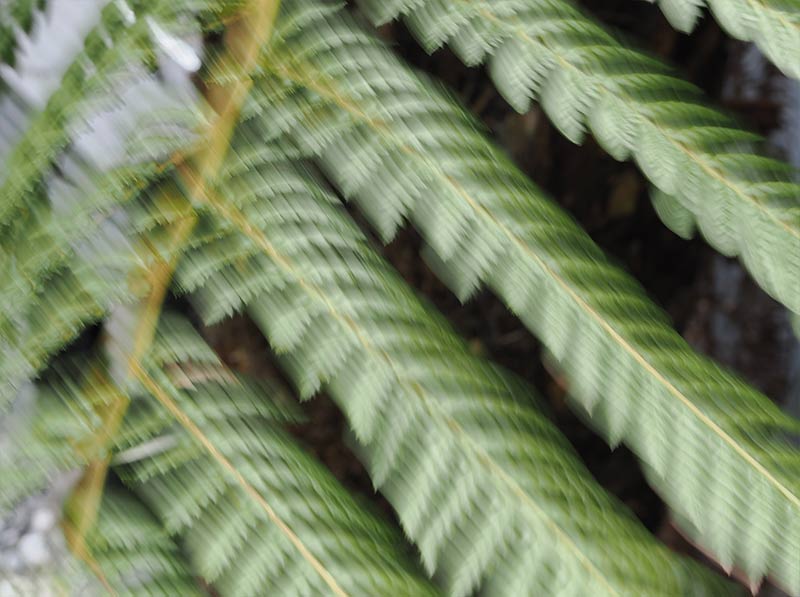
GND8 Soft 1/8s
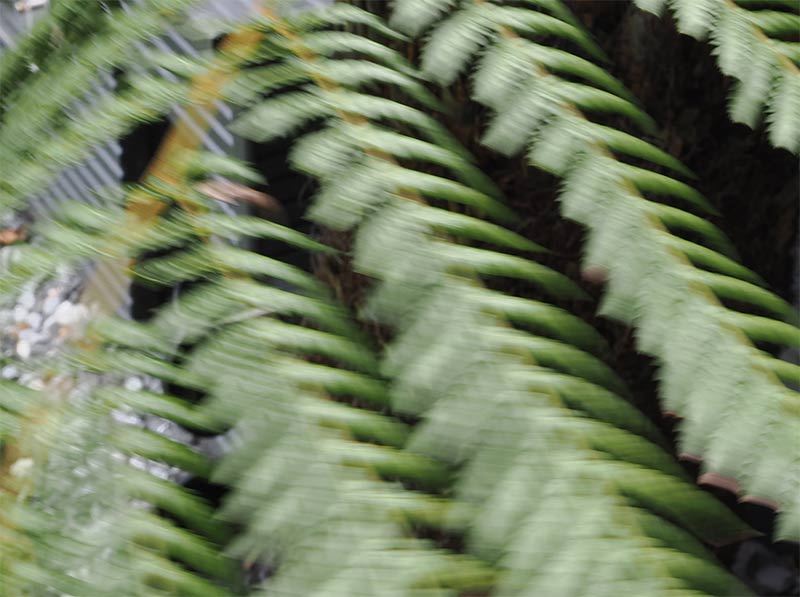
The obvious scenario would be a tree with leaves blowing in the wind. There are no leaves right now so I used the Australian Fern palm tree in our garden. Yes it loves the UK, though it is wondering what happened to Autumn! The second image had a Medium GND8 applied and dragged over the whole image, again crops of around 150%. It still looks like multiple exposures but the movement is softer.
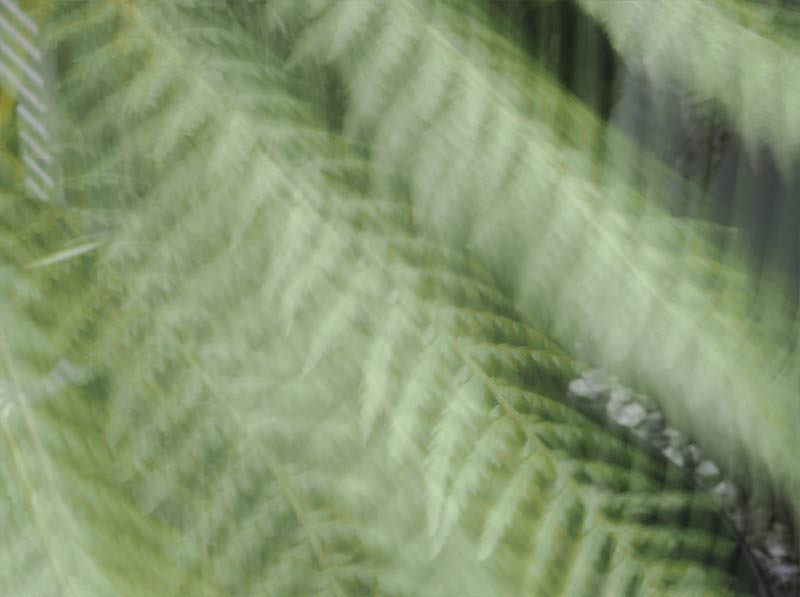
GND8 Soft 1/2s
Another image taken this time reducing the shutter to 1/2 second, and the movement is much smoother, more consistent with motion blur. It appears then that Live-GND works very much in the same way as Live-ND and that motion is much less attractive with faster shutter speeds. Just as in Live-ND, running water such as a water fall has much better movement rendering if the shutter speed is reasonably slow to start off, 1/30th approx or below. It is impressive how well movement is rendered with a slow shutter speed.
It leaves us with a predicament, how to shoot a landscape with a tree and obvious movement such as leaves blowing in wind with a sky that is too bright? Live-GND doesn’t solve it as shown. Bracketing multiple frames would have the same issue because leaves would not align. A real filter would solve the problem with a shutter speed high enough to freeze the motion. The only other way would be to capture one image and hope you can process successfully the brights and darks, or blending one image for the sky area and one for the ground.
NO LIVE-ND
The image below was taken using the in-camera Live-ND with ND128 enabled to get to the maximum 60 seconds exposure. Here is another limitation with Live-GND, we cannot use it in conjunction with Live-ND, High Res, or any other computational modes. It is a great shame. When producing a long exposure like above the first part of the scene to blow out will be the sky so we either have to use an external filter, or take another exposure slightly under-exposed and merge them. We could use use a real ND filter and then use Live-GND but we have the 60 second limitation to deal with, no used if we want a really long exposure.
It is hardly surprising right now two computational modes cannot be combined, it would be like taking a potato and trying mash it and chip it at the same time. Maybe one day someone will invent a mash chipper.
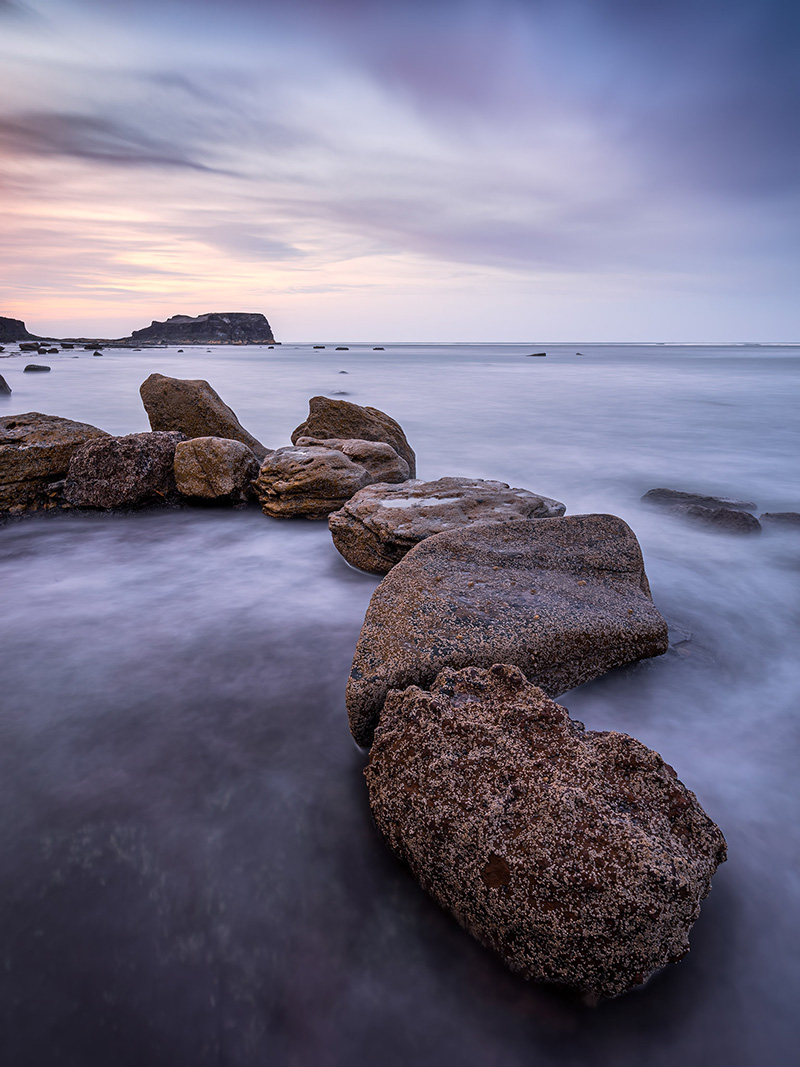
8-25mm @ 8mm f6.3 60s ISO200- Live-ND128
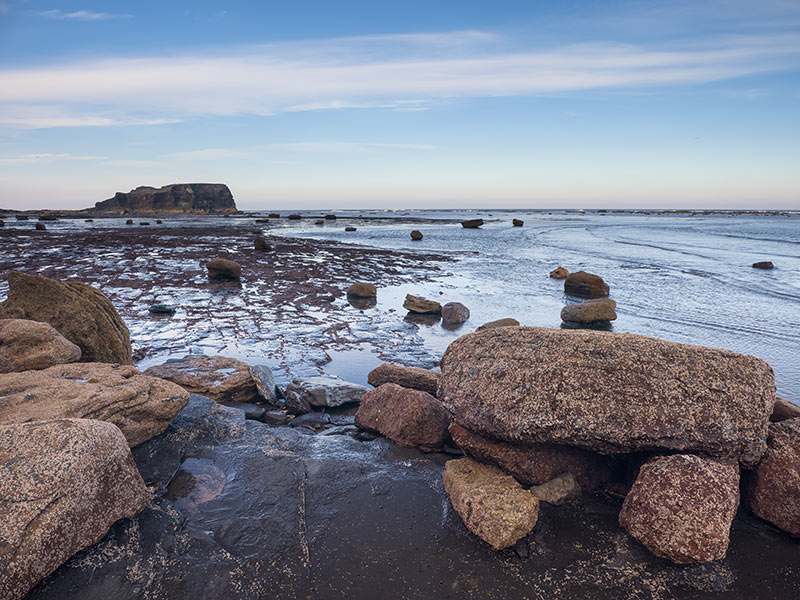
12-100mm @ 12mm f6.3 1/30s ISO200- Live-GND8 Soft
Above, a very simple image taken hand held with Live-GND Soft Graduated enabled to reduce the bright tones on the sky.
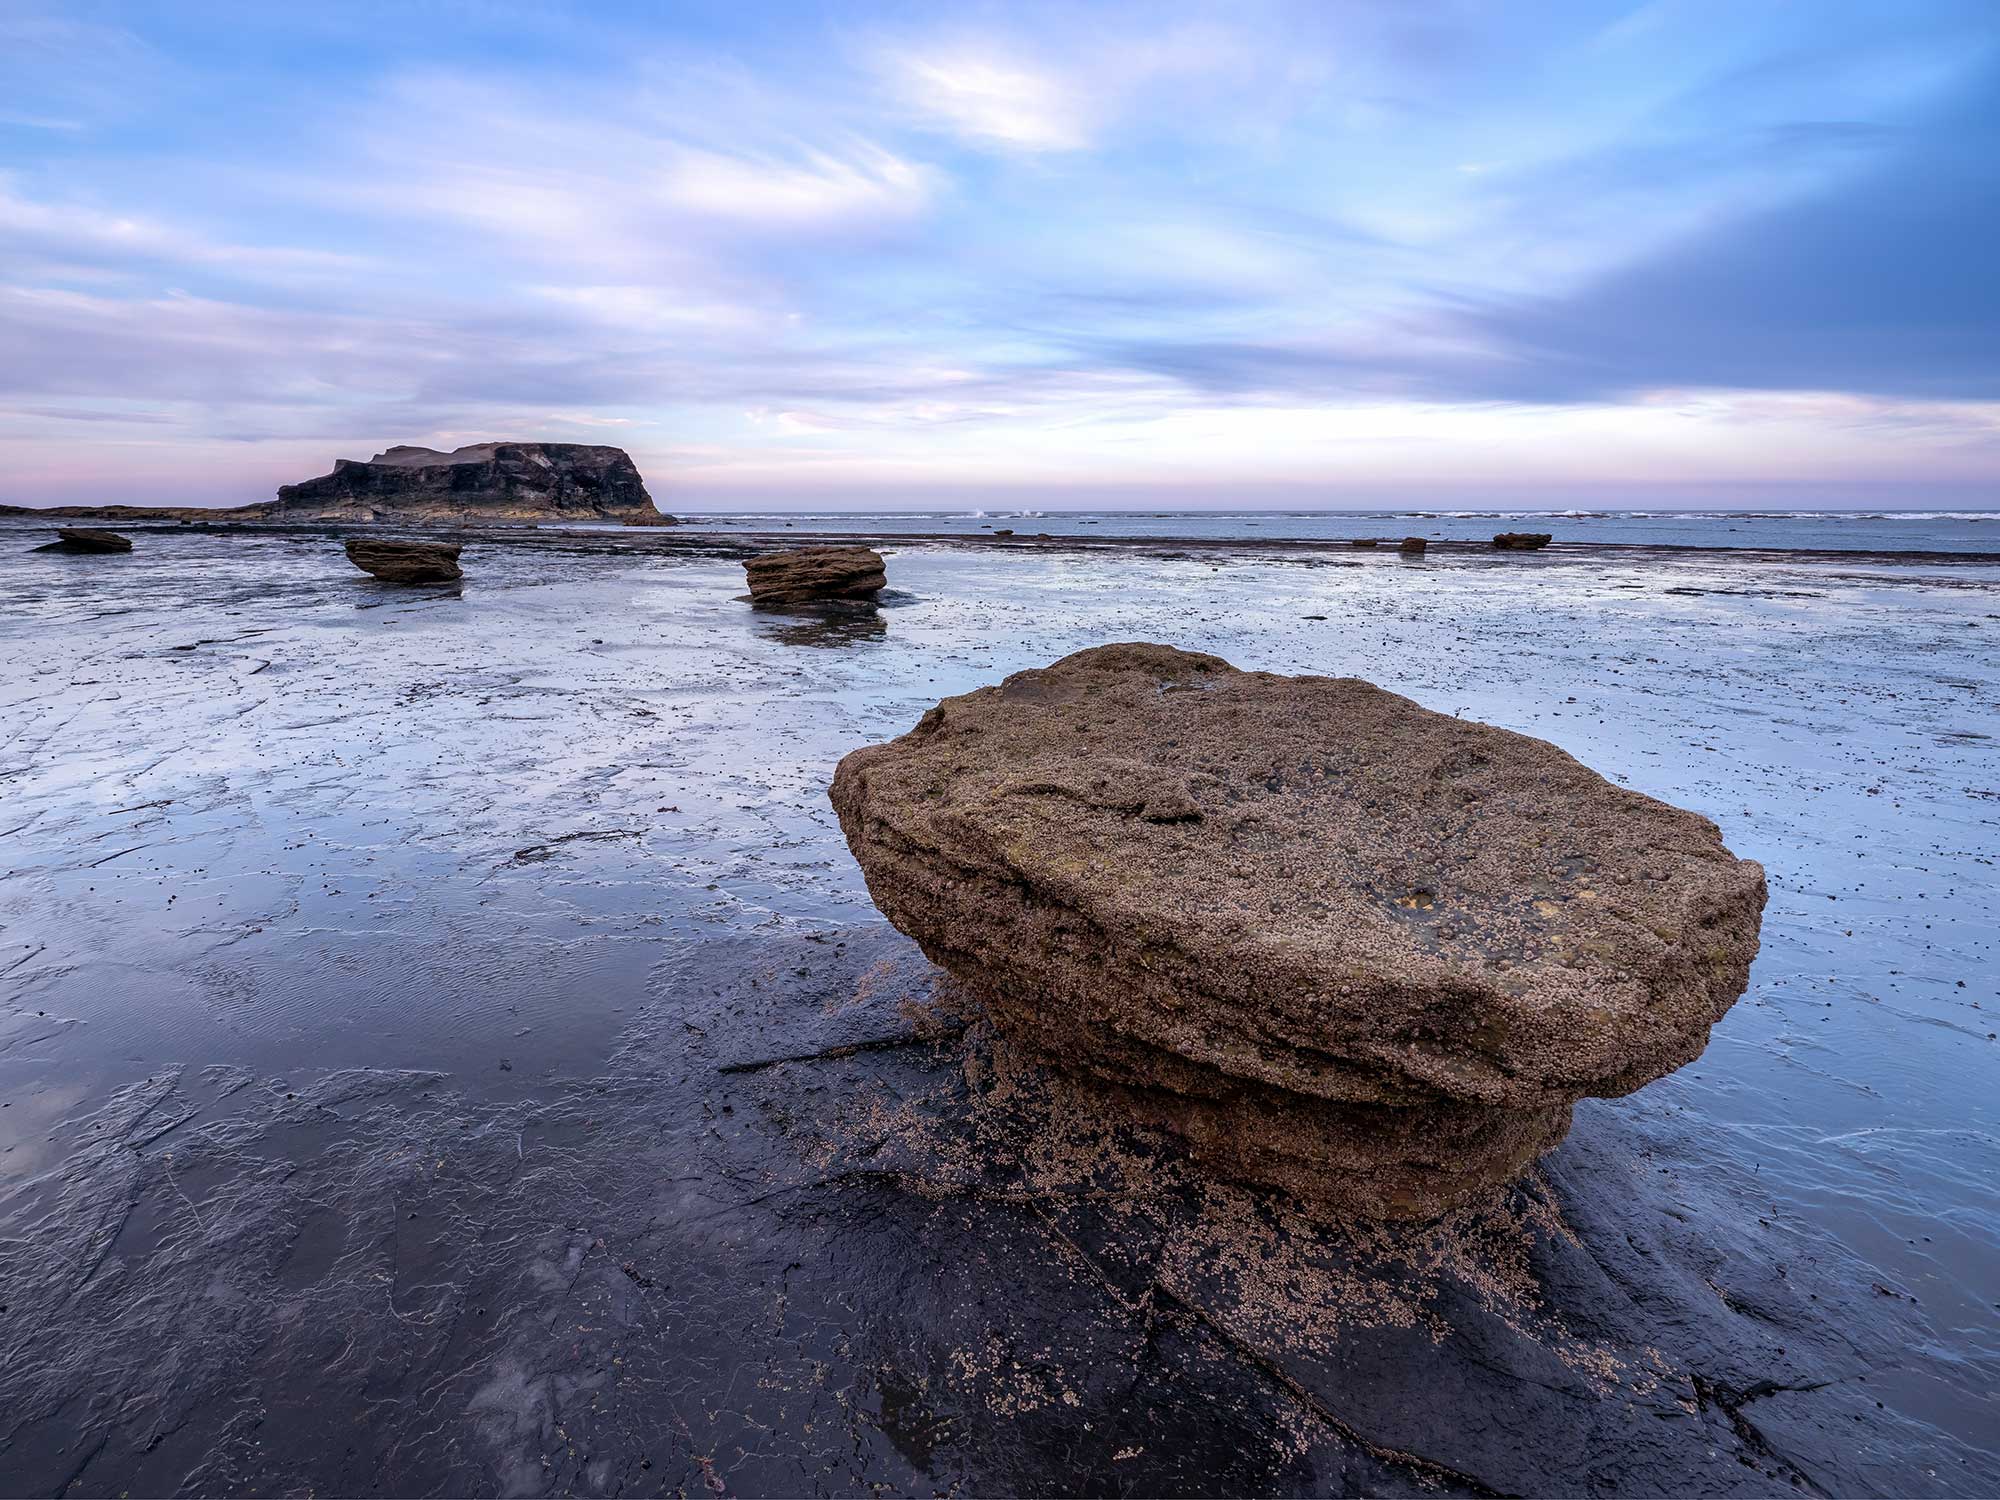
8-25mm @ 8mm f6.3 1/25s ISO200- Live-GND8 Soft
Another image taken at Saltwick Bay near Whitby, this time waiting for the light to soften at twilight. This is the processes Raw image using a Soft 3 stop Live filter, adjusting the height to recover the bright tones on the horizon. The Nab headland was a little dark, again making a selection of it in Lightroom and reducing the blacks and opening shadows was all that was needed.
THE END OF REAL FILTERS?
Are in-camera GNDs the end or physical glass filters? Not quite, there are limitations with movement and the limit of 60 seconds longest exposure. As a result it means I still have a 6 and 10 stop ND and a graduated ND in my kit bag. I am sure one day the 60 second limit will be expanded as Fuji and Nikon already do which will make a big difference. But even so, Live-GND is a hugely useful feature and is becoming one I use a great deal and in most situations the limitations are not a real issue.
