
AI DETECTION MODE
AI Detection for wildlife
A brief look at A.I Detection for wildlife, how it works and how to utilise it.
Olympus cameras are packed with features as you know reading this. In the section we will explore the newly expanded AI Detection in the OM-1. Although not new it has been improved and expanded to include more subjects. Although this guide is aimed at Landscape Photographers it is useful to understand the technicalities of the different focus modes and options, and have at least one CM saved just in case.
AI SUBJECT DETECTION
Olympus have been more than adequate for shooting moving subjects and the technology has been improved even more in the OM-1. Wildlife for example is not a new genre and once relied on nothing but skill. Tracking in previous models was good but a little hit and miss which was improved in the E-M1X with better tracking and the introduction of AI Subject Detection.
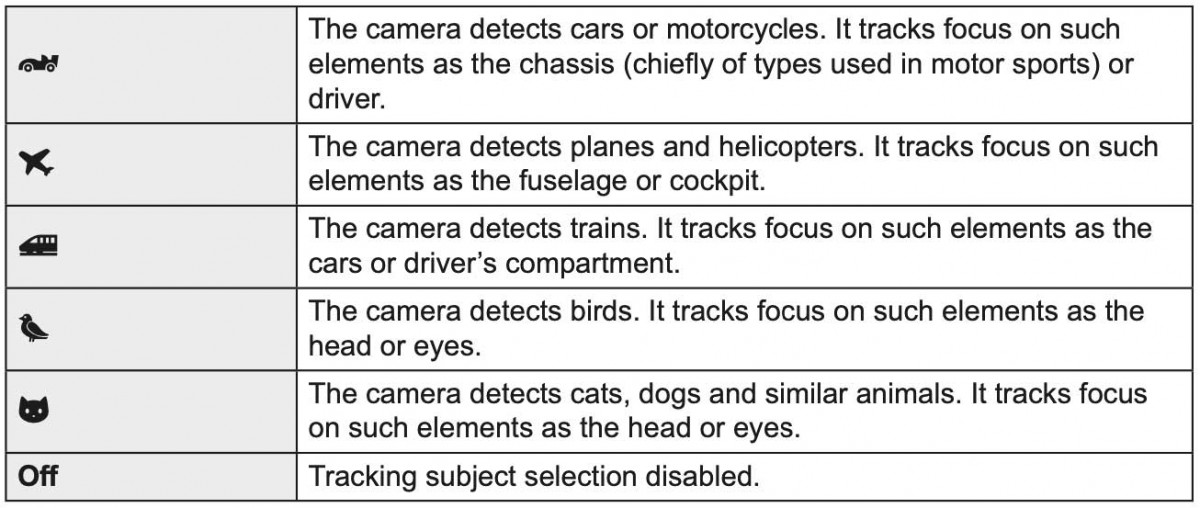
As the name suggests AI has been used to train the camera to recognise, focus and track cars, planes, trains, birds and animals, and it works very very well thanks to the improved focussing and faster processing power.
Other settings need to be considered when using these modes.
Setting the camera up for using Subject Detection Modes needs careful consideration depending on how often you you would use it. How you access the options and the general settings you have enabled will vastly increase your ‘keeper’ rate and enhance your reactions. If you have followed the Custom Settings section you will see I recommend a Custom Mode which I save to C4 with Subject Detection saved to a button.
There are also options for the AF Target mode, Drive Mode and FPS (Frames Per Second) Shooting Mode (A, S or M) and ISO to consider. The priority is fast shutter speeds obviously, so you may want to consider Auto ISO, or save a Custom Mode with a default 1/1000s shutter speed in S and alter ISO yourself as it is so easy to do.
There are so many ways to set the camera up, we will look at a few options. Thankfully you do not need to change the general settings for each Subject Detection Mode.
SUBJECT DETECTION
New in the OM-1 are the Subject Detection AF Modes. Note on the table above that for birds and animals the A.I machine learning has been trained to detect each category, and that focus will track either the body, head or eyes depending on how large they are in the frame.
The detection and success, or failure of it depend on the AF Target set. Birds in flight for instance a larger target will be adequate, a smaller target would more suit a bird in a tree with branches in front of it that can confuse the system. Do not enable Tracking with any AI Detect Modes, it will actually impede the success of the AI.
Set Subject Detection to a button for quick access.
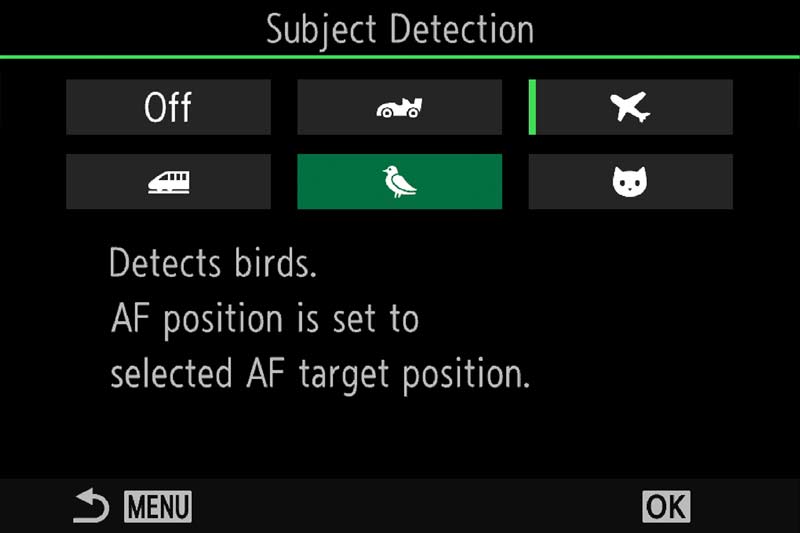
Menu AF 2.AF>Subject Detection
AF TARGET AREAS
AF Target Areas are crucial to understanding how how Subject Detection actually works. With these we can set various sizes of target areas or AF grid sizes whilst shooting. In A.I. (Subject Detection) Modes the grid acts as the area where the camera will try to detect the subject and will activate the focus point, detecting the best place to focus according to the table above. For a bird for instance, it will try to focus on the body or if prominent in the frame the head or even the eye. But it is not infallible and when there are two or more subjects it will detect both, not knowing which to actually focus on. We need to be aware of where it can go wrong, and what to do about it with ease.
Menu >AF>5 AF Target Mode Settings
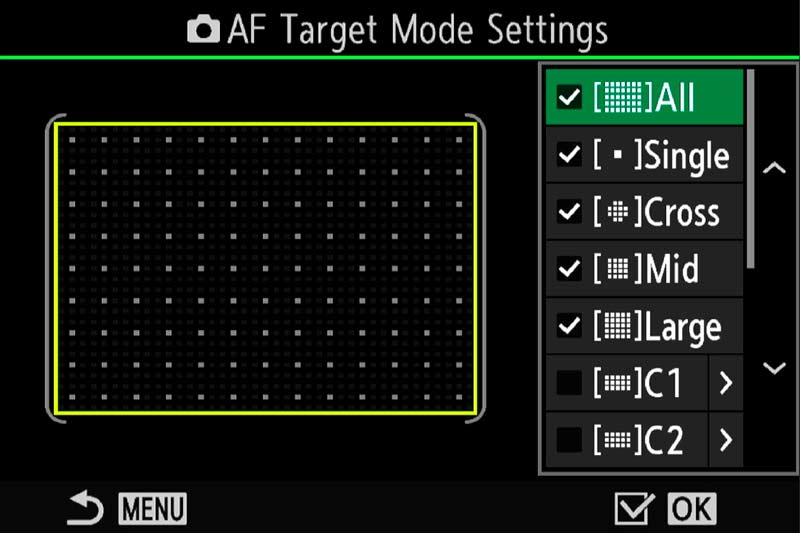
AF Target Mode Settings
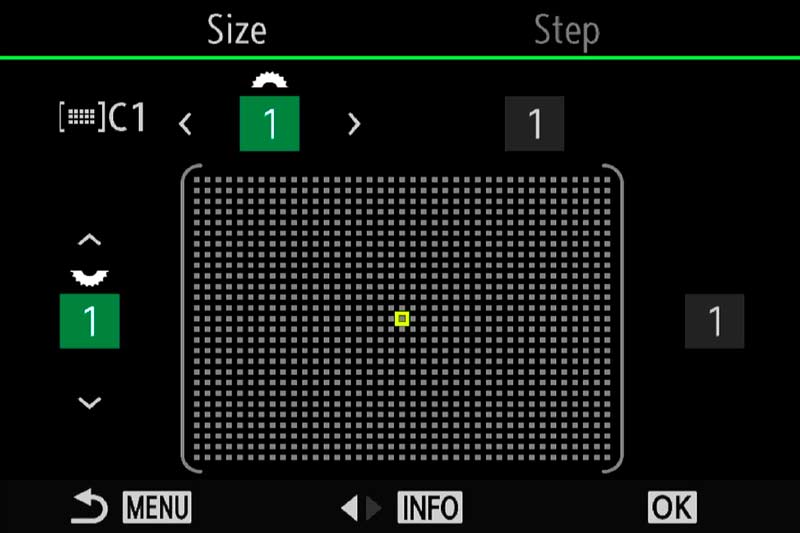
Custom 1×1 Target Area
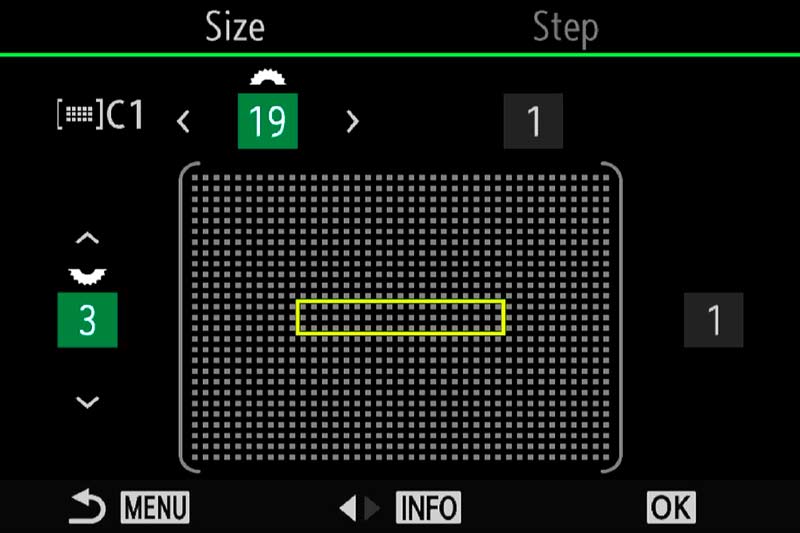
Custom Rectangular Target Area
Screen 1 shows the AF target Mode Settings. There are 5 ‘standard’ target modes and two modes that can be customised, C1 and C2. Activate them all by ticking them and customise the C1 and C2. C1 I have enabled with a Single 1×1 Grid which I have enabled mainly for Landscape work to allow finer placement of the focus point. Accessing them is easy, in most of my CM’s (Custom Modes) I simply activate the focus point by nudging the Jog Lever any direction and then turning the front dial. You could as an option set AF Area Select to the AEL Button which is easy to access with your thumb.
THE IMPORTANCE OF TARGET MODES
Using A.I Subject Detection is extremely good but as said above not infallible. When two or more subjects are in the frame it can detect them but will not know which is priority. We then have to take a little control to tell it which is priority by altering the target Mode.
AF Target Large
AF Target Medium
Here the AF Target used is Large. The Bird Detect has detected the main subject and also other subjects in the frame but it doesn’t know which is priority. It will struggle even more if the subjects overlap. By changing the Target Mode to Medium or Small we can tell the system which subject has priority and the other subjects will be ignored.
RECOMMENDED TARGET MODES
Note that C-AF is best to use and we do not need to use tracking. If you followed the Custom Options section you will have the Lever 1 setting set to C-AF/MF with a Medium Target Area set and in position 2 C-AF/MF with optionally a Small Target Area set. You will have realised by now that saving settings gives many options, and the Lever can be used for quick access. Choose two you think you will use the most and save them on the lever.
LARGE OR ALL – When there is one subject such as a bird in flight. The Subject Detect will quickly detect and track the subject across the frame.
MEDIUM – When there is more than one subject and refining of the main subject is needed.
SMALL – When there is more than one subject or a busy background such as a bird on a perch or in trees.
CROSS AND CUSTOM – These are useful to further refine the target area for you subject. For instance a rectangle grid can help when the AF focusses on a busy background or foreground
STATIONARY BIRDS
A.I Detect Mode is superb for Birds In Flight, but can have a problem with perched birds or stationary birds when foreground is in the way. The detection gets confused and sometimes will not find the bird, which may translate to other subjects too, if for example you have an animal peeking through trees. I would imagine this won’t be an issue with the plane or car mode, if I saw a plane peeking thought bushes I’d be more inclined to run.
This little Puffin was not an issue for the AI Detect Mode. Using a small focus target I was able to get the eye sharp and tracking did follow it as it moved.

40-150 Pro A.I Bird Detect ISO 1000 f4 1/640s
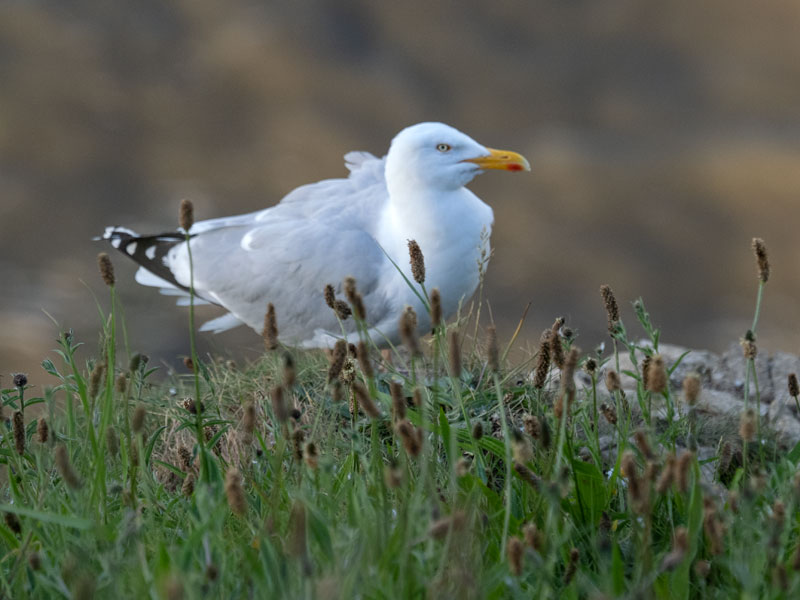
This image however was different because of the foreground, and despite using a small target focus point the detection was jumping all over the place. Notice focus is on the stems in the foreground and the bird was out of focus.
Swapping to standard C/AF and turning off A.I Detection was the solution. I was able to get a shot sharp, and when it flew away enabling Detection again nailed it. If you find issues with similar situations it’s worth trying with a small target mode first and then with Detection off which does seem more suited to Birds In Flight.
Another option would be to utilise AF Limiter to set a limit that would exclude the foreground (see below).
40-150 Pro A.I Bird Detect ISO 1000 f4.5 1/500s
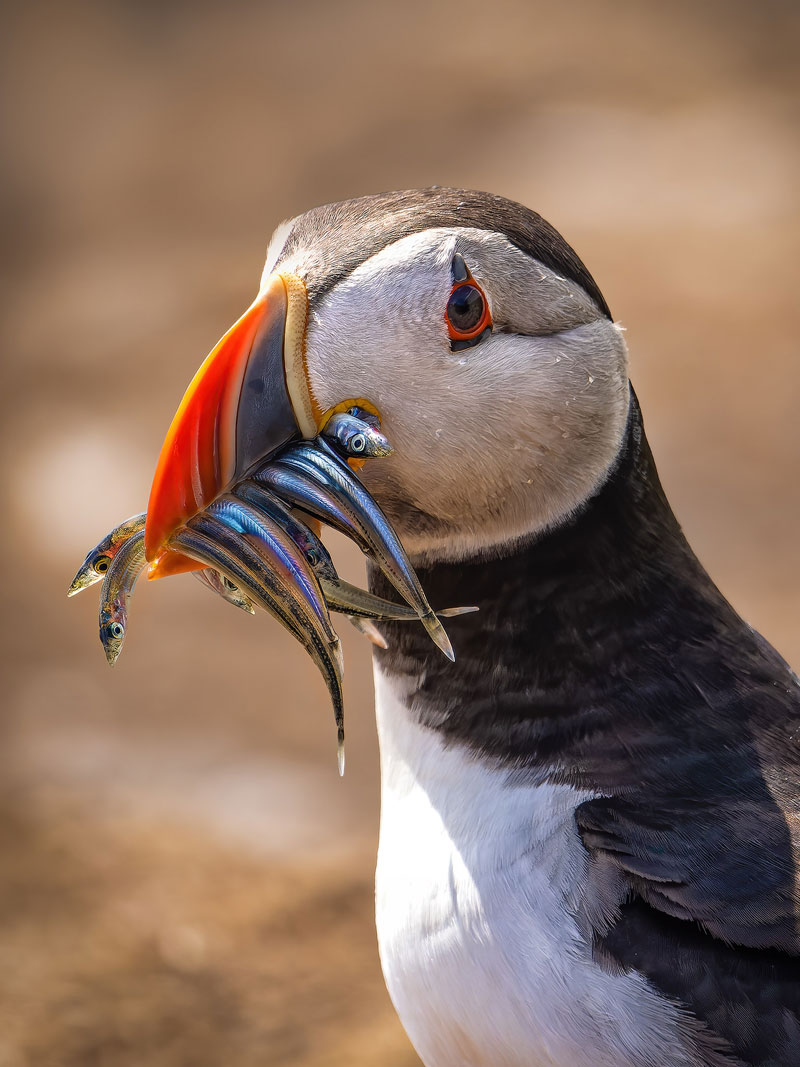
A cute Puffin on the Farne Islands in Northumberland.
Bird AI Detect worked flawlessly with this image using a Medium Target. The AI found the eye and managed to keep locked onto it each time it found the eye, despite how much the bird was moving its head.
Continuous AF had a few issues which seems to have been resolved with the Firmware Update v1.2.
100-400 @ 400mm A.I Bird Detect ISO 640 f6.3 1/3200s
→ TIP CAF + Tracking is best avoided in AI Modes because it will actually confuse it. .You are simply asking it to do too much at once when AI Detection works very well as it is. Use AI Modes with Continuous AF for best results.
In some instances as the example above it may be best to switch off AI and just use CAF, and experiment with Tracking, it may suit the subject. Many have reported and my experience confirms that when AI becomes confused mainly because of foreground elements it is best to switch it off. I have found when AI has not performed as well as I hoped using Tracking can be better although it will not keep up with fast movement.
OTHER SETTINGS
Other settings which are important and should be considered.
AF SENSITIVITY
AF Sensitivity can be altered plus or minus 1 or 2. When would you want or need to alter it?
Fast moving subjects can benefit from having sensitivity increased to allow the AF to react faster. This does mean if another subject enter the frame the AF can switch more easily so setting the AF less sensitive could help.
It’s unfortunate this function cannot be mapped to a button so the best solution for quick access is to save it to you My Menu. As situations vary so much you will need to experiment. I find setting it to +1 is best for most situations although note it has little difference when using A.I.
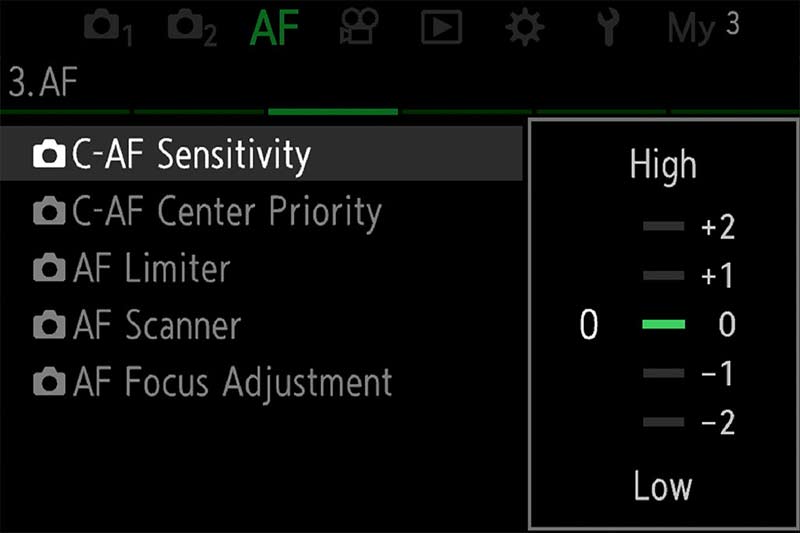
Menu>AF>3.AF>C-AF Sensitivity
AREA POINTER
Note that AF sensitivity is not the same as Area Pointer which does seem to confuse some.
Area Pointer has two modes ON1 which show the green box inside the Target Area when focus has been achieved, and ON2 will show multiple green boxes when using C-AF or C-AF+Tracking. It is just a visual aid showing what is in focus and is not more accurate than having one shown.
I prefer to set it to On1 because I find it less distracting but it is worth experimenting with to suit your own preference.
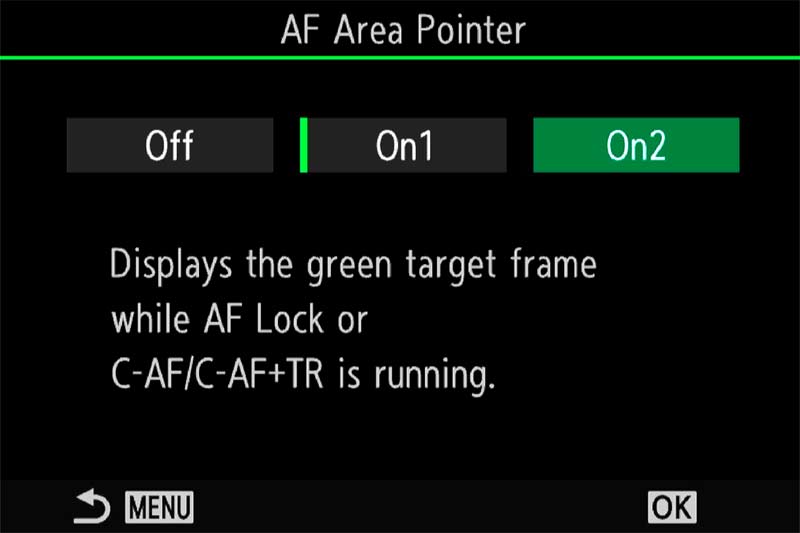
Menu>AF>2.AF>Area Pointer
AF-LIMITER
There may be times when the lens struggles to gain focus or focusses on a background or foreground element instead of the subject.
AF Limiter allows you to save three presets with a minimum and maximum distance to control the range the AF will try to focus in. Make sure a wide enough range is set.
You have to guess the distance or use the PRE-MF ‘hack’.
Go to PRE-MF, press info and focus on the area you want to exclude such as the background. The screen will show the distance instead of guessing it. Do the same for the foreground if needed. Now in AF Limiter set a range between these distances.
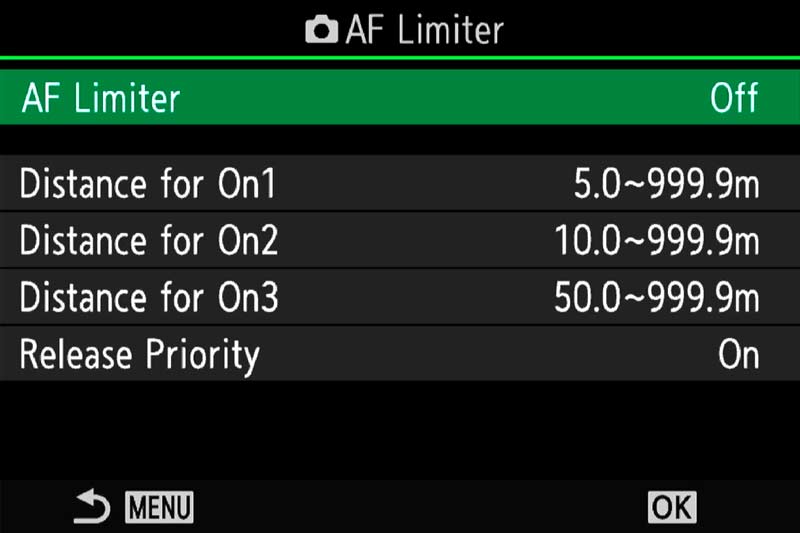
Menu>AF>3.AF>AF Limiter
An advantage of having this saved to a button in a CM not just for quick access is it will not be active for your next session once the camera is turned off and on again, thus avoiding problems wondering why your AF is limited. Do remember if you set up ON1, ON2 and ON3 and want to save them as part of your CM you must resave the CM again. As with all CM’s any changes you want to make permanently must be resaved.
PRESET MF DISTANCE
Preset MF is exactly what it says and is used for setting a fixed distance for focus. If for example you’re taking images in a fixed spot it can be useful to program the focus to the exact distance and prevent the lens from hunting.
Remember this is manual Focus. Ensure you have set AF-ON to ‘AF on in MF’ to allow for AF still to be used Menu>AF 1.AF>AF-ON in MF>Yes
There are two ways to set this:
Menu>AF> 6.MF>Preset MF Distance and enter manually
Top AF Button, scroll to Pre-MF. Press Info and focus on the area you want to save, press OK to store it.
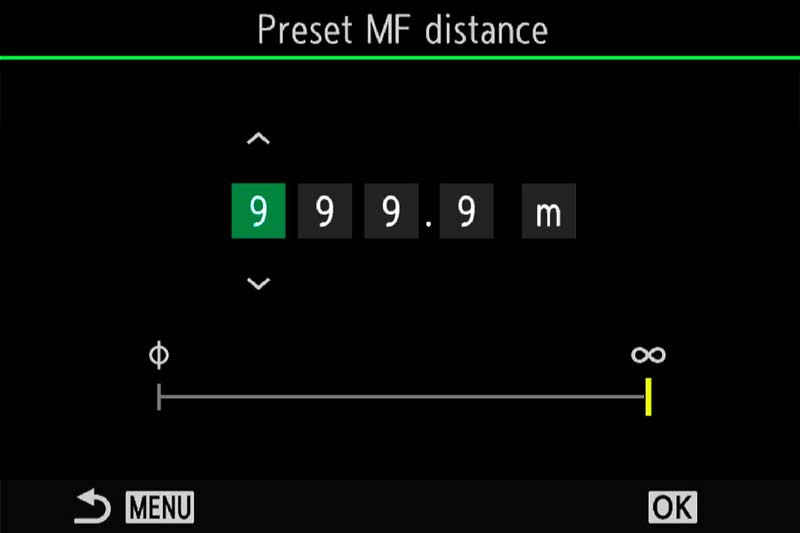
Menu>AF>6.MF>Preset MF Distance
I personally do not find much of a need for Pre-MF. If I do want to lock focus on a particular area I can just manually focus or auto focus and then lock it into MF, but I can imagine situations when the ability to have it saved on a button and immediately recall it would be useful. Note that recalling from a button only switches Pre-MF on or off. To change the distance saved you can actually press/hold the button and turn the front dial, although it is probably easier to access from the top left button or the Super Control Panel.
AF SCANNER
Longer lenses can sometimes struggle when contrast is low. AF Scanner will force the AF to try and rescan to acquire focus. It can lead to the lens ‘hunting’ where it scans from near to far focus, but disabling it can mean out of focus images. I tend to leave it on by default and revert to MF if there is an issue.
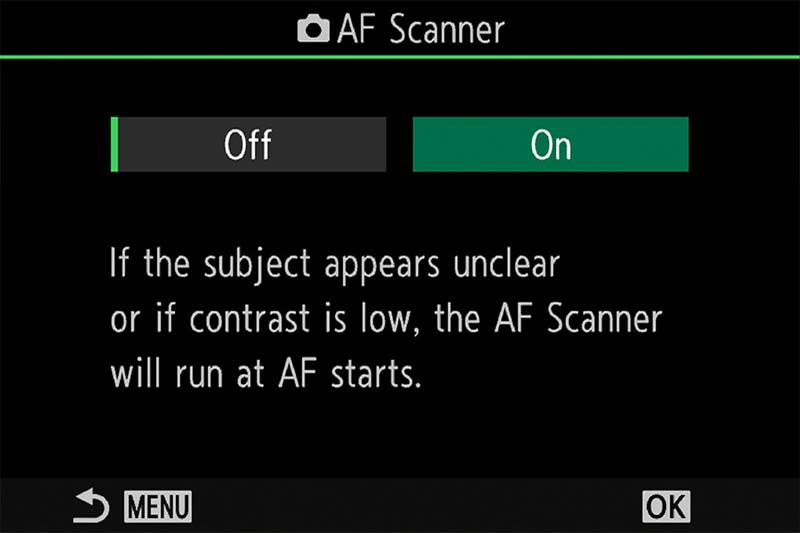
Menu>AF>3.AF>AF Scanner
RELEASE PRIORITY
Release Priority determine whether the camera will take an image even if focus has not been confirmed. Set to off means it will be set to ‘Focus Priority’ which is much more sensible. The camera will not take an image if focus is not confirmed, but in continuous drive modes it is effective on the first frame only.
C-AF CENTRE PRIORITY
Similarly AF Targets Cross, Mid and Large and Custom Targets can be set to give priority towards the centre of the target area. I prefer to set these ON and use a smaller target if I find an issue.
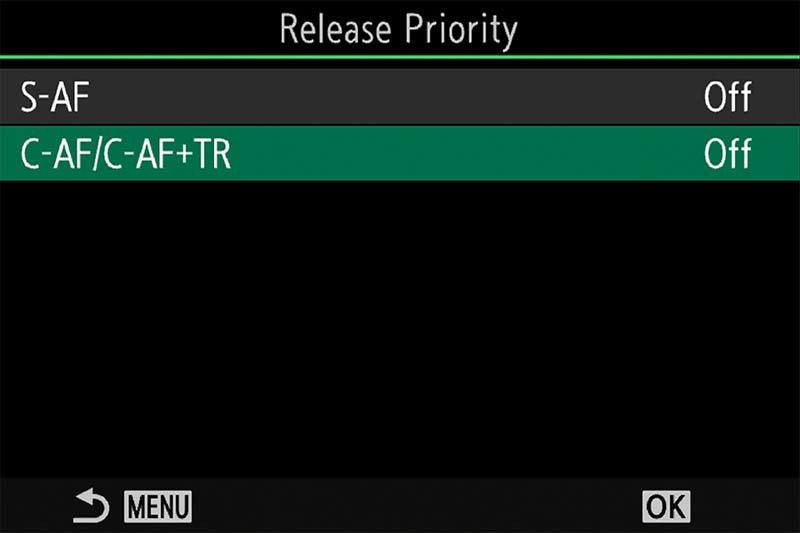
Menu>AF>1.AF>Release Priority
SEQUENTIAL SHOOTING
When considering AF Modes for use with any of the A.I Subject Detection Modes it’s also important to consider which drive mode to use. Drive Modes are easy to access from the main settings on the top left, and saving one as a CM is useful. I tend to use Silent SH2 but it is important to understand each.
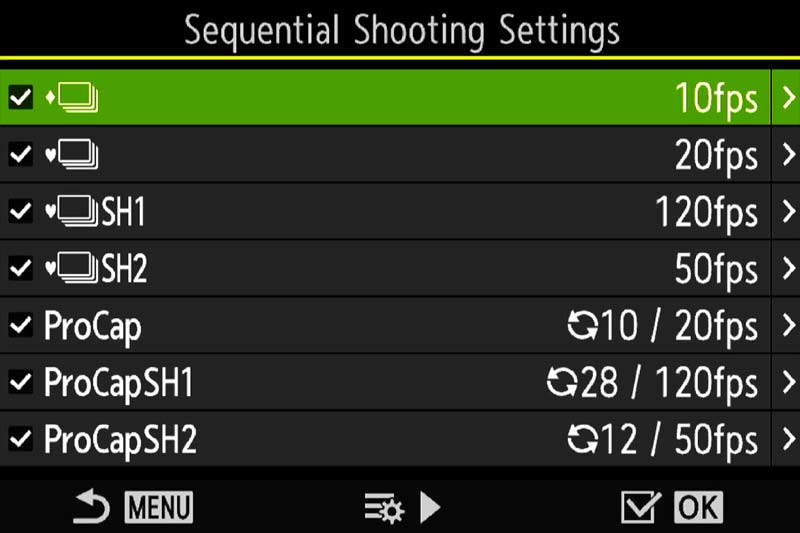
Menu>Camera1>7.Drive Mode>Sequential
Sequential Shooting settings, or Drive Mode will affect you chances of getting the shot just at the right time obviously, but there is no point setting a drive mode that will capture too many images, your card will quickly fill and the scene may not warrant it. Equally a drive too slow means you miss the shot. Birds in flight for example, some dart all over whilst others are more sedate; a perched bird may be relatively still whilst a Kingfisher diving for food would need precise timing.
The same is true for other subjects, how you choose the drive mode can affect your keeper rate.
DRIVE MODE COMPARISON
| MECHANICAL SHUTTER | ELECTRONIC SHUTTER | ELECTRONIC SHUTTER (SH2) | ELECTRONIC SHUTTER (SH1) |
|---|---|---|---|
| 1 to 10 FPS | 5-10-15-20 FPS | 25-50 FPS | 60-100-120 FPS |
| Continuous AF | Continuous AF | Continuous AF | AF 1st Frame |
| Metering | Metering | Metering | Metering 1st Frame |
| Live View | Live View | Live View | Live View |
| Blackout Between Frames | Blackout Between Frames | No Blackouts | No Blackouts |
| Frame Count Limit 2-99 | Frame Count Limit 2-99 | Frame Count Limit 2-99 | Frame Count Limit 2-99 |
| No Minimum Shutter * | No Minimum Shutter* | 1/320 @ 25 FPS – 1/640 @ 50 FPS | Min Shutter 1/15 |
Listing out the different drive modes in a table and we can clearly see the pros and cons of each. Mechanical shutter has the slowest FPS obviously because it is a physical shutter which has to open and close, and there is blackout when the EVF will go black momentarily between frames. AF is continuous for each frame and exposure will be metered for each. Electronic shutter is the same but can double the FPS rate. SH2 can increase FPS up to 50 and with no blackouts, whilst SH1 can go to a huge 120 FPS with no blackouts but at the expense of AF and exposure metering being for the first frame only. This leaves us with plenty of options but also decisions to make.
To avoid taking too many images the Frame Count Limit can be set from 2-99. This is a great option when speed is of the essence but you want to avoid filling your memory card. Once the limit is reached shooting will end.
PRO CAPTURE
In addition to the drive mode options we also have Pro-Capture. This feature has similar settings to the drive modes but also user set pre-capture frames that are recorded before the main frames. Using the Kingfisher diving into water situation again, how well could you anticipate and press the shutter at the exact moment its beak is mm’s away from the water? Not easily. Pro-Capture aims to assist by capturing a set number of frames the moment the shutter is half pressed and thus reduce the delayed reaction between a half press and full press. Images are stored in the camera buffer and then written to the card.
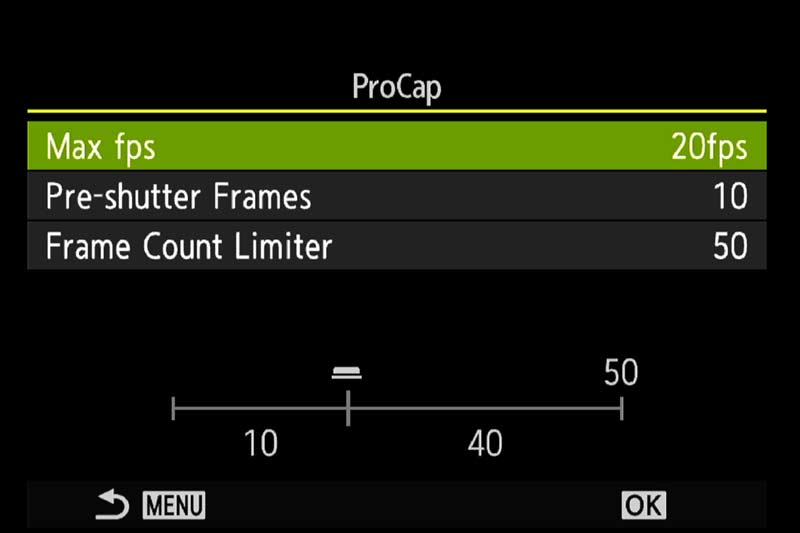
Menu>Camera1>7.Drive Mode>Sequential
PRO-CAPTURE COMPARISON
| PRO CAPTURE | PRO CAPTURE (SH2) | PRO CAPTURE (SH1) |
|---|---|---|
| 5-10-15-20 FPS | 25-50 FPS | 60-100-120 FPS |
| Continuous AF | Continuous AF | AF 1st Frame |
| Metering | Metering | Metering 1st Frame |
| Live View | Live View | Live View |
| Blackout Between Frames | No Blackout | No Blackouts |
| Pre Frames 70 Max | Pre Frames 70 Max | Pre Frames 70 Max |
| Frame Count Limit 2-99 | Frame Count Limit 2-99 | Frame Count Limit 2-99 |
| No Min Shutter * | 1/320 @ 25 FPS – 1/640 @ 50 FPS | Min Shutter 1/15 |
We can see here Pro-Capture is very similar, in fact the same as the Sequential settings, the difference being the ability to set how many frames will be taken as soon as you half press the shutter button. It is an ingenious solution to reducing the risk of missing a shot through slow reactions times. There are some limitations to be aware of:
LIMITATIONS
MINUMUM SHUTTER SPEED – As noted in the tables SH1 has a minimum of 1/15s shutter speed, and SH2 1/320s @ 25FPS or 1/640s @ 50 FPS. This could limit the usefulness depending on what you are shooting. Having said that you would only need high frame rates with a fast moving subject and would want a fast shutter speed.
NO Min Shutter* – There is no minimum shutter speed where indicated but bear in mind there is still an inherent minimum speed. If you are shooting at 20FPS and have a slow shutter speed of 1/2s the camera simply cannot shoot at that frame rate. How you are warned of this depends on the shooting mode used:
- Aperture Priority – Shutter Speed will blink. Image can be taken but will be under-exposed
- Shutter Priority – Lower shutter cannot be selected and Aperture will blink.
- Manual – Lower shutter cannot be selected and Exposure Meter will blink
REDUCED FRAME RATE – The buffer where pre-frames are stored in Pro Capture can slow down significantly and do require the fastest UHS-II cards you can obtain. Even so you can expect the buffer to affect the maximum time high speeds can be used. With 25FPS you may achieve 5 or 6 seconds of full bust before the frame rate drops whereas at 120FPS you may only achieve 1 or 2. Frame rate also decreases over 16000 ISO. Bear in mind high frame rates are designed for fast action to capture a brief moment in time and not for continued shooting over seconds.
SH2 REDUCED AF OVER f8 – Focus accuracy can be impacted when using SH2 and an aperture smaller than f8. This is not necessarily an issue when wider apertures would normally be used, but could be an issue with slower lenses like the 100-400 f5-6.3
LENS COMPATIBILITY – Only selected lenses are compatible with SH2 50FPS and Continuous AF. Other lenses will have FPS reduced to 25.
12-40mm F2.8 PRO
12-40mm F2.8 PRO Ⅱ
12-100mm F4.0 IS PRO
40-150mm F2.8 PRO
150-400mm F4.5 Pro
300mm F4.0 IS PRO
CUSTOM MODES
In the Custom Modes Section we reviewed how to set up CM’s with suggestions for each of the four available. Only one was dedicated to Wildlife or any action. For me personally it is enough, with buttons set for access to the many options and with quick access to drive modes I don’t feel I need more, but I am a Landscape photographer; what if you want more?
Refer back to the ‘Buttons’ Section where we set up a set of options for use with A.I Modes. Subject Detection was saved to a button along with other important features to make them easy to access. AF Limiter and Pre-MF were mapped to buttons which allow you to enable or disable them quickly, and adding them to My Menu allows quick access to change the actual parameters in each one too.
Study the additional Custom Modes below to see how they vary and how you can create sets depending on the situations you are trying to shoot in. Personally I would keep Custom Modes simple and ensure they have very distinct differences for the purpose you are creating them for. For instance an additional CM specifically to use with Pro Capture.
OTHER CUSTOM MODE SUGGESTIONS
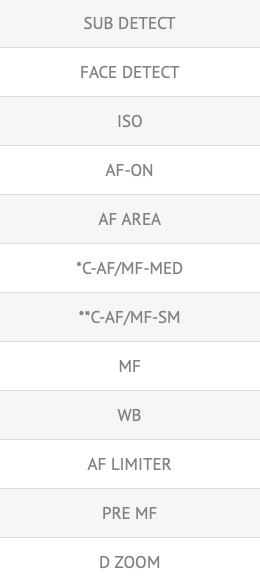
(Wildlife CM from ‘Custom Modes’ Section)
GENERAL
Manual Shooting Mode
ISO 200 (Default)
Metering Centre Weighted
Shutter Speed 1/1000
Drive SH2 25 fps
AF Sensitivity 0
Stabilisation Auto
Lever 1 C-AF/MF Med AF Target
Lever 2 C-AF/MF Small AF Target
Release Priority Off
AF Scanner ON
(Additional Wildlife CM)
FAST MOVEMENT
Manual Shooting Mode
ISO Auto (12800 Upper Limit)
Metering Centre Weighted
Shutter Speed 1/4000
Pro Capture SH2 50fps 20 Pre-Frames
AF Sensitivity +2
Stabilisation Auto
Lever 1 C-AF/MF Med AF Target
Lever 2 C-AF/MF Large AF Target
Release Priority Off
AF Scanner ON
(Additional Wildlife CM)
Combining a set of Customs Buttons and a Custom Mode gives an incredible amount of flexibility. In the General CM the drive mode is SH2 set at 25fps and ISO is the default 200. These are very easy to access and change on the fly so unless your genre leans more towards wildlife or action there is no need to set up different CM’s. If you do want to, bearing in mind my approach is as a Landscape Photographer who ‘dabbles’ from time to time in wildlife, set up a CM which is different in significant ways.
The ‘Fast Movement’ CM show below, for birds in flight or any subject with significant movement (The AI Mode is mapped to a button to make it quick to access and change) may not look very different, but notice ISO is Auto, shutter speed will default to 1/4000, Pro capture is enabled with a number of pre-frames, and AF sensitivity is increased to the max +2. The Lever settings could be changed also to any Target mode you prefer.
A note about setting CM’s to buttons. I advocate not doing this although I know some do prefer it. Firstly setting a CM to a button means the button cannot be used for a feature, secondly there can be conflicts where some settings may not be recalled, leaving you wondering what on earth is going on.
FACE DETECT
Another useful feature is Face Detect which will as the name suggests detect a face, detect eyes or even detect the left or right eye.
Face Detect can be useful especially when you want to shoot a spontaneous portrait, and having it mapped to a button for quick access makes it more convenient. You could also save it into My Menu. I tend to have it disabled for landscapes because it can often find what it thinks is a face in ground or rock patterns.
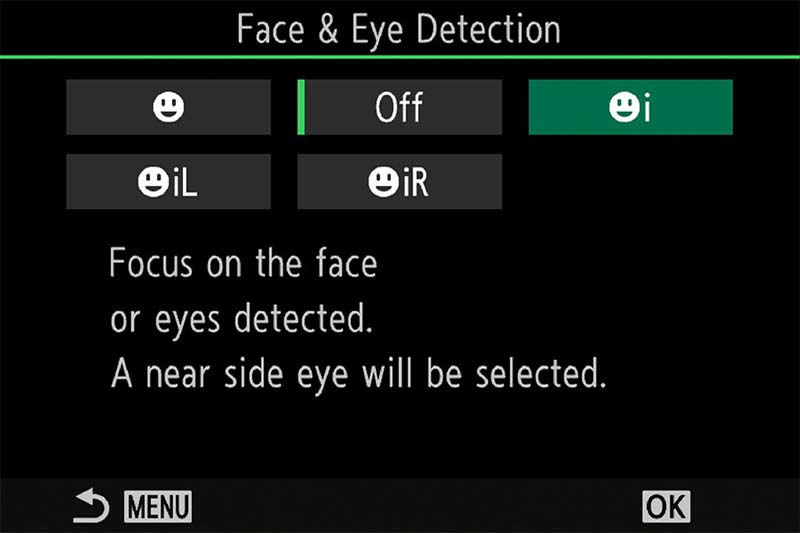
Menu>AF>2.AF>Face & Eye Detection. Also access through Super Control Panel or a button.
OPTIONS
AF-ON allows the focus priority to be given to the face, or the focus target (your green focus point). For instance if the focus target is not on the face and [Target] Priority has been enabled focus will be set on where the target is. Set it to Face Priority, otherwise there seems to be little point using Face Detect.
Face Selection is a button only feature. Assign to a button and each press will move detection to another face when there are more than one. Press/Hold the button and turn the front wheel to manually scroll through the available faces. Note that when more than one face is detection the AF Target does not give priority to any particular face so Face Selection is needed.
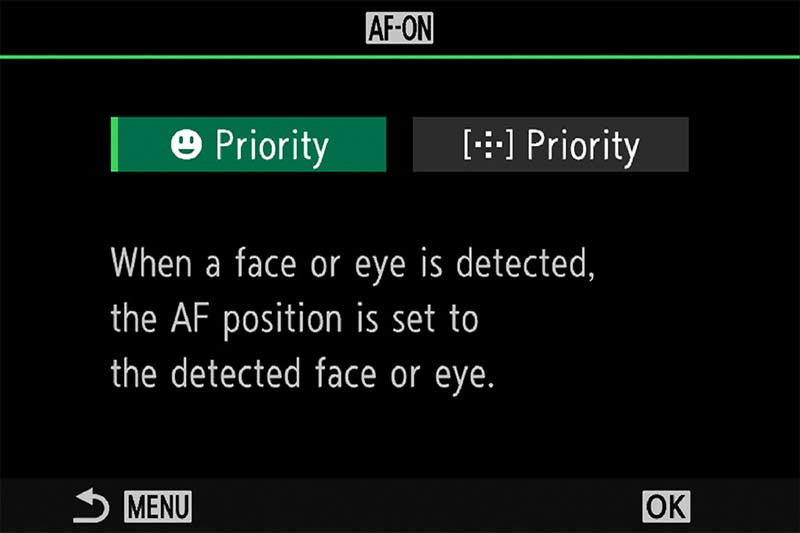
Menu>AF>2.AF>Face & Eye AF Button
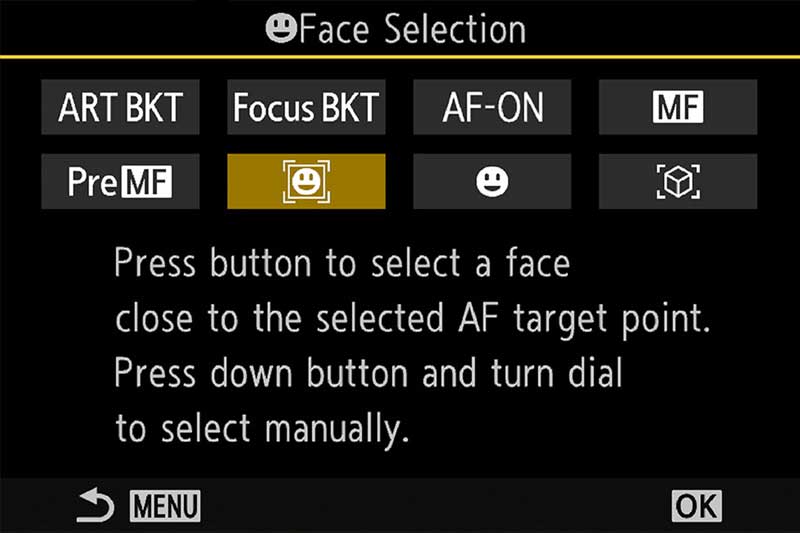
Face Selection Button Only Cog Menu>1.Operations>Button
→ TIP It’s unfortunate Face Selection is only available when assigned to a button because it is useful for quickly shifting the selected face. It’s easy to test without annoying your family, search on your PC ‘Faces’, select ‘images’ and give it a try. You will need Face Selection mapped to a button and Face Detect turned on. If you have a CM set up just assign any button, when you turn off the camera it will be reset back to your default button.
Face Detection is really designed for spontaneous portraits, not studio or posed portraits where you have more time to consider the focus point, so for this reason I have Face Detect mapped to a button as a useful ‘just in case’. If you do find yourself using Face Detect often when there are groups of people you would need Face Selection mapping to a button too. This uses two buttons, so consider a dedicated CM for it. Alternatively you could save Face Detect to MyMenu and then just map Face Selection to a button. This as a work-around gives quick access to Face Detection and Face Selection, and uses just one button.
EXAMPLES
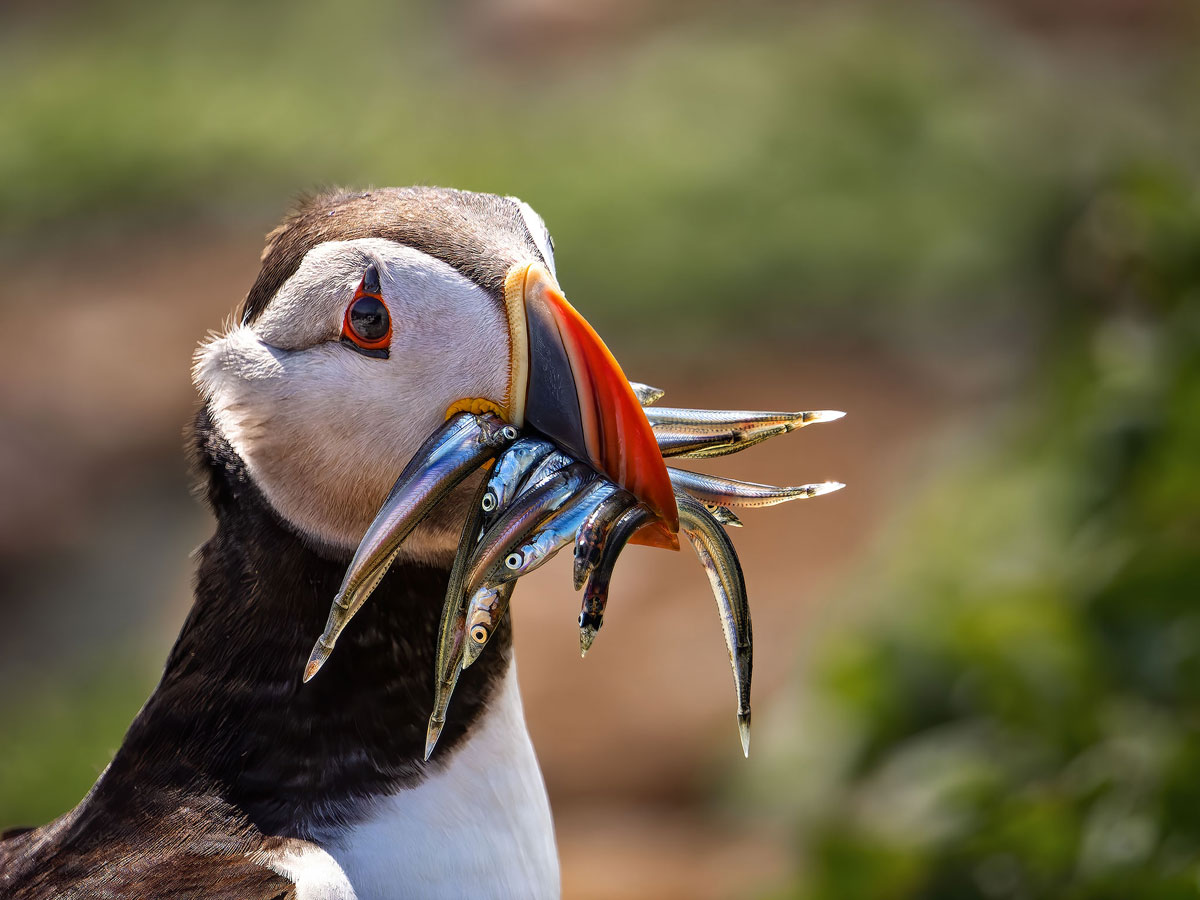
100-400 @ 400mm A.I Bird Detect ISO 640 f6.3 1/3200s
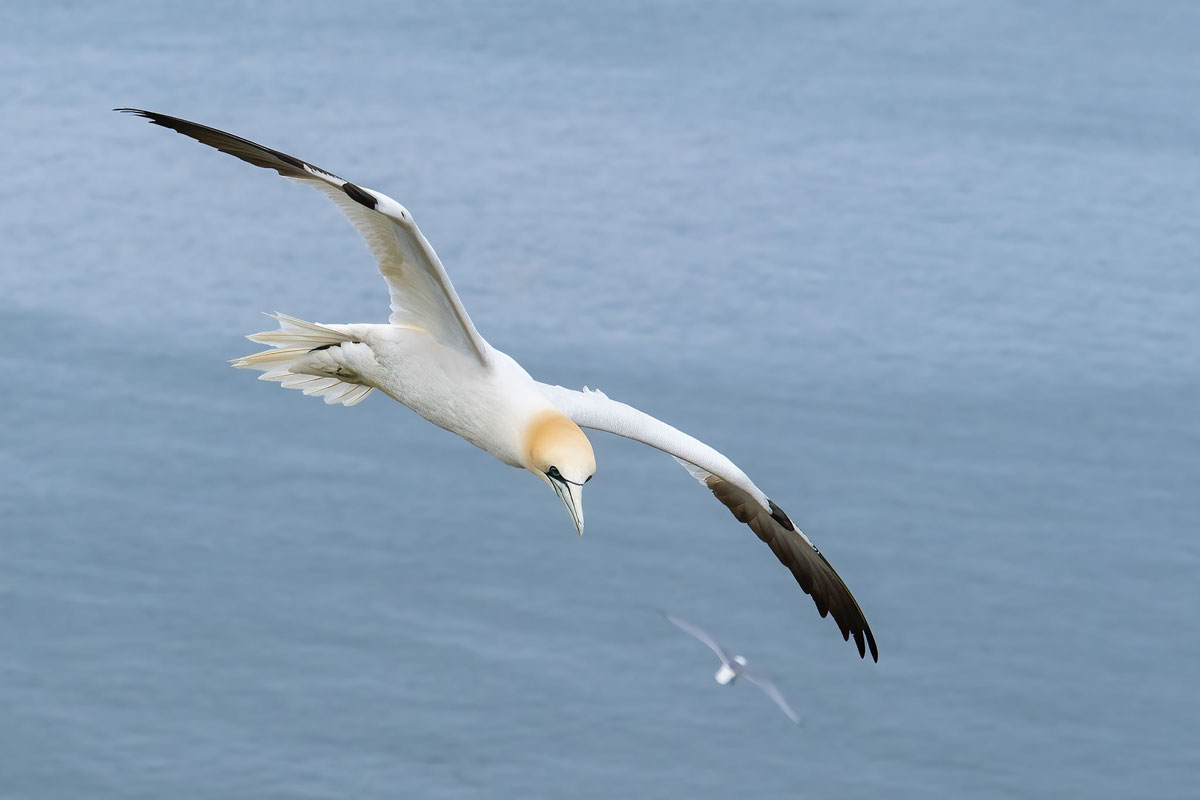
Bird Detect 40-150mm Pro @ 60mm f4.5 1/1600s ISO200
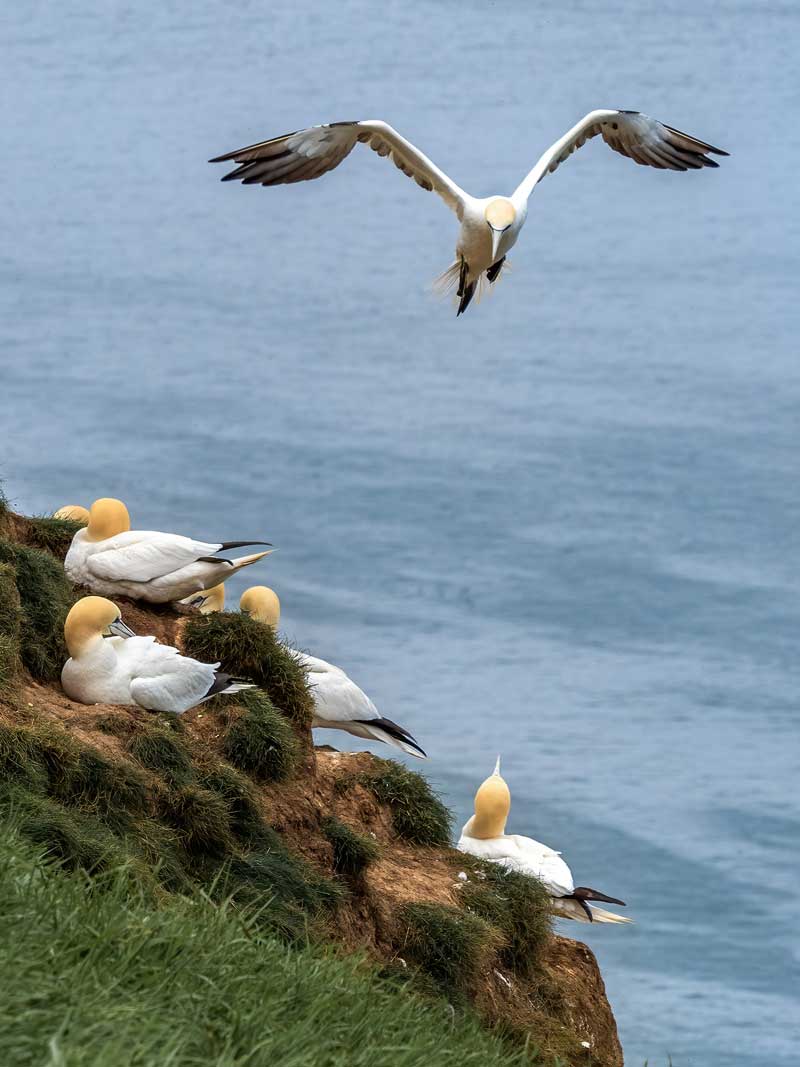
Bird Detect 40-150mm Pro @ 110mm f5 1/1600s ISO200
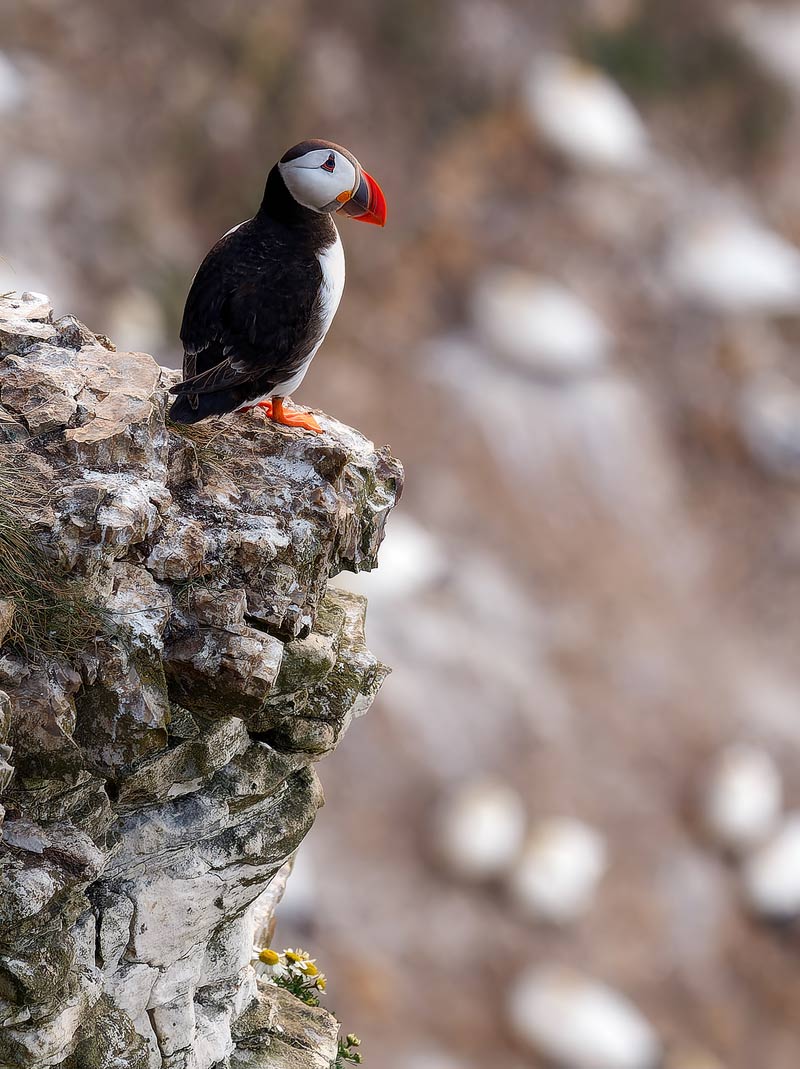
Bird Detect 40-150mm Pro @ 150mm f4 1/640s ISO1000

Animal Detect 100-400mm @ 400mm f6.3 1/500s ISO640

Bird Detect 40-150mm Pro @ 150mm f4 1/1640s ISO1000
CONCLUSION
AI Detect certainly has improved with the OM-1 and the focus system now gives the E-M1x a run for its money. In fact it is so good it has encouraged even me to experiment with it. It is not foolproof and as with everything there is still a lot of skill required but it should open up a genre many would not previously have considered. In The next and final section we will have a look at a few tips for gear and equipment.
