
VIDEO
The Video or Movie Mode
Settings and features.
The Video, or Movie mode as OM-System call it has carried over from the OM5 with few changes. The new menu has made it easier to use and there are two new video modes, Cinema 1 and Cinema 2. If like me you only dabble with Movies the settings can really confusing. In this section we will explore the settings and features and try to demystify them.
USING MOVIE MODE
The first step is to explore the physical settings of the camera.
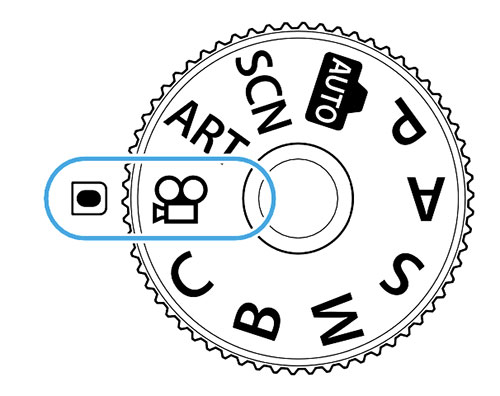
If you followed the suggestions in the Buttons Section you will have removed the video function from the red Record button to use for more useful functions. This means to record video we have to turn the Mode Dial to the Movie Mode. This is no bad thing, the disadvantage is losing the ability to record video quickly without changing settings, but the advantage is once we are in the Movie Mode on the dial, buttons will change to setting more useful which we can further customise, just as a Custom Mode.
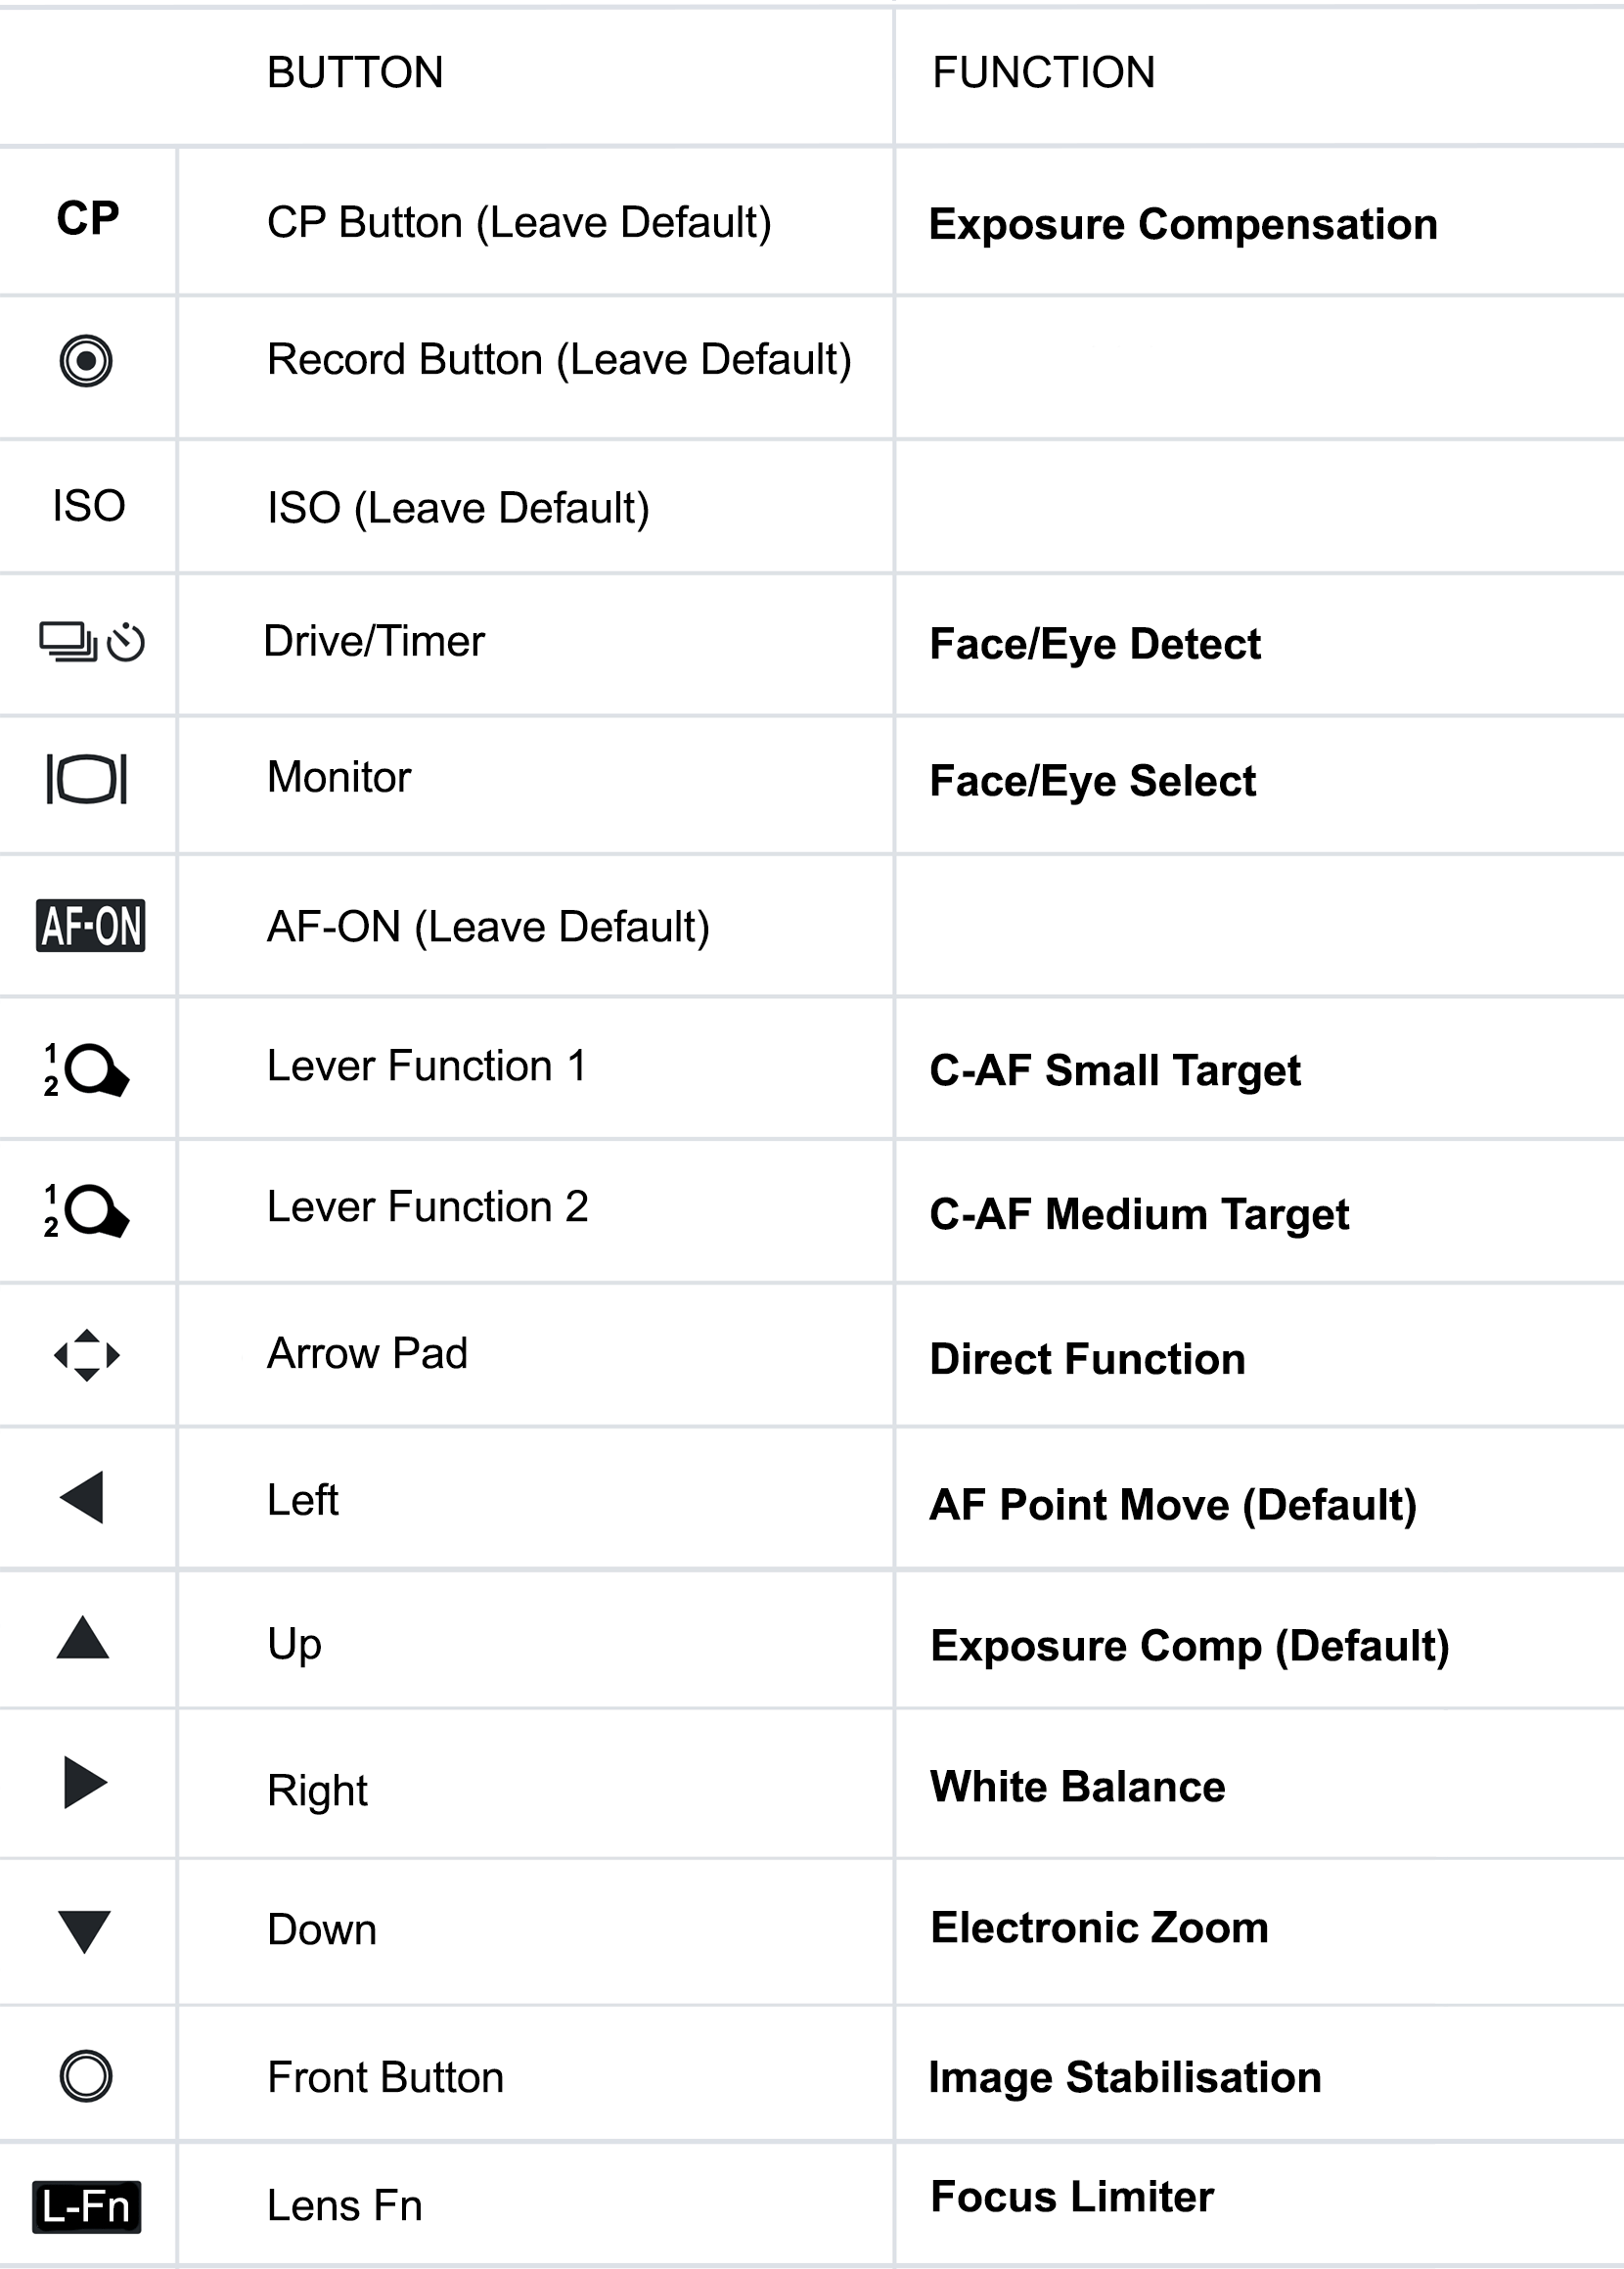
Menu Cog>1.Operations>Button Settings>Video Button Settings. Most of the buttons shown here are default settings when in Movie on the Mode Dial.
CP Button is set as Exposure Compensation by default because Computational Modes are redundant in video.
Monitor and Drive are more or less redundant in video. Using these to set Face Detect and Face Select is much more useful, especially if you are a content creator and intend to take video of yourself or people.
AF-ON, C-AF AF-ON stays as default and the focus mode is Continuous AF. With video obviously we need continuous focus for moving subjects. Do note in video pressing the AF-ON button whilst recording is best avoided, focus will hunt as it tries to find the focus point and it will show in the recording, set focus before recording. Moving the focus point whilst recording will force auto focus and it will shift smoothly. AF-ON is left as default and target sizes are changed to allow a specific focus to be set at the start of a movie when needed.
Lever Function L1 and L2 are set with C-AF and a small and Medium Target respectively for more AF options.
Front is set to IS which is useful. There are differences in image stabilisation for video, see the settings below.
D-Pad Set to Direct Function. The > and ∨ arrows can now be set to more useful functions such as WB, and Electronic Zoom if you have a lens with an electronic motor.
Focus Limiter is default set on the Lfn Button. Whether you find this useful depends on if you use a Pro lens with an Lfn button.
NOTE – Use C-AF, Continuous AF, which is default, along with Auto ISO. Most times you will use the rear screen where it is more convenient to set focus with the touch screen feature. For a wide Landscape it is perfectly fine to use S-AF (single) and then start recording, Continuous AF obviously is not needed in this situation and you can avoid the focus hunting or shifting. Change the AF Mode in the Super Control Panel, or consider the lever settings.
LEVER SETTINGS
Just as in the settings for Stills Photography the FN Lever can be set to change the AF Target and Mode, or the functions of the dials (Cog>1. Operations>FN Lever Settings), and this does need some consideration. Check the menu and decide for yourself which you prefer.
Setting Mode 1 means the dials will function just as you would expect in each shooting mode, for instance in Manual the dials change Aperture and Shutter in L1. In L2 the dials can be reprogrammed to other functions, WB, ISO, Exp. Comp, Aperture, and Sound Recording Level. We already have access to all of these features other than Sound Levels, so I prefer to keep things as simple as I can and not change settings too much.
Setting Mode 2 allows the lever to change AF Targets, just as we set for stills photography in all PASM Modes and Custom Modes. Consider whether you want the lever to change AF Target size, and AF Mode, for instance C-AF on L1, and S-AF on L2 for scenes where continuous focus is not needed such as a landscape.
The issue here is that we lose the ability to change Sound Levels easily. Is that important? If you are a vlogger it may well be, but you will already know what is important to you. A workaround if you use Mode 2 to get access to Sound Levels is to add it to My Menu for quick access.
MOVIE QUALITY
C4K 4096×2160
4K 3840×2160
FHD 1920×1080
SLOW AND QUICK
There are various options for Movie size and quality from Full HD, 4K and Cinema 4K, and S&Q (Slow and Quick) for shooting speeded up motion and slow motion. Resolution, or size, and playback frame rate (denoted ‘p’) affects the overall quality of the movie. Resolution impacts the quality of detail, the difference between a rubbish SD movie we used to stream on poor internet, and high quality 4K, with C4K being more ‘letterbox’. Playback Rate is how many frames a second are played and how smooth the movie is, with 24p being the general ‘good’ quality acceptable to the eye. Note how they are rounded up/down when shown just to save digits (23.98p is 24p). You can therefore decide what resolution you want, and the frame rate. It doesn’t take a genius to figure out the higher the resolution and the more fps, the bigger the movie file is. Codec plays a roll in quality too, and unfortunately we are limited to 8 Bit, not 10, which gives much better quality.
→ TIP Quality matters. If you just intend to put a video on your socials or share with friends FHD is probably fine. But just as with images, shooting the highest quality means you can always export smaller and more compressed video and preserve the original.
S&Q
Slow and Fast are really great ways to get creative by recording clips in slow motion and fast motion. I do like these features, Quick is a great way to record time-lapse effect movies, but it is not quite the same. Quick is nothing more than speeded up video, whereas a time-lapse is individual frames with a gap between of multiple seconds, taken over a longer period of time and sometimes hours to show the passage of time.
By altering the Playback rate (p) and the frames per second (fps) we can see in the menu from the playback icon what the effect will be, with less than 1 (e.g. x0.50) being slow motion, and over 1 (e.g. x4) being fast. Remember that recording fast motion movies the number of frames played back is faster, and the time you actually recorded will be shorter when played back. For example a 10 second clip may take multiple minutes to record.
QUALITY SETTINGS & PRESETS
PRESETS
Access the menu and we have 4 Presets. The menu gives an overview of each with a brief description, and each one can be edited with 3 modes for normal video and 1 for S&Q. Notice each one is L-8 meaning it is 8 bit which is a limitation of the camera.
How you set this is personal preference; I would set them as shown to give a good starting point. To set an S&Q mode alter the quality size and the frame rate, the Slow/Fast will update to reflect the setting, for example 0.4 (slow) x4 (fast).
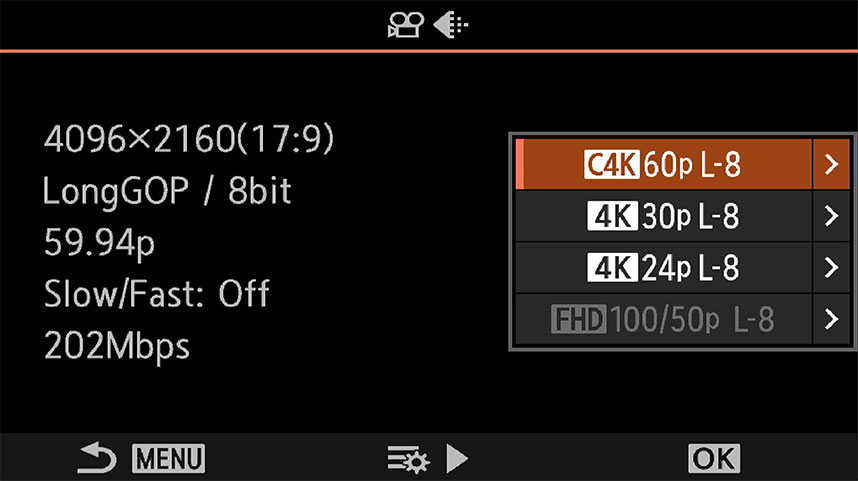
Menu Video> 1.Basic Setting/Image Quality
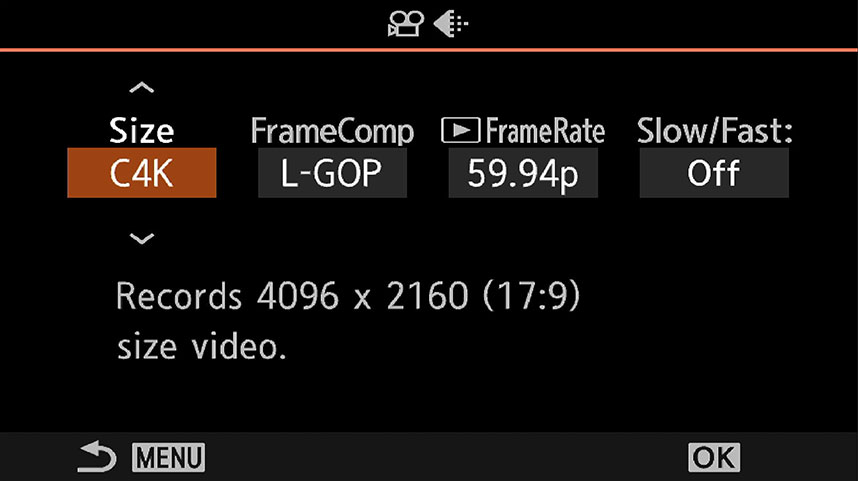
Editing Presets
OTHER SETTINGS
P, A, S, M
Most times you are probably happy to just use P and let the camera do all the work for you. Other modes function just the same as in Stills photography, A will give priority to aperture for depth of field, S to shutter priority and M to both. Set the mode you prefer in the Video Basic Settings. There are some limitations to be aware of:
- SHUTTER PRIORITY Shutter speeds are limited to between 1/24s and 1/32000s
- MANUAL Uses the same shutter speed restrictions as above. The display will flash if exposure is exceeded by 3EV.
Computational modes cannot be used in Video Modes which is a shame, it would be great to use Live ND to reduce shutter speeds. Many videographers use Variable ND filters to ‘drag’ the shutter speed and make movement smoother.
CREATIVE EFFECTS
Picture Modes such as Mono, Vivid etc and Art filters can be applied in 8Bit Video Codec. Art Filters are limited, however quite a few are available. Art Filters are not available in some recording settings such as S&Q. If Art Filters are greyed out, check your settings first.
COLOUR GRADING / CODECS
If you are new to video you will probably have heard of Colour Grading and Codecs. Codecs are really confusing and difficult to understand, they will start to make more sense if you try to think of them in a similar way as Jpegs and Raws, what you can do to process them on your computer and what the camera can actually apply to them to. Think of all the movies you have seen with a real ‘cinematic’ feel to them, deep rich colour and dramatic tones like ‘Lord of the Rings’, and gritty grain with subdued colour and high contrast like ‘300’. This is because of the codecs that are used and therefore what can be done with them. An overview is below, also see the table for Menu 2:
Grading is very similar to applying a Preset to an image for a colour effect. As well as being able to colour grade movies in post, we also have Cinema 1 and 2, see below Menu 2.
LUTs (Look Up Tables) can also be applied. There are many apps available, Final Cut Pro for Mac, Davinci Resolve for Mac and Windows which is free but limited to 8Bit, Pro for 10Bit. Adobe Premier Rush is free but limited.
H.264 8 Bit
- Lower Quality, in-camera Colour Grading or post production.
- Can use Slow and Quick Mode
- Picture Modes as Camera (Vivid, Natural etc)
- Can utilise Art Filters (except in S&Q)
- OM-Cinema 1 and 2
VERTICAL VIDEO
Your OM5ii is capable of shooting vertical video too, if you want to put clips onto Youtube Shorts or Instagram. And you don’t have to do anything, just turn the camera.
MENU SCREENS
We will explore the Video Menu settings and look at what the options are and what needs to be changed.
MENU 1 BASIC / IQ
- VIDEO QUALITY – Many options here allow settings to be set for qualities such as HD, FHD, 4K, C4K resolution and frame rate, higher frames mean smoother quality. Note that the highest frame rate is 30p. Also we only have H.264 8 Bit which does suffer from lower quality and lack of detail compered to 10 Bit. It is a shame 10 Bit was not included.
- MODE – Set P,A,S,M, in most situations set P and allow the camera to do all the work. Using A will give more control over aperture and DoF, S and M work similar to settings in stills photography.
- FLICKER SCAN – Only used under LED lighting. Leave off
- DIGITAL TELECONVERTER – Obvious what it is for, leave off.
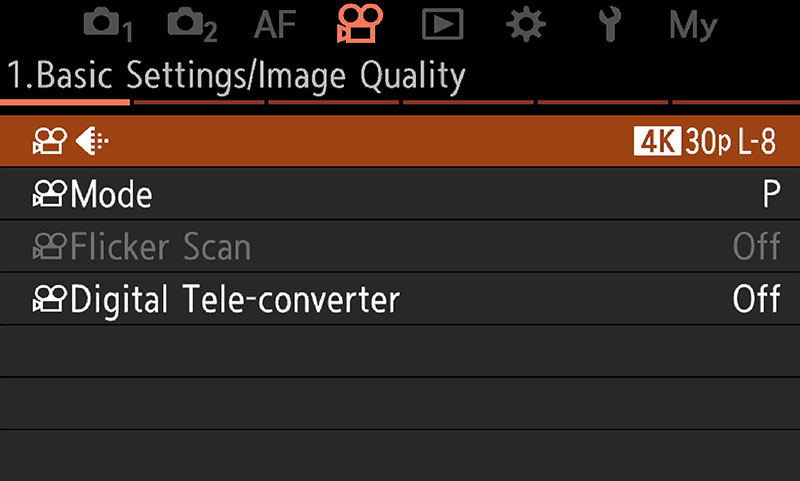
Menu Video> 1.Basic Setting/Image Quality
MENU 2 PICTURE MODE / WB
- PICTURE MODE – See TABLE below.
- VIEW ASSIST – Helps viewing on screen, best left off.
- WHITE BALANCE – Set to Auto. We will set WB to a button for quick access.
- WB ALL – Allows creating a custom setting for WB. I tend not to use this, but you may find it useful if you want to create really funky tones.
- KEEP WARM COLOUR – A personal choice, set on or off.
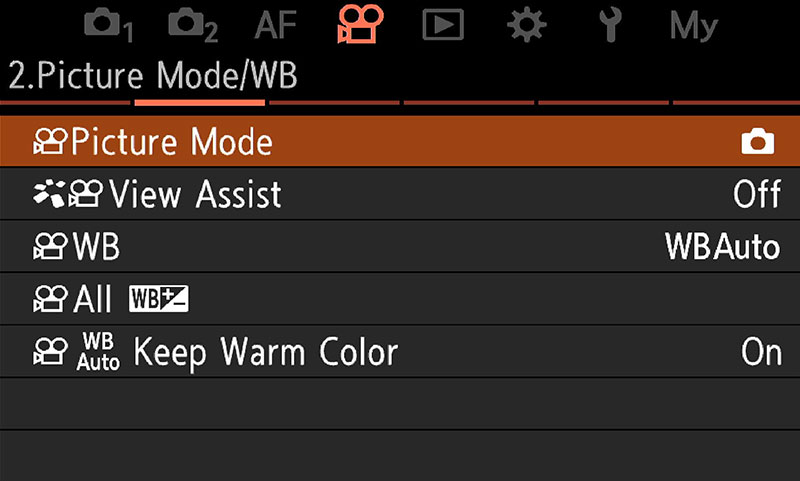
Menu Video> 2.Picture Mode/WB
| PICTURE MODE | DESCRIPTION |
|---|---|
| SAME AS CAMERA | Video is recorded using the same settings as used in the camera Picture Mode*. |
| OM CINEMA 1 | Videos recorded with a cinematic colour grading of yellow in highlights and blue in shadows. Recommended frame rate is 24p. |
| OM CINEMA 2 | Videos are recorded with a cinematic low contrast and soft colours. Recommended frame rate is 24p. |
| 1-FLAT | Videos are recorded with a flat tone curve best suited for colour grading. |
| 2-OM LOG400 | Videos are recorded with a log tone curve best suited for colour grading. |
Same As Camera* – What does this actually mean? The red Record button allows for quickly recording video even when the mode dial is not set to Movie (when set as default to Record in Camera Buttons Menu). Setting ‘Same As Camera’ allows for the Picture Mode (Mono, Vivid etc) to follow whichever mode is being used for stills in the Super Control Panel without having to go diving into the menu. You may find it convenient so that your video has the same settings, or you may want them to be different. When the Mode Dial is set to Video the option to set ‘Same As Camera’ is still available. Select the desired option, and to make accessing this setting more convenient add it to My Menu.
MENU 3 ISO / NR
- ISO-A UPPER/DEFAULT – Sets default ISO and Auto ISO upper limit. Set 200 and personal choice for Upper, I set 12,800.
- ISO-AUTO – Set to On.
- NOISE FILTER – Reduces grain from High ISO. Set to Standard.
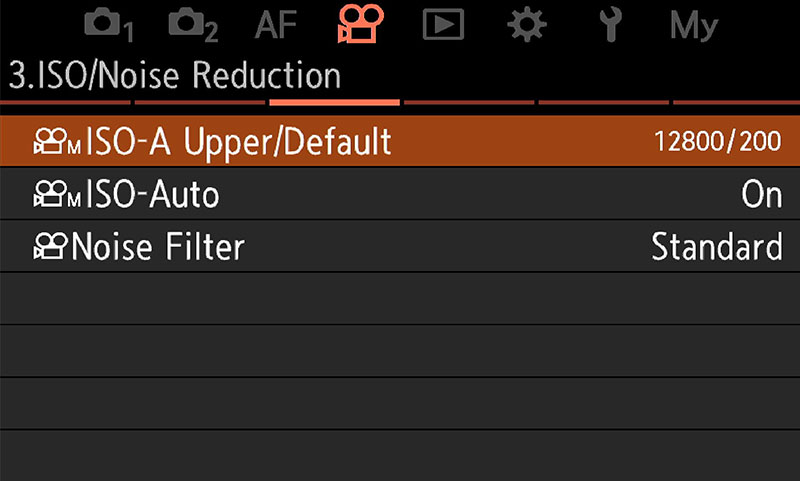
Menu Video> 3. ISO/Noise Reduction
MENU 4 I.S.
- IMAGE STABILISATION – Video uses VCM (Voice Coil Motors) for very smooth stabilisation. Add to My Menu or consider using a button for quick access if needed. Options are:
- M-IS 1 – Sensor and Digital stabilisation, for even more stabilisation but gives a slight crop.
- M-IS 2 – Sensor stabilisation only and suitable for most situations. Set as default.
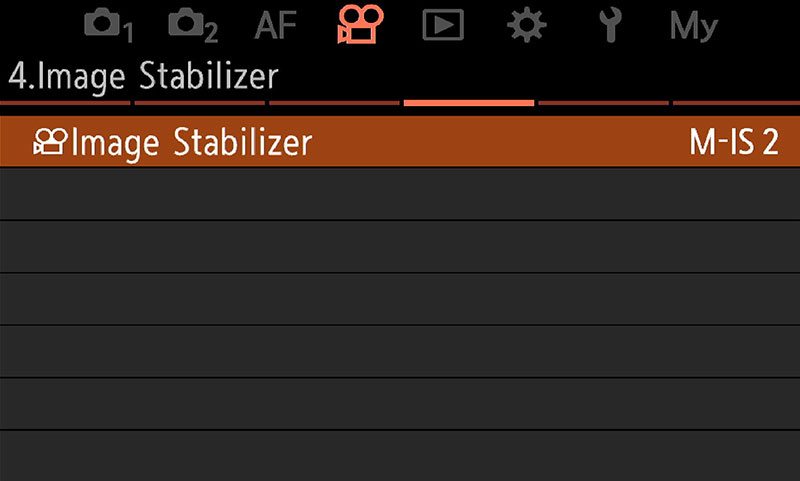
Menu Video> 4.Image Stabilisation
MENU 5 SOUND / CONNECTION
- SOUND RECORDING – Various settings, set volume limiter On, Wind Noise Reduction On and Recording Rate suitable to the external Mic you are using. External devices can be mounted on the hotshoe and will give better quality.
- TIME CODE SETTINGS – Settings here are used to make sure sound and video are synchronised during editing. Leave at default, they only need to altered if you need to make corrections or edits.
- HDMI OUTPUT – Settings for when outputting to an external monitor, either for viewing or for editing. Select the option as needed and check HDMI settings in Spanner Menu>3. HDMI for the output quality (4K, 1080p etc) and Frame Rates.
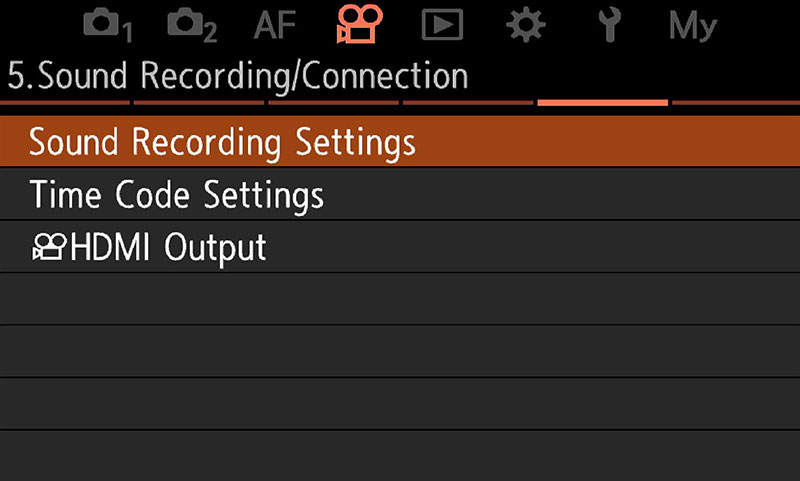
Menu Video> 5.Sound Recording/Connection
MENU 6 SHOOTING ASSIST
- RED FRAME – A convenience setting. When set to on a red frame is displayed on the screen to show it is recording.
- RECORDING LAMP – Similarly the AF assist lamp on the front will illuminate to indicate it is recording.
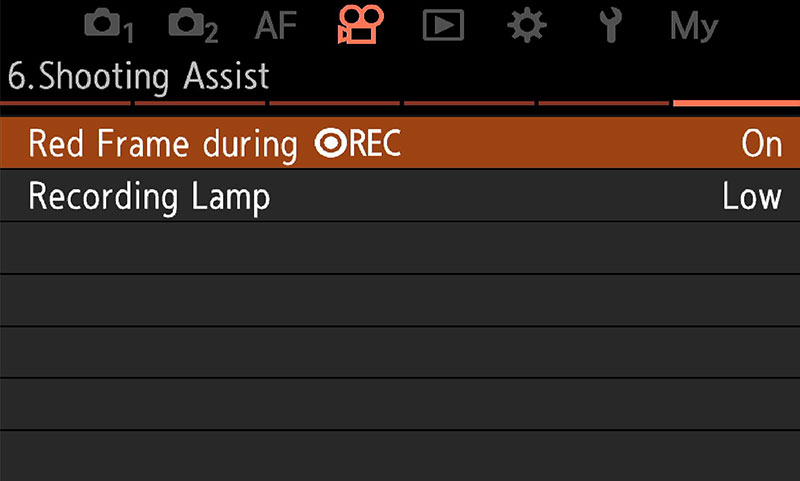
Menu Video> 6.Shooting Assist
COMPLETED
Section completed and hopefully now you will have a better understanding of the video functions, settings and possibilities. The OM5ii is not the best camera available for recording video and it has not tried to be. Instead it is a general all-rounder for producing quality video with creative possibilities. In that way it performs very well, especially for someone who wants to just dabble like me.
