SHOOTING & COMPOSITION
A Few Tips for Shooting & Composition
TAKING THE SHOT
The technique is actually quite easy. Make sure your tripod is steady, in surf or wet sand push it down as much as possible (spikes help) and then frame up your shot. In wind make sure you have nothing flapping about such as camera straps. Wrap it around or remove it. Hang a camera bag from the tripod hook if needed, although I confess I never do this, I don’t want to risk it when I’m standing in water.
- Focus and then switch to Manual Focus, important if you auto focus because the lens will just hunt when you attach the filter.
- Take a note of the shutter speed once you’ve set ISO and Aperture. It doesn’t matter if you are in A or M, as long as the meter reading is correct.
- Use the App to calculate the exposure time, set the normal unfiltered shutter speed and select the ND factor you are using. Switch the camera to Bulb Mode and fit the ND Filter. If you use a cable release press and lock it for the exposure time needed and then stop it. Review your image and make a judgement whether you need a little longer, shorter, or if it is correct. That is all there is to it.
→ TIP If your camera has extended shutter speeds beyond the normal 30 seconds you may not need to use Bulb.
Be aware of changing light especially when light is fading. If you need to retake a shot the original calculation may not be enough because the light has changed. Or vice versa of course for early mornings. Remove the filter and take another reading in A or M if the light changes significantly.
USING ND EXPOSURE APPS
Once you determine the density of the ND filter needed for the image, working out the actual exposure time is quite easy using an App.
Using a Graduated ND Filter to control the sky is personal choice. Often the first part of an image to blow out with long exposures is the sky so I usually use a grad too. That means using a square system and additional cost however it is perfectly acceptable to use a circular ND and take a couple of shots for the foreground and sky and blend together.
There are a wide variety of mobile phone apps available for calculating long exposures, including from Lee, Nisi, PhotoPills have one included and others are available. I like the Nisi App because it isn’t restricted to just 3, 6 and 10 stops and it has a built in timer.
Here it tells me what the exposure time will be when I set the normal shutter speed 1/20th second, taken from the camera with no filter added.
Selecting a 10 stop it then becomes 51 seconds.
Below are a few examples calculated from the app:

Normal Shutter Speed 1/200th, with a 10 stop 5 Seconds.
Normal Shutter Speed 1/20th, with a 10 stop 51 Seconds.
Normal Shutter Speed 1/4, with a 10 stop 4 Min 16 Seconds.
Normal Shutter Speed 1/200th, with a 15 stop 2 Min 43 Seconds.
Normal Shutter Speed 1/20th, with a 15 stop 21 Minutes 50 Seconds.
Normal Shutter Speed 1/4, with a 15 stop 2 Hours, 16 Min 32 Seconds.
I’m not suggesting at all you use a 15 Stop ND at 1/4s and shoot for 2 and 1/4 hours! Your battery would give up if you didn’t. It does show however that in bright light where the shutter is 1/200th (just for example) a 10 stop is only going to give 5 seconds, so you need a higher density ND.
→ TIP Note that in these examples above all exposure calculator apps ignore your ISO, Aperture and whether you have a polariser in use too. They only need your shutter speed. The shutter speed you enter is the shutter speed the camera suggests to you for the ISO and Aperture set, and including the polariser if using one. If you add a polariser afterwards you would need to add around 1 stop extra to the ND Factor selected because polarisers reduce light by at least a stop, or 1.5 stops. Best to take the reading with one fitted. You can manipulate the exposure time if it is too long or not long enough by altering your ISO and Aperture, but remember you will affect the depth of field if you have to open aperture, risk diffraction if you close it too much, or risk noise if you increase ISO. It is always a balancing act.
WHAT ARE THE BEST CONDITIONS?
That is a hard question because there is no such thing. What you absolutely should try to avoid is low level wind which will disturb the camera.
For dramatic skies with racing clouds a sky with lots of cloud definition is best. I hesitate to say a blue sky with white clouds because bright sunlight is too harsh usually, but even an overcast day can give really good cloud definition. It’s quite easy to work out how many seconds you’d need to get any cloud movement when they are moving slowly; fix your eyes on one part of the sky and count the seconds it takes for obvious movement from one part of the scene to another. And do try to have clouds moving either towards you or away from you for impact.
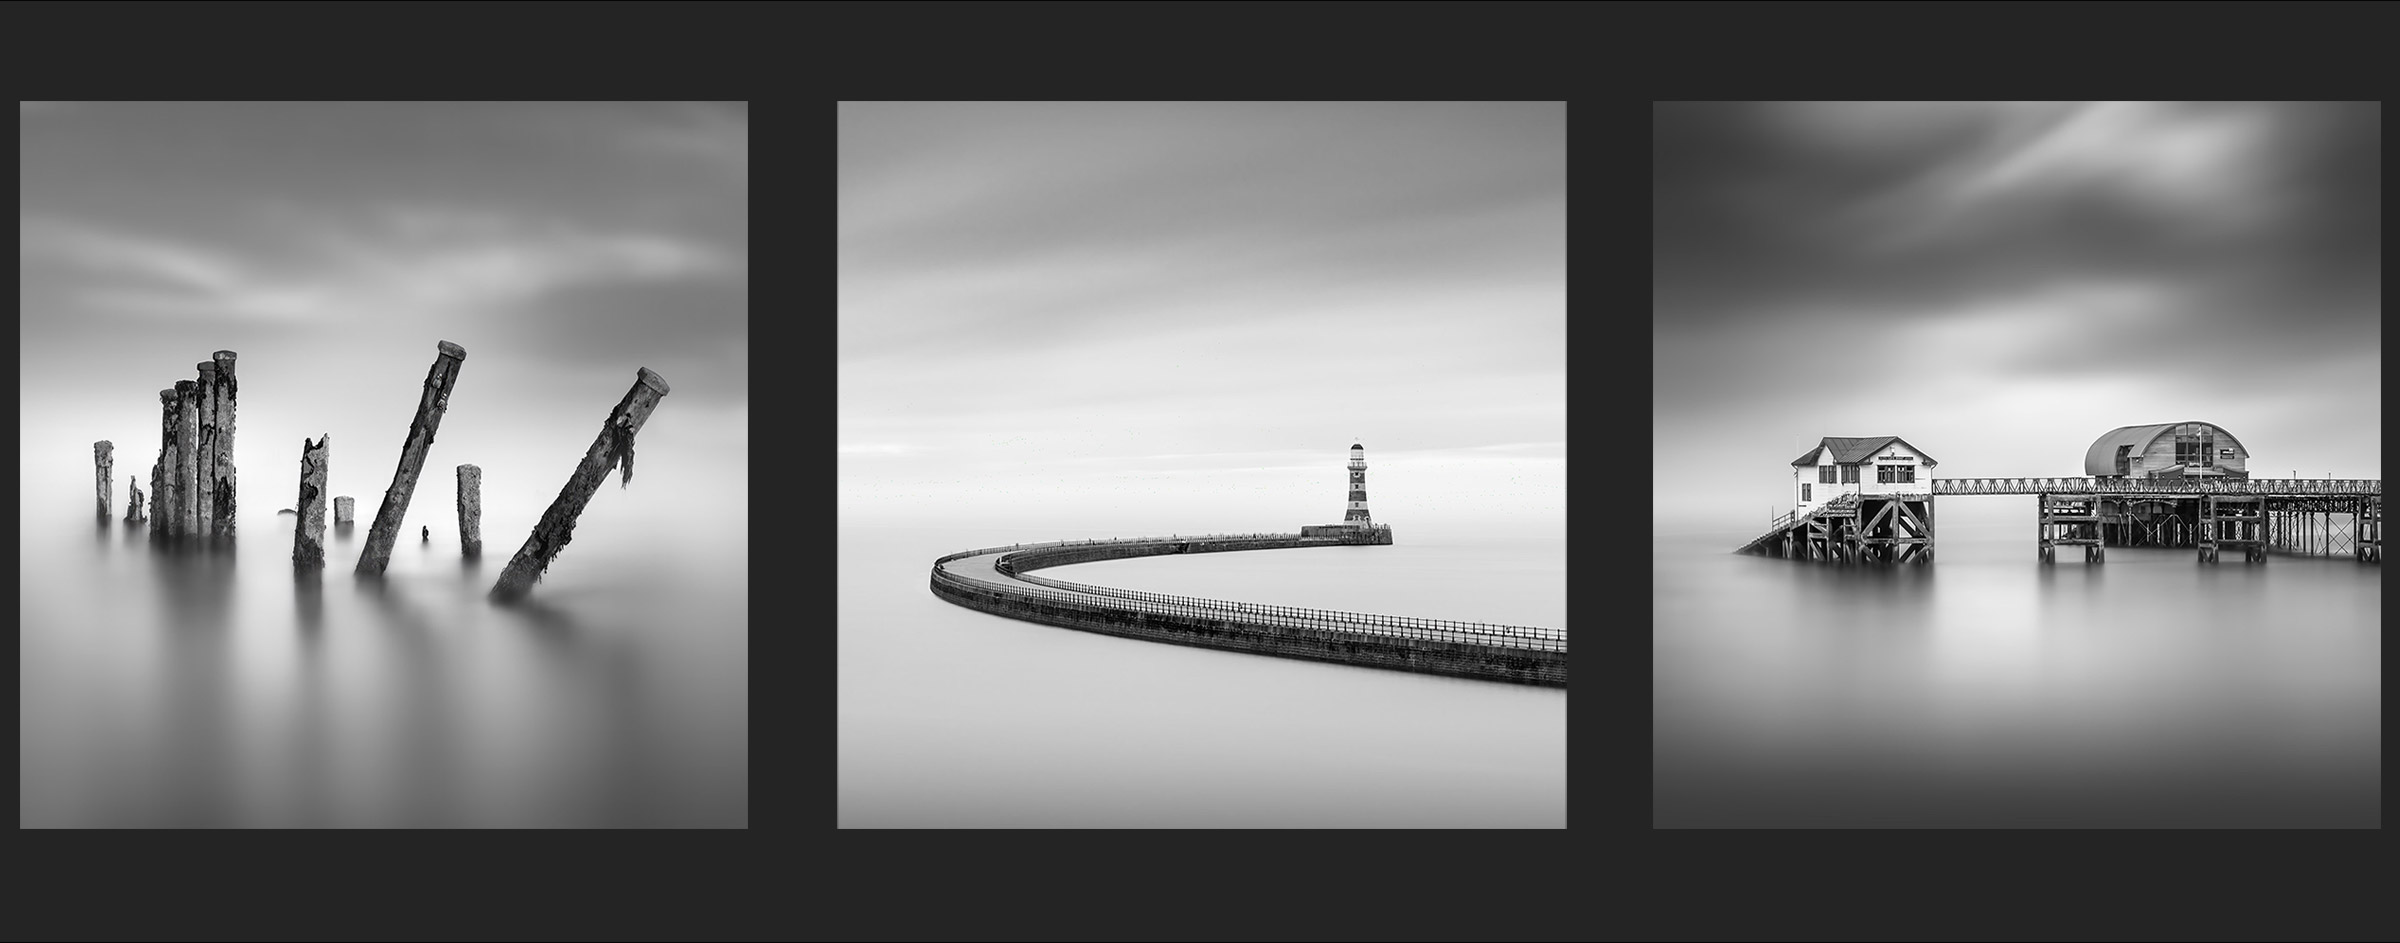
A flat dull day can be a very good time especially if your goal is to have a very soft clean sky with little or no detail such as my image of Roker Pier above. And if you intend to swap the sky it really doesn’t matter, soft diffuse light can yield better results. An image such as water-breakers projecting out of the sea as if they are floating is a few minutes of exposure usually.
Calm water can be flattened in just a few seconds whereas the sea can take much longer, maybe minutes. It again depends on the final result you have in mind, how much detail you want in the water, or lack of it. Incoming surf around pebbles to create a very soft misty feel can take a minute, whereas just 1/4 of a second retains some detail.
COMPOSITION
You’ll notice one thing all the examples in this tutorial have in common; the composition is also very minimal and simple. This is probably the most important factor to consider when looking for interesting compositions.
KEEP IT SIMPLE
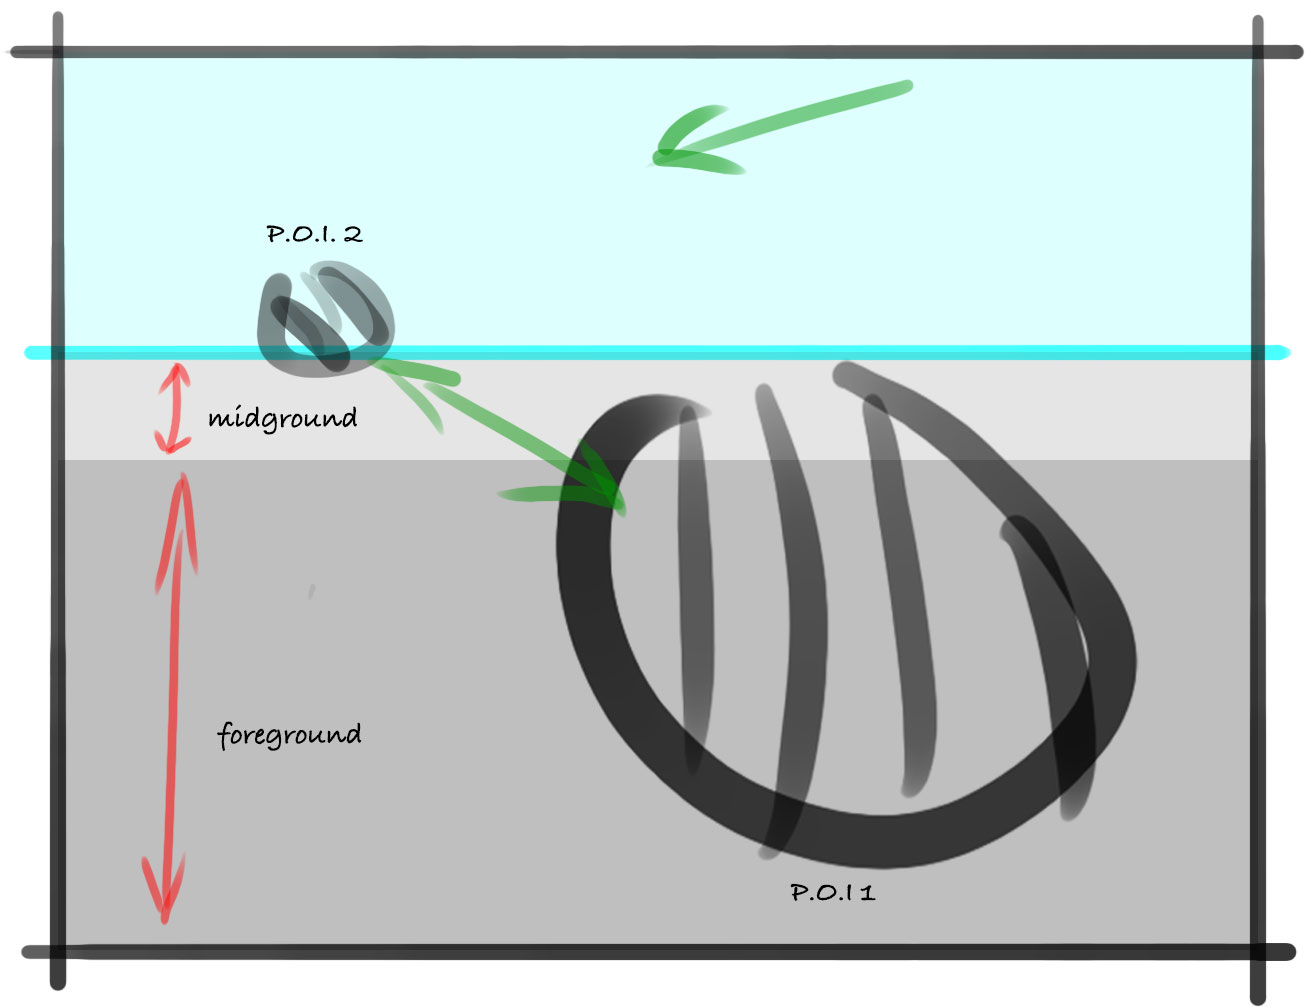
Keep the composition simple. Normally in landscape photography we may have a main subject as the focal point, or the ‘hero’ of the image, with a secondary subject, sometimes even three focal point or subjects. Lead-in lines are used to direct the viewer’s eye between the main and secondary subjects. Think of these as Points Of Interest (POI’s).
A lead-in line is not necessarily a physical line; it could be light, shadow, colour, or even simply how the POI’s have been placed such as below. The viewer’s eye will move diagonally between POI’s which creates the lead-in. We would also consider foreground, midground and background.

The rules for Minimal compositions are very similar except most of the time we are not looking for an interesting foreground for the subject because the foreground is the subject, or there isn’t one at all.

None of these three images have a foreground as such. The left and right images have reflections drawing the eye up towards the main subject, but the foreground is empty space. The centre image of Roker Pier has the subject itself extending from the foreground and sweeping around to create a lead-in line.

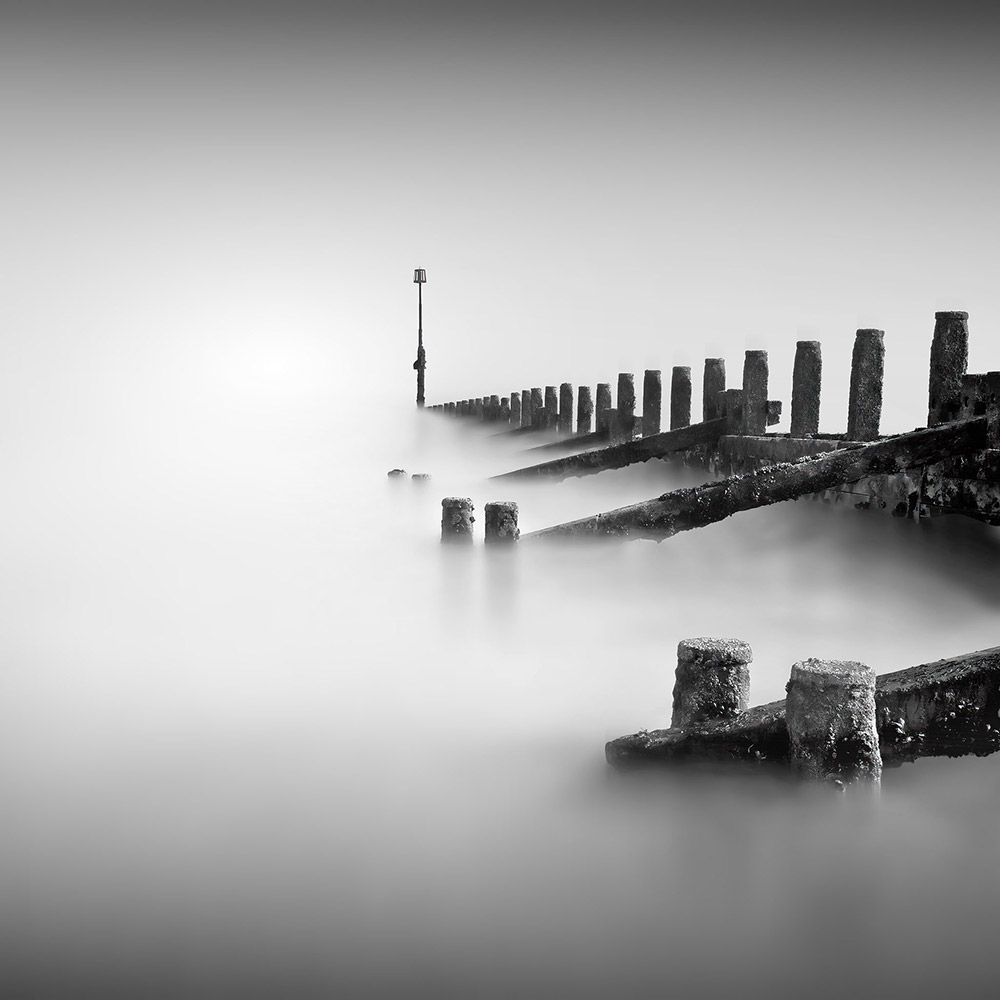
The image above has all the elements when considering minimal compositions, a classic shot of water breakers taken in Hornsea on the East Yorkshire Coast.
SUBJECT & LEAD-IN LINES
There is only one subject, the water breakers themselves. The depth post at the end can be considered a secondary POI because the eye is lead into it and acts as a resting place, preventing the eye from wandering out of the scene. The Primary POI are the front short posts. These have been placed on the horizontal and vertical thirds, and because of the framing they are much larger than the other posts, creating depth. The framing of the shot creates a strong lead-in from the right into the image. The depth post in this is placed off centre to give balance. The Rule of Thirds is just a guide and doesn’t need to followed exactly, However if subjects are placed exactly centred there should be a very good reason for it to be purposeful. The classic Lone Tree images come to mind and the work centred because it is a purposeful decision to do so.
HORIZON
There is no horizon in this image; still, consideration needs to be given to where the imaginary horizon is. It does not always need to be on the vertical thirds, remember the Rule of Thirds is just a guide. Just off centre is usually enough to create harmony.
POSITIVE AND NEGATIVE SPACE
Crucially, consider the negative, or empty space around the subject as this is what will create the balance and harmony. Minimal images have a lot of empty space, it is what makes them minimal. Remember Thirds, uneven numbers work so well because the occur in the natural world where even numbers are never found. Positive space should be a third, and negative space two thirds, or vice versa. Remember this and you will achieve harmony and balance.
COMPLETED
Next we will explore the Photoshop Workspace. If you are familiar with it already you can skip this.
Go to next section.
