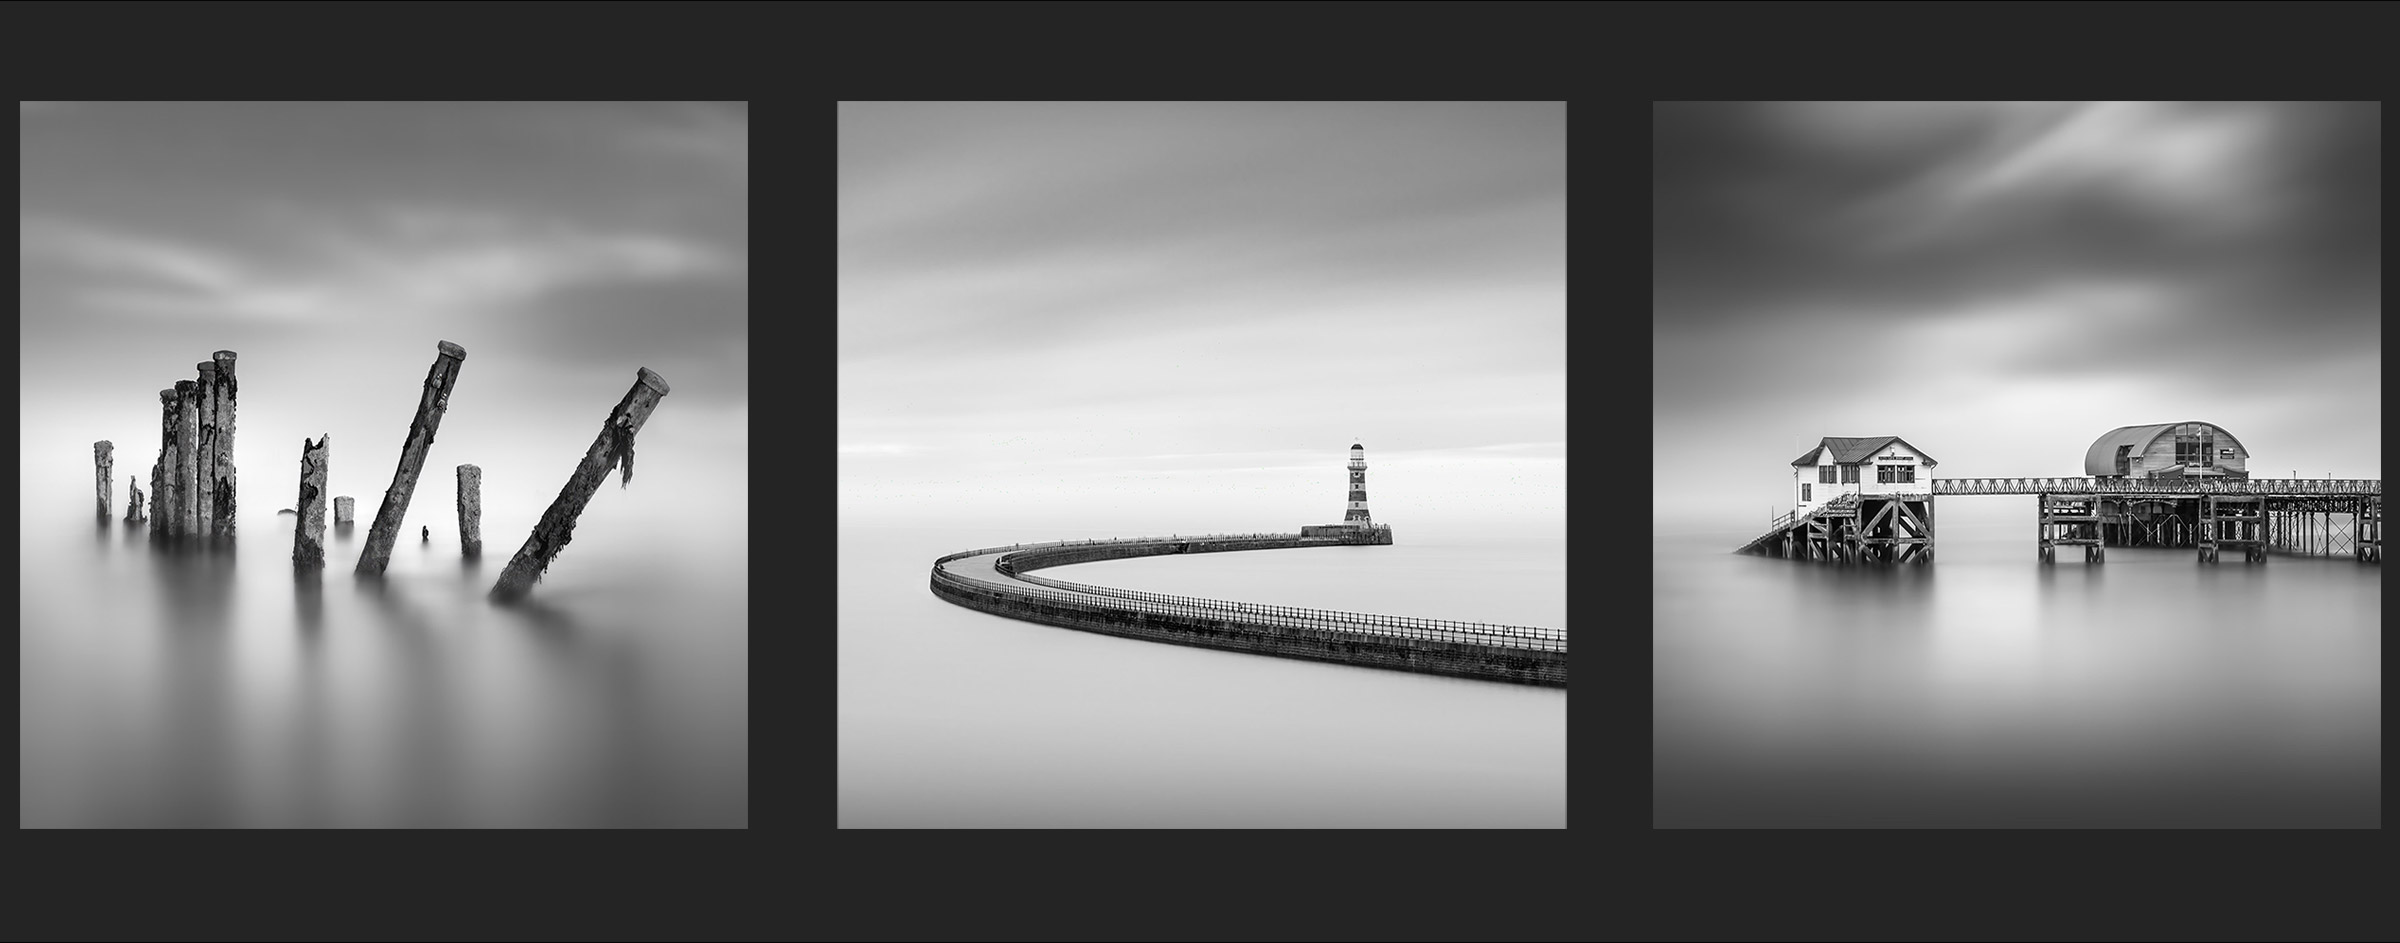
EDIT THE SKY
Editing and Replacing the Sky
Your image may have a great long exposure sky and you do not have to work on it a great deal. If you do, experiment on the tones with a Levels or Curves Adjustment Layer. You may want to soften it a little or add a little more motion just as we did in the previous section.
For this section I am going to replace the sky. Replacing skies is not something I normally do, choosing to keep it real. However with images such as this we are manipulating them so far away from reality I think it is acceptable.
There are quite a few resources where you can purchase and download skies, and you can of course use your own. You need a clean image of just a sky with no objects; you can open one of your own, crop the sky and use PS Remove Tool or AI Replacement to remove objects. And start shooting skies to build a collection for later use.
PS has a sky replacement feature which is very powerful. It allows edges to be shifted, faded, scaled and flipped and does a good job. There are a number of skies built in and you can load your own.
CONSIDERATIONS FOR SWAPPING SKIES
Consider the sky you want. I want a sky that will have a grey background with white clouds, so that means a blue sky. I do not want sunset skyfire skies, stormy skies, pale soft skies, or skies that are overly complex. I will soften and blur it more, so I am looking for a sky that will give a good foundation. Resolution of the sky can be an issue, there are times when a sky is low resolution and your image is high resolution so bear it in mind. I will use motion blurs so any artefacts will be removed making it not such an issue.
SKY SELECTIONS
There are times when swapping a sky can leave artefacts in the sky area, in other words parts of the original image are still visible. It can happen in Photoshop Sky Replacement and other apps. There are plenty of sliders and adjusters to help minimise it, but sometimes it doesn’t work as well as it could. A workaround for images like this with a straight horizon is to blank out and remove the existing sky before swapping it. At the same time we can save a new Selection for it.
You’ve already copied the layer, if not make another copy. Drag a rectangle with the Rectangular Marque Tool around the whole of the sky up to the horizon, and a rectangular selection appears. Now load your saved selection of the posts, in Select>Load Selection>. Under Operation make sure Subtract from Selection is enabled. The selection will load and it will subtract itself from the rectangle selection you just set. Save the selection as Sky.
Now just use levels and brighten the sky to wipe out the details or even fill it with white. This step is not always needed, however we do need the sky selection. If you find problems try and remove the detail this way. You could just make a new selection of the sky, but we did all the work before so this is a very fast way.
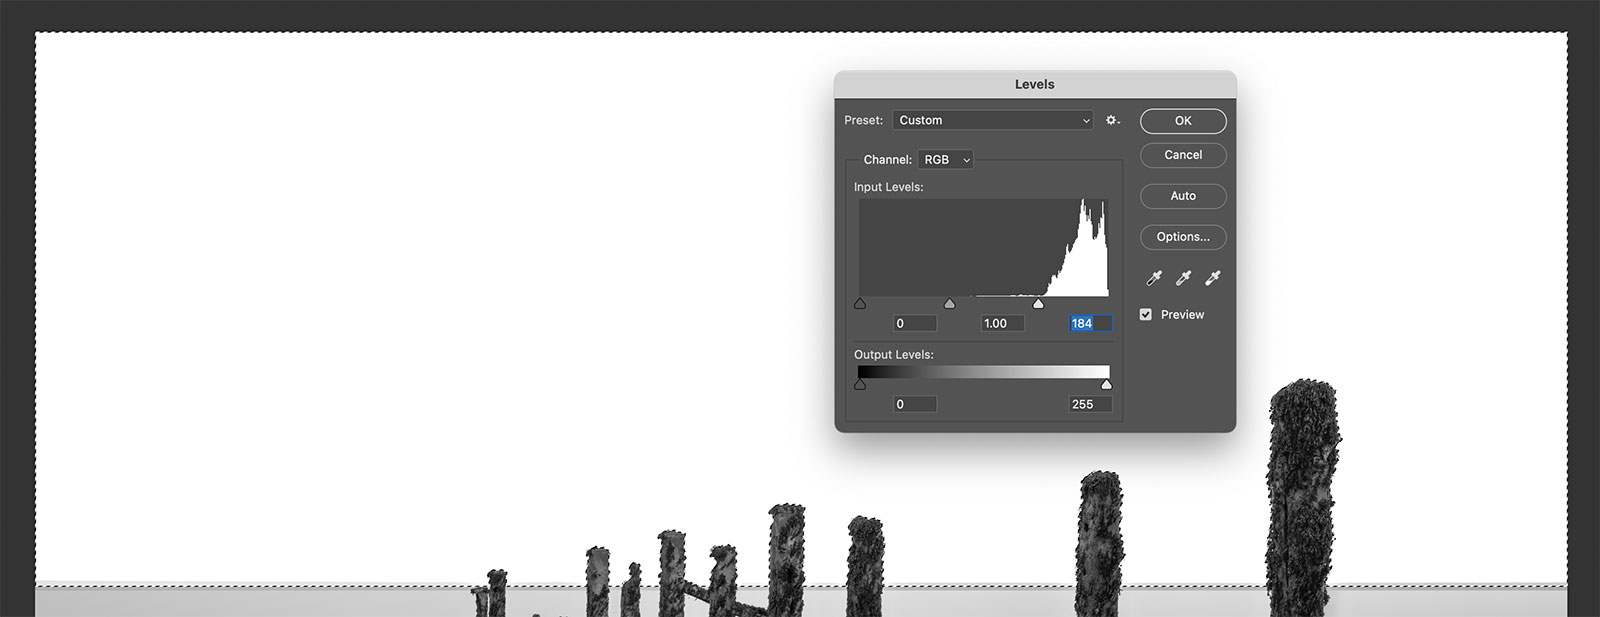
A selection for the sky. Remove all the detail in the sky. This step may not be necessary.
PS SKY REPLACEMENT
In the Main Menu select Edit>Sky Replacement. A new dialogue box appears where you can select the sky you’d like to use, with a number of sliders and options to refine it. The sky is replaced without any selections, PS does it automatically. Adjust the horizon edge with Shift Edge and Fade Edge, adjust the Scale of the sky, and brightness if needed. Temperate is irrelevant. Also adjust Foreground Lighting to make sure no part of the sky is visible. Make sure Output is set to New Layer.
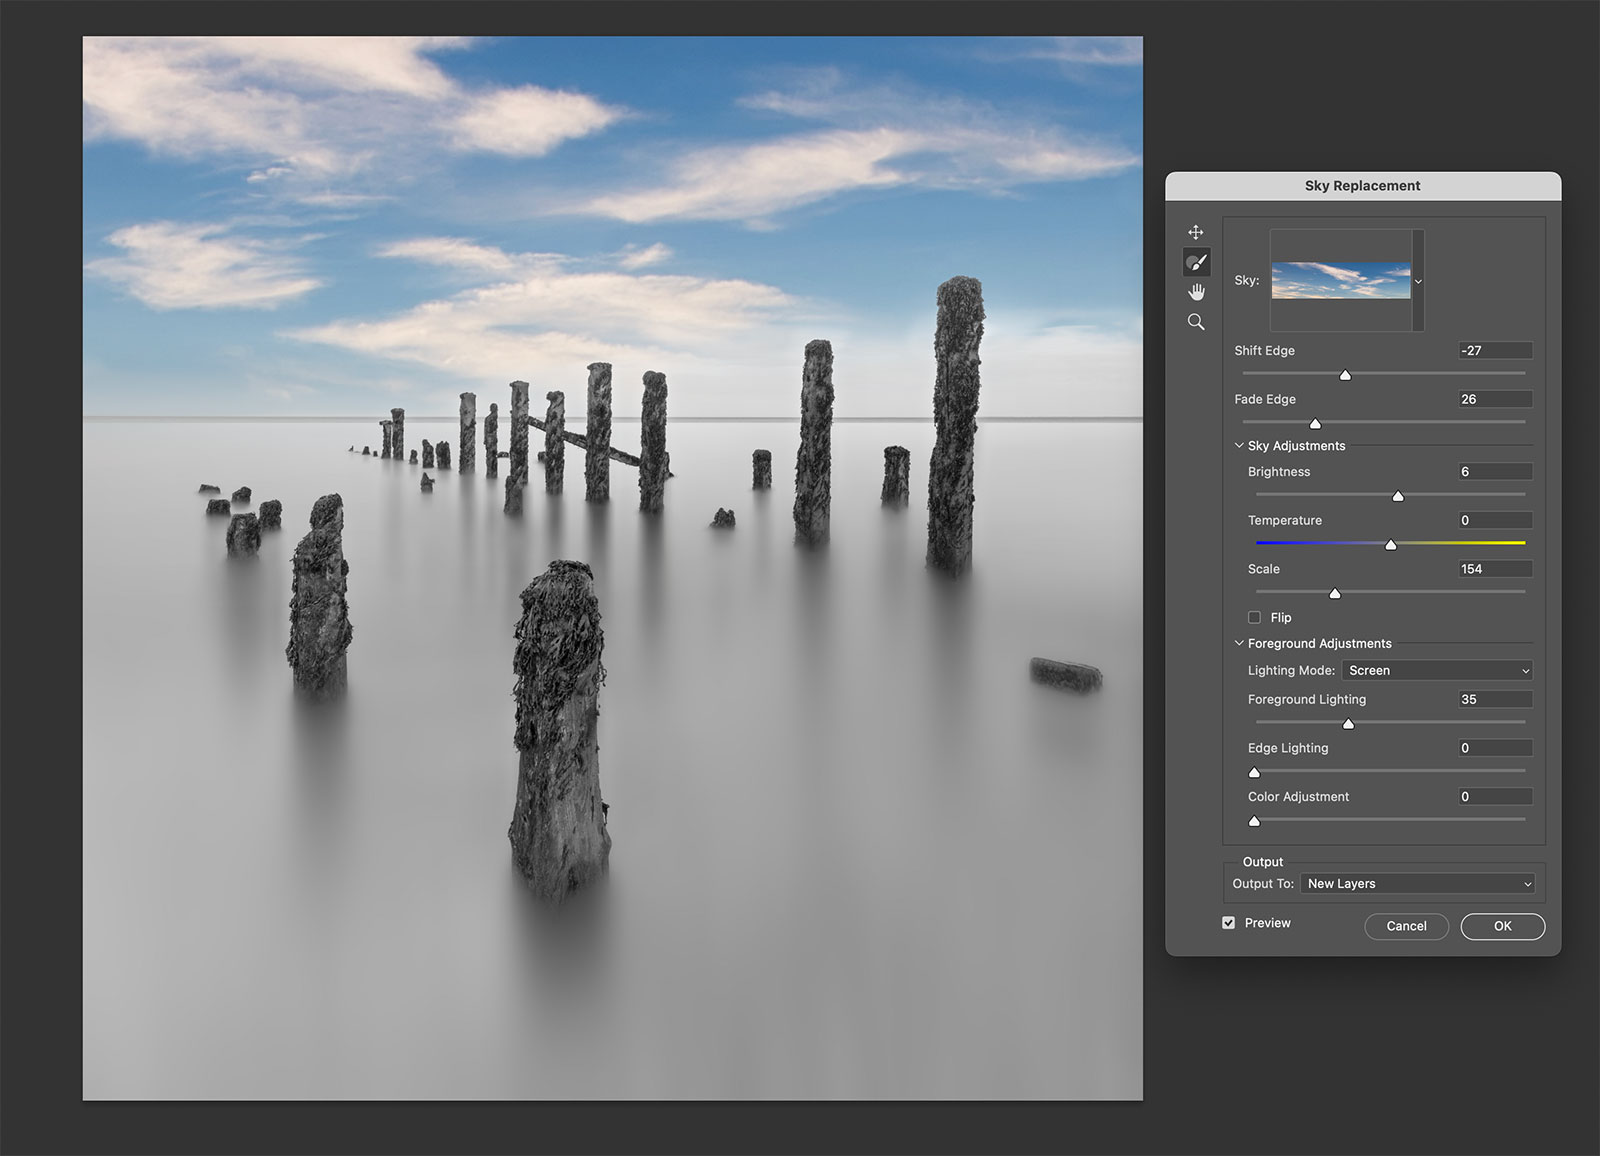
PS Sky Replacement. Click Edit>Sky Replacement
PS Sky Replacement adds a new layer Group in the layers Pallet. They can be handy to inspect and refine if needed, or switch off if not needed. For instance I could double click the Sky Brightness adjustment and alter a little, or click the Sky Mask and adjust it with Levels to make it stronger. I can switch Foreground Lighting on and off and see if it is adding any benefit.
If you used a sky that is colour you can convert it to B&W now, use Image>Adjustments>B&W. A dialogue box appears where you have the opportunity to make changes if you wish. Don’t be tempted to make it too dramatic, we will refine it later.
After this we do not need these layers, they are just clutter. Shift/Hold and click all the sky layers and the main image, then in the shortcut menu select Merge Layers.
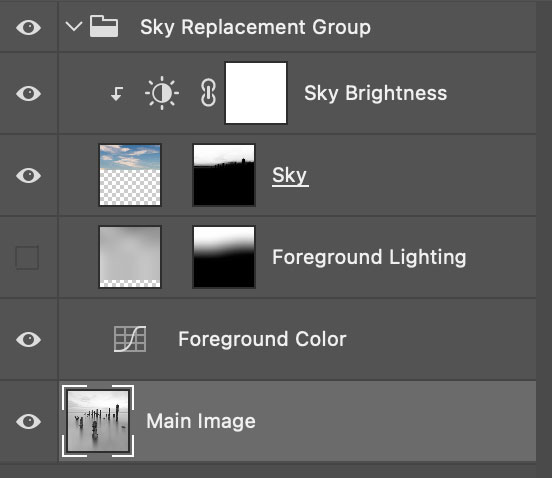
PS Sky Replacement Layers.
USING LUMINAR AI
I have used Luminar AI for a number of years (https://skylum.com/luminar). It has a ton of features beyond what we use here, with some filters that are actually very good. It is very useful though I appreciate it is another cost. Please note Luminar AI is now Luminar Neo, the same thing just updated and is now a £5pm subscription or £199 lifetime. Luminar AI is still available and worth the £35.
Install Luminar as a Plugin and it can be access from the Filters menu in PS. Or set up a keyboard shortcut like I do. As before make a duplicate of the layer before you start, just to preserve a copy.
Start Luminar and click Edit to enter the main edit workspace and select Sky. Click Sky Selection and finD a sky you like or scroll all the way down to load your own.
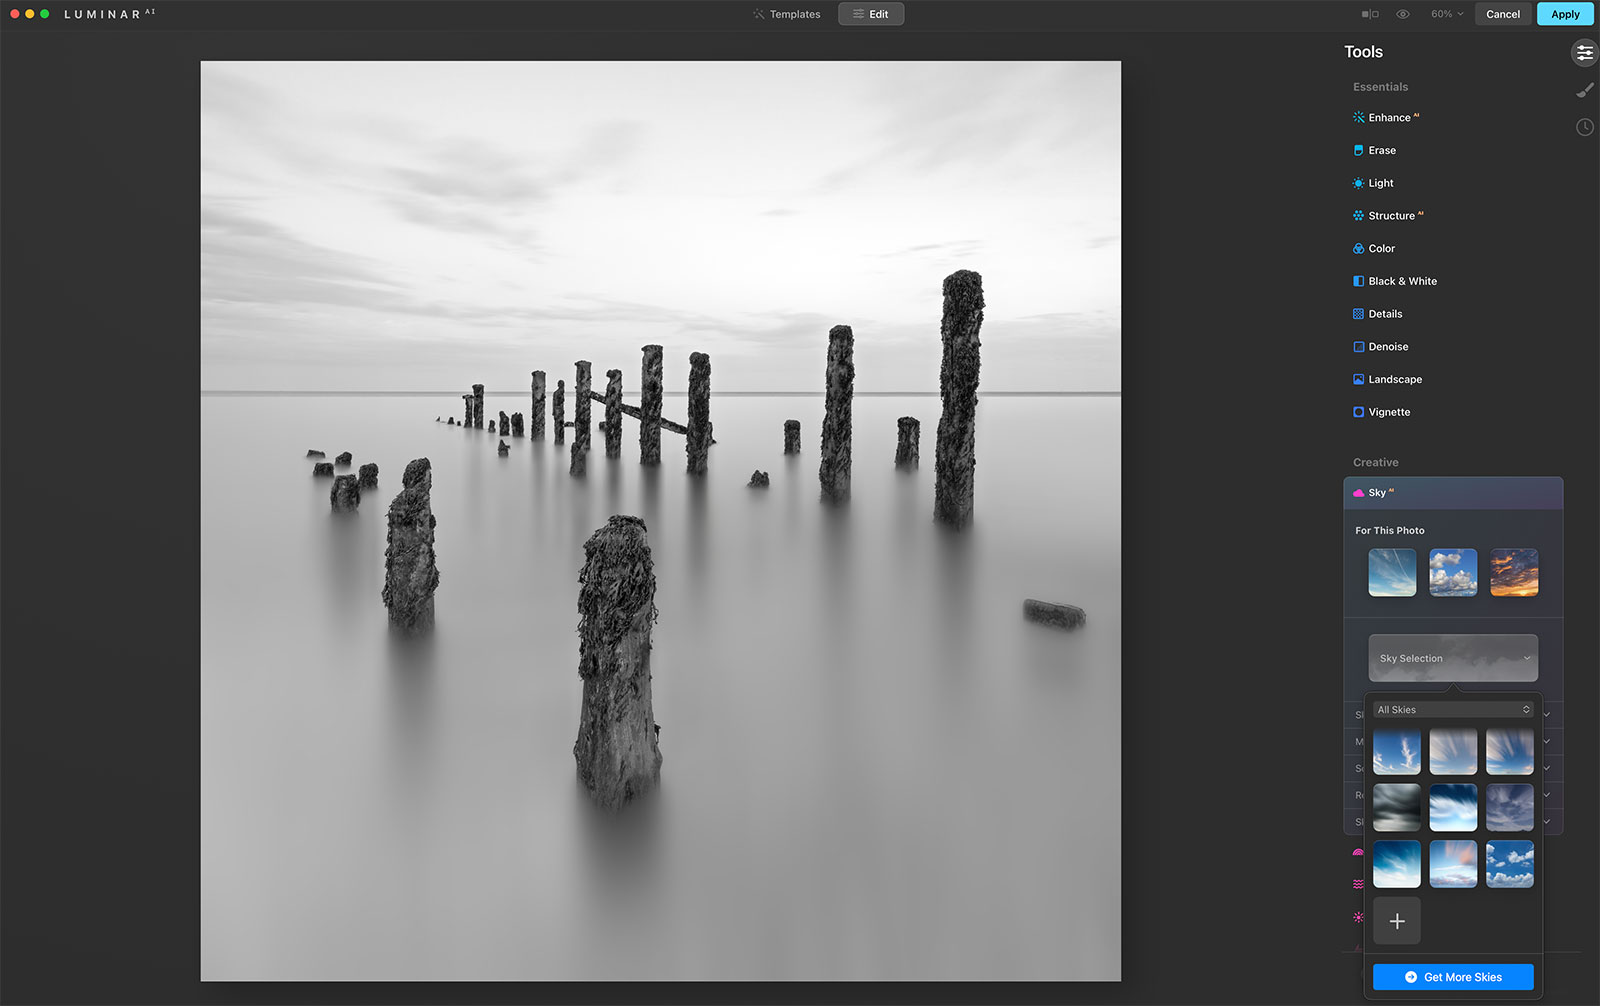
Luminar Screen. Click Edit to enter the main editing workspace
Find the sky you like and adjust the settings, using horizontal and vertical sliders, horizon position etc. Using the sliders you can scale the selection to find a part you think works well rather than the full sky. Make sure Reflections is switched off and don’t worry too much about Relighting. Defocus is useful to make a sky just a little softer but don’t overdo it, and Haze can be useful too. Don’t worry about the foreground, it may look muddy or grey as my image did, we aren’t using the foreground at all and will merge it.
When you’re happy scroll up and go to B&W and convert it. You have the chance to adjust a few sliders here if needed. Click Apply and the edited image comes back into PS.
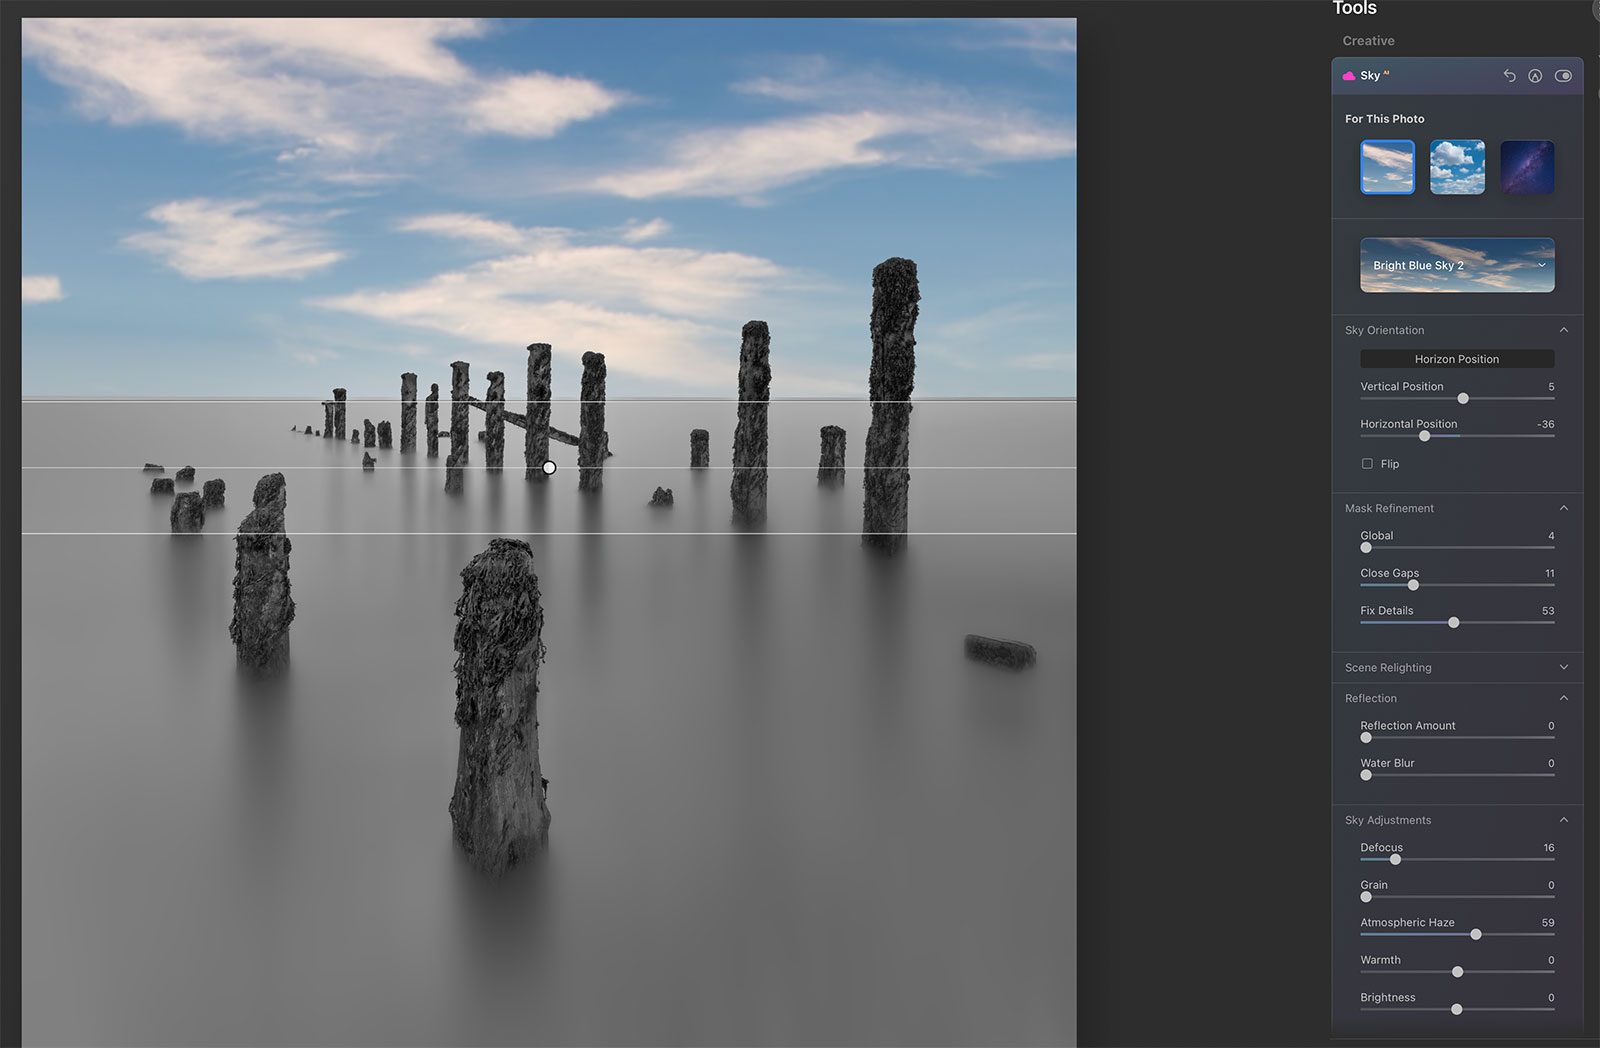
Sky swapped in Luminar. Note I defocussed it a little and also added Haze to brighten it.
→ TIP When the image came back into PS from Luminar the foreground water was very flat and dark as shown. All apps that replace parts of an image use Alpha Channels and sometimes they can leave the area that should be masked looking dark. It is easy to fix. Just drag a Rectangular Marque rectangle around the area, right click and select Layer Via Cut. The offending area is cut out as a new layer and you can trash it to reveal the original image underneath, then flatten the sky area left with the original layer below. Always work on a copy just in case there are issues.
MOTION BLUR THE SKY
Next I’m going to blur the sky with the Path Blur filter just as we did for the water with Filter>Blur Filter>Path Blur. Run it twice in two directions to give it some hazy softness, though this is obviously personal choice. Load your selection for the Sky and the Marching Ants will show.
The first pass followed the direction of the clouds, altering it a little. This time I enabled Centred Blur and set 100% Speed, 0 taper and 160px End Speed.
The second pass I altered the angle so that it would soften it more in the other direction almost at right angles to the first, I want a very soft almost dreamy effect to it. The Speed this time was 50% with 100px End Speed.
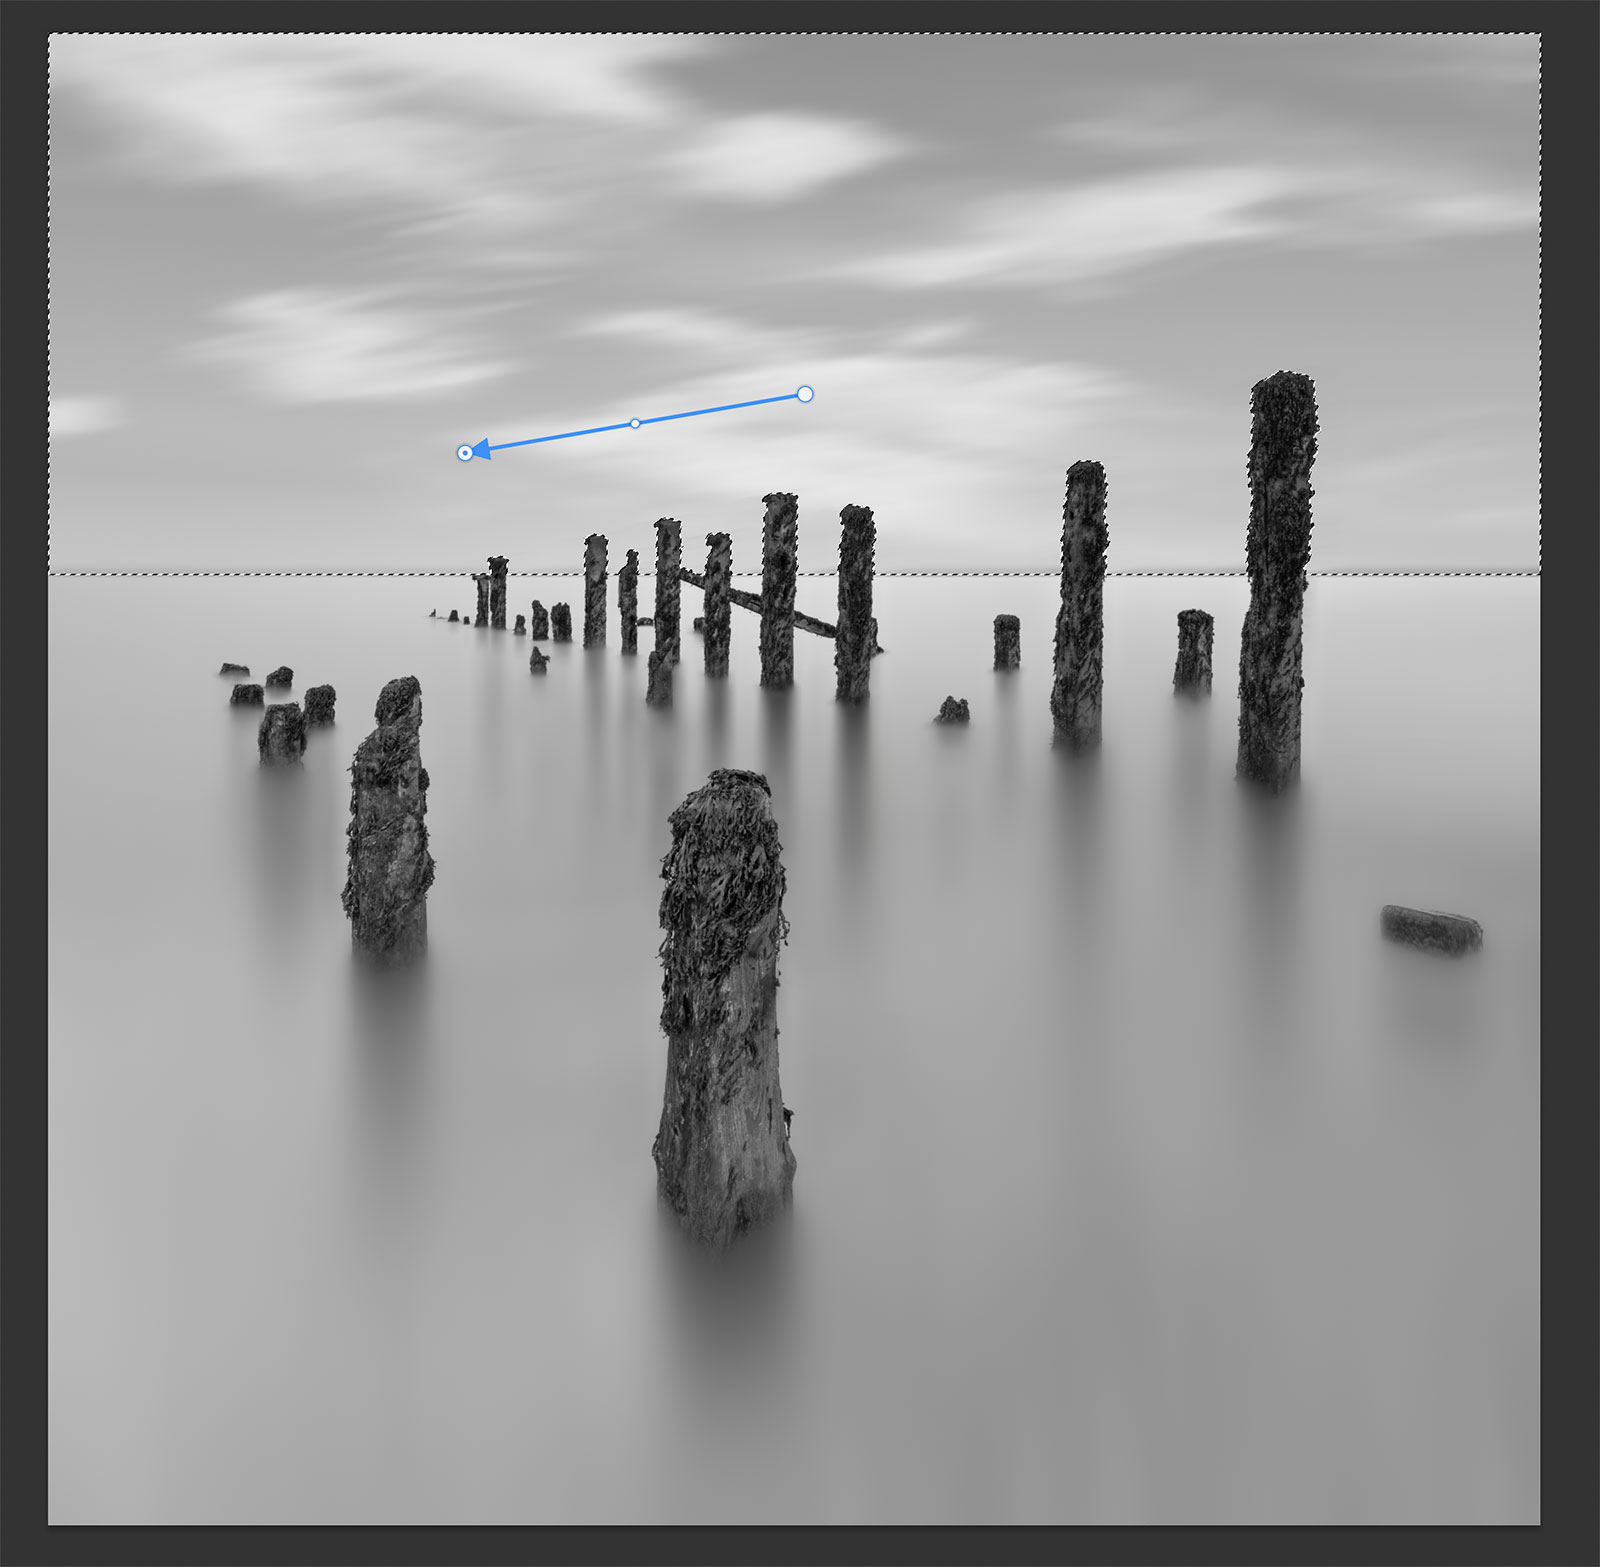
First Motion Blur pass of the sky
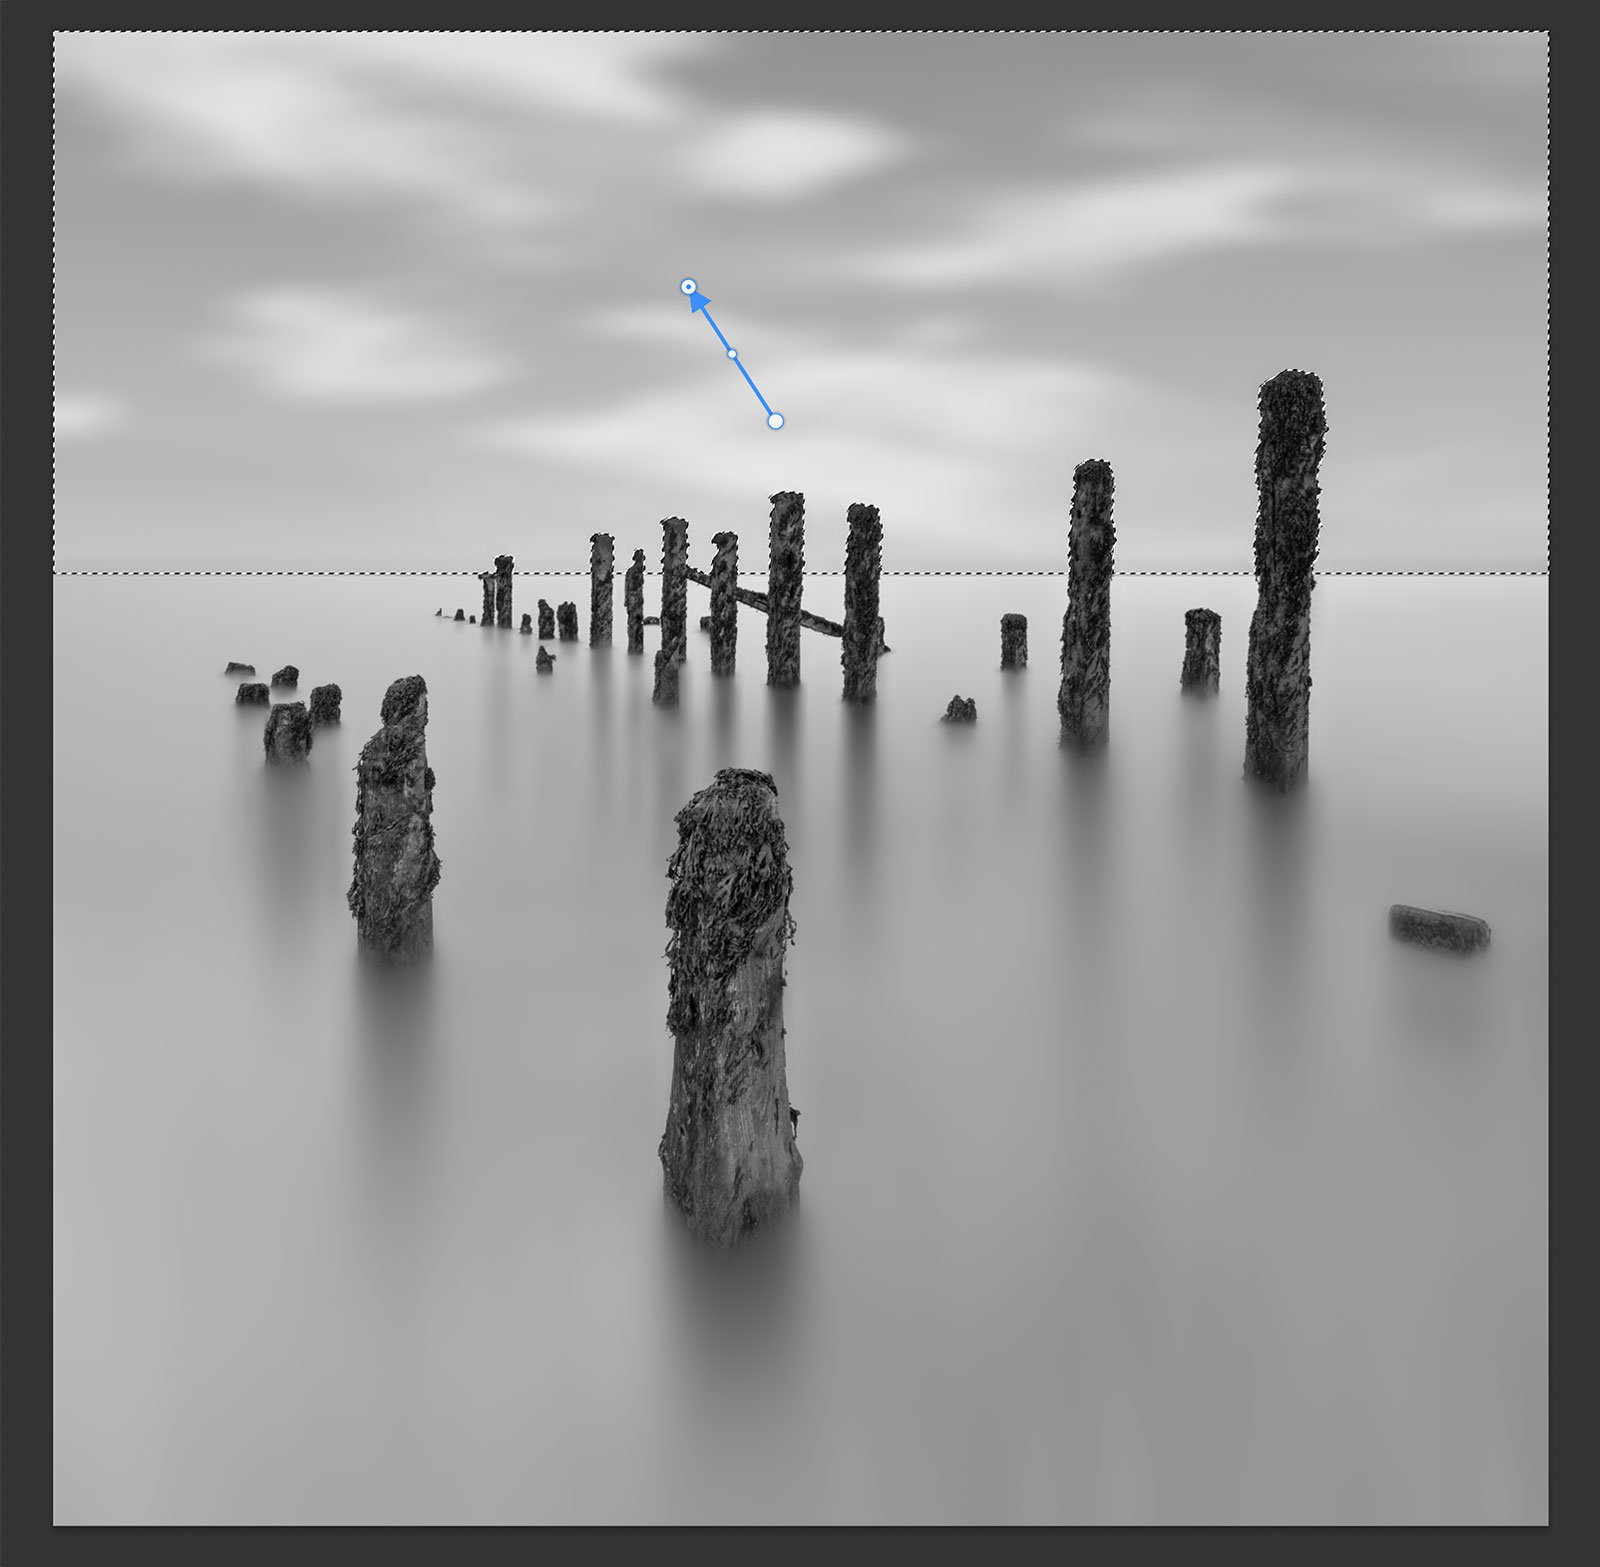
Second Motion Blur pass of the sky
REFINE THE SKY
That’s it for the sky. Go around and check it, see if there are any edges from the posts that need fixing as we did for the water and check for any artefacts. If you used a decent sky shot there should be no issues and blurring with motion tends to remove noise too. Don’t worry about it still looking flat, we will work on that. Once you’re happy remove the selection with Cmd+D (Windows+D).
COMPLETED
We have learned how to make a selection for the sky, how to swap it for another and how to add motion blur to it. If you are happy with the original sky you could skip the swapping step and add more motion if needed. We can move onto the next section, softening and removing the horizon.
Go to next section.
