LUMINOSITY MASKS
Exploring Luminosity Masks for Masking and Editing
What are Luminosity Masks?
Luminosity Masks are masks and selections created from the luminosity of the tones in an image, the lights, darks and mid tones. They are an incredibly powerful way of targeting specific areas, colours and tones in an image to manipulate and edit them, or blend into another image. The obvious example is when you have bracketed a scene because a sky was too bright and then want to merge or blend a correctly exposed sky into it. Making selections in PS as we have seen is one way, using the simple Select>Sky is another, and just doing it manually with masks and brushes is another.
They allow precise targeting of tones in an image when just making selections is too limited or difficult. One drawback with luminosity masks is they can be difficult to understand and use in practice.
Lightroom now has luminosity masking built in. By creating a new mask and using Luminance Range it is essentially using luminosity masks. Most of the mainstream editing applications now have some form of luminosity masks built in, such as DXO and Capture 1, but they do not allow us to use them in PS. PS has its own way of making them using Channel Intersections and Calculations. If it sounds complicated, it is. There are better and faster ways using third party plugins.
INSTAMASK & LUMENZIA
Two very good apps that can be used in PS for luminosity masking are Raya Pro Instamask and Lumenzia. Bear in mind in this instance we have a very specific task, selecting the posts, using an app such as one of these may pay dividends on future images that require more subtle and sophisticated edits.
Instamask: https://www.shutterevolve.com/introducing-instamask-powerful-luminosity-mask-panel/
Lumenzia: https://gregbenzphotography.com/lumenzia/
Both can be downloaded and installed as a plugin to PS and launched at will. The required channels to use as masks and selections are easy to create from these. There is a cost obviously, both are around £35 as a one off purchase. I am not affiliated but I have used both. If you chose to use one, follow the download and installation instruction, and please remember for any support you need to contact the app publisher, not me.
USING INSTAMASK
We will use Instamask to create a luminosity mask for the posts. Watch the tutorial video on the link above which shows step by step how to create masks.
First make a white background layer and drag it to the bottom just as we did in the previous chapter. Unlock the main layer, add a new layer, fill it with white and drag it to the bottom. It will be useful to compare the the mask. Then make a higher contrast layer again as we did in the previous chapter. Copy the main layer and use levels to increase contrast. Note that this is not how you would normally make luminosity masks, by altering the tones (or luminosity) first. However, as we are only wanting the posts selected it’s fine to do.
→ TIP Photoshop can be a bit of a pain where Plugin Apps are located and it varies with the version too. It may be in Plugins, in File>Automate or in older versions in Window>Extensions. Seriously. There are two ways to deal with it, method one in Edit>Keyboard Shortcuts customise the keys required to start your most used tasks which is what I do (Levels for instance is Cmd+L). Find the task or tool, then set a key you’ll find useful. PS may tell you off and say it is already in use so use a different key combo or decide if you can overwrite the one in use.
Method two is to dock the app. All panels in PS can be collapsed with the two arrows >> on the title bars. Collapse it and drag it where you wish to a tool bar.
START INSTAMASK
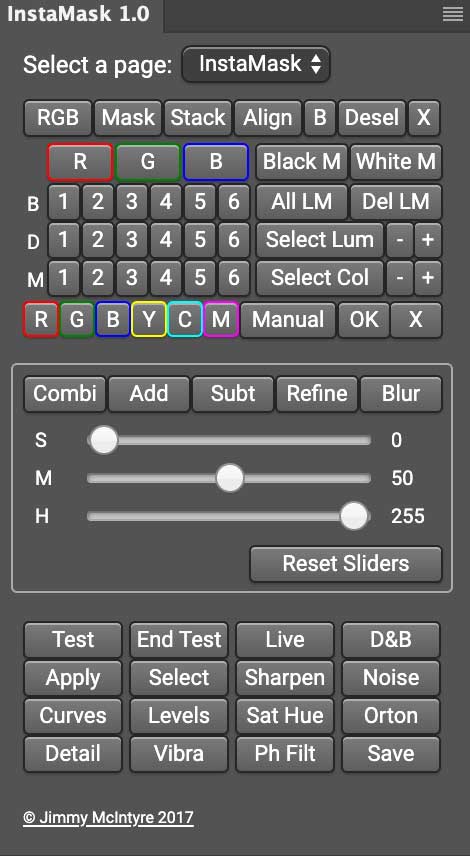
THE INSTAMASK SCREEN
You’ll see lots of confusing boxes and numbers, with B(brights), D(darks) and M(midtones). The numbers indicate the level of the tone and what will be produced as a mask. If you wanted a sky to be selected as a mask you would try to get the sky as white as possible in the mask and the ground dark selecting the appropriate tone and number.
I want the posts white (visible) and the background dark (hidden). Click the numbers and a mask appears, and it turns out Darks 3 is the one I need. Make sure the image layer is active (highlighted) and hit Test. You’ll now see the mask active, and because we added a white background layer you’ll see how effective it is.
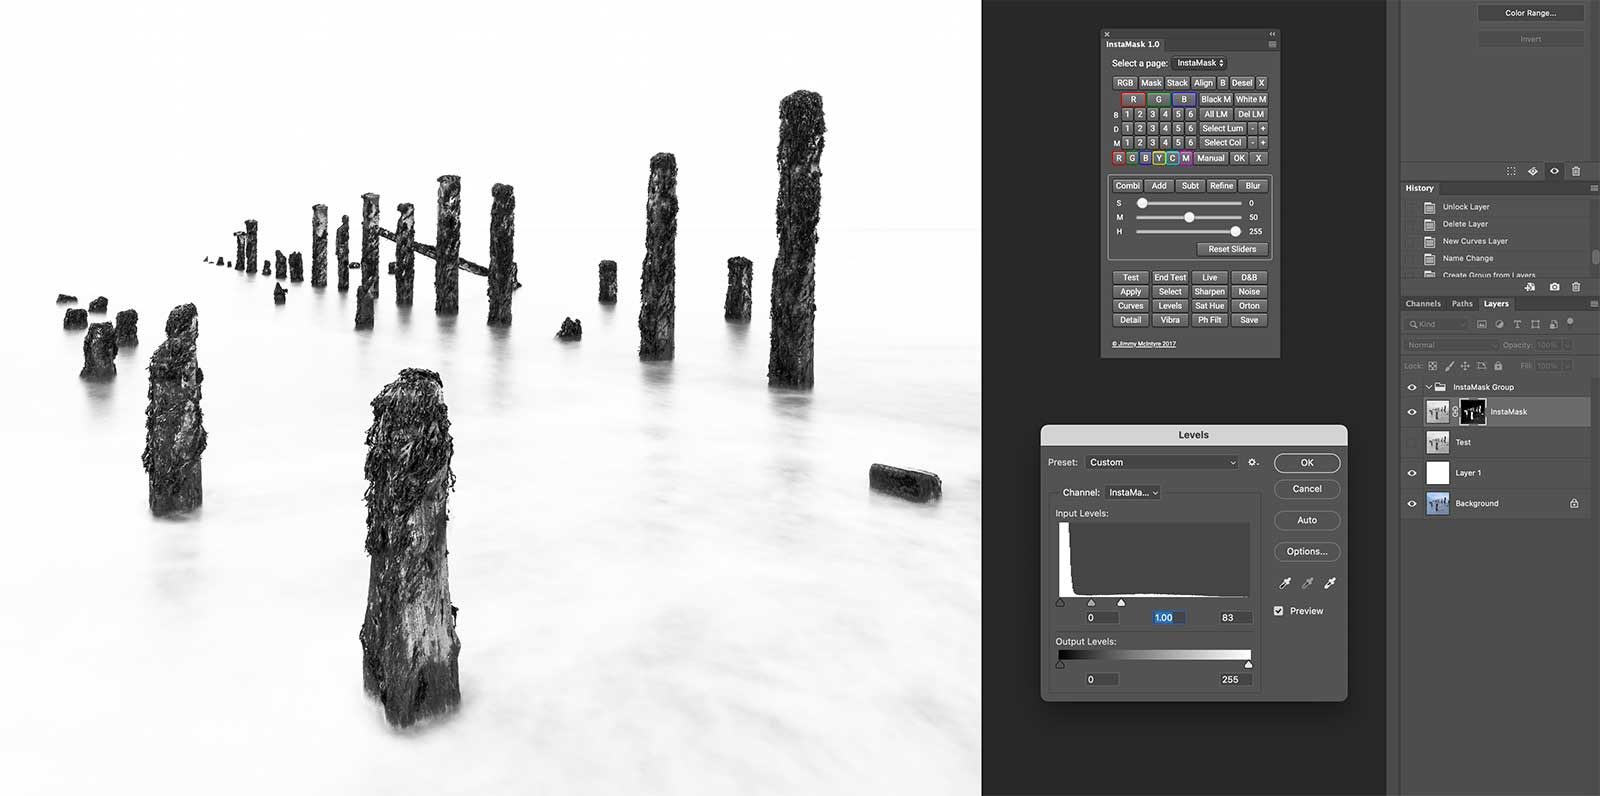
Instamask Mask applied and using Levels to refine.
The mask has been applied but it is not perfect, there are some light grey tones still in the water I need to remove. Instamask has tools to refine it before accepting it, but in this case it is easier to to use Levels again (Image>Adjustment>Levels) and with the mask selected increase the blacks, whites and mid tones to adjust contrast. I could make selections or use a brush but just using levels does the job.
Remember this is a Mask and not a Selection. To make a selection press/hold Cmd (Windows Cmd) click the mask and a selection will show with marching ants. Then save the selection. There will be a group shown in the Layers Panel called Instamask Group which isn’t needed. Drag it to the trash can to delete.
INSPECT & REFINE THE SELECTION
Just as we did in the previous chapter we can further inspect the selection using a white layer as a background, or switching off all the laters to review it as a transparent layer. Zoom in and inspect around the image looking for problematic areas and deal with them just as in the last chapter. You will find it quite easy with a little experience and remember taking time to get it right will pay off in the long run.
Make sure as you refine and modify selections to update the saved selection by resaving and overwriting it, or saving as a new one in some cases. Also update the mask by painting on it with the paintbrush, white on the selection to add, then invert it and use black to remove areas on the mask. The paint colour depends on the mask and what you want to achieve, using the same colour will achieve the same result, using the opposite colour will achieve the opposite, so using white on black areas would reveal parts of the image back through the mask.
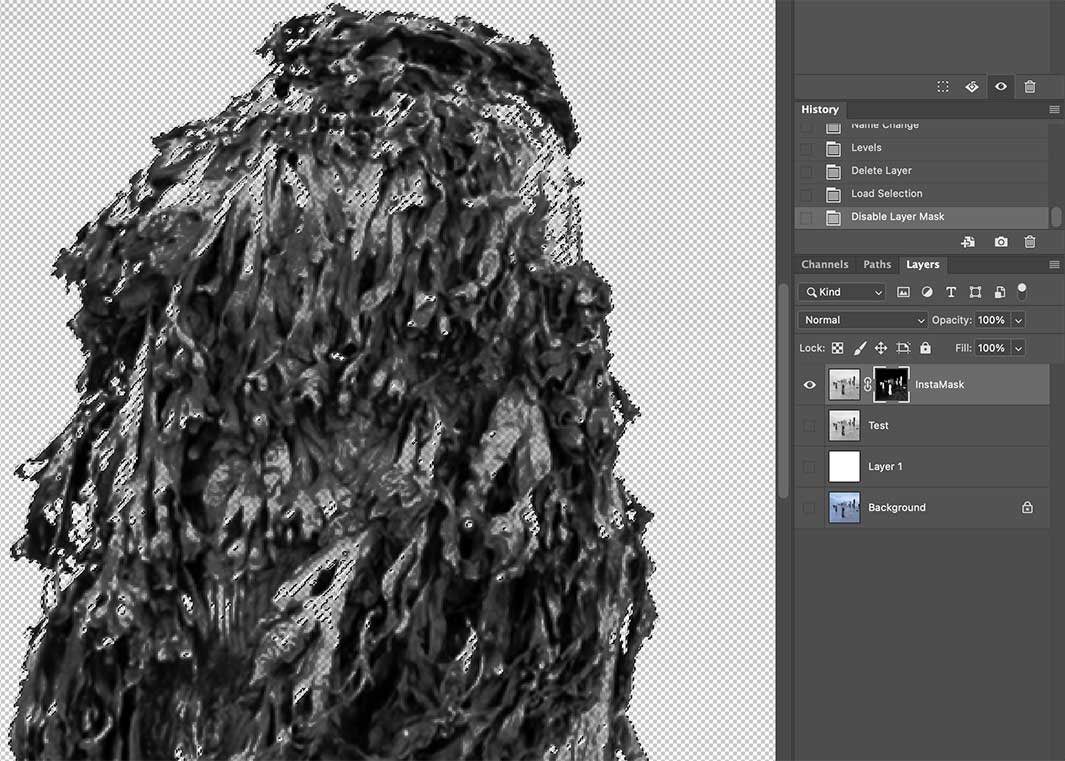
Refine small sections not selected
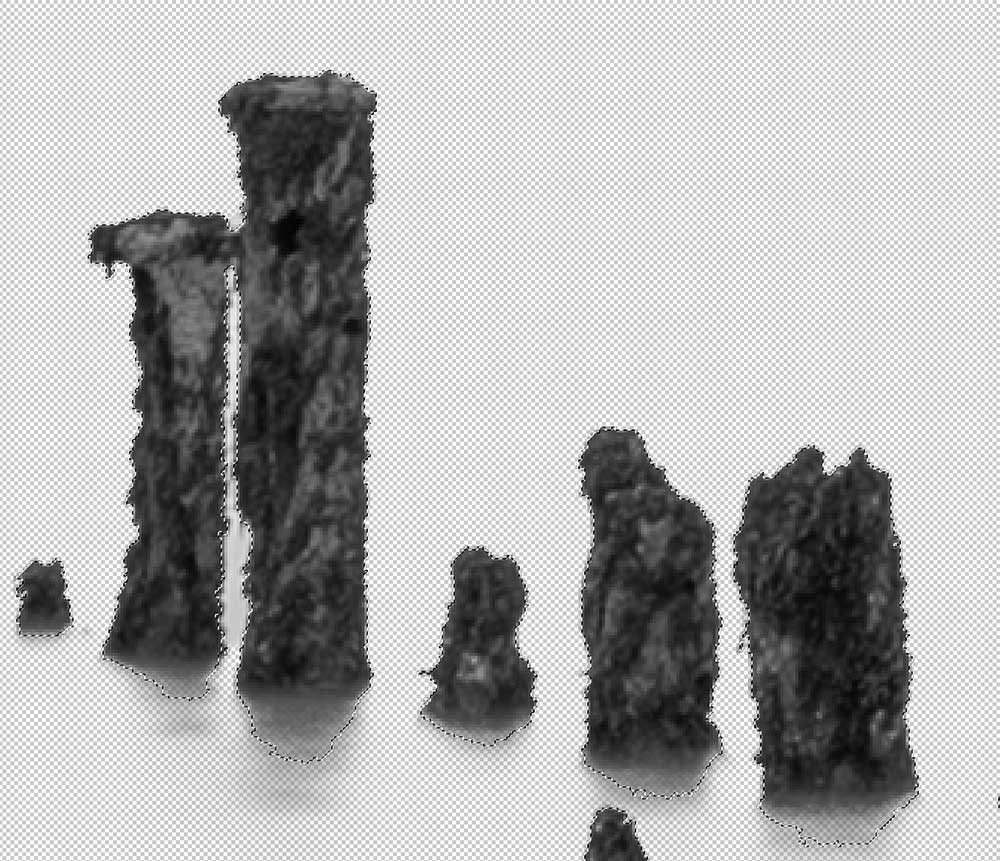
Refine sections between posts
CREATE A COPY OF THE POSTS
Again just as in the last chapter make a copy just of the posts which will come in useful later. With the main image thumbnail selected and active, and with the selection showing, right click and select Layer Via Copy. If it is not available you do need one of the selection tools active so click any of them, Quick Select for example. You’ll now have a cut-out copy of the posts to use later.
LAST THOUGHTS ON LUMINOSITY MASKS
Luminosity Masks do have pros and cons as with everything in life.
They do allow targeting of specific tones in an image such as lights, mids and darks, which can be further refined by selecting the level of the tone. It allows for greater manipulation of areas and blending multiple images together such as bracketed images, in a much better and controlled way than running an HDR filter.
They do not have specific tools for selecting areas such as those found in PS; the Quick Select, Magnetic or Lasso Tools. However this can be used after a mask has been created.
Which you use is entirely up to you, the more tools you have at your disposal the better I think but don’t fall into the trap of ‘all the gear and no idea’.
COMPLETED
We have learned how to create selections, masks and how to use luminosity masks. The next step is to start editing the image.
Go to the next section.
