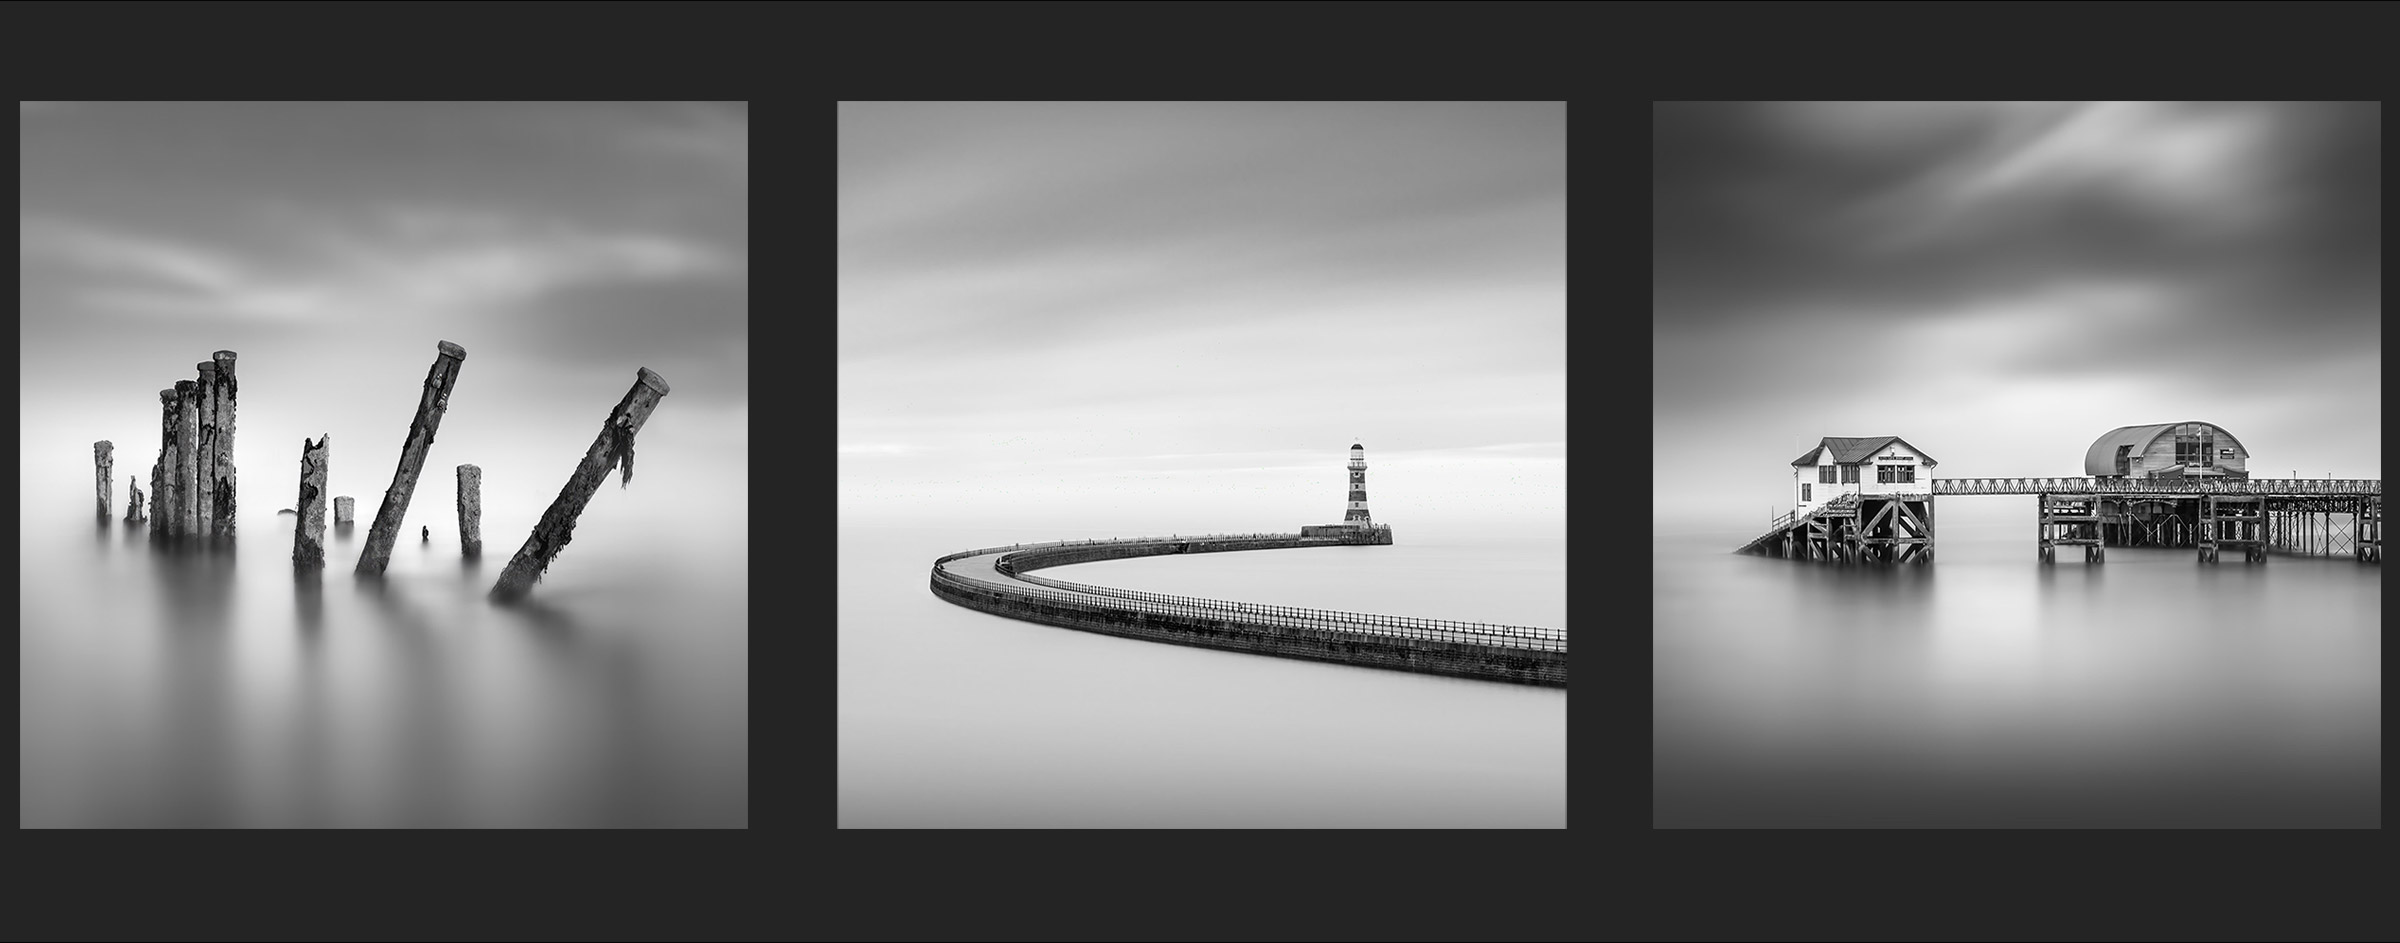
MAKING SELECTIONS
Creating Selections for Editing and Masking
What are Selections? A selection is an area of an image, be it a sky, a foreground or object(s) used to edit it, or protect it while we edit other areas. They can be used directly on an image, or used to generate Masks, much like you would mask an area while you paint another. They can also be used to copy parts of an image too. Selections can be saved as a separate channel to recall when needed.
Selections are a laborious task and can sometimes take quite a while to create depending on the image. The quality of the selection will impact the quality of what you want to achieve so always try to do your best, it will pay off. They can also be inverted to swap between subject and background giving quite a lot of flexibility.
Confusingly there are so many ways to make selections, using PS built-in tools and using third party apps. Many apps will help to select part of an image and allow you to make a copy very accurately as a new layer. But many do not create a selection, and a selection is what we need.
PHOTOSHOP SELECTION TOOLS
There are quite a few Selection Tools in PS, all serving different purposes, some of which you may use quite often, others rarely. Grouped at the top of the Tool Bar, they are collapsed to save space. Click and hold to reveal other tools. They vary in how they are implemented, from simple boxes and ovals, to Quick Select for clicking on the image and selecting similar tones, to Magnetic for analysing edges and sticking to them. None are perfect which is why there are so many options, however when combined they do allow you to get the job done.

Marquee Selections – Rectangle, Ellipse, Row, Column
Lasso Tool, Polygon Lasso, Magnetic Lasso
Quick Selection, Object Selection, Magic Wand
→ TIP Rather than trying to explain each what each of the selection tools do, enable Rich Tool Tips.
Photoshop>Settings>General>Tools>Rich Tool Tips
Hover over tools and a small box appears with a clickable video guide to explain them. They get irritating but they are useful until you understand each one.
Also notice the bar at the top of the PS workspace, the Context Sensitive Menu. When tools are selected it will change depending on the context of the tool, or what it is for. When Selections Tools are active it will change, allowing you to edit a selection with Add, Subtract or Intersect, useful if you want to add to a section, or take a part away.
PHOTOSHOP SELECT AND MASK
You can create selections just using the tools above, sometimes it is all you need. For more extensive selections Select And Mask is probably the easiest. It has advantages and disadvantages; it can show a colour overlay to show what you are masking and has a neat Refine Edge tool, but it has less selections tools like Magnetic. You can however jump in and out of it, using it and returning to the main PS window to refine with Magnetic tools if needed, and then launching it again.
We need a selection of all the posts to separate it from the background, but before we start using Select And Mask there are a couple of quick tasks we can do to make it easier.
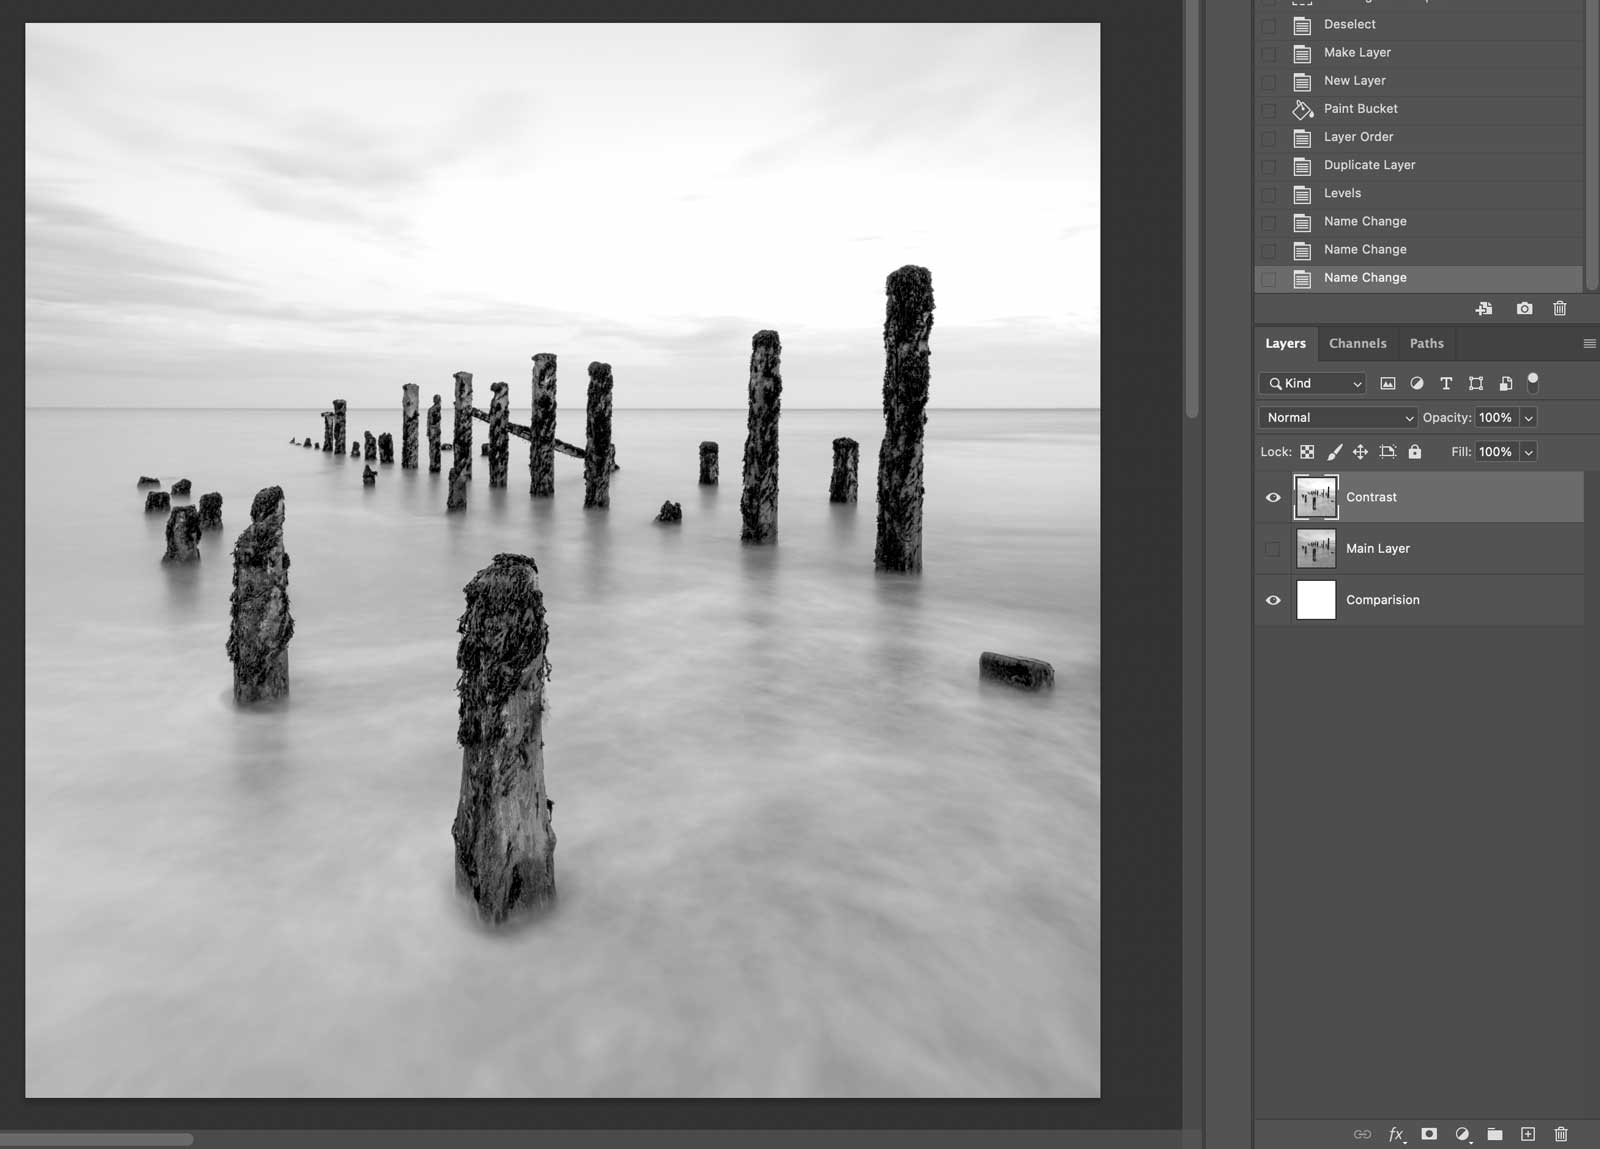
Create a white comparison layer and increased contrast layer
MAKE A WHITE COMPARISON LAYER
In the Layers Panel double click the image thumbnail to unlock it. Then on the + icon at the bottom click to add a New Layer. On the main Tool Bar make sure the paint colour is set to white, click the curved arrow to swap them or the icon above to reset. With the Paint Bucket Tool (hidden under Grad) click on the image to fill it with white. Now click the layer thumbnail and drag it under the main image. This gives us a nice clean background to compare a mask when we create it. You can if you wish double click the names of layers and rename them to whatever makes sense to you.
INCREASE CONTRAST OF MAIN IMAGE
As the image is quite flat on the water making selections will be tricky; PS looks for differences in tones, edges or colour. We can give it a helping hand to make it easier. On the image thumbnail drag it to the + icon to create a duplicate layer. Now hide the original layer by clicking the Eye icon. Select the duplicate layer and increase the contrast as shown above. There are a few ways to do this, the quickest is Levels in Image>Adjustments>Levels. Adjust the Black, Mid and Bright sliders a little until contrast has improved. As we duplicated this layer it doesn’t matter what we do with it. Rename the Layers if you wish as shown above.
START SELECT & MASK
Go to the top menu at Select>Select And Mask. A new window appears with various tools available to make selections. First in the main Properties Panel, in View select the appearance you prefer, there are many options, I tend to use the red Overlay and drop opacity a little. There are many other tools here allowing manipulation of the selection such as Radius, Smooth and Feather. I leave at default for this image, but may refine them depending on the task in hand.
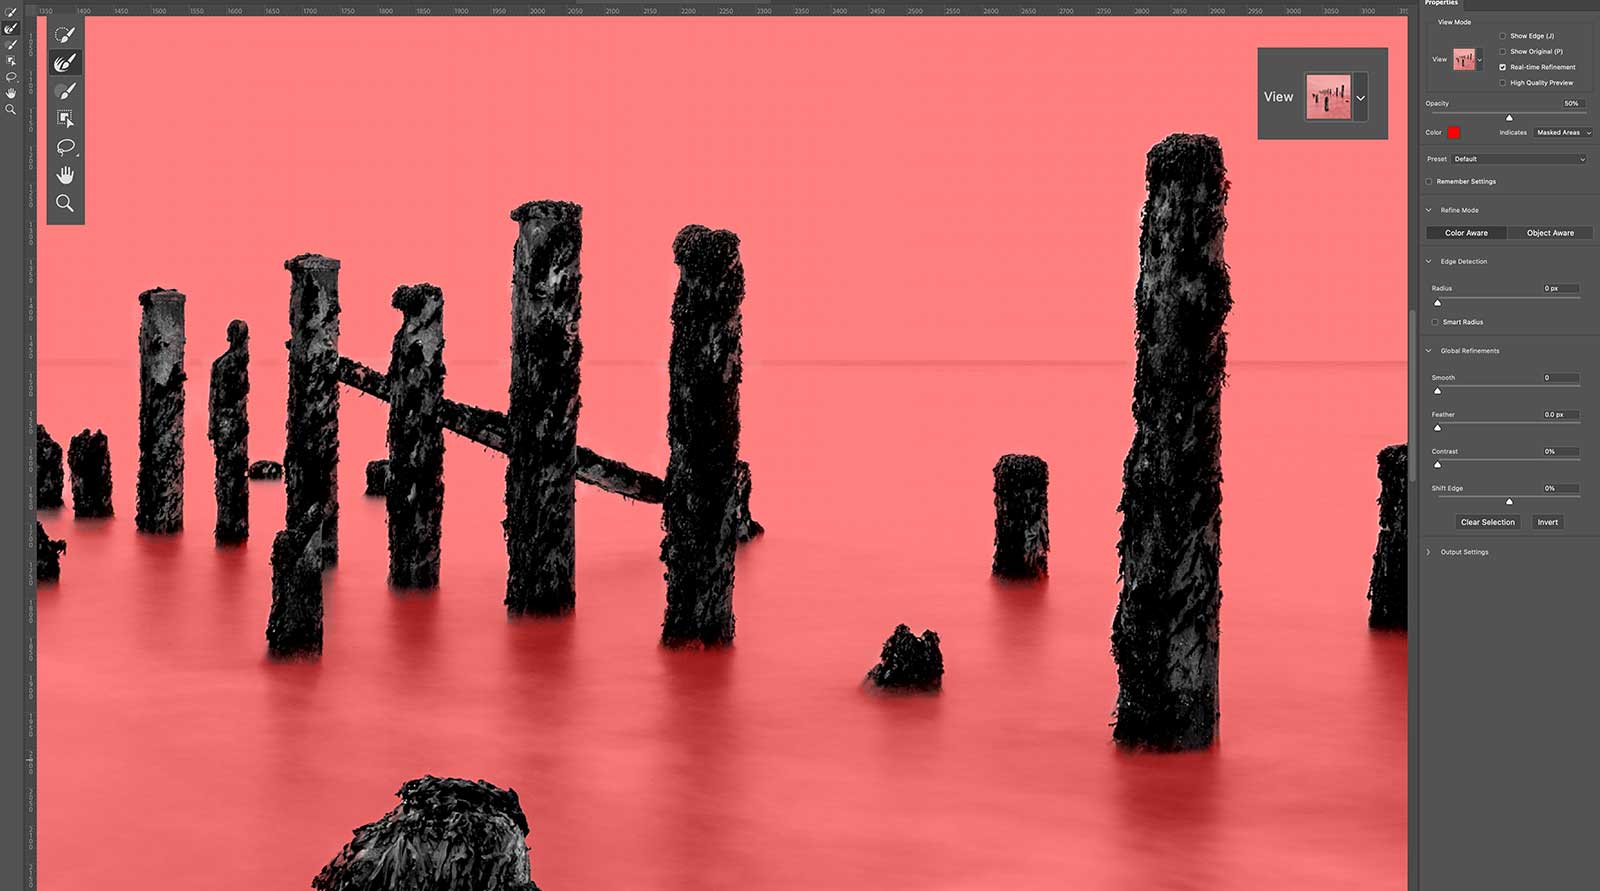
Using Select And Mask in PS (Tools enlarged to highlight)
The main tools for creating selections are on the left (enlarged to highlight), with Quick Select, Refine, Object Select, Brush, Lasso and Polygon. There’s also Pan and Zoom for moving around the screen. Tools here are more limited than the default Selections Tools, remember that you can use those to refine more once you quit Select & Mask, and you can go back into it again.
Start using the tools to select the posts and notice the red is removed. use Quick Selection and paint on the posts, Object Selection and click each one, or click/hold and drag a box around multiple posts. How effective each tool is depends on the image complexity and the separation of tones. At the top of the screen you can select + or – to add or subtract, and adjust the brush size. Straight lines can be created with the Polygon Lasso tool. Remember with all brushes in PS size can be altered quickly with the shortcut keys [ and ]. Go around each edge with the Refine Brush to improve the selection.
When you’re done click OK and you will be back in the main window with the Selection you created indicated with Marching Ants. Remember now you can refine it a little if needed. Inspect it, zoom in, are there any patches that were not selected? Use Quick Select to click and remove any patches, or draw around any areas you need to add with the Polygon or Magnetic Polygon tools. Make sure you use + or – to add or subtract.
Make sure you save the selection. In Select>Save Selection make sure a New Channel is selected and give your selection a name, Posts for example.
→ TIP Selections can be further refined when needed. In some cases you may want to feather edges or make them tighter. In Select>Modify you can manipulate them more after they are created, such as Contract by a pixel or two and then Feather to make it softer. Worth noting for future use in other projects you have.
INSPECT THE SELECTION
Remember we created a white layer? This was to allow an inspection of the selection and the masks to be created from it. It is not always necessary but can be useful. Switch off the Contrast layer with the Eye icon and make sure the main layer is visible. Make sure the main layer is active by clicking it, and make sure the Selection is active (marching ants visible), or reload it from Select>Load Selection. Click the Mask icon at the bottom and a mask is added. Now the posts are visible with the background invisible, showing the layer underneath. Because the posts were the selection and filled white, to show, and the background black, to hide, the layer underneath is shown into the image. The Contrast layer isn’t needed anymore so drag it to the trash to delete it.
Switch off the white layer underneath and you will then see the main layer with the background transparent.
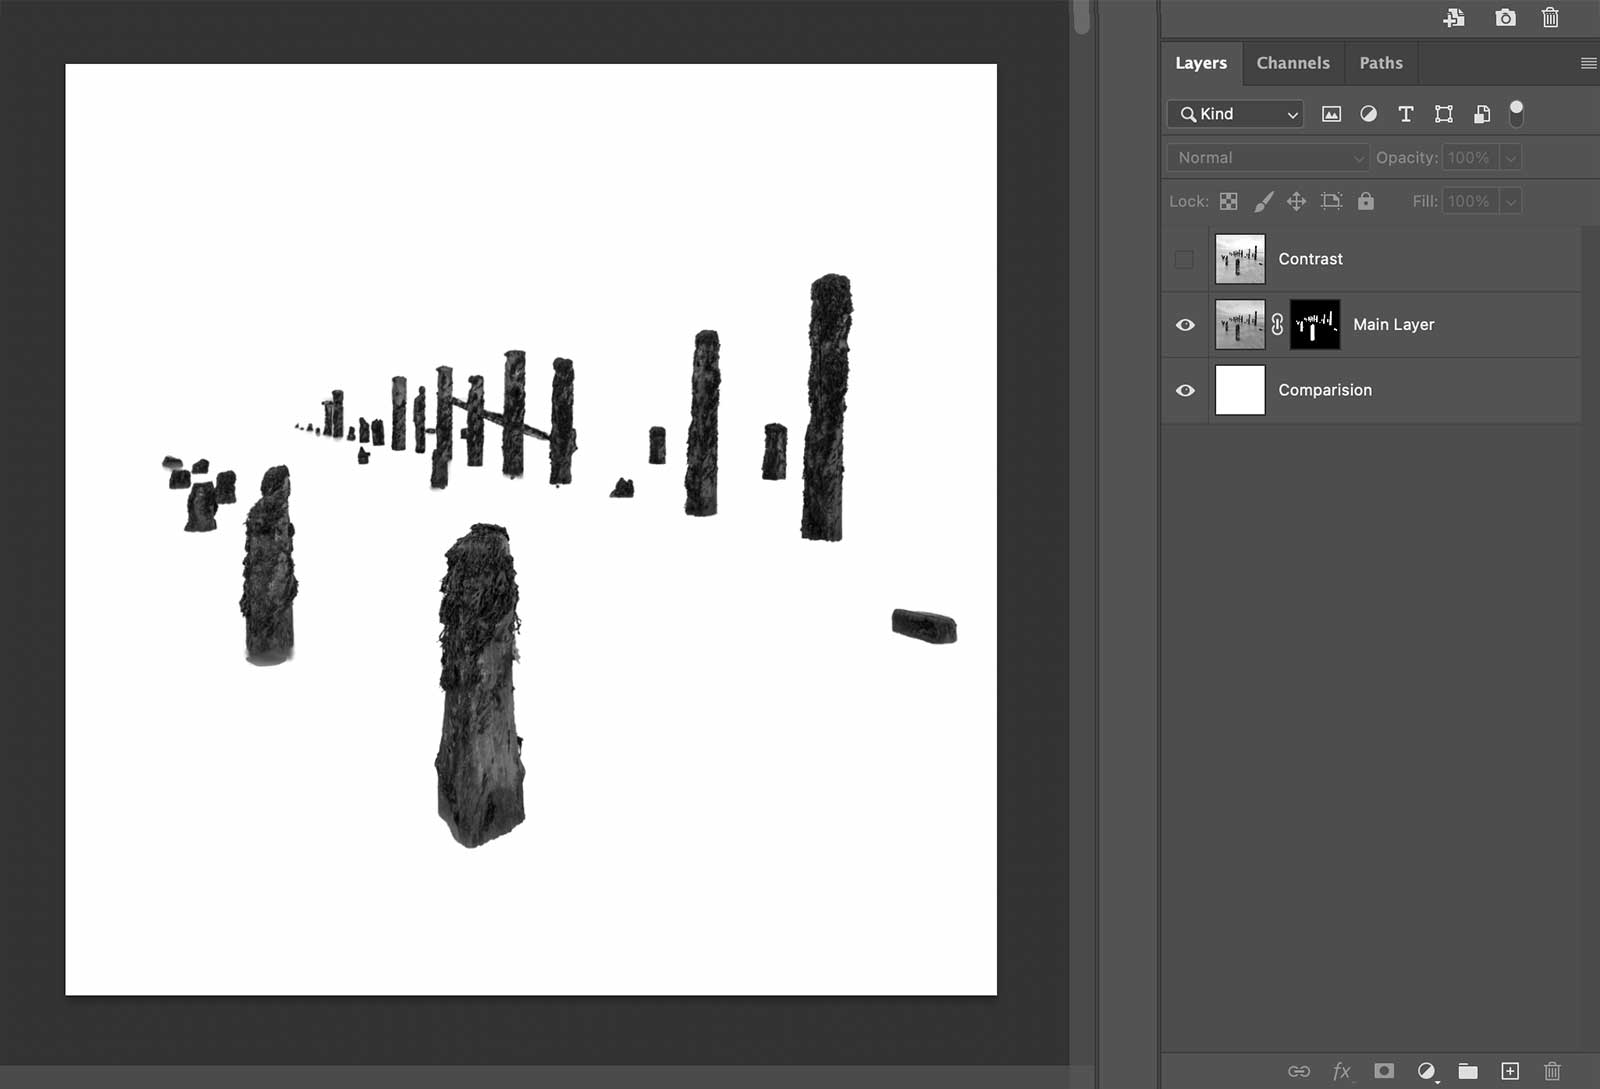
Subject shown on white layer with background hidden by a mask.
MODIFY THE SELECTION AND MASK
It all looks good to me, the posts are clean and the background doesn’t have anything unwanted. The posts are a little hard at the bottom which we will deal with later in blending and blurring. But what if you have gone wrong? Do you need to start again? Not necessarily, there are a number of ways to modify it. Hopefully you don’t need to but knowing what you can do is helpful
1 – PAINT DIRECTLY ON THE MASK.
As a mask was added the Selection is now deactivated and the Marching Ants have vanished. Paint on the mask (not the image), click the thumbnail first, to recover or remove details but remember it is freehand and no edges are protected. Vary the brush size and hardness. Use History to undo if needed. This is altering the mask, NOT the selection because it isn’t loaded. If you change it this way you need to update the selection, it won’t update itself. With the mask thumbnail active Cmd+Click (Windows Cmd+Click) and a new selection is shown created from the modified mask. Save it and overwrite the previous selection.
PS allows so much freedom to do just about anything. You could also make new selections on the image, perhaps with the Magnetic tool, then click on the mask and paint. Only the area selected will be painted and added (with white paint) or subtracted (with black paint). Dismiss the selection with Cmd+D (Windows Cmd+D), then Cmd+Click the mask thumbnail to show the new modified selection and save it.
2 – RELOAD SELECTION AND MODIFY IT.
The selection we made was for the posts, therefore we can paint inside that area to alter it, but nothing will change outside the selection. To manipulate the area outside the selection such as the background, go to Select>Inverse and invert it, swapping it around. Remember to invert it back and resave the selection. Another work-around, perhaps you want to add to the selection, a post was removed by mistake and you want to add it back. The problem is you can’t see it because the mask is active. Right Click the mask thumbnail and Disable it. Now you can see the whole image, and use selection tools to make additional selections. Click the mask thumbnail again to reactive it, and then paint over the new selection on the mask. Cmd+Click (Windows Cmd+Click) to reload a new selection and save it as above.
This all sounds a headache I know. It is easy to get confused with what is selected, what paint colour to use etc, but once you have done it a few times it gets easier I promise. And you’ll learn how powerful selections are for other projects.
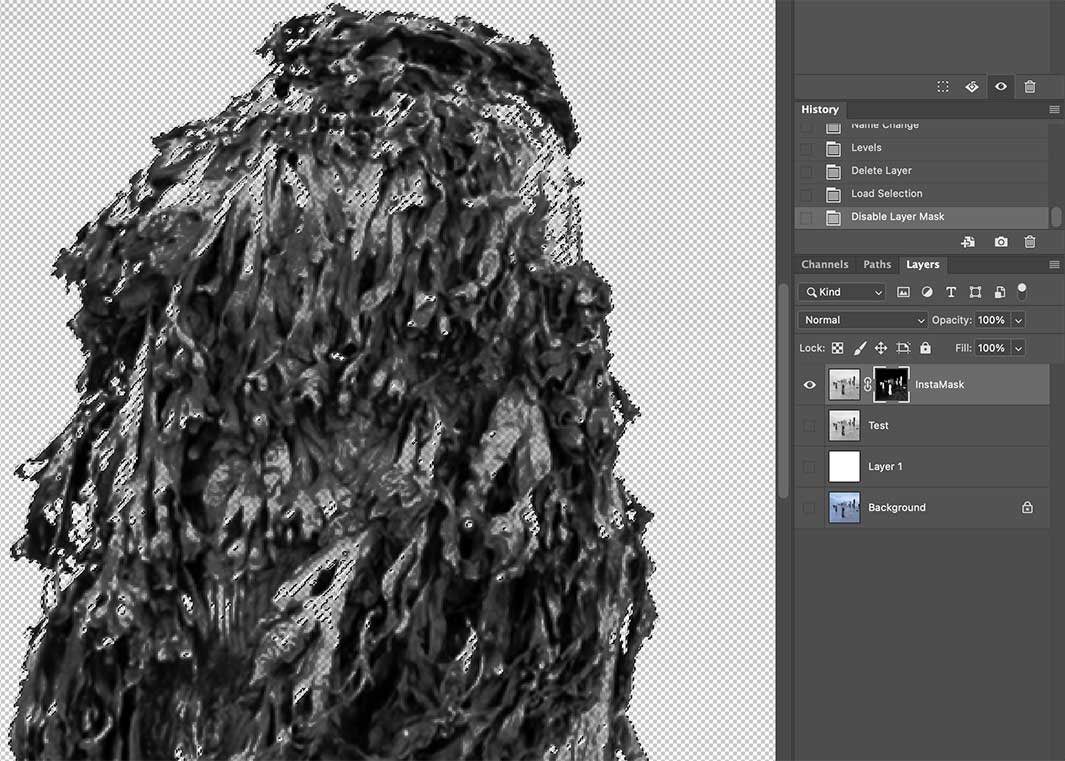
Selection viewed as a transparency
DEALING WITH PROBLEMATIC AREAS
With the selection active you will see the marching ants. You may sometimes notice small parts that have been selected in error. Turn off the layers underneath and view the selection/mask as a transparency, with the chequered empty background.
Use the selection tools to correct them. Here I used a very small Quick Selection brush with + selected to add to the selection, going around it carefully. You may find other tools tools helpful such as the Magnetic or even Polygon Tool. You’ll find some of the fine detail that should not be selected like the gaps between the seaweed and the post may now be selected. Larger parts can be removed again with the Polygon tool. Don’t worry too much about really small spots, it will be easier to clone them away when we finish.
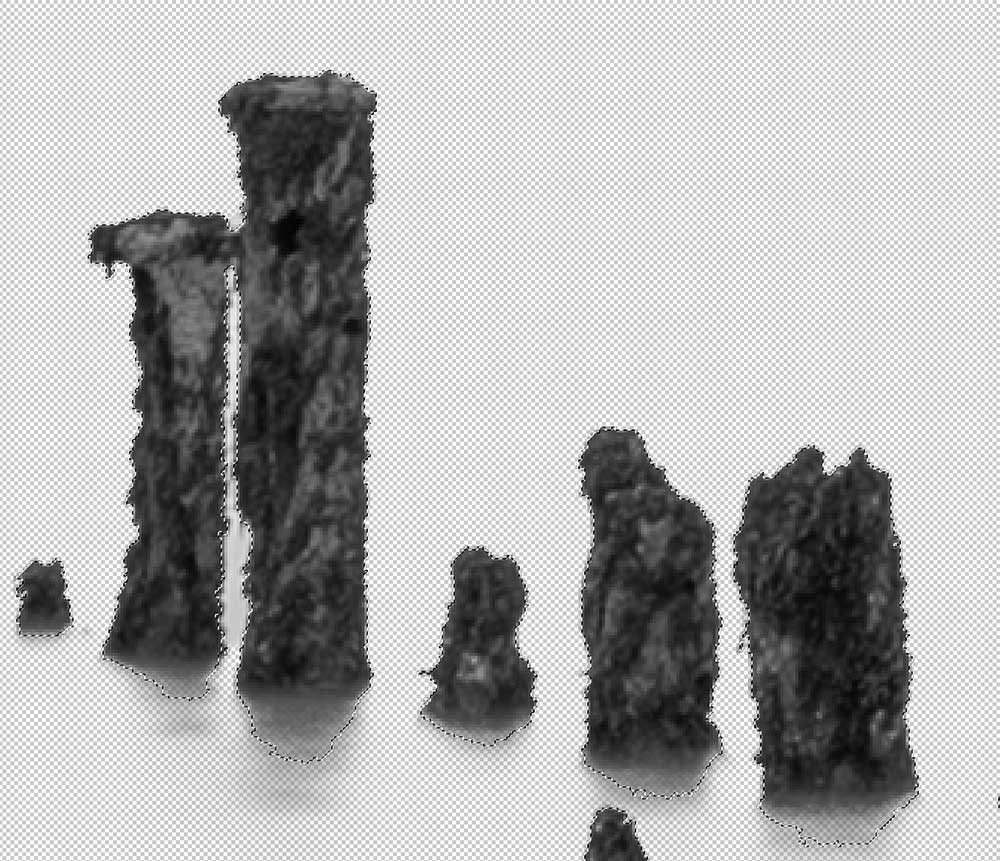
Removing a gap between the posts from the selection
ANOTHER ISSUE
Zooming right in to 400% I can see a gap between two posts that is part of the selection and it needs removing.
Using Quick Select didn’t work. I undid it in History and used the Magnetic tool to find the edges with subtract selection enabled. Remember your last point must connect with the first point to complete the selection.
It isn’t perfect but it is good enough, certainly better than what would happen to the gap when we alter the background.
If altering the Selection remember to resave it. The mask needs updating too but if I paint over the gap (with black) nothing happens. That’s because the post are selected and I am trying to paint outside them. In Select>Invert invert the mask to swap it around. Now the background is active and the posts are not selected. Paint on it again, and invert the selection back again.
→ IMPORTANT – UPDATE MASK AND SELECTION
Remember with both of the issues above it is the selection that has been modified and not the mask. Resave the selection when it is altered. Masks need updating too and instead of deleting and adding a new mask just paint on it. In this instance I can paint on the post mask with white and update it, but I cannot use black to alter the background, nothing happens. Invert the selection to make that area active and then use black paint, and invert it back. Only an area that is active can be edited in any way so invert and invert back again.
CREATE A COPY OF THE POSTS
The beauty of Selections is that they can be recalled, modified, inverted and used on an image at any time making them very powerful. You may want to brighten an object but not the background and vice versa. They can also be used to create copies. I know I am going to be using blur filters which will affect edges, which can be protected with selections, and I also know I will be cloning too. As a precaution, I will make a copy of the posts as a new layer. This is old school and is not always necessary, however I often do this just as a precaution.
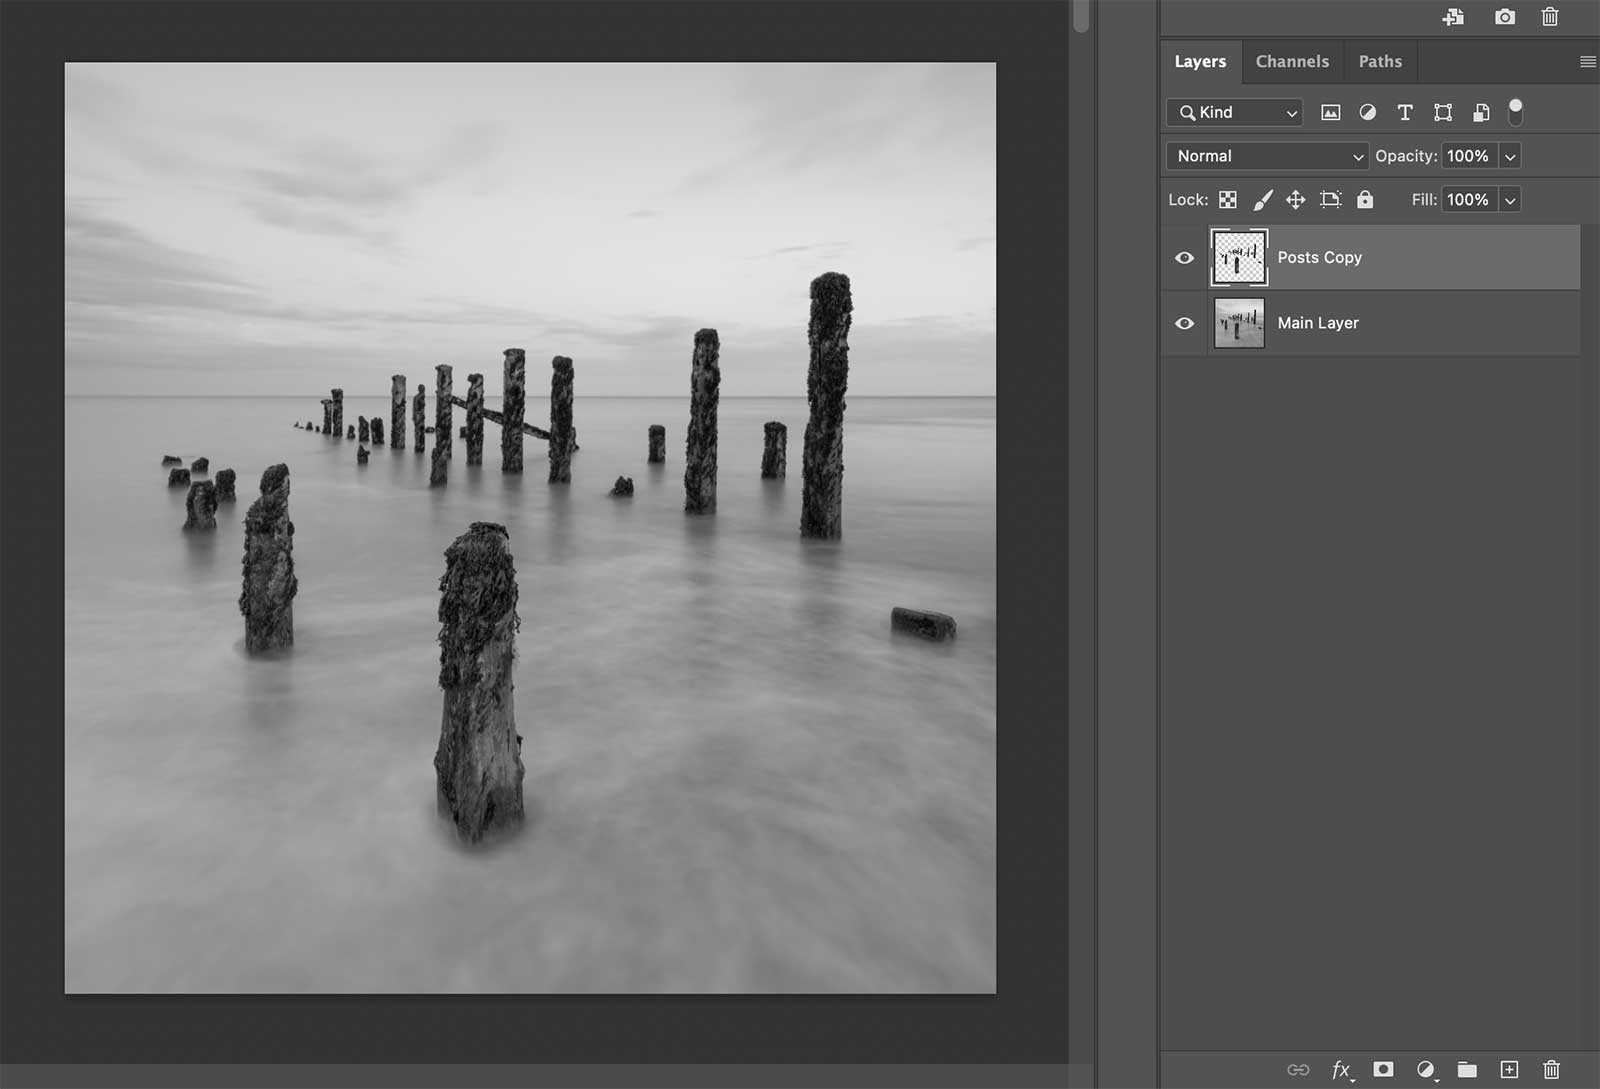
Copy of posts (the subject) created from Selection
I do not need the white layer or the contrast layer anymore so I delete them by dragging to the Trash.
On the main layer click the thumbnail and reload the Selection we made (Select>Load Selection). Make sure a Selection Tool is active (Quick Select or any), right click inside the area and select Layer Via Copy. If it is greyed out the thumbnail is not selected so click it. A new layer appears which is a copy of the posts, cut out from the background.
→ TIP Inverting Masks and Selections
Creating a selection allows us to create masks. We saw above that a selection can be Inverted, or swapped around, so that a background is active instead, and a new mask could be created from this. However when a selection is active pressing Option+Click (Windows Alt+Click) and clicking the mask icon will add a new mask already inverted or swapped. This gives us lots of power and flexibility.
COMPLETED
We have learned how to create selections, masks and how to copy parts of an image. The next step is to start editing the image.
Before this there is another way to create selections and masks using Luminosity Masks. They are very powerful and useful and you may prefer to use them so please study the next section first.
Go to the next section.
