
Please log in to view and edit your settings.
Please log in to view and edit your settings.
Please log in to view and edit your settings.
Please log in to view and edit your settings.
Please log in to view and edit your settings.

It is a simple Web App to help you keep a handy reference of your settings and Custom Modes. We all do it, create a CM and then forget what all the settings are. The OM3 at least lets us name a CM now.
Custom Mode Companion lets you record all the buttons you have changed for each CM, with a handy field at the bottom for special notes. Save each one and the next time you log in your settings will be recalled. And it is free to use as a Thank You to purchasers of my Guides.
What is it not?
It is not a tool to download, save or upload settings from your camera, it is for visual reference only.
It is only available to those who have purchased one of my Guides and you’ll need to log in with your username and password. If you forgot it you will need to reset it.
Please save your information at the bottom of each Tab or it will be lost, and please LOG OUT, or your information will also be lost. It is not possible to recover lost information. The idea for the App is just to record your main settings. I have tested it and it is actually so useful!
To access CM Companion bookmark the link in your Browser, and save it to your mobile Home Screen.
On Apple iOS click the 3 Dots icon at the bottom of the screen, then "Share", "View More" and "Add to Home Screen". You can also rename it to CM Comp.
It is similar on Android too, tap the three dots at the top and select ‘Add to Home Screen”.
There is a way to change the icon too but it is so complicated I suggest you just accept my logo. Please bear in mind this is not an App that is installed, it is a Web App (a page) designed to work like an app, so there are some limitations. And it is free :)
Custom Mode Companion can be used with one camera body only at the moment. Any changes you make to each Tab will be saved but you cannot save it, for example for an OM1 and an OM3. The next versions perhaps. If you just want to save screenshots then please go ahead, as a work around you could save Tab1 as OM1-Landscapes, then update the info and name it OM3-Landscapes.
Logging in is required so that the information is saved to your account, but it is also a pain having to do that every time you just want a reminder, we all hate constant logins. And what if you are somewhere remote with no signal. Easy to solve, just take a screenshot.
On each Tab once you are happy with the selections and you have saved each one, take a screenshot of each. It is then a picture in your library you can view really quickly. I designed it specifically to fit on most mobile screen heights to make screen shots easier. Android and iOS also let you create Albums, so create an Album, name it and put all your screenshots there. Now you can view them anytime anywhere, even with no signal.
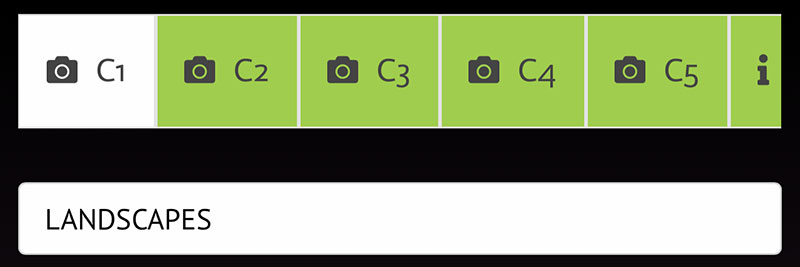
Why 5 Tabs?
The number of CMs varies across bodies, some bodies only have 3 Custom Modes, whilst the OM-3 has 5. And older bodies use MySets. Therefore to ensure the App is useful for everyone providing 5 CM Tabs caters for all bodies.
Mysets - For older bodies just consider each tab as a Myset.
CM5 Wasted?
Not necessarily. Remember each CM has specific settings saved to it, but the standard PASM Modes do not. You can change settings obviously and they will be applied to each mode, P, A, S, M, (and B if your camera has it). They don't work the same as CM's and if you change a setting it will not revert back when you next use the camera, that is what CMs are for. And a setting on PASM will only apply if it is compatible with the mode, for instance Live ND iff applied to a button will only function in S or M.
If like me you always use you CMs, PASM is still useful and can be considered as an addition flexible mode. You can therefore create another group of settings, albeit not with fixed settings, and then use Tab 5 to record them. For example I use all my CMs on my OM1 and OM1-II and and don't have space for a 'Night' CM, instead I use PASM or to be more precise M and B. I have Night LV mapped to a button, Starry Sky AF set, Noise Reduction/Off and Fisheye Compensation mapped to a button for when I use the 8mm Fisheye; I can consider this a 5th CM.
CM Name
Give your CM a name. The field is a text entry field rather than a drop-down selector allowing you to give any name you wish rather than just standard Landscapes, Macro etc names. You may have a very specific use and need a name that reflects it.
Right now there is only one set of Tabs. Whilst there has always been ways to set button functions in Video Mode as opposed to Stills, the OM-3 now goes further by allowing additional Custom Modes to be created.
This is not catered for in Custom Mode Companion v1 at the moment. If you do shoot video a lot and use CMs you will need to save your settings for stills, screen shot them, and then save settings for Video and screen shot them again.
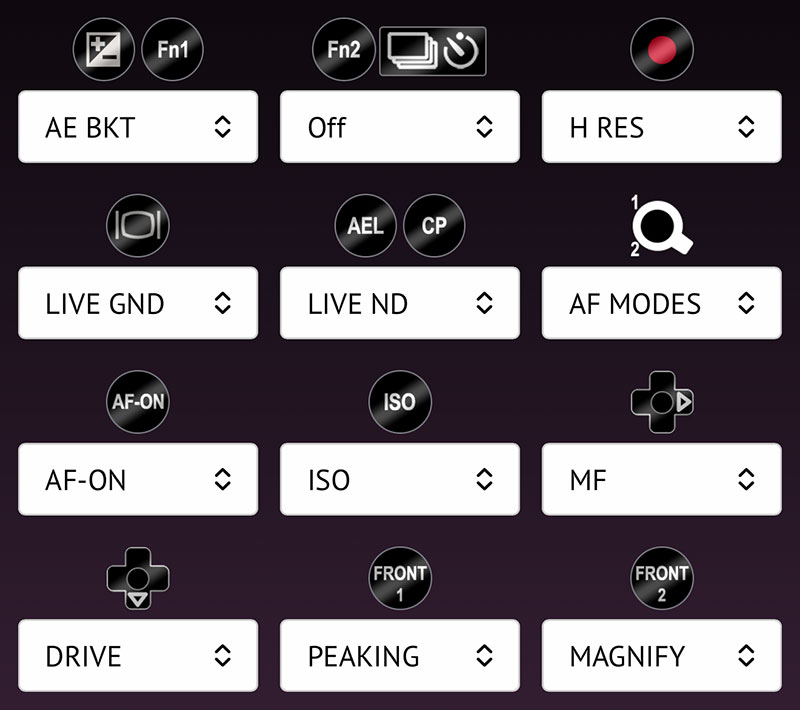
The first thing to notice is some buttons appear to have a dual function such as the first one, Exposure Compensation or Fn1. This is purely because all bodies will have a button in that position but they are not all assigned the Exp. Comp. icon.

The OM-3 for example is Fn (named Fn1 here to separate from Fn2). The icons only depict the button on your camera. Select the drop down function applicable to the button you have.
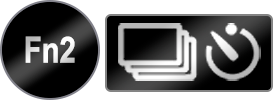
Fn2 and Drive Mode. Similarly whilst the EM-1 MKII has an Fn2 button, the OM-5 does not. But the OM-5 (1 and 2) does have a Drive Mode and Monitor function buttons on the top left hand side which can be reassigned. Rather than having a long list of every single button I have kept it to the fewest I can so that the on screen informations doesn't need to be scrolled up and down. Just choose the button that applies to your camera and set the function you want to display.

AEL / CP. Again whilst most bodies have an AEL button, the OM-3 changed it to CP. The OM5-II changed it again with having AEL replaced with AF-ON and the CP moved to the top. You can see how complicated this was to rationalise, but with your camera in from of you, you will soon understand it.

Fn Lever 1 and 2. There are three modes that can be set in camera for the lever, Mode 1 changes the front and rear Control Wheel Functions which can be set with a number of options, ISO, WB for instance. Mode 2 allows AF Mode changes. Mode 3 is to switch to video quickly. The Drop Down List allows the function you have selected to be displayed with a description better than just Mode1, 2, 3, but not the actual function settings because they can be complex to set a simple list. AF Mode for example you could set a large AF target with C-AF on Lever 1, and small AF target with S-AF on Lever 2. It is simpler to make a note of the specific setting in the My Settings text area.

The Rear Arrow Pad is such a wasted resource set to just move the AF target. When set to 'Direct' the Right and Down buttons can be set to more useful functions. Options are limited and the drop-down list reflects this.

Front1 and Front2 are the two buttons on the front of the camera obviously. Your camera may just have one.
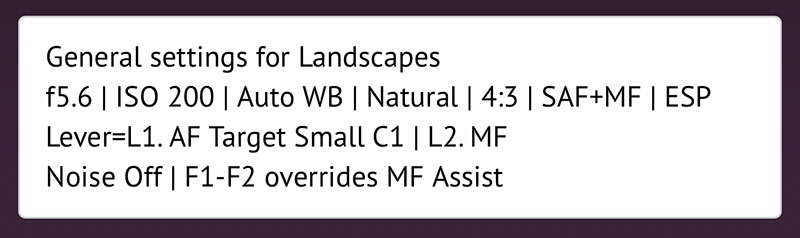
The My Settings box is a text entry box and does exactly as you would expect, allows your own information to be entered.
The rear Super Control Panel shows such a wealth of information such as Aperture, WB, ISO etc, entering such basic info may not be needed, but it is entirely up to you. The purpose here is to record deeper settings that are not shown on the SCP that you want a reminder of. In the example I have shown basic settings, but also my specific settings for the Fn Lever. And I have Front1 and Front2 set for Magnify and Peaking because I can use it to over-ride MF Assist settings, or call them at will without using the MF Ring.
What do I mean by Deep Settings? Any setting that you cannot see immediately from the Super Control Panel without going into the Menu.
Another example, settings for Sequential drive shooting, perhaps you have changed settings and want to note them, a quick note such as:
SEQ Mec 10fps | S 20fps | SH1 60fps | SH2 25fps.
This tells me what frames per second I have set for Mechanical, Silent, and both SH modes without looking at the menu. You could have another line for ProCap.
It's entirely up to you what you record here. Just don't add notes like 'Call Mum Thursday', you'd be better off using your phone reminders.
Please log into your account and save your settings on EACH tab. IMPORTANT-PLEASE ENSURE YOU LOG OUT AGAIN.